Asset mappings
The Asset mappings page allows you to associate HaloPSA assets with their corresponding Bitdefender GravityZone endpoints. This ensures that service desk tickets generated by the integration explicitly reference the affected HaloPSA asset, improving visibility and traceability for your support teams.
Note
The HaloPSA client must have a valid client mapping established with a GravityZone company, and the assets must exist within a defined asset group in HaloPSA.
Loading assets
To create a asset mappings, follow these steps:
Select a HaloPSA client.
Only clients with an existing client mapping will be available.
Select the HaloPSA asset group containing the assets you want to map.
(Optional) Filter by asset type.
You can narrow down the list by selecting one or more asset types.
Click Load assets.
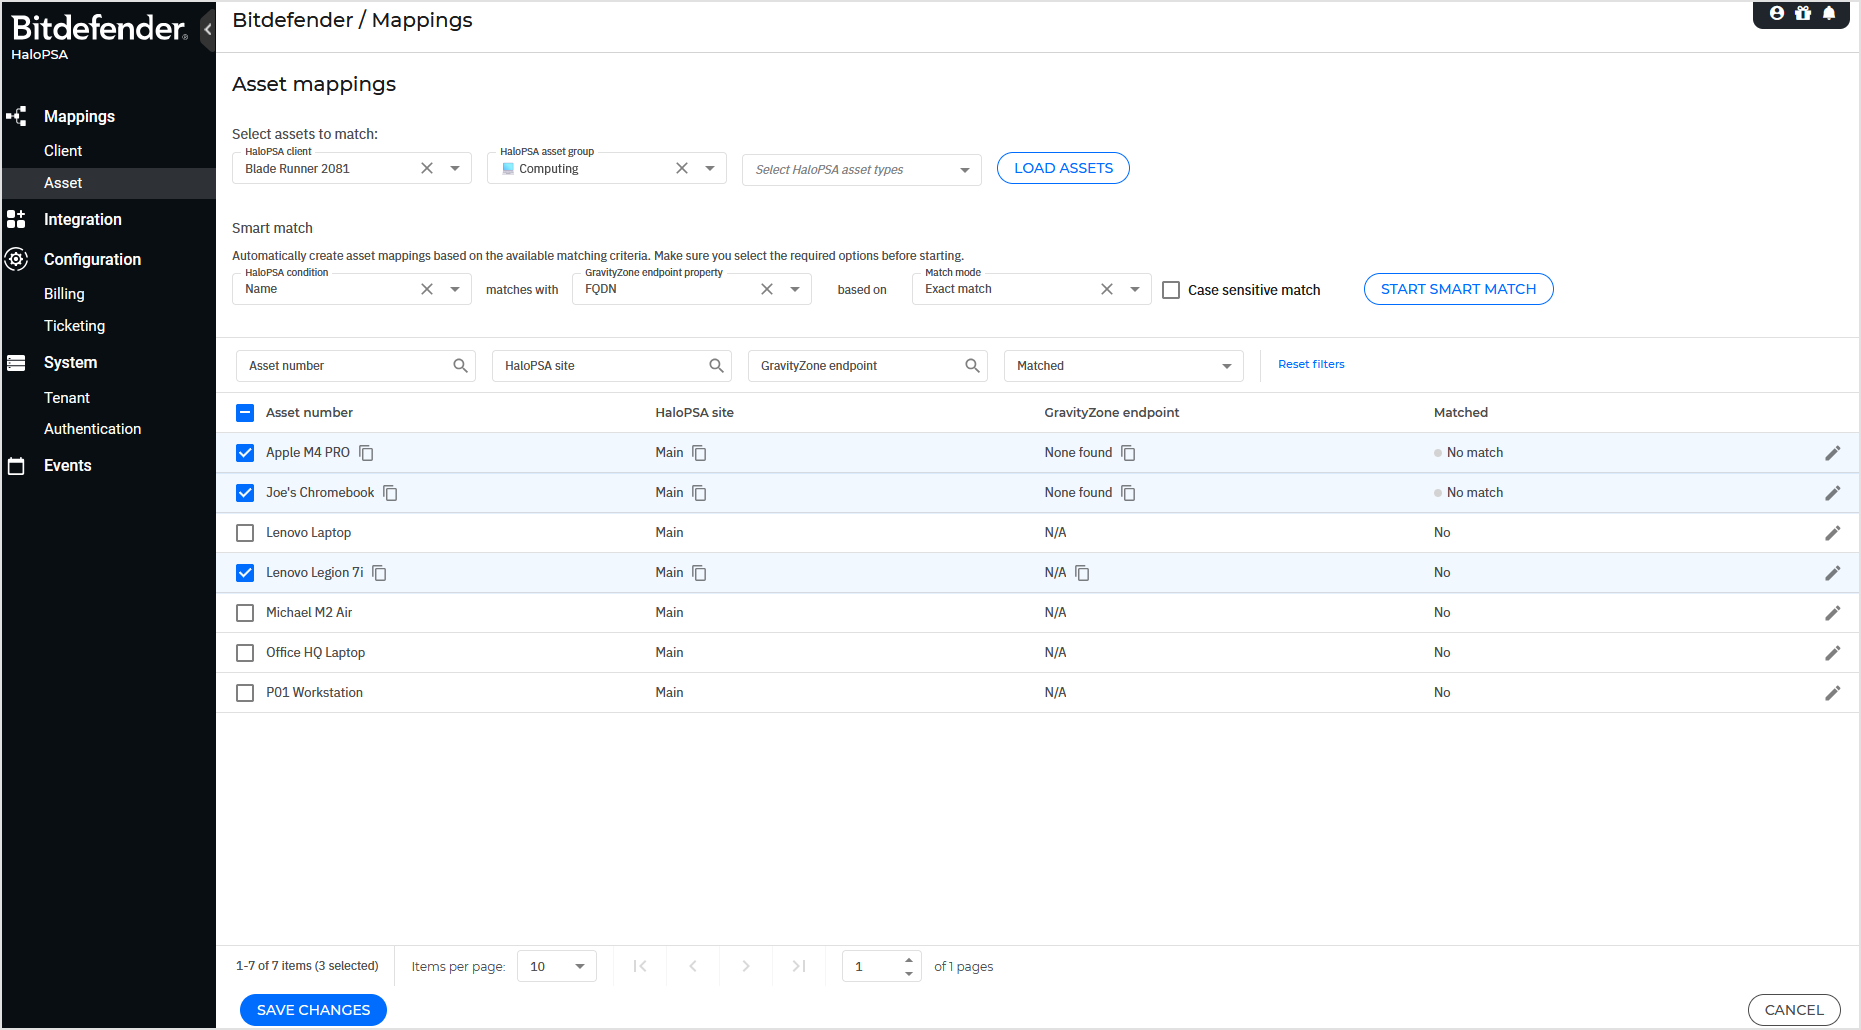
The available assets from the selected group will be displayed in a table with the following details:
Asset number
HaloPSA site
GravityZone endpoint (default = N/A)
Matched status (default = No)
Smart match
The Smart match feature allows the integration to automatically suggest asset mappings between HaloPSA assets and GravityZone endpoints based on selected matching conditions.
To configure and run Smart Match:
Select matching conditions:
From the HaloPSA condition drop-down list, choose the asset field or custom field to be used in the comparison.
From the GravityZone property drop-down list, select the corresponding endpoint property:
Endpoint label
IP address
MAC address
FQDN
SSID
Define the match mode:
Choose how the comparison should be performed from the Match mode drop-down list:
GravityZone property contains HaloPSA field
HaloPSA field contains GravityZone property
Exact match
Optionally, enable Case sensitive match mode to perform case-sensitive comparisons.
Run Smart Match:
Select the Assets you want to include in the Smart Match process.
Click Start smart match to begin.
After the Smart Match process completes, the suggested GravityZone endpoints will appear in the GravityZone endpoint column, along with the Match Status.
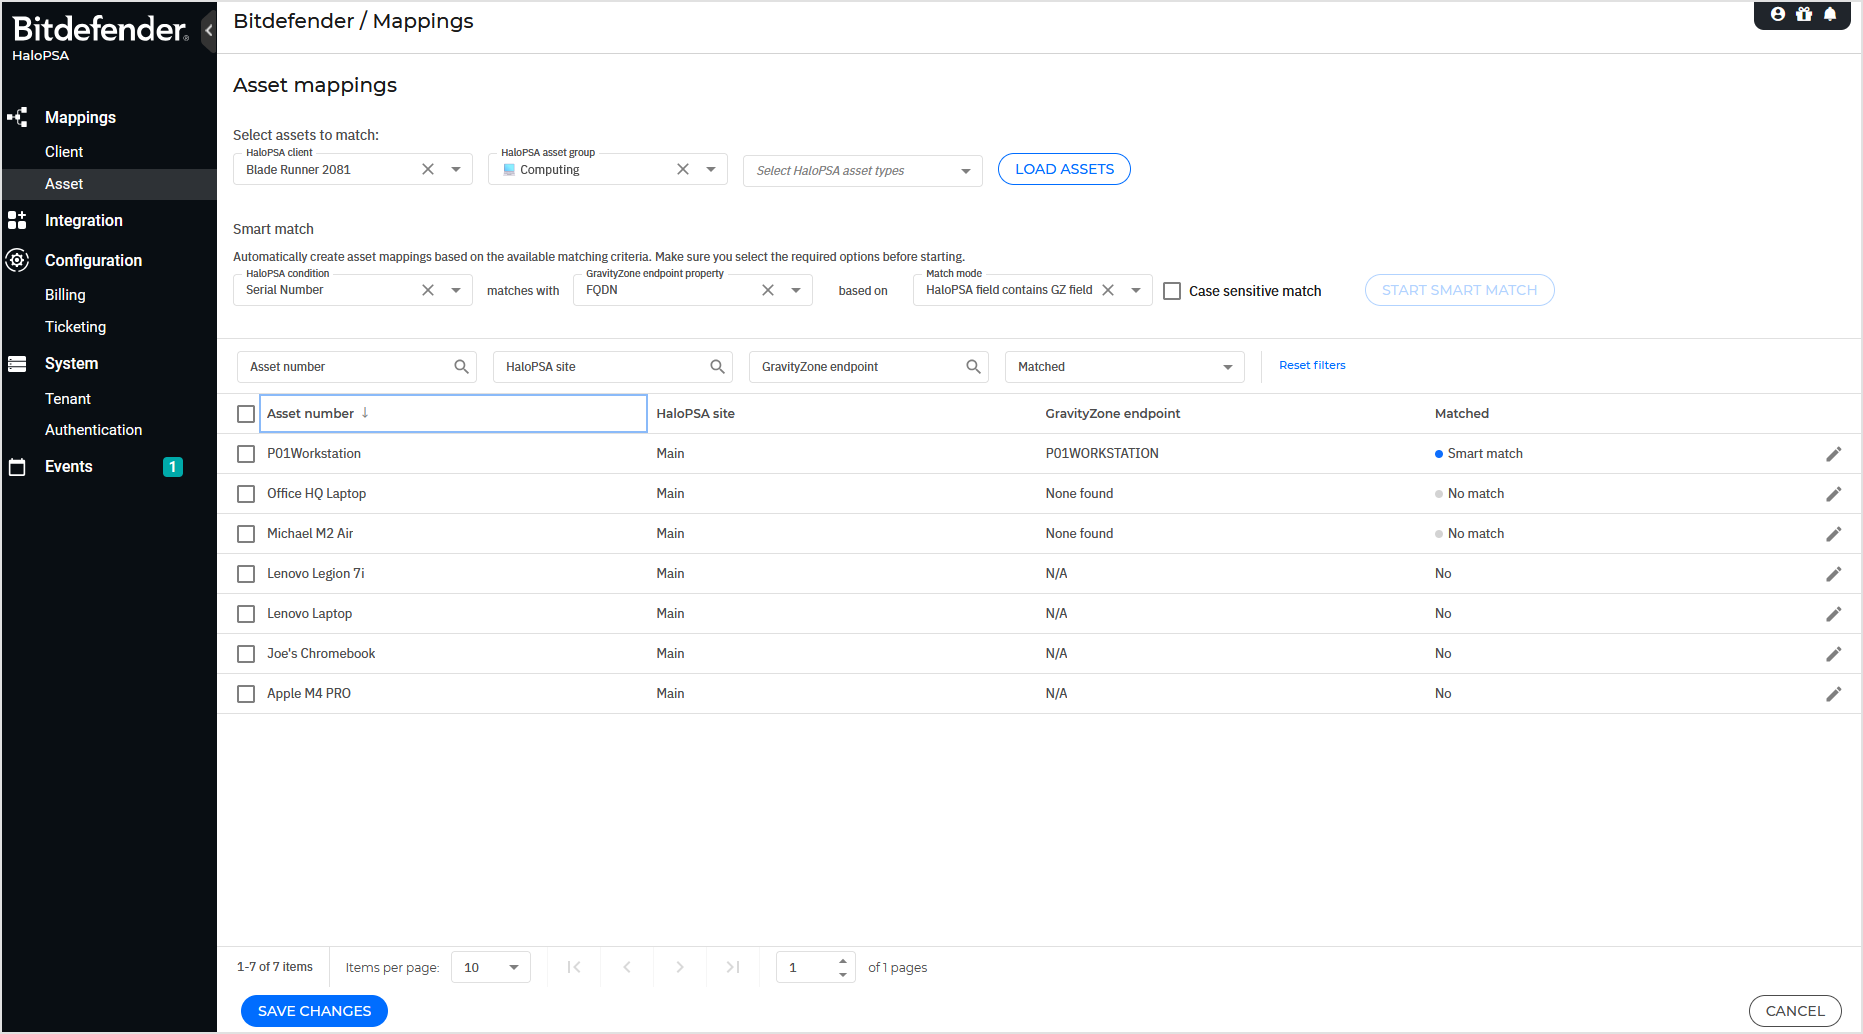
The possible match statuses are:
Smart match – An exact GravityZone endpoint was found for the selected criteria. The endpoint is automatically added in the GravityZone endpoint column.
No match – No GravityZone endpoints were found for the selected criteria.
Duplicate match – Two GravityZone endpoints matched the selected criteria. Both endpoints can be viewed by hovering over the field.
Multiple match – More than two GravityZone endpoints matched the selected criteria. All matched endpoints can be viewed by hovering over the field.
Caution
To confirm and save the proposed mappings or any changes to the Asset Mappings, click Save Changes. If an already saved mapping is selected for Smart Match, the proposed GravityZone endpoints will be re-evaluated based on the newly defined criteria.

Manually mapping assets
To manually map an asset, follow these steps:
Click the Edit icon on the line of the desired asset.
From the drop-down list, select an available GravityZone endpoint.
Click Save to confirm the selection.
Repeat the process for any additional assets that require mapping.
Once all mappings are complete, click Save changes.
Note
Until you click Save changes, mapped items will display a Pending status.
Managing existing mappings
Missing assets
If an asset’s corresponding GravityZone endpoint is no longer available, its matched status will automatically change to Missing.
Removing a mapping
To delete an existing mapping:
Edit the asset line.
Select Remove mapping, then Save.
Click Save changes.