MobileIron MDM integrations guide (Ivanti)
The GravityZone MTD detects malicious activity and, depending on the platform, is able to take some defined actions locally. However, when the app is integrated with an MDM, actions can be performed by the MDM, providing a very powerful protection tool.
Prerequisite requirements
Item | Requirements |
|---|---|
Ivanti/MobileIron MDM enrolled device (Non-Integrated) | Core: minimum v9 Cloud (Current SaaS version) |
MobileIron Core with Ivanti Neurons for MTD | Core: v9.6.0.1 iOS Mobile@Work MDM Agent: v9.7.0 Android Mobile@Work MDM Agent: v9.6.0 (Core v10.0.0.1 and Mobile@Work v10 are needed to support local app actions) |
MobileIron Core with Ivanti Neurons for MTD | MobileIron Cloud Release 52 MobileIron Go for iOS Client: v3.2 MobileIron Go for Android Client: v2018.04.23 |
API Administrator Account in MobileIron management console. | Set this up with the proper authorization defined in the sections below. |
MDM Password | Do not use a colon (:) in the MDM access password field, or use `password` as a password value. |
The MDM and Mobile Security console communication
The Mobile Security console server is configured to share information with the MobileIron console through API REST calls. When the GravityZone MTD detects an event, it consults the current Threat Policy resident on the device and if the action involves MobileIron, it is either performed locally or communicated to Mobile Security console. The Mobile Security console reaches out to the proper MobileIron API Server and provides the commands to perform the configured action
Ivanti Neurons MTD and MobileIron Core
MobileIron Threat Defense is active in the MobileIron Core Mobile@Work Agent in this configuration. GravityZone MTD does not need to be pushed to the device because the engine is already integrated into the Mobile@Work Agent. In this scenario, the MobileIron Mobile@Work Agent is configured with the activation code to enable the threat engine and communicates with the appropriate Mobile Security console when a device enrolls in MI Core. Defined in the MI Console, the actions that can be taken in response to a threat are: Performed locally on the device when the device is not attached to a network. Initiated from the console when the device is connected to a network.
Since MobileIron Threat Defense is provided by the Mobile@Work Agent, the agent on the device needs to be updated with the activation code to enable the feature. This is done differently between iOS and Android but, in both cases, the same MobileIron Activation Code is required. This code is retrieved after the MobileIron Core MDM integration has been performed in the next step.
Setting up synchronization in the MobileIron Core console
In order to create a MobileIron administrator with the proper API access, along with the Common Platform Services, follow the steps below:
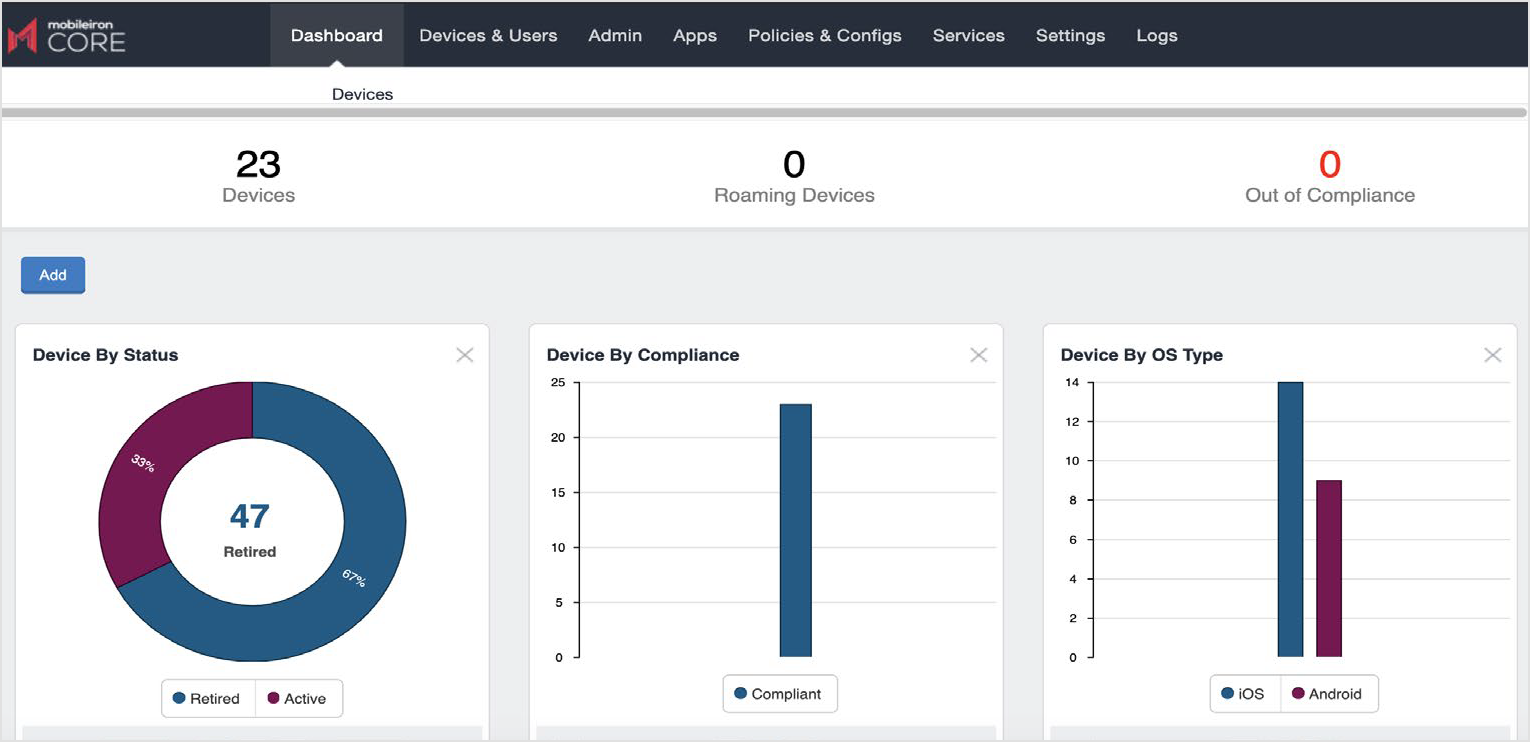
When you log into the MobileIron Core console and the main Dashboard window opens.
Along the top several tabs, click Admin.
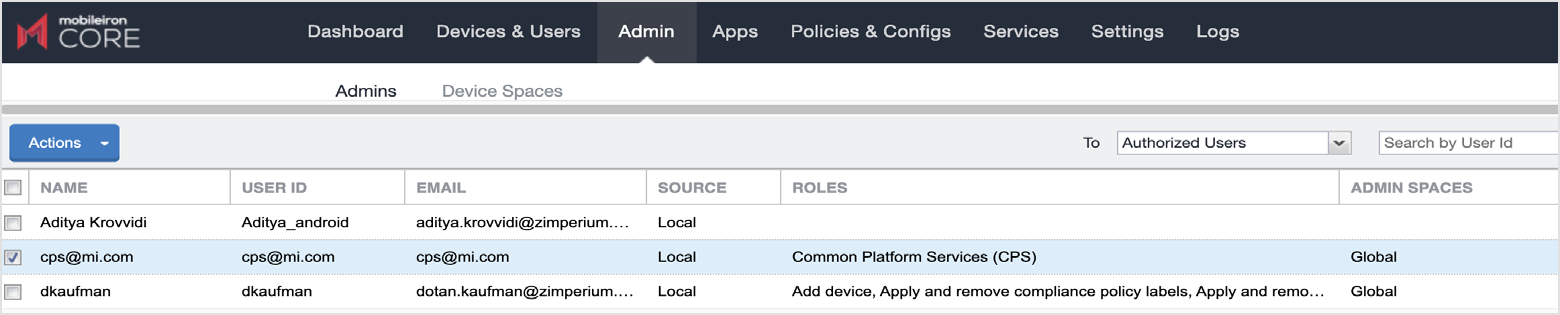
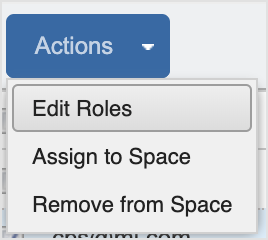
Click the checkbox for the CPS user, and from the Actions drop-down at the top left, select Edit Roles.
The Admin Roles pop-up window opens.
Note
If using MobileIron Core version 10.8 or later, then in the Device Management section, click on the checkbox for Apply and remove device label, as shown below. If using MobileIron Core prior to version 10.8, then the Apply and remove device label permission is not required.
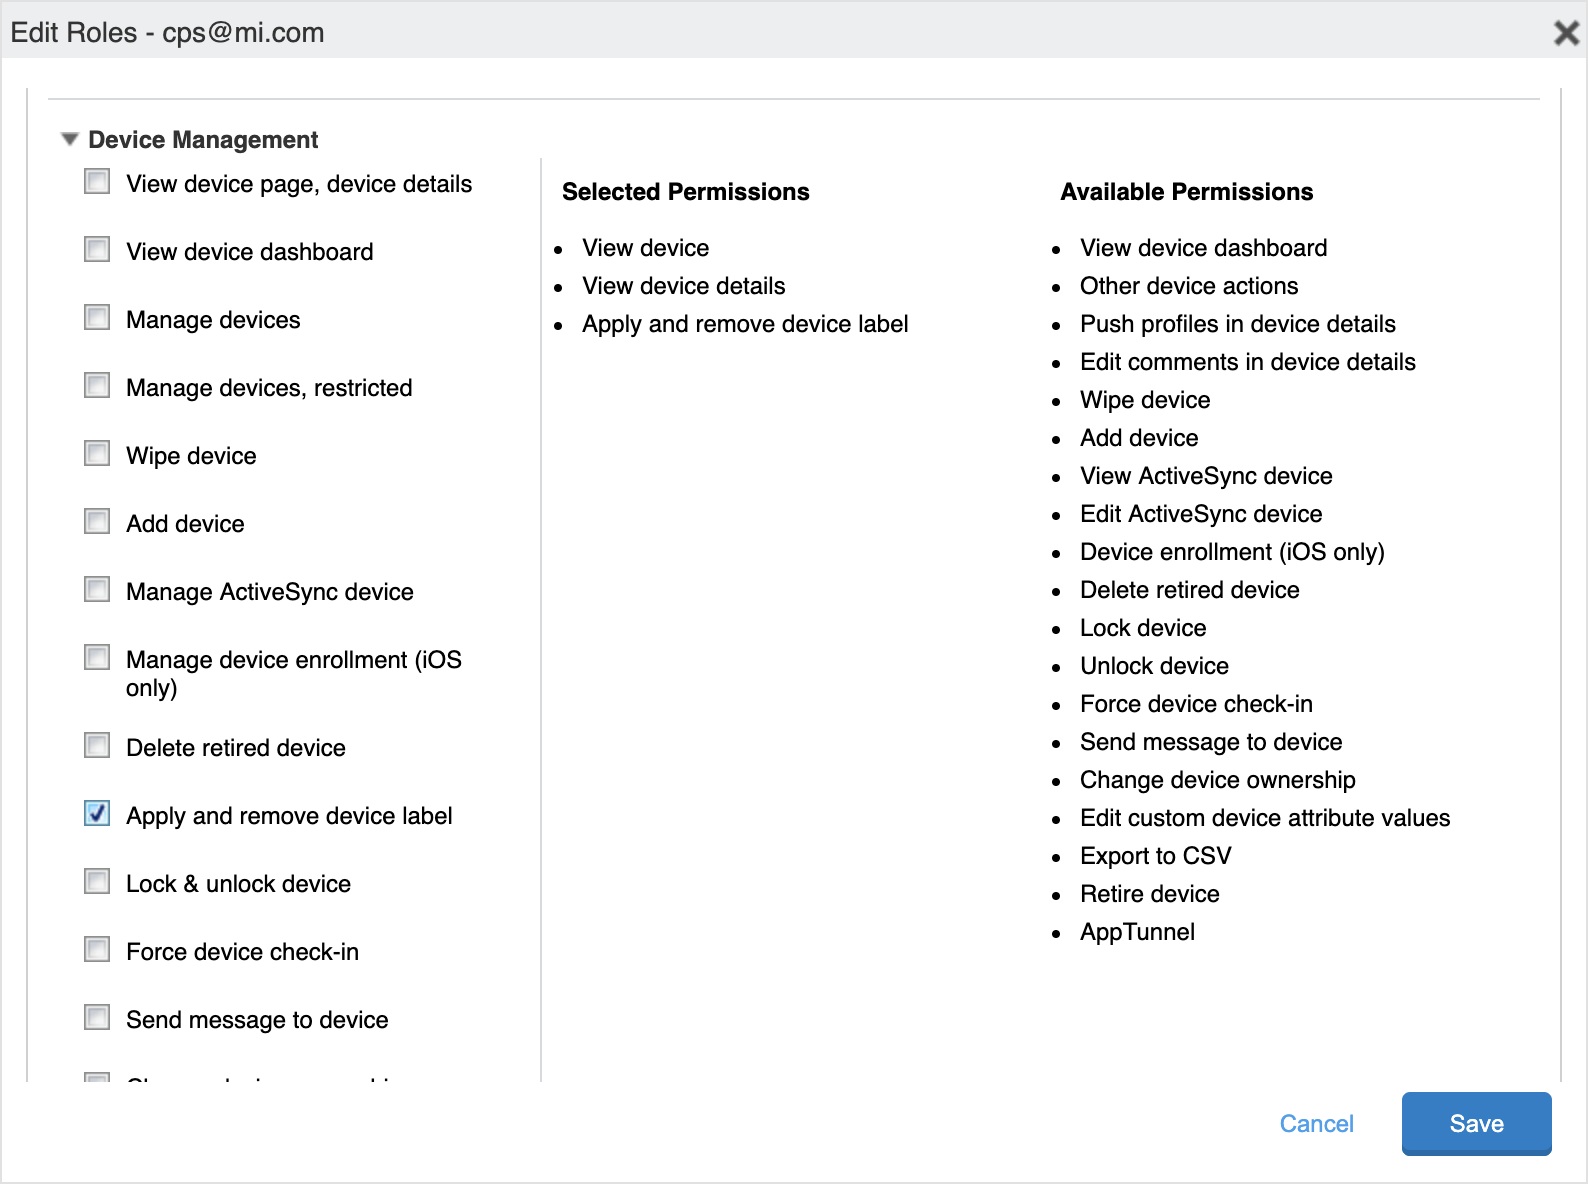
Scroll down to the Privacy Control section, and click on the checkboxes for View apps and ibooks in device details and Locate device.
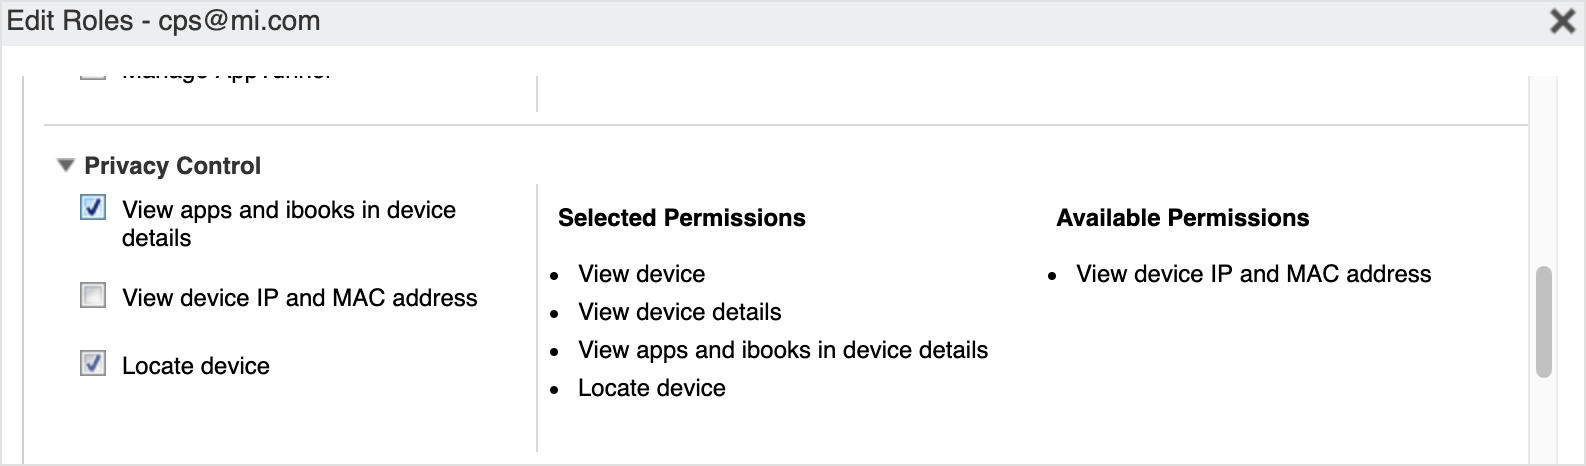
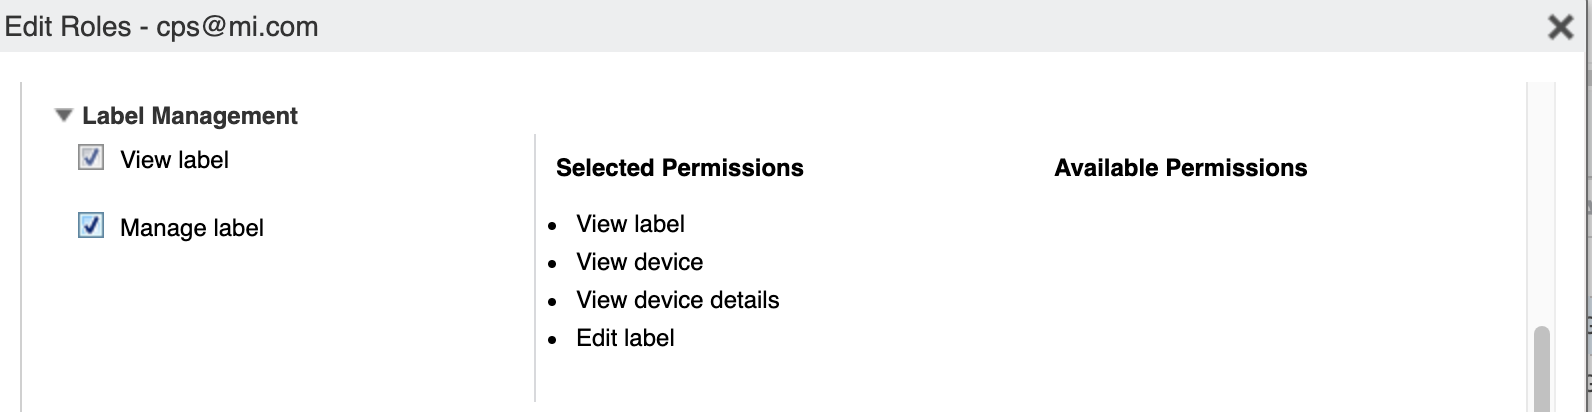
Scroll down to Label Management, and click the checkboxes for View Label and for Manage Label.
Scroll all the way down to the Other Roles section.
Note
If using MobileIron Core version 10.8 or later, click on the checkbox for Common Platform Services (CPS). If you are using MobileIron Core prior to version 10.8, an additional permission is required. Click on the checkbox for API.

Click Save.
Set Up User and Device Synchronization in the Mobile Security console
The next step is to select one or more Labels that are used to contain the devices that are to be protected if there is not an existing one defined. The Mobile Security console application uses these labels to synchronize devices and associate users with the Mobile Security console.
To set up the MDM integration in Mobile Security Console:
Log in to Mobile Security console.
Go to the Manage page.
Select Integrations.
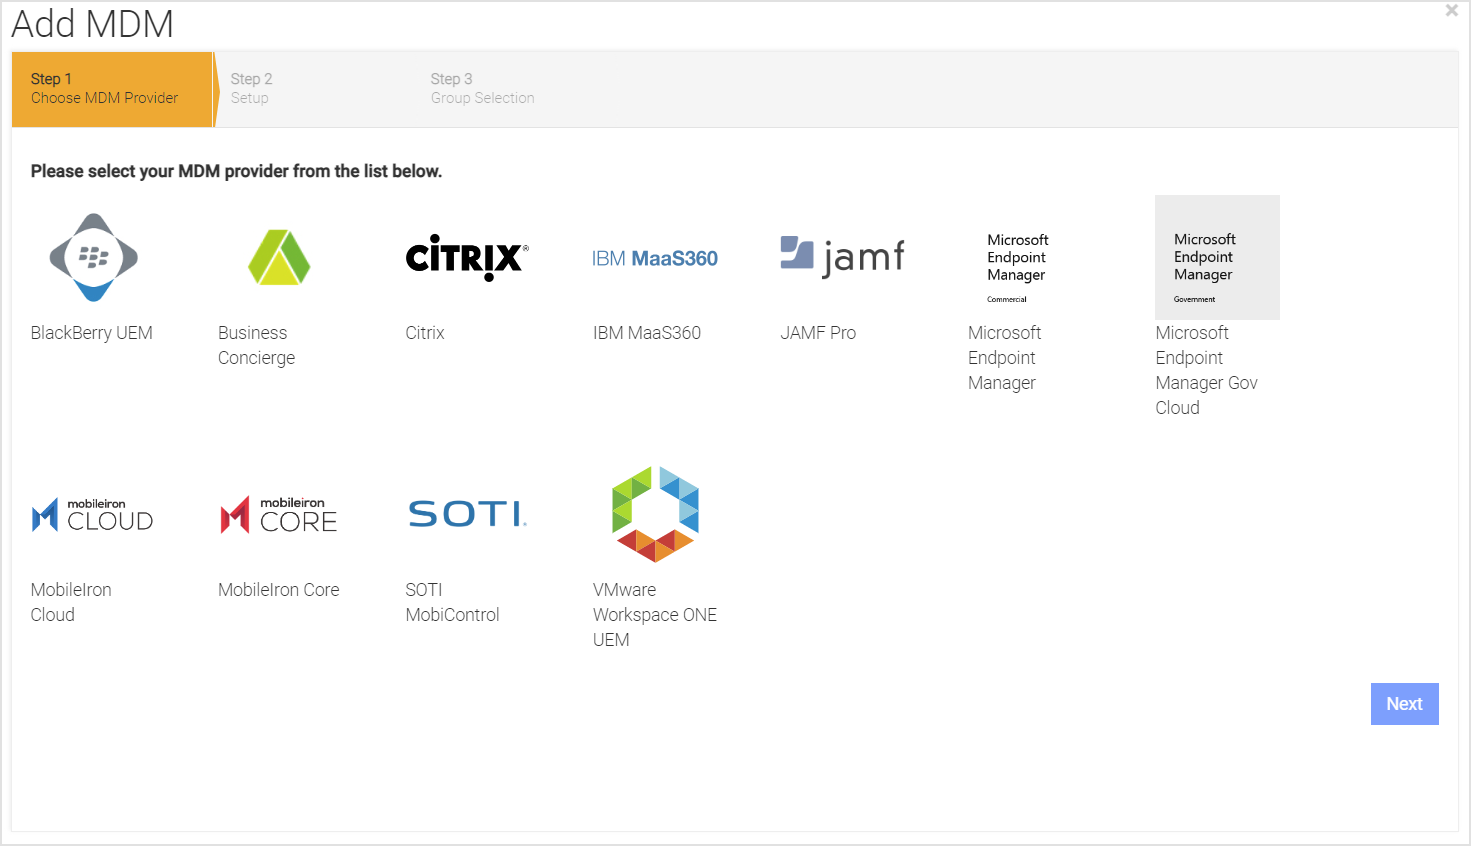
Click on Add MDM and select the MDM integration you want to use.
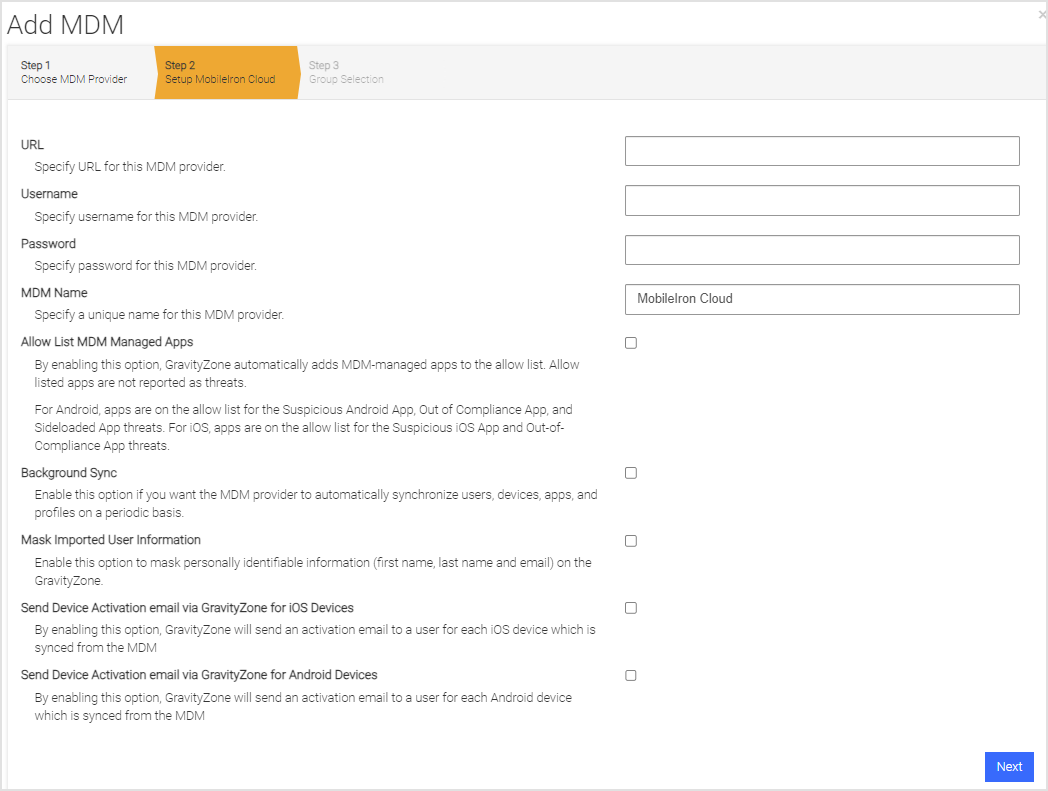
Enter information pertinent to the UEM integration list in the table, and click Next.
Field/Option
Description
URL
URL of the MobileIron API Server.
Username
MobileIron Administrator created with the API role access.
Password
The password of the MobileIron Administrator.
MDM Name
The name used in Mobile Security console to reference this MDM integration. This is prepended to the group name to form the Mobile Security console group name.
Allow List MDM Managed Apps
When adding or editing a MobileIron MDM, users have the option to allow (whitelist) iOS and Android apps that are identified as always safe. When this option is enabled and an allowed app is opened on the user’s device, it is not checked for vulnerabilities. For Android, apps are on the allow list for the Suspicious Android App, Out of Compliance App, and Sideloaded App threats. For iOS, apps are on the allow list for the Suspicious iOS App and Out-of-Compliance App threats. Once this option is turned on in the MobileIron MDM, the next step is to add the apps to be allowed (whitelisted) on the Mobile Security console.
Background Sync
Check this box to ensure users/devices are synchronized with the MobileIron Labels chosen on the next page.
Mask Imported Users Information
Check this box to mask personally identifiable information about the user when displayed, for instance, name or email address.
Send Device Activation email via Mobile Security console for iOS Devices
Check this box to send an email to the user for every iOS device synced with the MDM.
Send Device Activation email via Mobile Security console for Android Devices
Check this box to send an email to the user for every Android device synced with the MDM.
Click Next and choose the User Group(s) to synchronize. The available groups show up in the Available Device Groups list and can be moved to the Selected Mobile Security Console Groups list by clicking on the plus sign (‘+’). This can be reversed by clicking on the minus sign (‘-’).
Click Next.
Specify the MDM alerts if you want to be notified when there are MDM sync errors. If you want more than one email address, separate them by a comma.
Click Finish to save the configuration and start the first synchronization by clicking Sync Now.
Enabling Ivanti Neurons MTD
Now that a valid MobileIron MDM Integration is set up, retrieve the activation code for MobileIron Threat Defense and apply it to the Mobile@Work agent on the device.
Enabling Ivanti Neurons MTD in iOS
After following the above procedure you need to follow these steps to enable Ivanti Neurons MTD in iOS devices:
Log into the Mobile Security Console and navigate to Manage, then select Integrations and MDM.
Locate the MobileIron instance that was just configured and copy the MobileIron Activation Code to the clipboard.
Log into the MobileIron Console.
Navigate to Apps and select App Catalog.
Locate the iOS Mobile@Work entry. If one does not exist, add it from the App Store and associate the required labels.
Click on the Mobile@Work app and Edit.
Ensure that these options are enabled (set to Yes).
Allow conversion of the app from unmanaged to managed.
Send installation requests or send convert unmanaged to managed app requests on device registration or activation.
Send installation or convert unmanaged to managed app requests to quarantined devices.
Under Managed App Configurations, click Add+.
Enter a name for this App Configuration.
Click Expand.
Enter the Activation Code.
Enable Activate.
Save the settings.
Enabling MobileIron Threat Defense in Android
Log into the Mobile Security Console and navigate to Manage, then select Integrations and MDM.
Locate the MobileIron instance that was just configured and copy the MobileIron Activation Code to the clipboard.
Log into the MobileIron Console.
Create an XML file comprised of the following content:
<?xml version="1.0" encoding="UTF-8"?><bitdefender><token>insert activation token</token></bitdefender>
Ensure there are no extra carriage returns or line feeds in the file after it is saved.
In the MobileIron console, navigate to Policies and Configs, select Configurations and click Add New
Navigate to Android, and select Android XML Configuration.
Enter a Name for this configuration.
Provide a description.
Choose Bitdefender for the Configuration Type.
Browse to the XML file created above and upload it.
Select the I Agree checkbox and then click Save.
Assign the required Labels to this new Android XML Configuration.
Now, Ivanti Neurons MTD is enabled for both iOS and Android. When a user enrolls their device, the Activation Code is sent to the Mobile@Work agent and Ivanti Neurons MTD starts.
The device shows up immediately in the Mobile Security Console in the default group and after the MDM Integration is automatically synchronized, it shows in the assigned group.
GravityZone MTD integration with MobileIron Core
The following sections describe the steps for app deployment, synchronization, and device actions for MobileIron Core Integration with GravityZone MTD.
Application deployment
If the user is not using MobileIron Threat Defense, GravityZone MTD can be deployed. To deploy the application through MobileIron, download it from the public App Store for iOS and the Google Play Store for Android and then deploy it with the steps provided.
Access the MobileIron Core platform by logging in. If there is no suitable Label available for the deployment of the application, then a new Label should be created. Develop a novel Internal Application and proceed to upload the appropriate application file (IPA for iOS and APK for Android) to MobileIron. Apply the label to the application and proceed with the publication process.
Create a Label to be assigned to devices that need to deploy GravityZone MTD.
Go to Device and click on Users, then select Labels and select Add Label.
Enter the label name and short description.
Click Save.
Upload the GravityZone MTD.
Go to Apps and select Add+.
Click Next and add/update information as needed in the next two screens and then click Finish.
The application is now ready to be deployed.
Assign the Label created in step 1 to this application.
Click the radio button in front of the application just imported and click Actions and Apply to Label.
Choose the label created in step 1) and click Apply.
Assign this label to all devices that are required to be protected by the GravityZone MTD.
Navigate to Device and Users and select Devices.
Click on the radio button next to all devices to be protected.
Click Actions and then choose Apply to Label.
Choose the Label to be applied and click Apply.
Syncronization
Full MDM synchronization
After the initial full synchronization during the MDM integration setup, a scheduled synchronization process runs every four hours.
On-demand device synchronization
Due to the four-hour MDM synchronization window, there are times when a new MDM user has GravityZone MTD pushed down to their device and attempts to start it prior to the device actually being synchronized from the MDM. Mobile Security Console handles this by doing an on-demand device synchronization when the GravityZone MTD tries to activate but no information yet exists for it.
The Mobile Security Console application receives the identification information from the app used for the authentication and matches it up with the proper customer for authentication. Once that happens, Mobile Security Console retrieves that device and user information from the MDM configured for that customer. The app on that device is now authenticated and allowed to proceed. For this to work correctly, the app must be deployed as follows:
iOS
Associate a PLIST file with the the GravityZone MTD that pushes down the fields used for the on-demand device sync. This is described in the Auto Activation/Advanced Application Deployment section.
Android
This requires Android for Enterprise for auto-activation. Use the Mobile Security Console activation URLs for native Android. Contact the Customer Support team for more information on this topic.
Setup synchronization
Scroll down to the Other Roles section. If using MobileIron Core version 10.8 or later, click the checkbox for Common Platform Services (CPS). If using MobileIron Core before version 10.8, additional permission is required, and click on the checkbox for API in the Other Roles section
Create a MobileIron administrator with the proper API access.
Navigate to Devices and Users, then select Users, select Add, and select Add Local User.
Then, select the Admin tab, and the window in the figure opens.
Click on the checkbox for the API admin user, and on the Actions button at the top left, click on the drop-down menu and select Edit Roles.
The Admin Roles pop-up window opens. If using MobileIron Core version 10.8 or later, then in the Device Management section, click on the checkbox for Apply and remove device label, as shown below. If using MobileIron Core before version 10.8, the Apply and remove device label permission is not required.
Scroll down to the Privacy Control section, and click on the checkboxes for View apps and ibooks in device details and for Locate device
Scroll down to Label Management, and click on the checkboxes for View Label and for Manage Label
Scroll down to the Other Roles section. If using MobileIron Core version 10.8 or later, click the checkbox for Common Platform Services (CPS). If using MobileIron Core before version 10.8, additional permission is required, and click on the checkbox for API in the Other Roles section
Click on the blue Save button at the bottom of the pop-up window.
Create one or more Labels that contain the devices that are protected if there is not one that exists. The Mobile Security Console uses these label(s) to synchronize devices and their associated users.
Zero-Touch activation for iOS GravityZone MTD for MobileIron Core
This feature allows an administrator to activate the app protection on managed devices without the end-user being required to click on the installed application.
Overview of the setup
The MobileIron Core console has a label and a VPN profile (referred to as VPN) for the devices.
The device is registered with the MDM.
The app is pushed to the device.
The VPN profile is initially pushed to the device.
Mobile Security Console has the MDM defined as an integration.
A sample flow after the configuration is complete
These steps describe a sample flow once Zero-Touch Activation is configured:
The MDM pushes the app and the VPN profile to the device.
There is a “Launch App” notification on the device from the VPN profile, but the end-user does not activate the apps yet.
A threat is generated on the device, such as a “Device Pin” threat.
The VPN profile shows a notification of the threat on the device, and the app is still not launched.
The threat is visible on the Mobile Security Console Threat Log page and:
The App Name shows “VPN Extension.”
The Detection Status shows “Active” for the device.
The App Status shows “Pending Activation” for the device.
The user launches and activates the app.
Setting up Zero-Touch Activation for iOS
Updating your configuration file
These are the steps to update your VPN configuration file.
Contact the Customer Success team and get these items:
The default XML configuration file for zero-touch activation for MobileIron Core
Your default channel value for zero-touch activation. This value must have “/json” at the end of the string.
Your tenant id value for zero-touch activation.
Update the configuration file with your defaultchannel and tenantid that the Customer Success team provided.
Make sure the values follow these conventions and the keys are exact matches as they are case-sensitive.
Key
Optional/ Required
Key Description
Sample Value/Notes
defaultchannel
Required
Set the defaultchannel to the JSON endpoint value. You get this from the Manage page and General tab in the Mobile Security Console, and you must add “/json” string to the end.
EU: https://gz2-acceptor.ms.gravityzone.bitdefender.com/srx/json
US: https://gz1-acceptor.ms.gravityzone.bitdefender.com/srx/json
tenantid
Required
Set the tenantid according to the value that you get from the Customer Success team member for your tenant.
####-####-#### or 1234-ABCD-5678
MDMDeviceID
Required
This is the identifier for the device for this MDM.
$DEVICE_UUID$
enable_auth_redirect
Optional
The values are true or false. Set this value to control and enable this feature. This controls redirecting HTTP URLs to a customized web page requesting the user to launch an app. This key is required if you are using other redirect configuration parameters.
false
enable_auth_notification
Required
The values are true or false. This controls the display of the local notification message requesting the user to launch the app.
true
auth_custom_notification_title
Required
Set the value to “Launch app.” The notification title can be changed to a custom title if desired.
“Launch app”
runlevel
Optional
This indicates the running level for the detection, and the values are “QA”, “Beta”, and “Production” and you set it to the default of Production.
“Launch app”
auth_custom_html_base64
Optional
The administrator can set a custom HTML page to show up when an HTTP site is visited. It needs to be Base64-encoded before entering it in this field.
VPNSubType
Optional
This is the application that you want to activate.
Configuring within the MobileIron Core console
Log in to the MobileIron Core with an admin ID and password.
Navigate to Devices & Users > Add and create a new label with the type as Manual.
Navigate to Policies & Configs and create a new configuration profile.
The Policies & Configs window opens. Click on the drop-down menu next to Add New at the top left.
Select Add New, then select iOS/macOS/tvOS.
Click Configuration Profile.
In this window, enter a Name and a Description of the zero-touch profile.
Browse to the configuration profile you created in the section above and associate it with the new label you created.
Make sure you assign the configuration to the label you created in Step 2.
Configuring within the Mobile Security console
Log in to the Mobile Security console.
Navigate to the Manage page and the Integrations tab, and add the MobileIron Core MDM.
Navigate to threat policies on the Policy page and the Threat Policy tab.
Update the App Pending Activation threat with MDM Action and Mitigation Action field values.
Save and Deploy your changes
Auto activation/advanced application deployment
The GravityZone MTD in both iOS and Android Enterprise can auto-activate. The process is different on each platform and described below.
iOS Activation
Configure the desired keys within MobileIron after adding the application. For the app, create a PLIST file that contains the information using variables as outlined in this table.
Configuration Key | Value Type | Configuration Value |
|---|---|---|
MDMDeviceID | String | $UDID |
tenantid | String | Copy the value from the Tenant ID field on the Mobile Security Console Manage page under the General tab. Retrieve from Mobile Security Console |
defaultchannel | String | Copy the value from the Default Channel field on the Mobile Security Console Manage page under the General tab. Retrieve from Mobile Security Console |
tracking_id_1 | String | (Optional) Use the desired identifier |
tracking_id_2 | String | (Optional) Use the desired identifier |
display_eula | String | no (Optional) If this key is not used, the default displays the End User License Agreement (EULA). |
assume_vpn_permission_granted | String | (Optional) true The values are true or false. Set this value to true to grant this permission. If this is used, ensure this is in the MDM app configuration key list. This only applies to iOS. |
Add this PLIST file to MobileIron through the console by performing these steps:
Go to Policies and Configs and select Configurations.
Select Add New and select iOS and OS X.
Select Managed App Config.
Select the file which was created above to upload.
Enter the bundle ID for the iOS app.
Click on the radio button by the new Managed App Configuration item.
Go to More Actions and select Add to Label.
Choose the Label associated with the iOS app.
Click Apply
Android activation
Android Enterprise users can use the managed app config for activations. For native Android devices, activations require the use of activation URLs, which can be sent to end-users via the Mobile Security Console or the MDM. The Mobile Security Console page displays the expiration date and time, and if needed, the link can be regenerated. The administrator sends the concatenated activation link by email or text to users, along with instructions to accept the app being pushed.
GravityZone MTD integration with MobileIron Cloud
Synchronization
Full MDM synchronization
After the initial full synchronization during the MDM integration setup, a scheduled synchronization process runs every four hours.
On-demand device synchronization
Due to the four-hour MDM synchronization window, there are times when a new MDM user has the app pushed down to their device and attempts to start it before the device is synchronized from the MDM. The Mobile Security Console handles this by doing an on-demand device synchronization when the GravityZone MTD tries to activate, but no information yet exists for it. The Mobile Security Console application gets the identification information from the apps used for the authentication and matches it up with the proper customer for authentication. Once that happens, The Mobile Security Console retrieves that device and user information from the MDM configured for that customer. The GravityZone MTD on that device is now authenticated and allowed to proceed. For this to work correctly, the app must be deployed as follows:
iOS: Associate an App Configuration with the application that pushes down the fields to be used for the on-demand device sync.
Android: This requires Android for Enterprise for auto-activation. Use Mobile Security Console activation URLs for native Android.
Setup synchronization
The next step is to create one or more device groups that contain the devices that are protected if a device group does not exist yet for this purpose. Mobile Security Console uses these device group(s) to synchronize devices and possibly their associated users. Set the device groups up in the MobileIron console, then follow these steps in the Mobile Security Console to continue the synchronization setup.
Zero-Touch activation for GravityZone MTD for MobileIron Cloud
This feature allows an administrator to activate the app protection on managed devices without the end-user being required to click on the installed application.
Overview of the setup
The MobileIron Cloud console has a device group and a VPN profile (VPN) for the devices
Mobile Security Console has the MDM defined as an integration.
Setting Up Zero-Touch activation for iOS app
This instruction set describes configuring zero-touch GravityZone MTD for iOS activation and the workflow. This option provides threats being detected without the activation of the app on the end user’s device, where the GravityZone MTD is pushed from the MDM. The user is prompted to open the app, but it is not a required action. A VPN profile runs on the device until the user activates the app.
Configuring MobileIron Cloud for iOS
Log in to the MobileIron Cloud with an admin ID and password.
Create a new Device Group.
Navigate to Configurations.
Click on Add -> Select Custom Config.
In this window, enter a Name of the zero-touch profile, for instance, named
VPN.Browse to the configuration profile you created in the section above and upload it to the configuration.
Make sure you assign the configuration to the device group that you created in step 2.
Configuring within the Mobile Security console for Zero Touch Activation
To finish the configuration for zero-touch activation, perform these steps:
Log in to the Mobile Security Console.
Navigate to the Manage page and the Integrations tab, and add the MobileIron Cloud MDM.
Navigate to threat policies on the Policy page and the Threat Policy tab.
Select the appropriate group in the Selected Group field.
Update the App Pending Activation threat with MDM Action and Mitigation Action field values.
Save and Deploy your changes.
Setting up Zero-Touch Activation for Android GravityZone MTD
MobileIron Cloud can start and activate an app that is on the device through Android Enterprise and provisioning. This option provides threats being detected without the activation of the GravityZone MTD on the end user’s device, where the app is pushed from the MDM. The user is prompted to open the app, but it is not a required action. A VPN profile runs on the device until the user activates the app. There are setup requirements on both the Mobile Security Console and MobileIron Cloud.
Configuring MobileIron Cloud for Android
Create these two additional configurations for the devices and distribute them to your user group.
Always On VPN configuration
Log in to the MobileIron Cloud with an admin ID and password.
Select Configurations and click + Add.
Search for Always On VPN, and select it.
Enter a name and select Android.
Select the GravityZone Security for Mobile app as the app to be "always-on" and select the devices that you want to have the configuration.
Distribute this to your user group.
Automatic runtime permissions grant configuration
Log in to the MobileIron Cloud with an admin ID and password.
Select Configurations and click + Add.
Search for Default App Runtime Permissions, and select it.
Enter a name and select Auto Grant.
Click Next and select the devices that you want to have the configuration.
Distribute this to your user group.