eXtended Detection and Response (XDR)
The eXtended Detection and Response (XDR) feature is a cross-company event correlation component, capable of detecting advanced attacks across multiple endpoints in hybrid infrastructures (workstations, servers or containers, running various OS). As part of our comprehensive and integrated Environment Protection Platform, XDR brings together device intelligence across your enterprise network. This solution comes in aid of your incident response teams' effort to investigate and respond to advanced threats.
Important
The capabilities of the XDR feature may differ depending on the license included in your current plan.
eXtended Detection and Response (XDR) is a lightweight cross-company solution that enables you to:
View, analyze, and minimize the impact of network-wide incidents on your environment (see the extended incident view).
Take actions to eliminate vulnerabilities and eliminate the risk of recurrent attacks.
Detect activity that evades classic endpoint prevention mechanisms.
Search for specific Indicators of Compromise (IoCs) and suspicious elements that enable security analysts to discover early-stage attacks.
You can add sensors to XDR to enrich incident data and get better data correlation. Separate licenses are required for adding sensors related to network, identity providers, cloud workloads and productivity apps.
This provides you with easy-to-follow response workflows that enable incident response teams to limit lateral spread and stop ongoing attacks.
Components
eXtended Detection and Response is dependent on the following components:
GravityZone Control Center
Security agent (Windows)
Configure and install the feature
To start using this feature, follow the steps below:
Important
If your endpoints already have the BEST agent deployed, you can use a Reconfigure agent task to add the module to the endpoint. If no agent is installed, you will need to use an installation package to deploy BEST on your endpoints along with all required modules.
Below we have included both procedures.
Log in to GravityZone Control Center.
Go to the Installation Packages page from the left side menu.
Click the Create button in the upper-right side of the screen.
Type in the Name and Description for the new installation package.
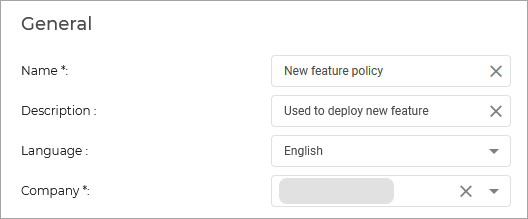
Select the modules you wish to deploy.
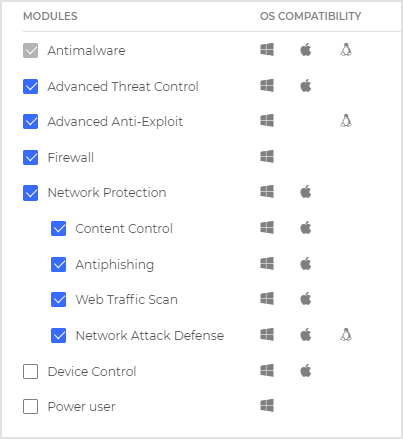
Note
Make sure you include the EDR Sensor module.
Click Save.
Select the newly created package from the list of packages and click Send download links.

Enter the email addresses of the recipients and click Send.
Testing out the feature
Test out the Custom rules feature
This will allow you to create a custom rule that will create an alert when detecting a specific file name in a specific folder:
On the endpoint you wish to test the feature on, create a test folder (for example, create a folder
testunder partitionC:).Note
Make sure the policy you edited or created is applied to the endpoint.
Create a
.txtfile with the nametest_detection.Go to the Custom detection rules page from the left side menu.
Click Add Rule.
Configure the following conditions:
Under Consider as detection every, select File.
Path > Is >
C:\test\Name > Is >
test_detection
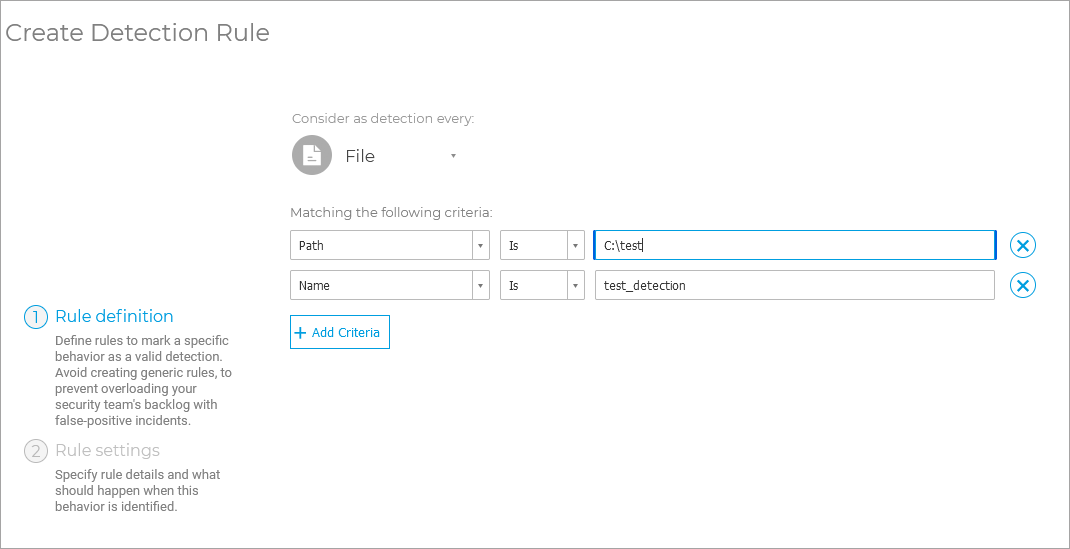
Select Next Step.
Type in a name and a description for the rule and select Create rule.
Wait a few minutes to allow the freshly created rule to be received by your endpoint.
Go to the
testfolder and open the.txtfile.An alert will be created as a result of this rule being triggered. You can view this alert in the Search or Incidents pages.
For more information regarding the Custom rules feature, refer to Custom detection rules.