On-demand
In the Antimalware > On-Demand section of the policy, you can add and configure antimalware scan tasks that will run regularly on the target computers, according to the defined schedule.

Important
This functionality is enabled only if the security agent installed on endpoints is running in Detection and prevention mode. To access this setting, go to the Installation packages page and click on the packages you want to use. You can find it as Operation Mode under the Security Modules and Roles section.
The scanning is performed silently in the background, regardless the user is logged in the system or not.
Though not mandatory, it is recommended to schedule a comprehensive system scan to run weekly on all endpoints. Scanning endpoints regularly is a proactive security measure that can help detect and block malware that might evade real-time protection features.
Besides regular scans, you can also configure the automatic detection and scanning of external storage media.
Managing scan tasks
The Scan tasks table informs you of the existing scan tasks, providing important information on each of them:
Task name and type.
Schedule based on which the task runs regularly (recurrence).
Time when the task was first run.
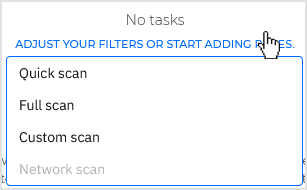
You can add and configure the following types of scan tasks:
Quick scan checks the
%windir%\system32and%TEMP%folders to detect malware threatening the endpoint. A Quick scan is usually completed faster and uses fewer local system resources than a Full scan.When malware or rootkits are found, Bitdefender automatically proceeds with disinfection. If, for any reason, the file cannot be disinfected, then it is moved to quarantine. This type of scanning ignores suspicious files.
The quick scan is a default scan task with preconfigured options that cannot be changed. You can add only one quick scan task for the same policy.
Full scan checks the entire endpoint for all types of malware threatening its security, such as viruses, spyware, adware, rootkits and others.
Bitdefender automatically tries to disinfect files detected with malware. In case malware cannot be removed, it is contained in quarantine, where it cannot do any harm. Suspicious files are being ignored. If you want to take action on suspicious files as well, or if you want other default actions for infected files, then choose to run a custom scan.
The Full Scan is a default scan task with preconfigured options that cannot be changed. You can add only one full scan task for the same policy.
Custom scan allows you to choose the specific locations to be scanned and to configure the scan options.
Network scan is a type of custom scan, that allows assigning one single managed endpoint to scan network drives, then configuring the scan options and the specific locations to be scanned. For network scan tasks, you need to enter the credentials of a user account with read/write permissions on the target network drives, for the security agent to be able to access and take actions on these network drives.
The recurrent network scan task will be sent only to the selected scanner endpoint. If the selected endpoint is unavailable, the local scanning settings will apply.
Note
You can create network scan tasks only within a policy that is already applied to an endpoint that can be used as a scanner.
Besides the default scan tasks (which you cannot delete or duplicate), you can create as many custom and network scan tasks as you want.
To create and configure a new scan task, click the Add button at the top of the table and select between the available types. If the table is empty, you can also click the link and select a scan task type.
To change the settings of an existing scan task, click the name of that task.
To remove a task from the list, select the task and click the Delete button at the top of the table.
Configuring scan tasks
The scan tasks settings are organized as follows:
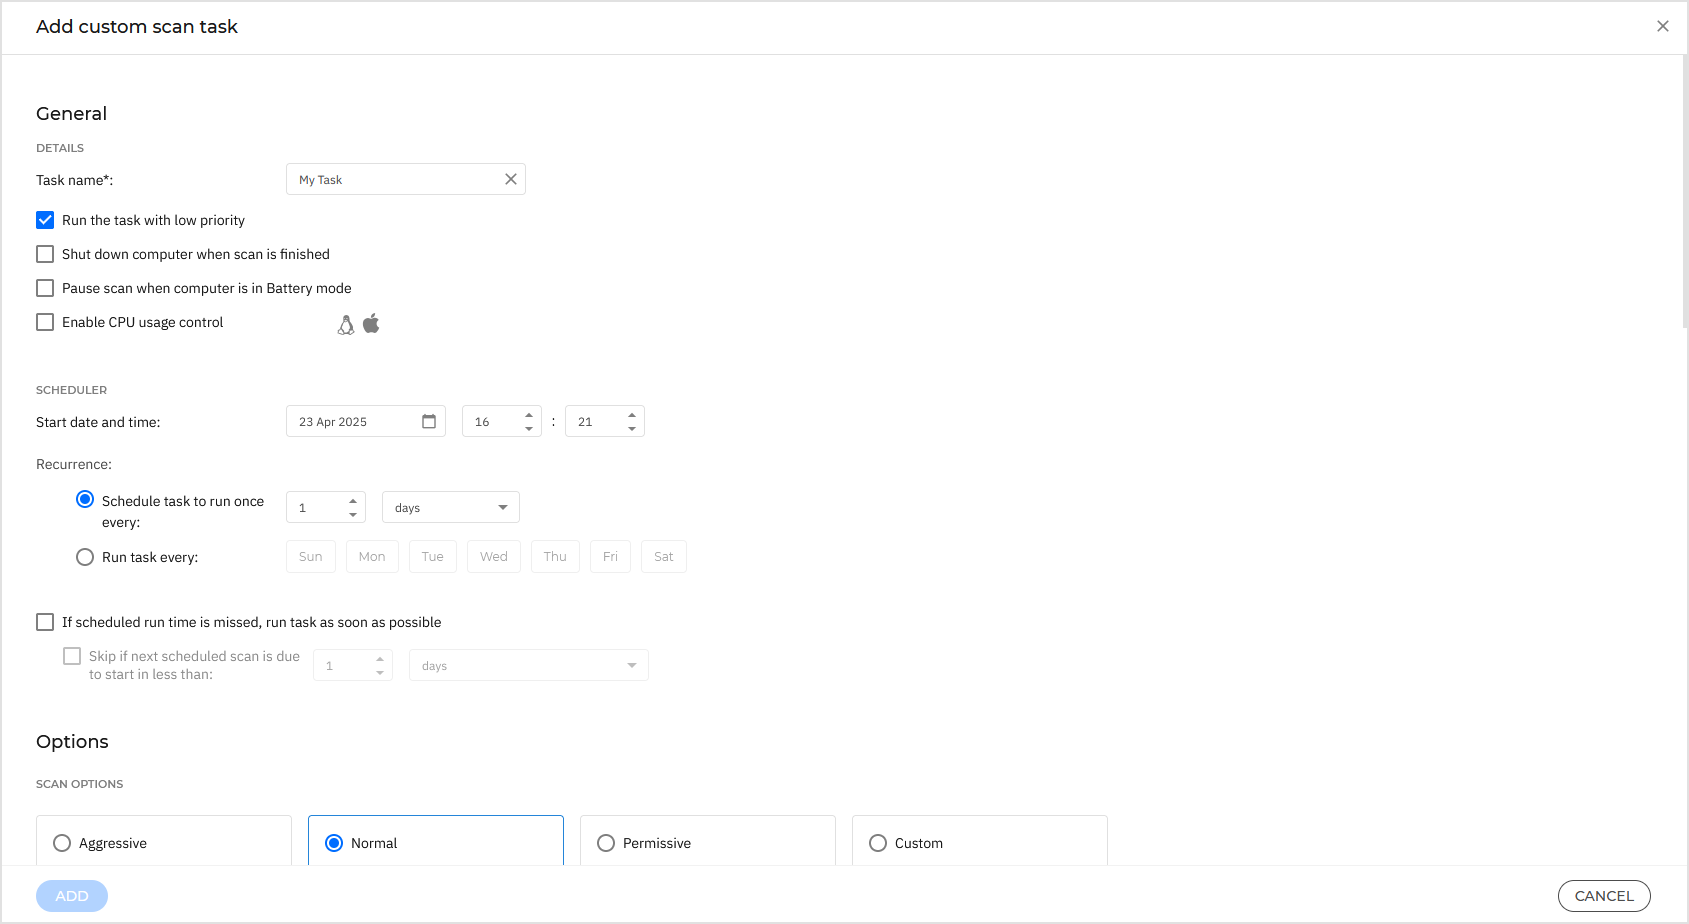
Details
Choose a suggestive name for the task to help easily identify what it is about. When choosing a name, consider the scan task target and possibly the scan settings.
By default, scan tasks run with decreased priority. This way, Bitdefender allows other programs to run faster, but increases the time needed for the scan process to finish. Use the Run the task with low priority check box to disable or re-enable this feature.
Note
This option applies only to Bitdefender Endpoint Security Tools and Endpoint Security (legacy agent).
Select the Shut down computer when scan is finished check box to turn off your machine if you do not intend to use it for a while.
Note
This option applies to Bitdefender Endpoint Security Tools, Endpoint Security (legacy agent) and Endpoint Security for Mac.
Pause scan when computer is in Battery mode: this option helps you pause the scanning process on endpoints running on battery power and automatically resume it once they are plugged back in.
Enable CPU usage control: this option allows you to adjust the CPU usage allocated for the scanning process and tailor the scan performance to your needs. The option is available for all operating systems, offering three levels:
Low
macOS: One core is reserved for scanning from the total number of available cores. The scanning process pauses when the idle CPU usage falls below 75% of the remaining cores and automatically resumes when idle CPU usage rises above this threshold.
Windows and Linux: the scanning process uses up to 25% of the total CPU.
Medium
macOS: One core is reserved for scanning from the total number of available cores. The scanning process pauses when the idle CPU usage falls below 50% of the remaining cores and automatically resumes when it rises above this threshold.
Windows and Linux: the scan uses up to 50% of the total CPU.
High
macOS: One core is reserved for scanning from the total number of available cores. The scanning process pauses when the idle CPU usage falls below 25% of the remaining cores and automatically resumes when it rises above this threshold.
Windows and Linux: no CPU usage limit is imposed on the scanning process.
Note
Selecting a specific CPU usage profile directly impacts the duration of the scan task. Lower CPU usage results in longer scan times, while higher CPU usage speeds up the scanning process.
Scheduler
Use the scheduling options to configure the scan schedule.
You can set the scan to run every few hours, days, or weeks, starting with a specified date and time.
Endpoints must be powered on when the schedule is due. A scheduled scan will not run when due if the machine is turned off, hibernating, or in sleep mode. In such situations, the scan will be postponed until next time.
Note
The scheduled scan will run at the target endpoint local time. For example, if the scheduled scan is set to start at 6:00 PM and the endpoint is in a different timezone than Control Center, the scanning will start at 6:00 PM (endpoint time).
Optionally, you can specify what happens when the scan task could not start at the scheduled time (endpoint was offline or shutdown). Use the option If scheduled run time is missed, run task as soon as possible according to your needs:
When you leave the option unchecked, the scan task will attempt to run again at the next scheduled time.
When you select the option, you force the scan to run as soon as possible. To fine-tune the best timing for the scan runtime and avoid disturbing the user during work hours, select Skip if next scheduled scan is due to start in less than, then specify the interval that you want.
Scan options
Click the security level that best suits your needs (Aggressive, Normal, or Permissive).
Use the descriptions to guide your choice.
Based on the selected profile, the scan options in the Settings section are automatically configured. However, if you want to, you can configure them in detail and, as a consequence, the profile automatically becomes Custom.
File types
Use these options to specify which types of files you want to be scanned.
You can set the security agent to scan all files (regardless of their file extension), application files only or specific file extensions you consider to be dangerous.
Scanning all files provides best protection, while scanning applications only can be used to perform a quicker scan.
Note
Application files are far more vulnerable to malware attacks than other types of files.
For more information, refer to Application file types.
If you want only specific extensions to be scanned, choose User-defined extensions from the menu and then enter the extensions in the edit field, pressing
Enterafter each extension.Archives
Archives containing infected files are not an immediate threat to system security.
The malware can affect the system only if the infected file is extracted from the archive and executed without having real-time protection enabled.
However, it is recommended to use this option in order to detect and remove any potential threat, even if it is not an immediate threat.
Note
Scanning archived files increases the overall scanning time and requires more system resources.
Scan inside archives
Select this option if you want to check archived files for malware.
If you decide to use this option, you can configure the following optimization options:
Limit archive size to (MB)
You can set a maximum accepted size limit of archives to be scanned.
Select the corresponding check box and type the maximum archive size (in MB).
Maximum archive depth (levels)
Select the corresponding check box and choose the maximum archive depth from the menu.
For best performance choose the lowest value, for maximum protection choose the highest value.
Scan email archives
Select this option if you want to enable scanning of email message files and email databases, including file formats such as .eml, .msg, .pst, .dbx, .mbx, .tbb, and others.
Note
Email archive scanning is resource-intensive and can impact system performance.
Miscellaneous
Select the corresponding checkboxes to enable the desired scan options.
Scan boot sectors
Scans the system’s boot sector.
This sector of the hard disk contains the necessary code to start the boot process.
When a virus infects the boot sector, the drive may become inaccessible and you may not be able to start your system and access your data.
Scan UEFI
This option enables Unified Extensible Firmware Interface (UEFI) scanning that ensures the security and integrity of the system's boot process and protects against sophisticated threats that can persist at the firmware level.
The option is available for Full, Quick, and Custom scan types and is enabled by default when the security level is set to Aggressive.
Scan registry
Select this option to scan registry keys.
Windows Registry is a database that stores configuration settings and options for the Windows operating system components, as well as for installed applications.
Scan for rootkits
Select this option to scan for rootkits and objects hidden using such software.
Scan for keyloggers
Select this option to scan for keylogger software.
Scan network shares
This option scans mounted network drives.
For quick scans, this option is deactivated by default. For full scans, it is activated by default. For custom scans, if you set the security level to Aggressive or Normal, the Scan network shares option is automatically enabled. If you set the security level to Permissive, the Scan network shares option is automatically disabled.
Scan memory
Select this option to scan programs running in the system's memory.
Scan cookies
Select this option to scan the cookies stored by browsers on the endpoint.
Scan only new and changed files
By scanning only new and changed files, you may greatly improve overall system responsiveness with a minimum trade-off in security.
Scan for potentially unwanted applications (PUA)
A potentially unwanted application (PUA) is a program that may be unwanted on the PC and sometimes comes bundled with freeware software. Such programs can be installed without the user's consent (also called adware) or will be included by default in the express installation kit (ad-supported). Potential effects of these programs include the display of pop-ups, installing unwanted toolbars in the default browser or running several processes in the background, and slowing down the PC performance.
Resume scan after product update
Select this option to automatically resume on-demand scan tasks after being interrupted.
Preserve last access time
This option helps you control whether to preserve the last access time for a file during a scan or to allow the scanning process to modify the timestamp of that file. The option is enabled by default.
Actions
Depending on the type of detected file, the following actions are taken automatically:
Default action for infected objects
Bitdefender detects objects (such as files and registries) as infected through various advanced mechanisms, which include malware signatures, machine learning, and artificial intelligence (AI) based technologies.
The security agent typically handles infected objects by denying access to them and moving them to quarantine. An attempt is then made to disinfect the system by removing the malware code and any artifacts created by the malware.
If an infected object is detected, the security agent will automatically attempt to remediate it.
Important
For particular types of malware, disinfection is not possible because the detected object is entirely malicious. In such cases, the infected object is deleted from the disk.
Default action for rootkits
Rootkits represent specialized software used to hide files from the operating system.
Though not malicious in nature, rootkits are often used to hide malware or to conceal the presence of an intruder into the system.
Detected rootkits and hidden files are remediated by default.
Default action for PUA
By default, detected potentially unwanted applications are only reported, but not remediated.
Though not recommended, you can change the default actions.
The following actions are available:
Report only
No action will be taken on infected objects. These objects will only appear in the scan log.
Remediate
Access to the infected objects is denied, and they are moved to quarantine. An attempt is then made to disinfect the system by removing the malware code and any artifacts created by the malware.
It is recommended to always keep this as the default action to be taken on infected objects.
Note
To automatically move the infected objects to quarantine, make sure you have selected Copy files to quarantine before applying the disinfect action in the Antimalware > Settings section of the policy.
Move to quarantine
Infected objects are moved from their current location to the quarantine folder.
Quarantined files cannot be executed or opened; therefore, the risk of getting infected disappears.
You can manage quarantine files from the Quarantine page of the console.
Scan target
Add to the list all the locations you want to be scanned on the target computers.
To add a new file or folder to be scanned:
Choose a predefined location from the drop-down menu or enter the Specific paths you want to scan.
Under Scan target, specify the path to the object to be scanned using one of the following methods:
Full path. Enter the absolute path to the file or folder.
Windows:
C:\Windows\System32\cmd.exe- scans thecmd.exefile.
macOS:
/Applications/Google Chrome.app/Contents/MacOS/Google Chrome- scans theGoogle Chromefolder.
Linux:
/usr/bin/bash- scans thebashfile.
System variables. As best practice, use system variables (where appropriate) to make sure the path is valid on all target computers.
Windows:
%ProgramFiles%- scans the entireProgram Filesfolder.%ProgramFiles%\<folder_name>- scans a subfolder.
macOS:
$HOMEor~- scans the user profile folder.
For more information, refer to System variables.
Predefined locations. When you enter a predefined location, it applies to all endpoints regardless of the operating system.
GravityZone supports predefined locations as described below.
Location
Windows
Linux
macOS
All DrivesAll Local DrivesLocal DrivesScans all local drives.
Scans the entire system (equivalent to
/).Scans all local drives.
Removable DrivesScans all removable drives.
Not supported.
Scans all removable drives.

Click the
 Add button.
To edit an existing location:
Click the
 Edit button in the Actions column.
Modify the location.
Click the
 OK button to confirm the changes.
Alternately, click the
 Cancel button to discard the changes.
To remove a location, click the
Delete button in the table.For network scan tasks, you need to enter the credentials of a user account with read/write permissions on the target network drives, for the security agent to be able to access and take actions on these network drives.
Exclusions
You can either use the exclusions defined in the Antimalware > Exclusions section of the current policy, or you can define custom exclusions for the current scan task.
For more details, refer to Exclusions.
Scan settings
These settings allow you to change the default behavior of two scan types: Contextual scan and External devices scan.
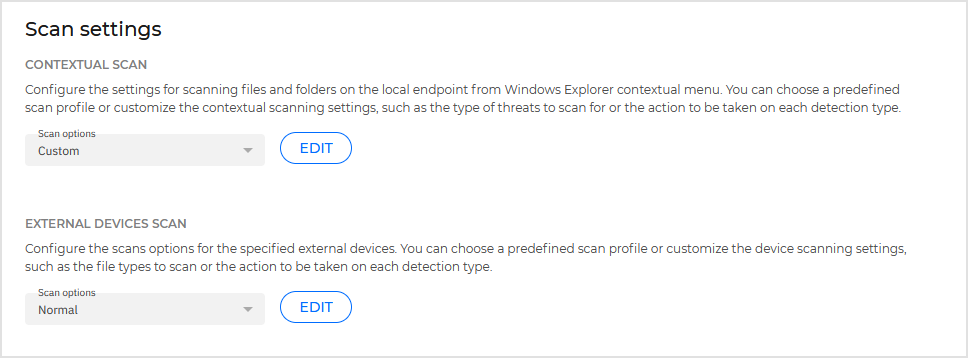
Contextual scan
Right-click on local files or folders to start a scan directly from the Windows Explorer contextual menu.
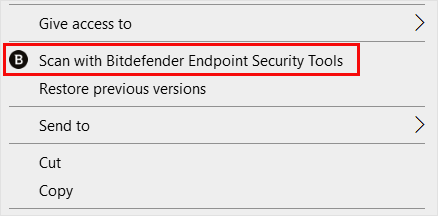
The Contextual scan policy settings allow you to change the default behavior of this type of scan.
External devices scan
These settings allow you to customize the scans performed on external devices.
For both scan types, you can set how aggressive or permissive the scans are, what is being scanned, the type of threats the scans are searching for, and what actions BEST should take once suspicious activity is detected.
Device scanning
You can configure the security agent to automatically detect and scan external storage devices when they are connected to a Windows endpoint.
Detected devices fall into one of these categories:
CDs/DVDs
USB storage devices, such as flash pens and external hard drives
Devices with more than a specified amount of stored data.
Device scans automatically attempt to disinfect files detected as infected or to move them to quarantine if disinfection is not possible.
Important
some devices such as CDs/DVDs are read-only. No action can be taken on infected files contained on such storage support.
Note
During a device scan, the user can access any data from the device.
If alert pop-ups are enabled in the Agent > Notifications section, the user is prompted whether or not to scan the detected device instead of the scan starting automatically.
When a device scan is started:
A notification pop-up informs the user about the device scan, provided that notification pop-ups are enabled in the Agent > Notifications section.
Once the scan is completed, the user must check detected threats, if any.
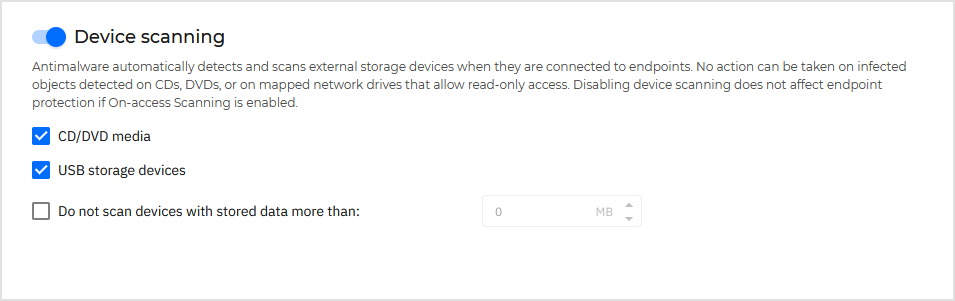
Select the Device scanning option to enable the automatic detection and scanning of storage devices. To configure device scanning individually for each type of device, use the following options:
CD/DVD media
USB storage devices
Do not scan devices with stored data more than. Use this option to automatically skip scanning of a detected device if the amount of stored data exceeds the specified size. Type the size limit (in megabytes) in the corresponding field. Zero means that no size restriction is imposed.