Report Junk & Phishing Button
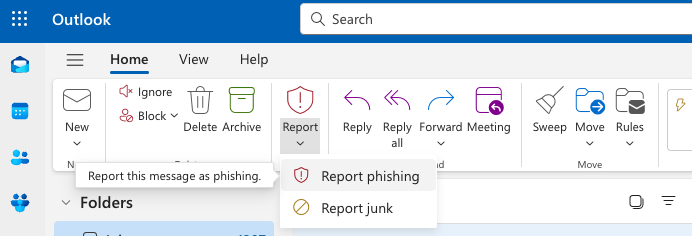
The Outlook report button can be used to share potential false negatives and false positives with your help desk and the Mesh detection team.
 |
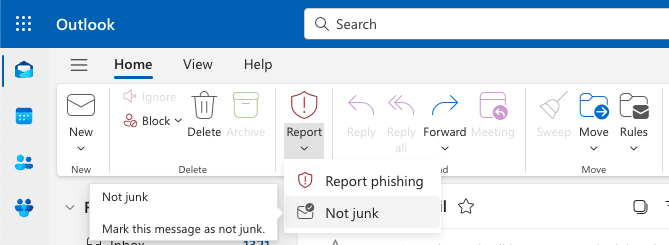 |
Sharing reported messages with the detection team helps improve filtering based on user feedback and enables notifications for potential spam, phishing, and false positives.
Note
The reporting mailbox is largely automated, and neither you nor the end user will receive a response. To discuss a false positive or false negative, contact Technical Support. For contact information, see Bitdefender Technical Support.
Configure the button experience and report destination
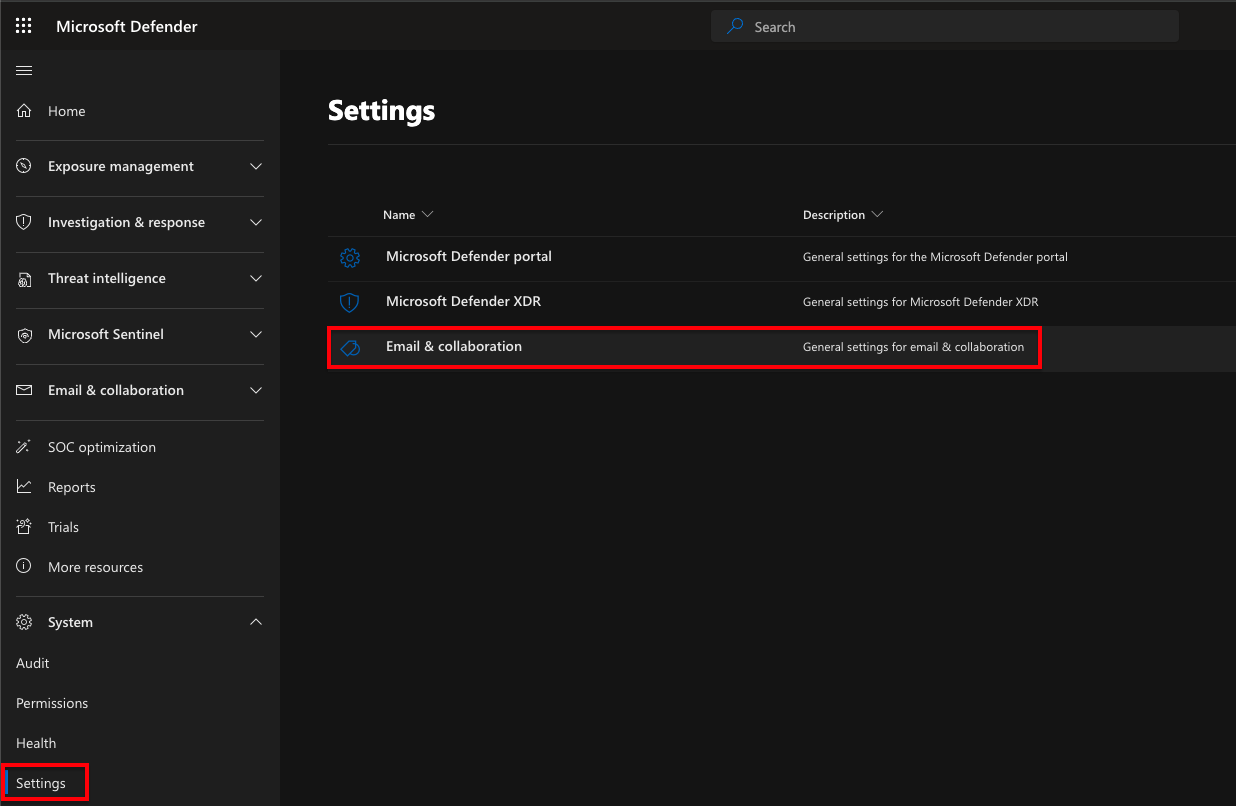
Open Microsoft Security Center
Go to the Microsoft Security Center, and then select Settings > Email & collaboration > User reported settings.
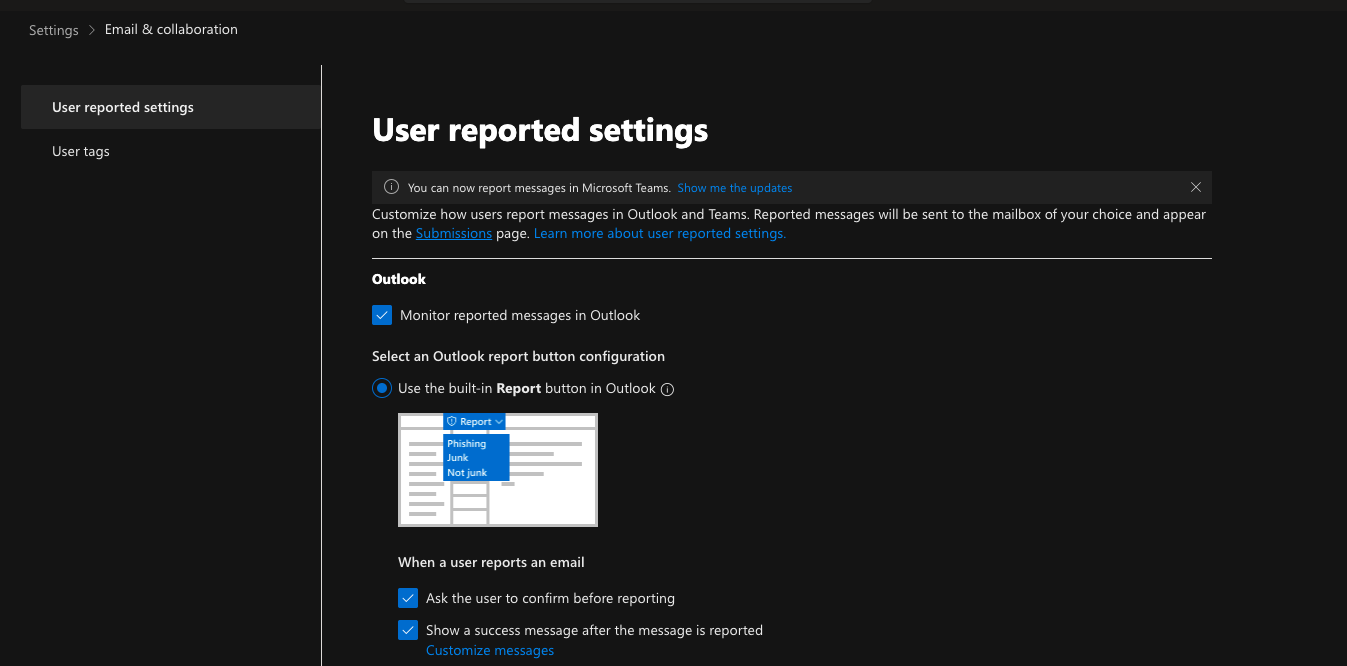
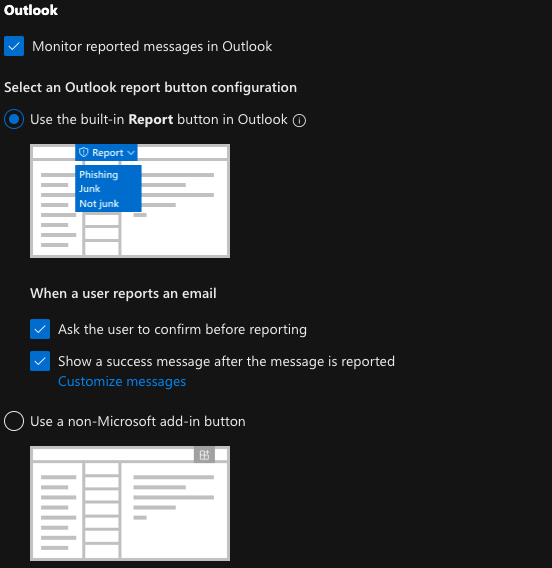
Configure the reporting experience
Enable the following options:
Monitor reported messages in Outlook.
Use the built-in Report button in Outlook.
Ask the user to confirm before reporting.
Show a success message after the message is reported.
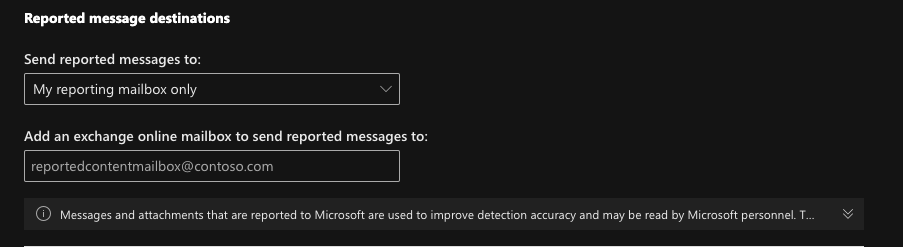
Configure the reporting destination
For Send reported messages to, select:
My reporting mailbox only.
Note
The specified email address must be a mailbox in the customer’s tenant.
Create a mail flow rule for the Report button
This mail flow rule allows you to copy reported messages to mailboxes outside the customer’s tenant.
Open the Microsoft Exchange admin center
Go to the Microsoft Exchange admin center, and then select Mail flow > Rules.
Add a rule
Select Add a rule > Create a new rule.
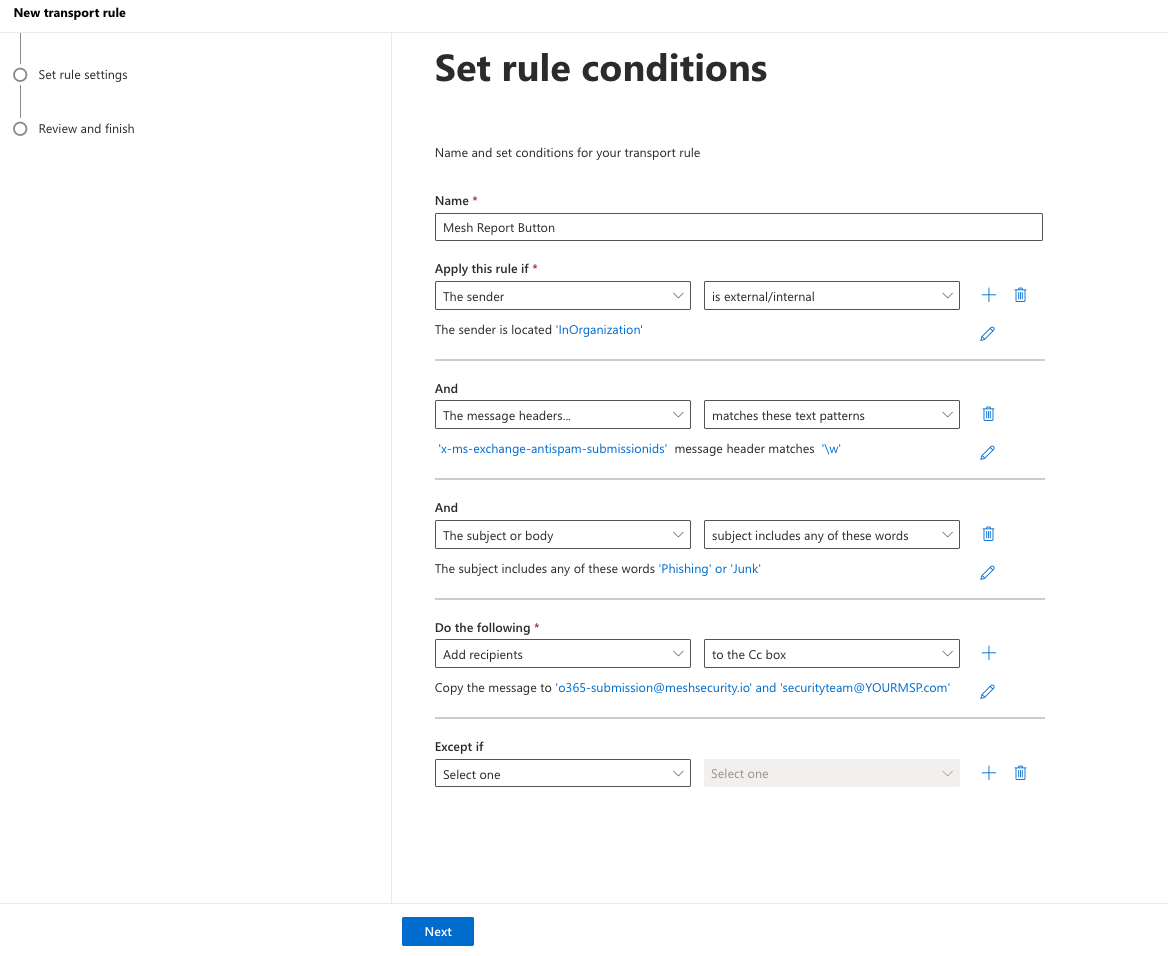
Configure the rule conditions
Enter a name for the rule, and then apply the following conditions:
The sender > is external/internal > Inside the organization.
AND
The message headers > matches these text patterns.
Set the
x-ms-exchange-antispam-submissionidsmessage header to match\w.AND
The subject or body > Subject includes any of these words.
Add
Phishing, and then addJunk.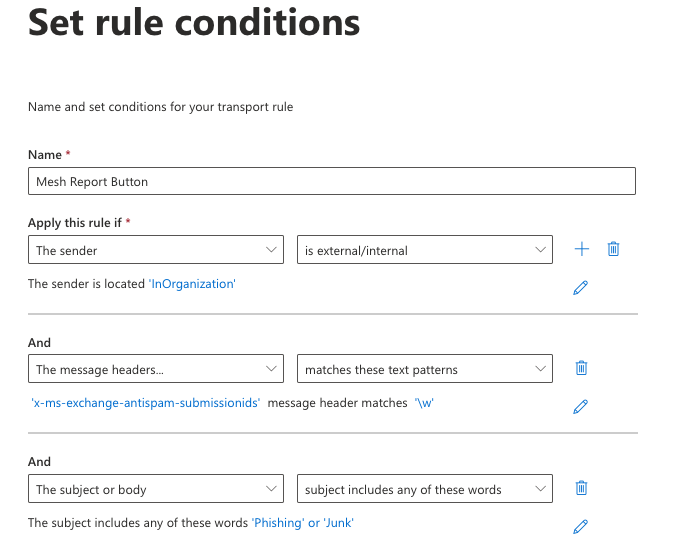
Configure the rule action
Select Add recipients > Copy (Cc) the message to, and then add o365-submission@meshsecurity.io and any other required recipients.

Note
We recommend copying an address at your MSP, such as your security team or help desk, to maintain visibility of reported messages.
Use Live Email Tracker to verify the message verdict. If the message is a missed detection, use Remediate to remove it from affected mailboxes. If it is a false positive, create an allow rule or verify whether the active policy options caused the message to be moved to the Junk folder.
Review and finish
Keep the default rule settings, and then select Next.
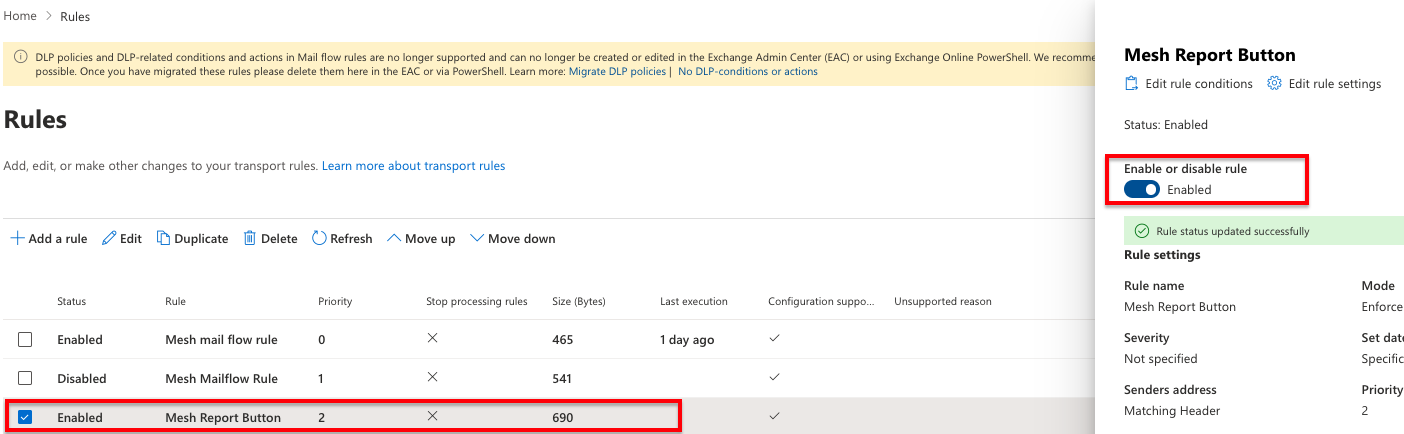
Enable the rule
New mail flow rules are disabled by default. In the Rules table, select the Mesh Report Button rule, and then enable it.