Configuration
Default rules
Default rules are created and supported by Bitdefender. These rules cover the most popular operating systems and applications, as well as services and user entities, assuring the integrity of the endpoint.
For more information about default OS rules and default application rules, refer to Integrity Monitoring default rules.
Note
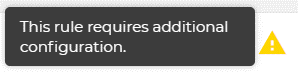
Some rules require additional configuration before they can be applied to the endpoint. In addition, deprecated rules need to be deleted.
For more information about editing rules, refer to Edit rules and Delete rules.
Custom rules
Custom rules are created and managed by any user with Partner, Company Administrator and Network Administrator role.
You must make sure that any custom rule you want to create is not already covered by a default rule. Running duplicate rules affects the overall performance of the product.
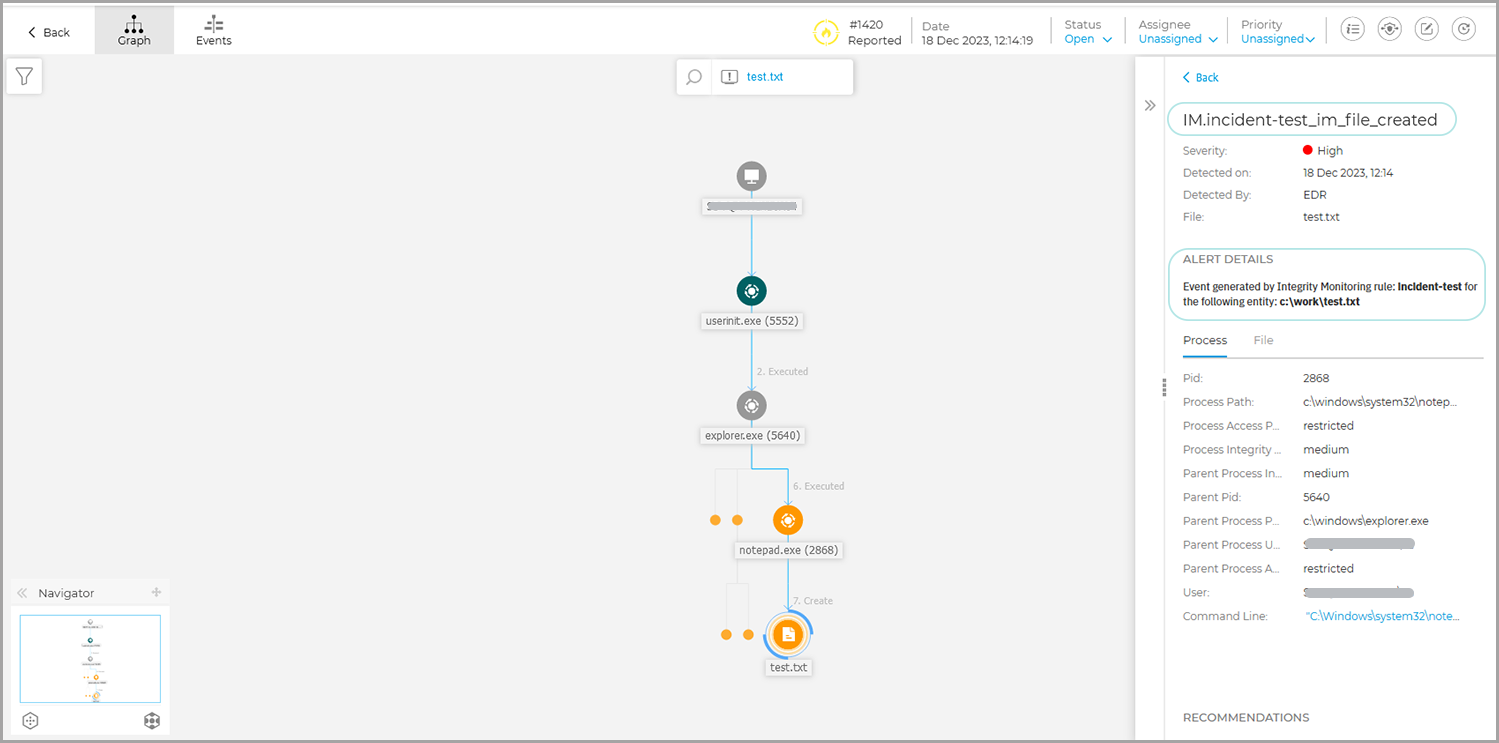
Custom rules with critical severity generate EDR alerts for registry keys and values, files, and directories. You can view these alerts in the Node details panel of EDR incidents.
Note
Registry keys and registry values are only available for Windows endpoints.
For more information related to limitations when generating EDR events, refer to the Integrity Monitoring limitations section in Integrity Monitoring.
Create rules
You can create custom rules by following these steps:
Log in to GravityZone Control Center.
Go to the Policies > Integrity Monitoring Rules page from the left side menu.
Click the Action drop-down.
Select New rule.
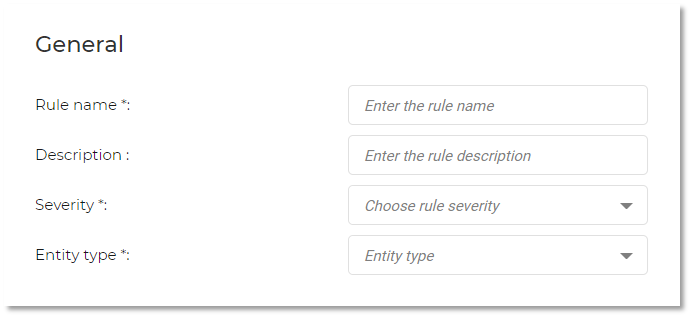
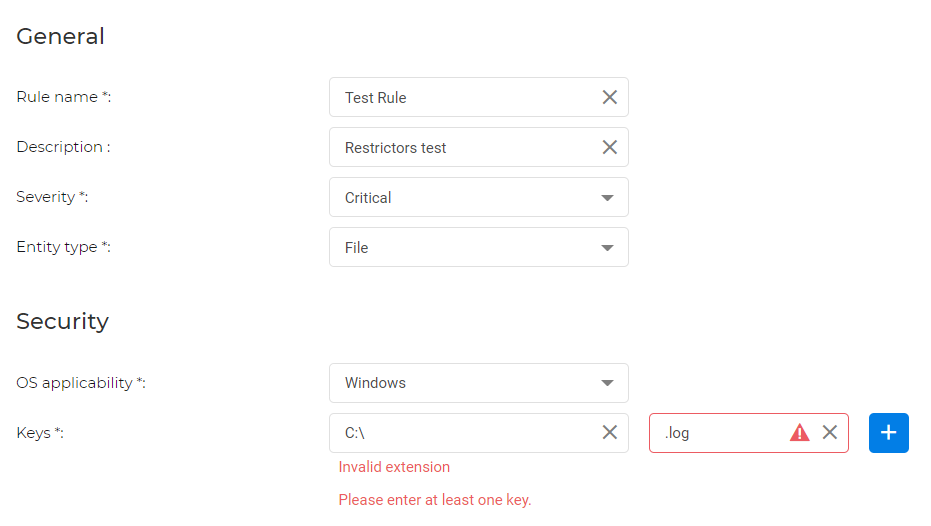
The following fields are available when you create a custom rule:
Rule name: must be unique. You cannot have two rules with the same name.
Description: general description of the rule.
Severity: this option can be set to: Low, Medium, High or Critical.
Entity type: the following types are available:
File
Directory
Registry key
Registry value
Once an entity type is selected, the following fields are available:
File
For this field, you have the following options:
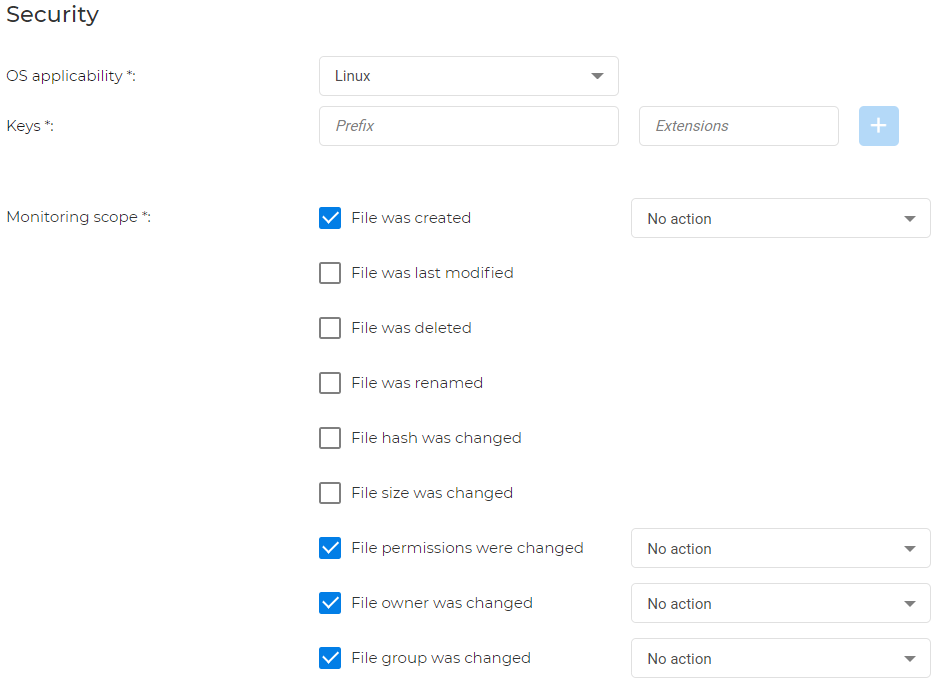
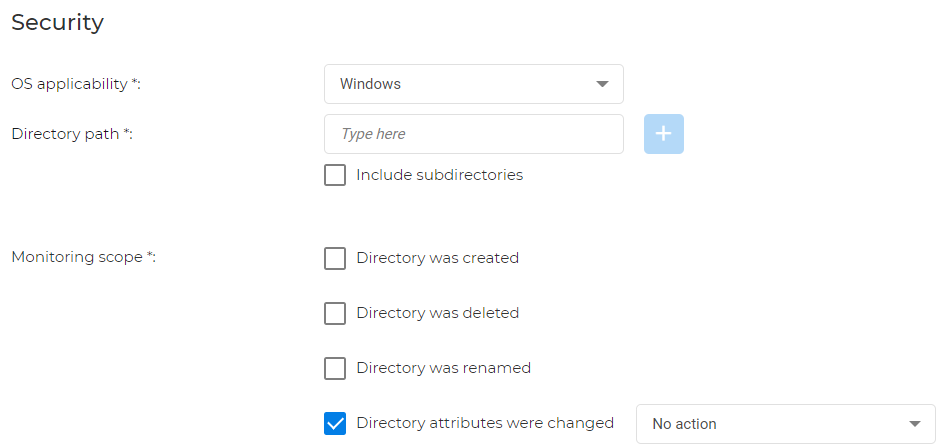
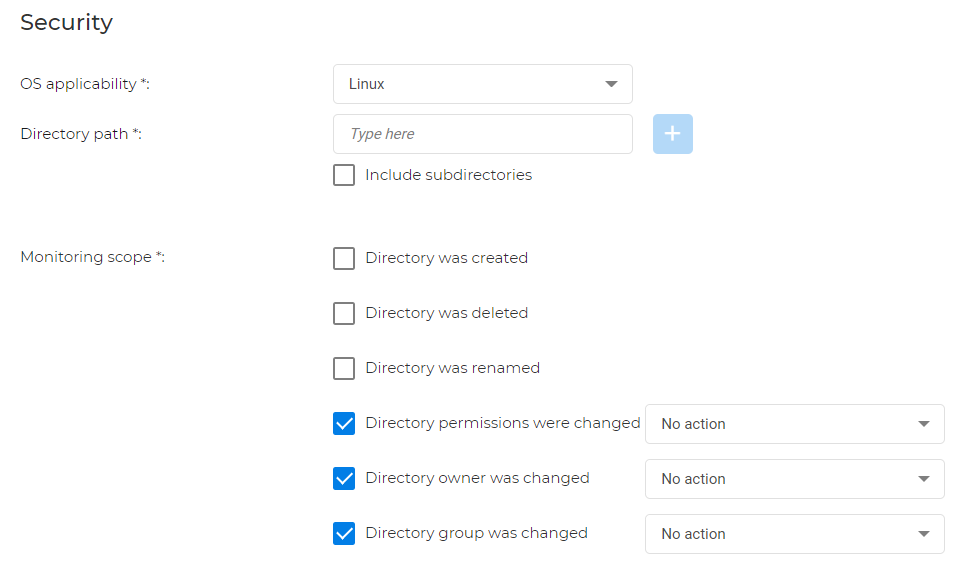
OS Applicability: Windows or Linux.
Keys: this is where you add the prefix and/or the extension type.
Monitoring scope:
For Windows: you can monitor if the file is created, modified, deleted, renamed. File hash, size and attributes can be monitored as well.
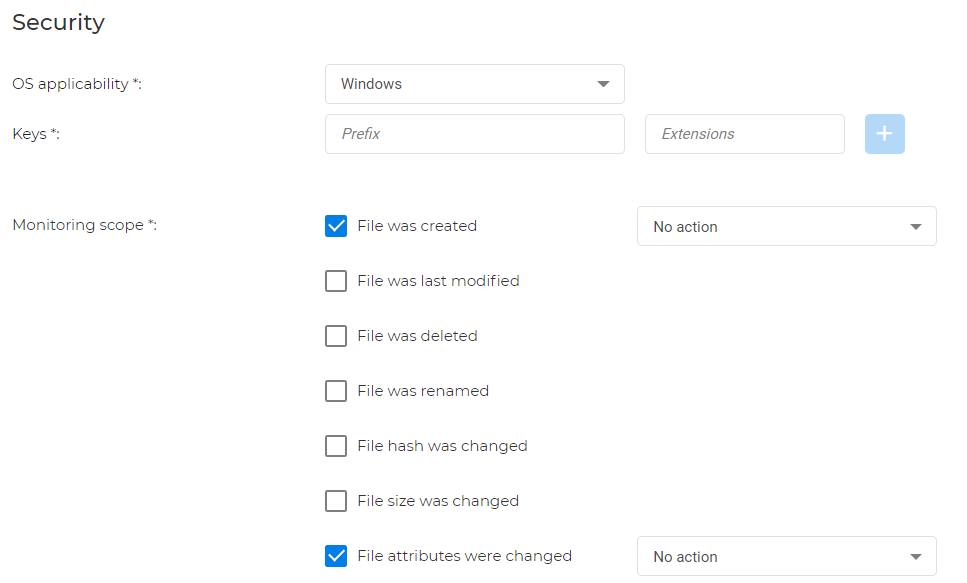
Note
Unwanted created files can also be deleted or moved to quarantine. You also have the to correct file attribute changes.
For Linux: you can monitor if the file is created, modified, deleted or renamed, or if there are changes in the hash, size, file permission, file owner and file group.
Note
Unwanted created files can also be deleted or moved to quarantine. You also have the option to correct permission, owner, and group changes.
Directory
For this field, you have the following options:
OS Applicability: Windows or Linux.
Directory path: path to the monitored directory. You can also include the subdirectories by selecting the checkbox under this field.
Monitoring scope:
For Windows: you can monitor if a directory is created, deleted, renamed, and if its attributes have changed.
Note
You also have the option to correct directory attribute changes.
For Linux: you can monitor if a directory is created, deleted, renamed and if its permissions, owners and groups have changed.
Note
You also have the option to correct permission, owner, and group changes.
Registry key
For this field, you have the following options:
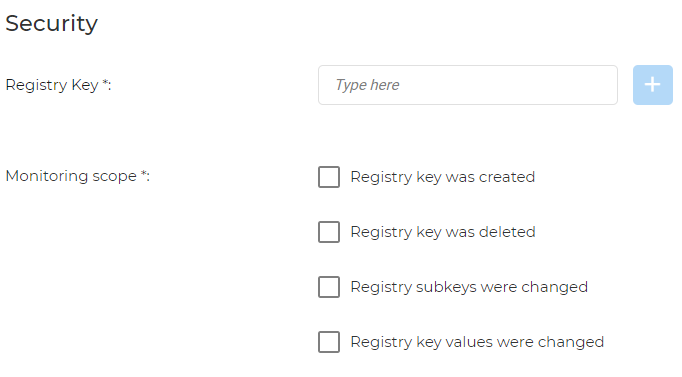
Registry key: add the registry key you want monitored.
Monitoring scope: you can monitor if a registry key is created and deleted, and if its subkeys and key values have changed.
Registry value
For this field you have the following options:
Registry value: add the registry value you want monitored.
Monitoring scope: you can monitor if a registry value is created and deleted, the time the last value was modified, or if the registry hash and the registry value size have changed.
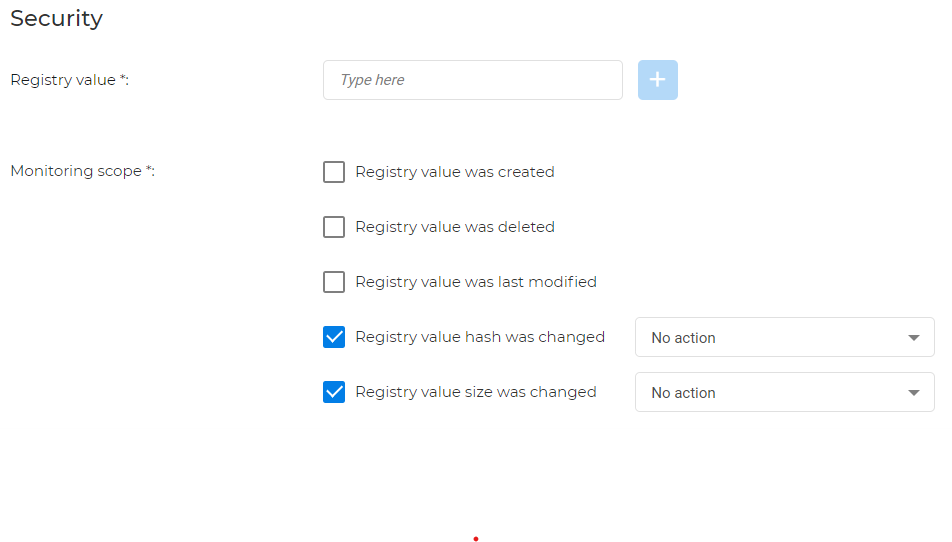
Note
When registry value hash changes, you have the option to correct it. In addition, for size change, you can choose to automatically delete the value.
When a registry value is corrected, it is restored to the value it had before the alert was generated. The rule processing mode can affect this correction.
Edit rules
You can edit rules by following these steps:
Log in to GravityZone Control Center.
Go to the Policies > Integrity Monitoring Rules page from the left side menu.
Select the rule you want to modify.
Under Configuration, modify the rule.
Click Save.
Delete rules
You can delete custom rules by following these steps:
Log in to GravityZone Control Center.
Go to the Policies > Integrity Monitoring Rules page from the left side menu.
Select the checkbox next to the rule you want to delete.
Click the Actions drop-down.
Select Delete.
Confirm your selection by pressing the Delete button.
Restrictors
Integrity Monitoring has implemented restrictors. They are a layer of protection with the sole purpose of reducing alert fatigue. These restrictors aim to cover human errors.
For example, users cannot monitor files with the .log extension. These files are used for constant logging and are frequently changed. Therefore, monitoring these would generate a great deal of events which might flood the endpoint with notifications and/or events.
Rule sets
Rule sets are a collection of rules that you can assign to a GravityZone policy. Any rule that you want assigned to a policy must be part of a rule set.
Note
You must create a rule set, even if it only contains default rules, to enable Real-time monitoring in the policy settings.
Create rule sets
You can create a rule set by following these steps:
Open the Integrity Monitoring Rules window.
Select each rule you want added in your rule set by selecting the checkbox next to it.
Click Actions and select New rule set from rules.
In the new page, add the Rule set name and a Description (optional).
Note
These fields can only contain alphanumeric characters
Click Save.
Edit rule sets
You can edit a rule set by following these steps:
Log in to GravityZone Control Center.
Go to the Policies > Integrity Monitoring Rules page from the left side menu.
Select the desired rule set.
Click
 More.
More.Select Edit.
Edit the Rule set name and Description.
Click Save.
Delete rule sets
You can delete rule sets by following these steps:
Log in to GravityZone Control Center.
Go to the Policies > Integrity Monitoring Rules page from the left side menu.
Select the desired rule set.
Click
More.Select Delete.
Confirm your selection by pressing the Delete button.
Assign or remove existing rules to rule sets
To assign existing rules to a rule set you must:
Log in to GravityZone Control Center.
Go to the Policies > Integrity Monitoring Rules page from the left side menu.
Select the checkbox next to the rules you want assigned to the rule set.
Click the Actions drop-down.
Select Assign rules to rule sets.
Select the rule set you want the rules to be assigned from the drop-down menu.
Click Assign.
To remove rules from a rule set, you must:
Log in to GravityZone Control Center.
Go to the Policies > Integrity Monitoring Rules page from the left side menu.
Select the checkbox next to the rules you want assigned to the rule set.
Click the Actions drop-down.
Select Unassign rules.
Assign rule sets to a policy
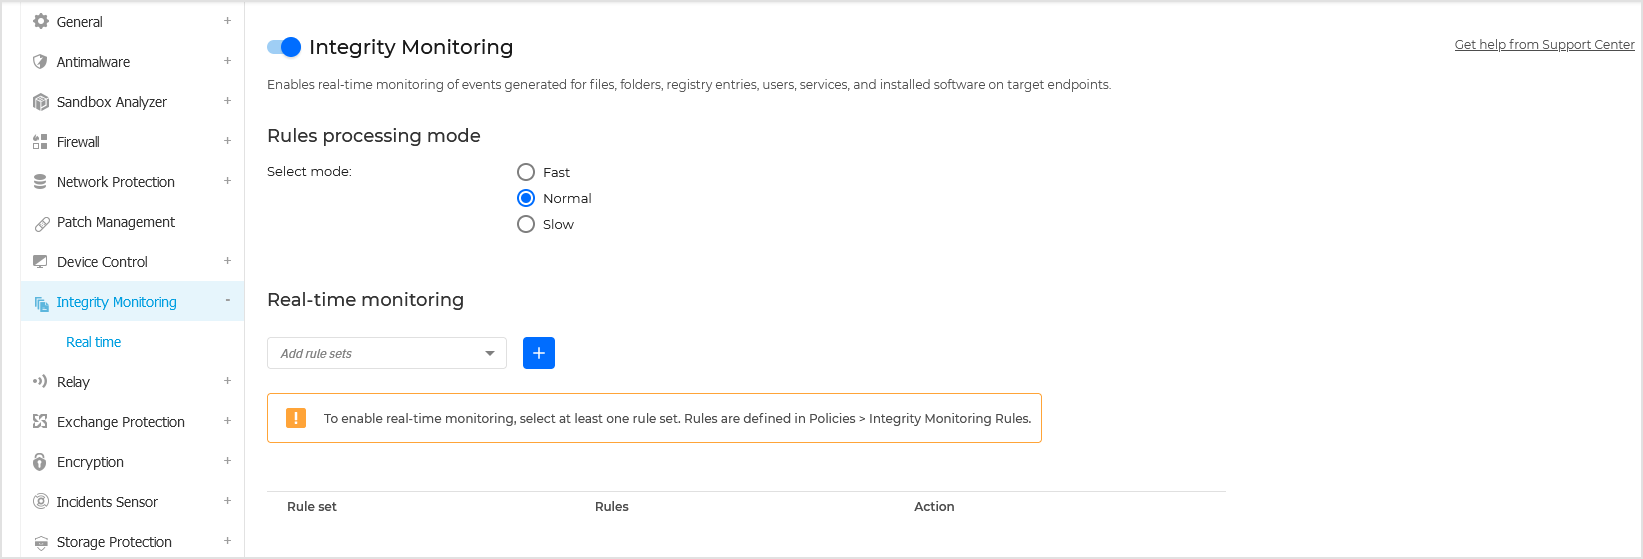
To assign Integrity Monitoring rule sets to a policy, you must first enable Real-time monitoring in the policy settings and then assign the rule sets that you want applied:
Log in to GravityZone Control Center.
Go to the Policies page from the left side menu.
Add a new policy or edit an existing one.
In the policy settings, go to the Integrity Monitoring section.
Click the toggle and add an existing rule set from the drop-down list.
Make other configurations in the policy as preferred.
Save the policy and apply it to endpoints.
Once a policy is applied (or reapplied), the entity baseline attributes are renewed. Therefore, the next alert that comes after the policy is applied uses these renewed attributes as a basis of comparison for the next signaled alert. This renewal takes place regardless of whether Integrity Monitoring is suspended or not.
In addition, once the policy is applied, the endpoints start sending events to GravityZone. You can view them on the Integrity Monitoring Events page.
Important
On-Access exclusions added for file, folder, and process exclusions through configuration profiles or in-policy also apply to the Integrity Monitoring module. Integrity Monitoring is based on Extended Berkeley Packet Filter (eBPF) probes. These exclusions are propagated to eBPF probes (Kprobes) so that corresponding events that trigger Integrity Monitoring alerts are no longer generated.
Rules processing mode
The rules processing mode determines the speed at which events are processed and displayed in the Integrity Monitoring Events page:
Fast - events are processed as close to real-time as possible.
Normal - buffers events for 3 seconds and then processes them. This is the default setting.
Slow - buffers events for 6 seconds and then processes them.
To have an optimal resource footprint, all rule processing modes use event queues and compression.
For processed events, a set of deduplication actions are applied to provide the best information without succumbing to alert fatigue:
Events of the same type are compressed.
For example, from multiple File hash was changed events for the same entity, Integrity Monitoring takes into consideration only the latest one.
Some actions are not processed anymore due to baseline change.
For example, a quick succession of File hash was changed events, right before a File was deleted or File was renamed event, are discarded. In this case, the baseline for file hash change cannot be established because the object is not there anymore.
The deduplication actions are applied to File, Directory, Registry key and Registry value events in all processing modes. The Fast processing mode processes events in real-time, without delay. However, when all available resources are busy processing events, new events start queueing up. These queued events are processed as soon as resources are freed, but they are not exempt from deduplication actions.