Configuring GravityZone Control Center single sign-on with Okta
GravityZone Cloud supports single sign-on (SSO) with various Identity Providers (IdP) that use SAML 2.0 as authentication standard.
This topic describes how to configure GravityZone Cloud single sign-on with Okta. For generic information on configuring other Identity Providers, refer to Configuring single sign-on using a 3rd party identity provider.
Prerequisites and requirements
You have an Okta account with administrator privileges to create, activate and assign applications to users.
You have a GravityZone Cloud administrator account to manage users, your company and other companies.
GravityZone users have Okta accounts with the same email addresses.
Important
As GravityZone administrator, you can configure single sign-on for users from your company and from companies under your management. You cannot enable SSO for your own GravityZone account due to security reasons.
SSO and two-factor authentication (2FA) cannot be used simultaneously. When you enable SSO for a user, 2FA is disabled for that user.
Email addresses are case sensitive with GravityZone SSO. Therefore,
username[at]company.domainis different fromUserName[at]company.domainandUSERNAME[at]company.domain. If the email address from GravityZone does not match the email address from the identity provider, the user will receive a login error message when trying to connect to Control Center.GravityZone only supports service provider initiated login. IdP-initiated login is not supported.
Extract the GravityZone SP signing certificate
Extract the GravityZone SAML metadata using the following steps:
Log in to Bitdefender GravityZone as an administrator.
Click your user name in the upper right side of the screen and select My Company.
Go to the Authentication tab.
Under the Direct GravityZone single sign on section, copy the GravityZone SAML medatada URL.
Open the metadata URL in a separate tab of your browser and save the page as a metadata.xml file.
Open the metadata.xml file you saved in the previous step.
Copy the
<ds:X509Certificate>...</ds:X509Certificate>value as shown below and paste it into a text editor.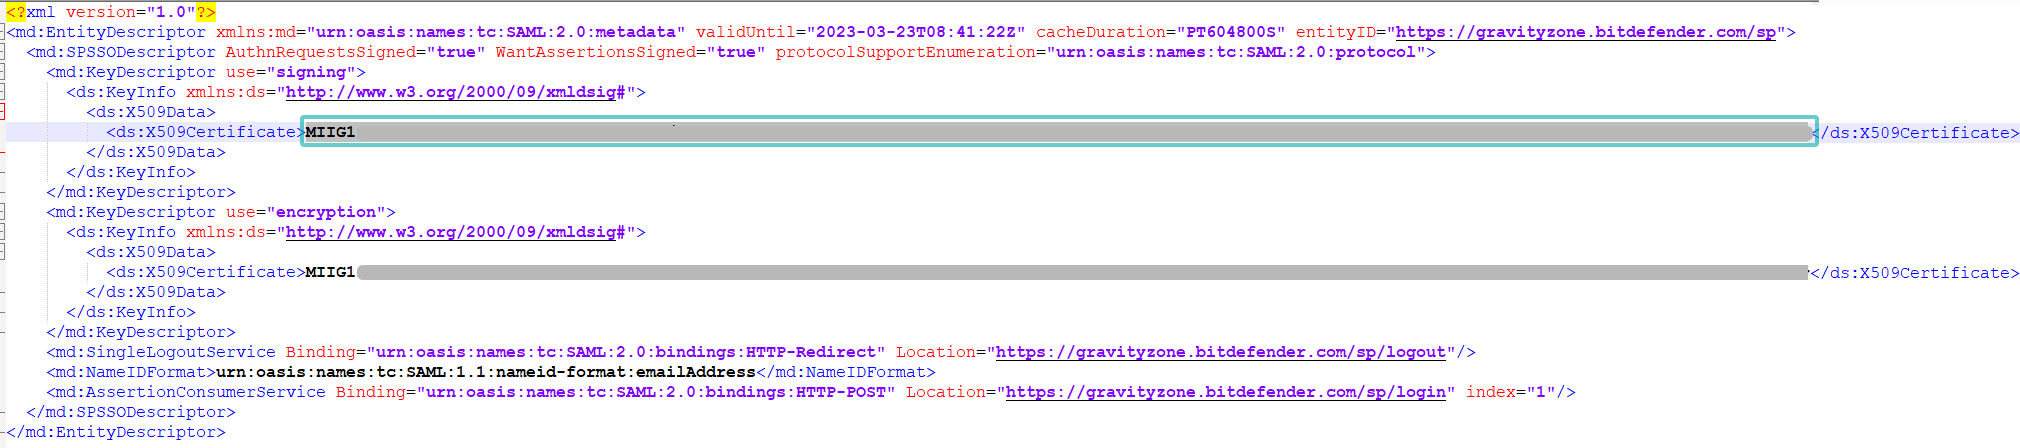
Add the following lines at the beginning and end of the file:
-----BEGIN CERTIFICATE-----
-----END CERTIFICATE-----

Save the file you created as
certificate.cer.
Configure Okta
This is how you configure an Okta application for GravityZone Control Center SSO:
Create the SAML application
Log in to the Okta Admin Console.
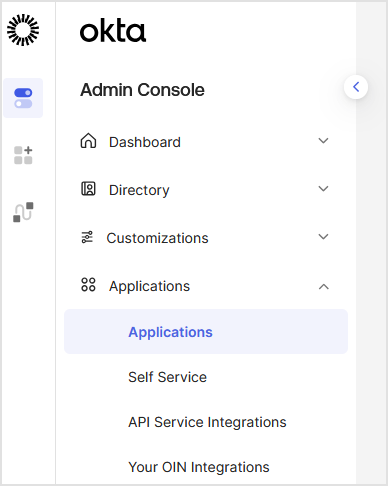
In the left-side menu, go to Applications > Applications.
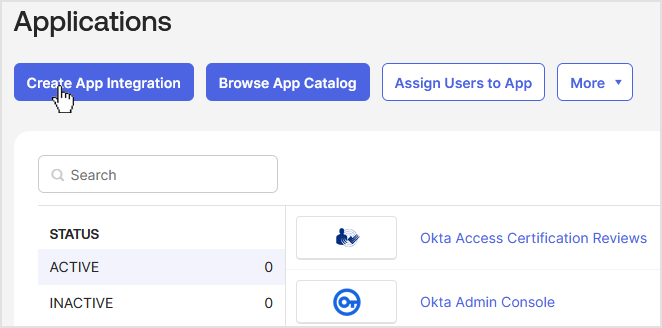
Click Create App Integration.
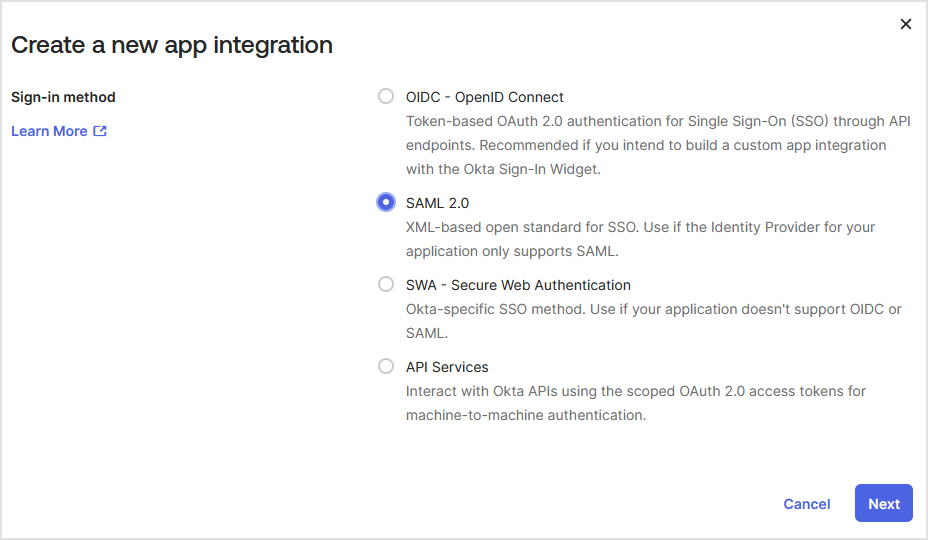
In the Create a new app integration window, select SAML 2.0 as sign-in method, and click Next.
On the Create SAML Integration page, apply the following configuration:
Under the General Settings tab:
Enter an app name (for example,
Bitdefender GravityZone).(Optional) Upload a logo image and set your app’s visibility.
Click Next.
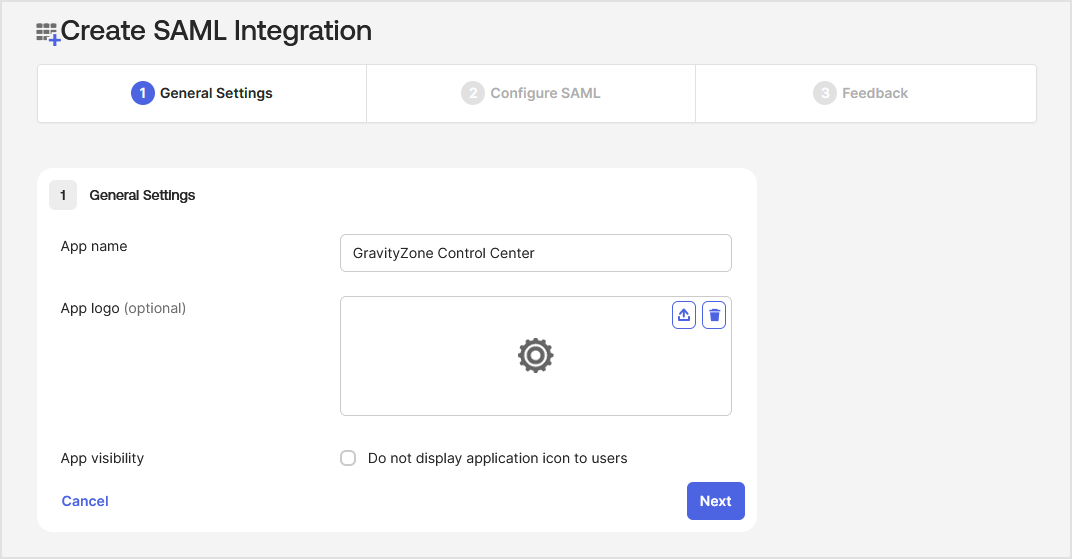
Under Configure SAML, follow the steps below:
Under Single sign on URL, enter
https://gravityzone.bitdefender.com/sp/loginand select the checkbox for Use this for Recipient URL and Destination URL.Under Audience URL (SP Entity ID), enter
https://gravityzone.bitdefender.com/spFor Name ID format, select EmailAddress.
For Application username, select Email.
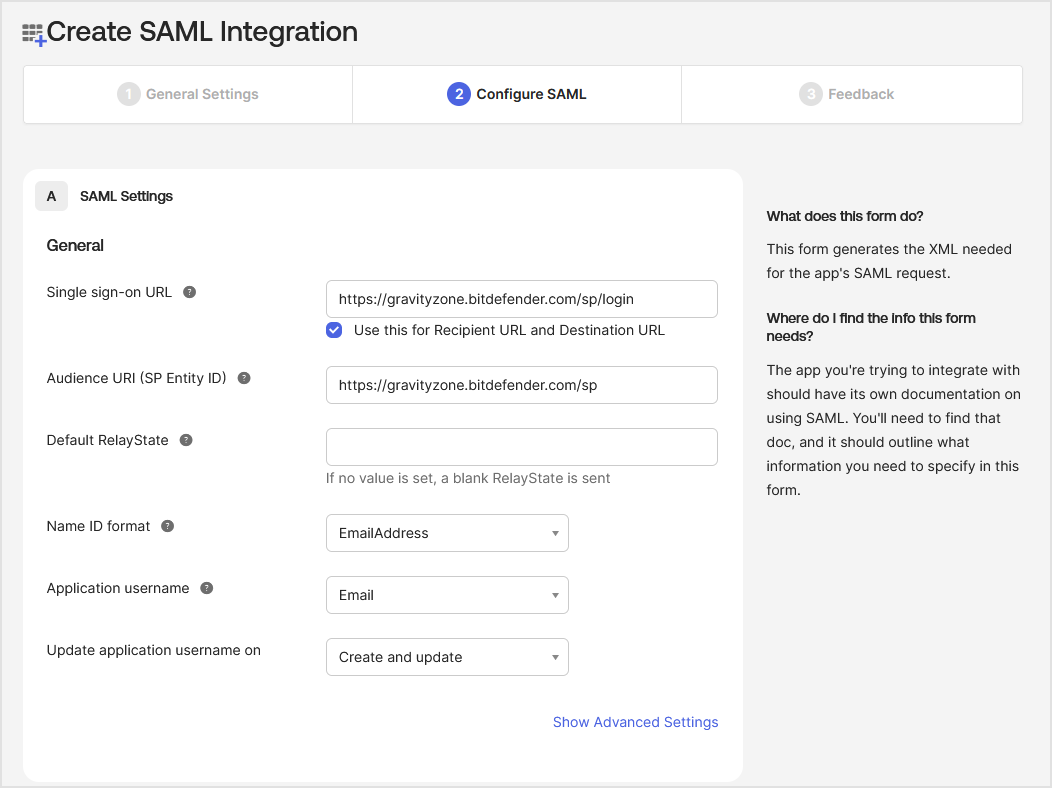
Click the Show Advanced Settings link.
Apply the following configuration:
For Response, select Signed.
For Assertion Signature, select Signed.
For Signature Algorithm, select RSA-SHA256.
For Digest Algorithm, select SHA256.
For Assertion Encryption, select Unencrypted.
Under Signature Certificate, upload the GravityZone Control Center certificate created previously (
certificate.cer).For Enable Single Logout, select the checkbox for Allow application to initiate Single Logout to display new options.
Under Single Logout URL, enter
https://gravityzone.bitdefender.com/sp/logoutUnder SP Issuer, enter
https://gravityzone.bitdefender.com/spFor Authentication context class, select PasswordProtectedTransport.
For Honor Force Authentication, select Yes.
For SAML Issuer ID, leave the default value:
http://www.okta.com/${org.externalKey}.Leave the rest of the fields blank.
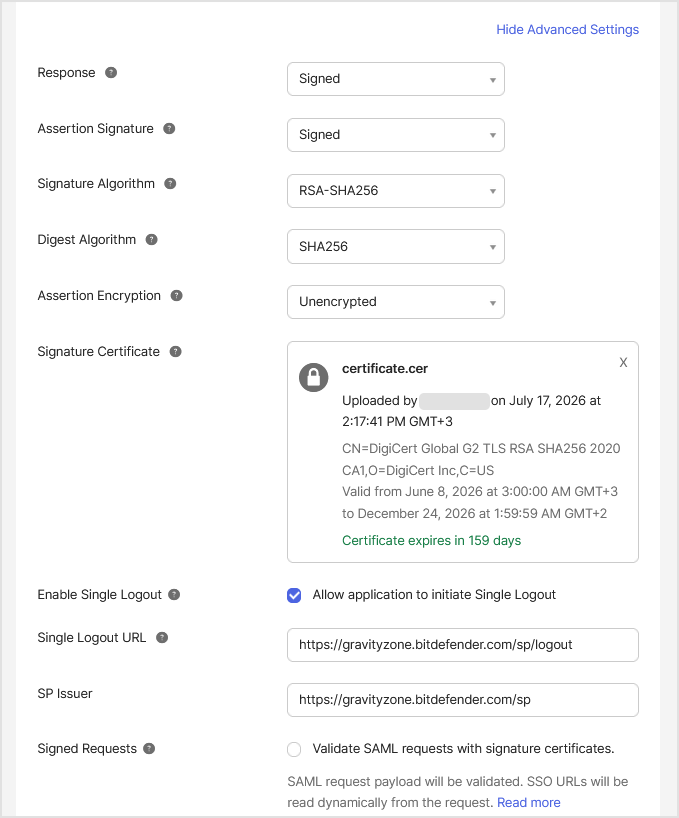
Click Next.
Under Feedback, select I'm an Okta customer adding an internal app and click Finish.
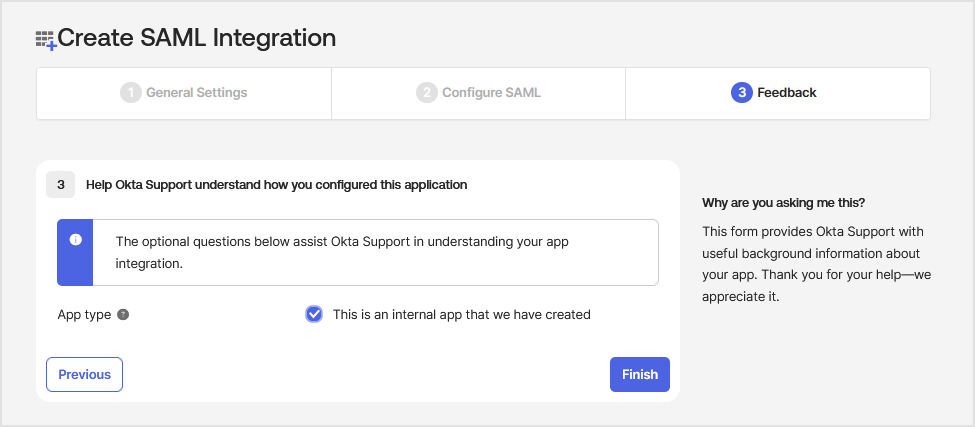
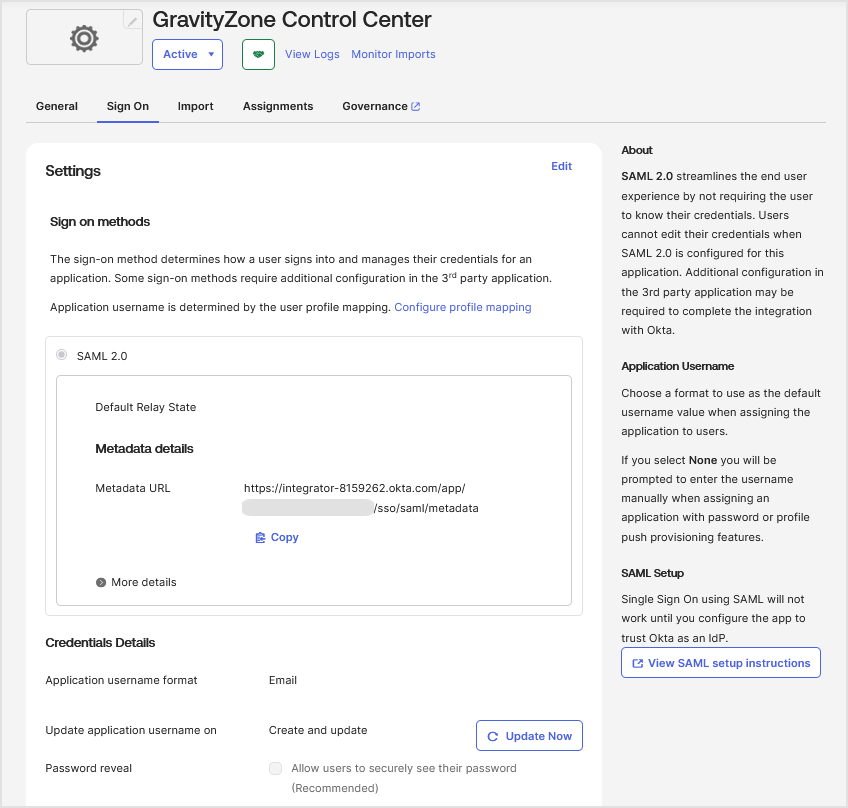
After finishing the configuration, Okta will redirect you to a page containing details about the application you have created.
Assign users to the application
In the Okta Admin Console, go to the application you just created.
Go to the Assignments tab.
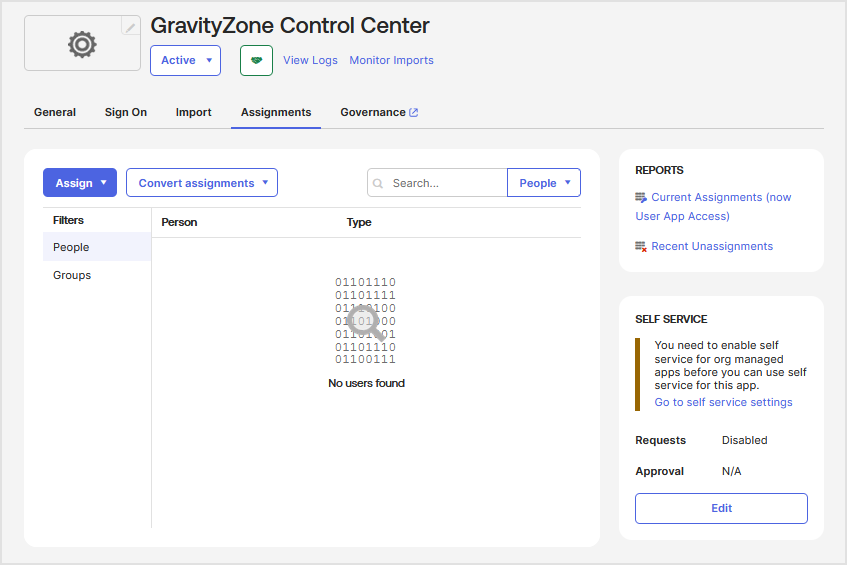
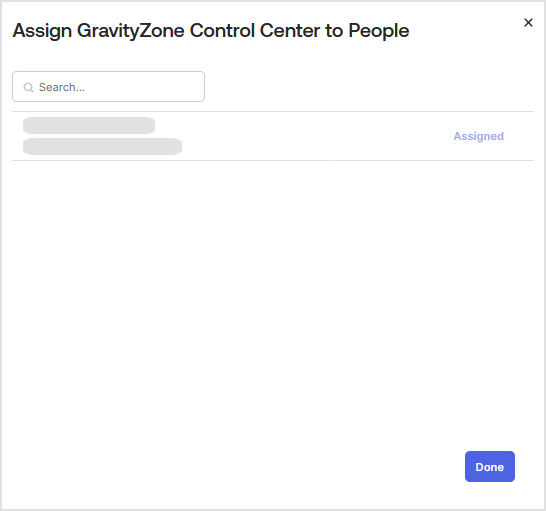
Click Assign and select Assign to People or Assign to Groups.
Select the relevant users or groups and click Assign for each, then click Done.
Get the Okta metadata URL
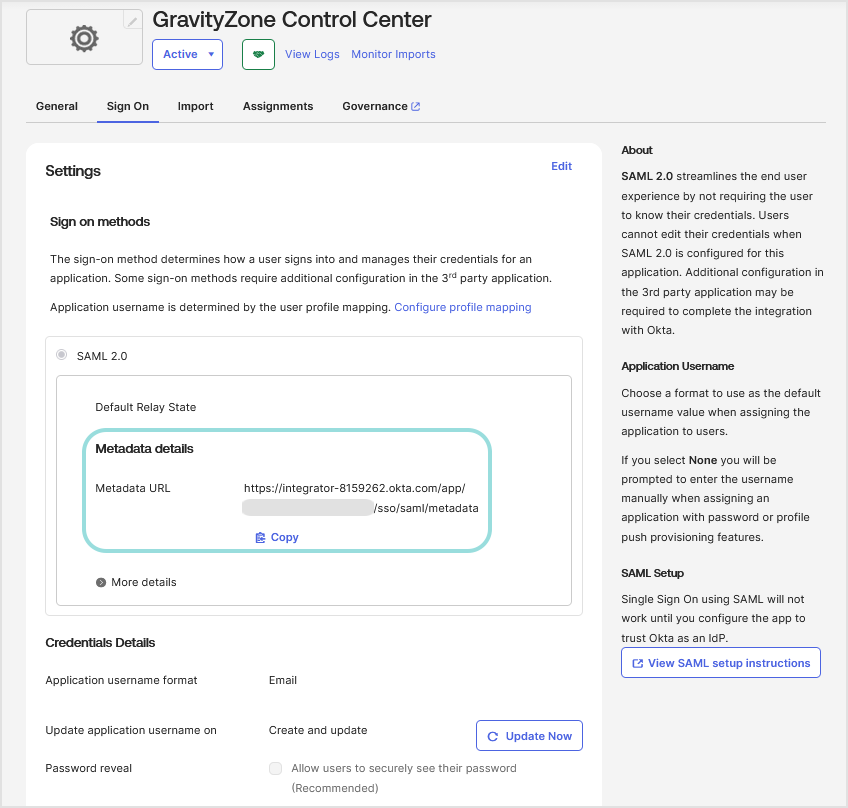
In the Okta Admin Console, go to the application you created.
Go to the Sign On tab.
Under the Settings > SAML 2.0 section, find the metadata URL.
This is the identity provider metadata URL you will need for GravityZone.
Click the Copy button to copy the URL to the clipboard.
You will paste this URL in the GravityZone console when enabling SSO for the company.
Go to the Applications page in Okta to verify the status of your application. The application must be Active.
Enable SSO in GravityZone
After configuring single sign-on in Okta, go to GravityZone Control Center to enable SSO for companies and users. Only users under a company with SSO enabled have the option to log in with an Identity Provider.
Enable SSO for your company
This is how you enable SSO for GravityZone Control Center for your company:
In the upper-right corner of Control Center, click the
 user icon and then select My Company.
In the Authentication tab, under GravityZone Control Center single sign-on, enter the identity provider metadata URL in the corresponding field. The other field, reserved for the GravityZone metadata URL, is non-editable.
Click Save.
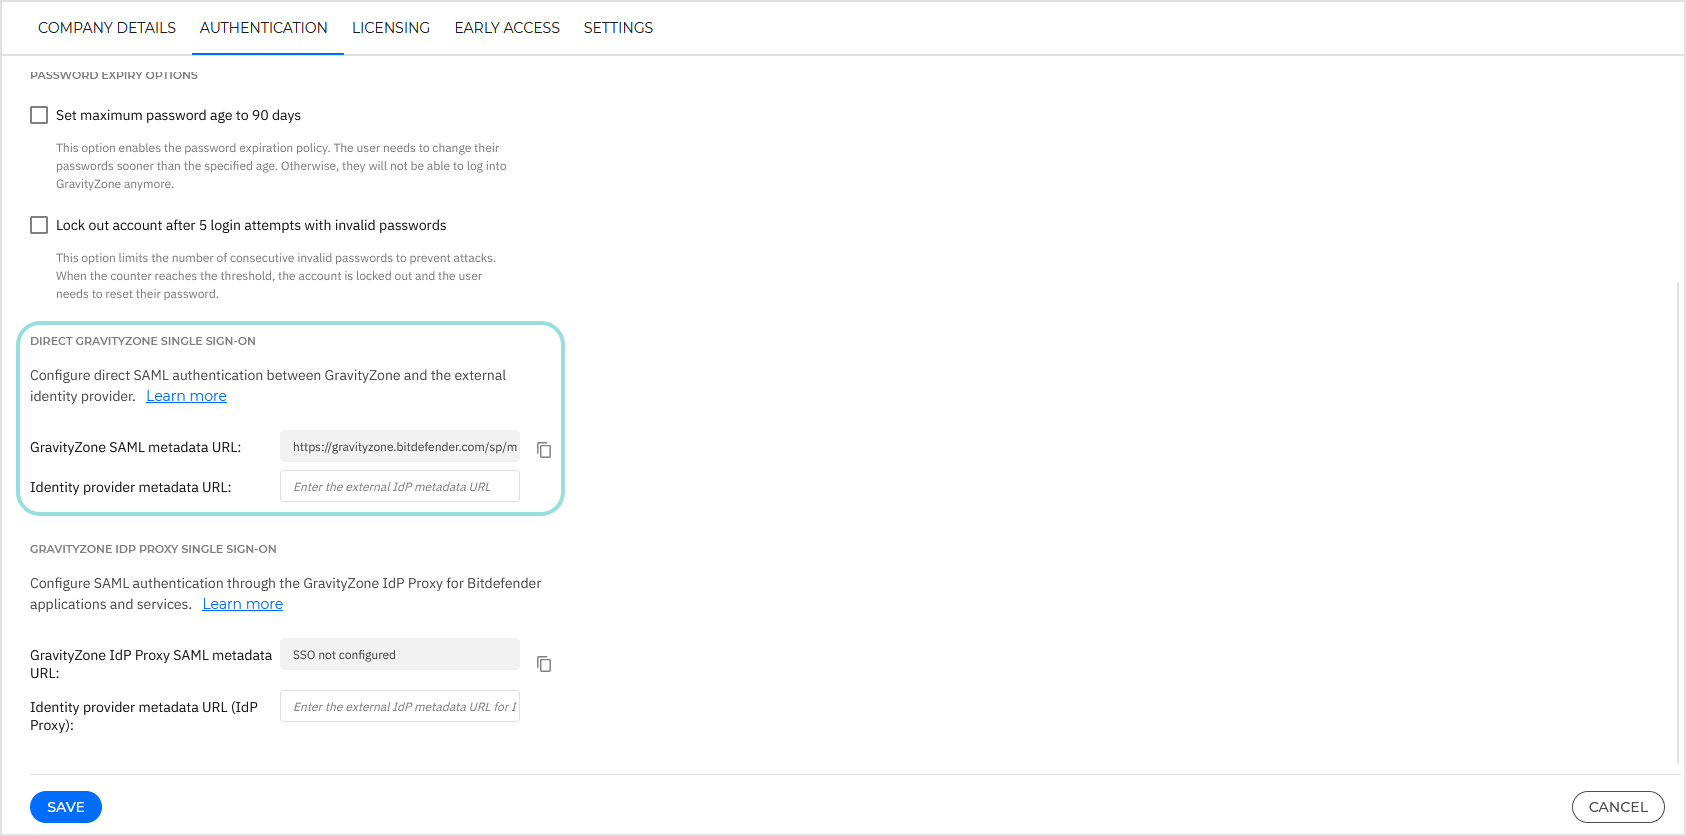
Enable SSO for managed companies
This is how you enable single sign-on for a company under your management:
Log in to GravityZone Control Center.
Go to the Companies page from the left side menu.
In the table, click the company’s name.
Under GravityZone Control Center single sign-on, enter the identity provider metadata URL in the corresponding field. The other field, reserved for the GravityZone metadata URL, is non-editable.
Click Save.
Change the authentication method for users
After enabling SSO for a company, GravityZone user accounts under that company become available for changing their authentication method.
You can change the authentication method for users one by one, as follows:
Log in to GravityZone Control Center.
Go to the Accounts page from the left side menu.
In the table, click the user’s name.
Under Login Security, go to Authentication method and select Login using your Identity Provider.
Click Save.
You can enable SSO for as many GravityZone users as you want, but not for your own administrator account.
Note
You cannot enable SSO for your own administrator account.
Tested identity providers
The following identity providers have been officially tested with GravityZone SSO:
Log out from GravityZone.
Log out from Okta.
Enter a valid email address created for testing (other than the one of your GravityZone administrator account).
Click Next.
You should be redirected to the identity provider's authentication page.
Authenticate with your identity provider.
You will be redirected back to GravityZone and, in a few moments, you should automatically log in to Control Center.
Disable GravityZone Control Center SSO
To disable single sign-on for GravityZone Control Center:
Delete the Identity Provider metadata URL from the configuration page of that company.
Click Save and confirm the action.
Users can obtain new passwords by clicking the Reset my password option on the Control Center login page and following the instructions.
To re-enable GravityZone SSO for a company, enter again the identity provider in the configuration page and click Save.
After re-enabling SSO, users under that company will continue to log in to Control Center with GravityZone credentials. You have to manually configure each account, one by one, to log in with the identity provider again.