User accounts
You can set up and manage GravityZone from Control Center, using the account received after subscribing to the service.
This is what you need to know about GravityZone user accounts:
To allow other employees of the company to access Control Center, you can create internal user accounts. You can assign user accounts with different roles, according to their access level in the company.
For each user account, you can customize the access to GravityZone features, to certain companies, or to specific parts of the network it belongs to.
You can only manage accounts with equal or lesser privileges than your account type.
You can create and manage user accounts in the Accounts page.
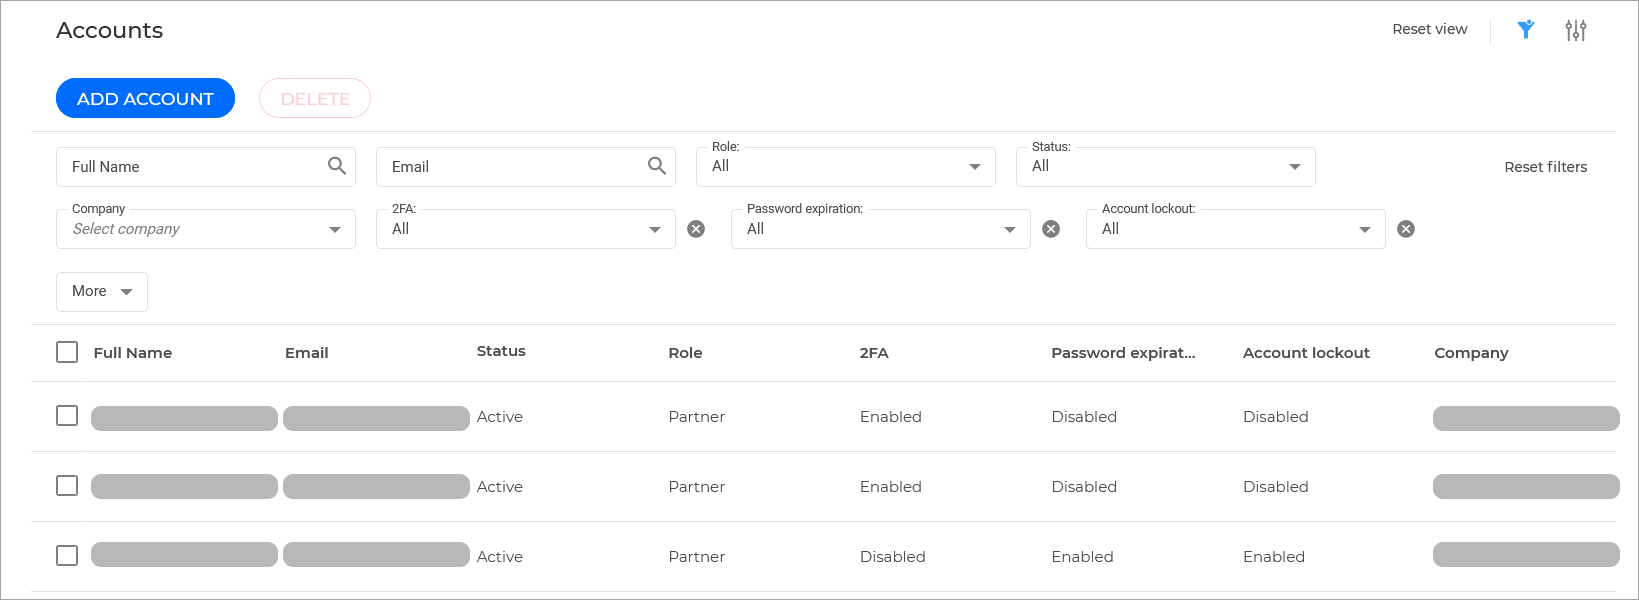
Existing accounts are displayed in the table. For each user account, the following information is available:
Full name - the username of the account used to log in to the Control Center.
Email - the email address assigned to the account. Reports and important security notifications are sent to this address. Email notifications are sent automatically whenever important risk conditions are detected in the network.
Status - indicates if the user still has access to this account.
Role - the role assigned to the user. The user role determines the rights assigned to the account.
Note
For more information refer to User roles.
Company - The company to which the user belongs.
Services - the security services the user is allowed to manage (Computers, Virtual Machines, and Mobile Devices).
2FA - indicates if two factor authentication is enabled for this account.
Note
For more information refer to Managing two-factor authentication for user accounts.
Password expiration - indicates if the the password expiration policy is applied to this account.
Note
For more information refer to Managing user accounts
Account lockout - indicates if the user has been locked out of their account due to multiple login attempts with invalid passwords.
Note
For more information refer to Managing user accounts
Note
You can customize the information displayed on the page by using Filters and Account table settings. You can use the Reset view option to revert all changes to default.
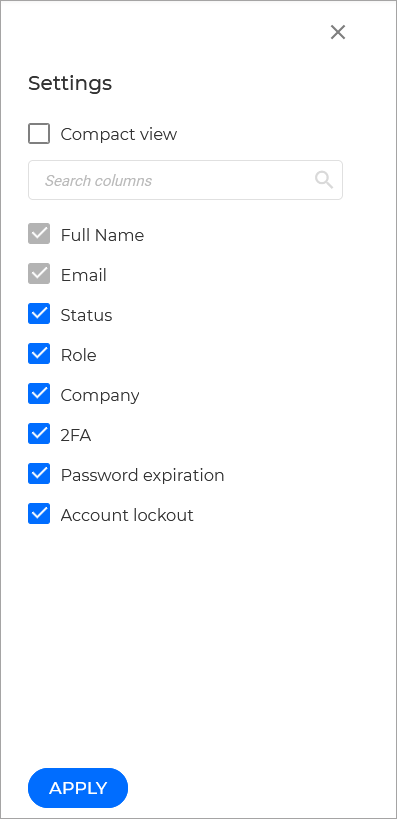
Account table settings
You can use the  button on the upper right side of the screen to customize which columns are visible on the page:
Note
Check the Compact view box to change the lines in the table closer together.
Filters
There is a filter available for user accounts that displays accounts based on specific types of data:

Each filter allows you to either search for a specific value or select between multiple options from a drop down menu. Multiple filters can be used at a time.
Note
You can use the Clear filters button to return all filters to default.
You can add or remove specific filters using the  button. Additionally, you can use the
  button to remove a specific filter from the screen.
Note
Specific filters are not optional and can not be removed from the displayed filters section.
You can hide or show the filters section using the  button on the upper right side of the page.