VMware Workspace ONE UEM integration guide
Integrations with MDM servers and the Mobile Security console provide the ability to:
Synchronize users and devices with the Mobile Security console from the MDM.
Provide transparent user access to GravityZone MTD.
Define groups to be used in policies and other configuration items.
Provide granular protection mechanisms in addition to the protections built-in to GravityZone MTD.
Auto-activate GravityZone MTD through an application configuration push from the MDM and verify the device identifier and user.
GravityZone MTD detects malicious activity and takes action locally.
When integrated with an MDM, the MDM is capable of performing protection actions. Workspace ONE UEM administrators can set up different workflows to handle different situations and threats.
Smart Groups, Tags, and Profiles are used to achieve the workflow to protect the device.
Integration with an MDM is not required to use GravityZone MTD, but this integration provides additional features.
Prerequisite requirements
Integration with VMware Workspace ONE UEM requires a connection between the Mobile Security console and the Workspace ONE UEM API server.
Create an API key that only Bitdefender uses for communication between the Mobile Security console and Workspace ONE UEM. Workspace ONE UEM monitors the API connection per API key to ensure it does not exceed a threshold. By using a unique API key for Bitdefender traffic, the chances of hitting that threshold are reduced.
Setting up the Workspace ONE Console
Enabling API Service in the Workspace ONE UEM
To enable the API Service, perform these steps:
Log in to Workspace ONE UEM.
Navigate to Groups & Setting > All Settings > System > Advanced > API > REST API.
Click the Authentication tab and enable certificate-based authentication for API calls.
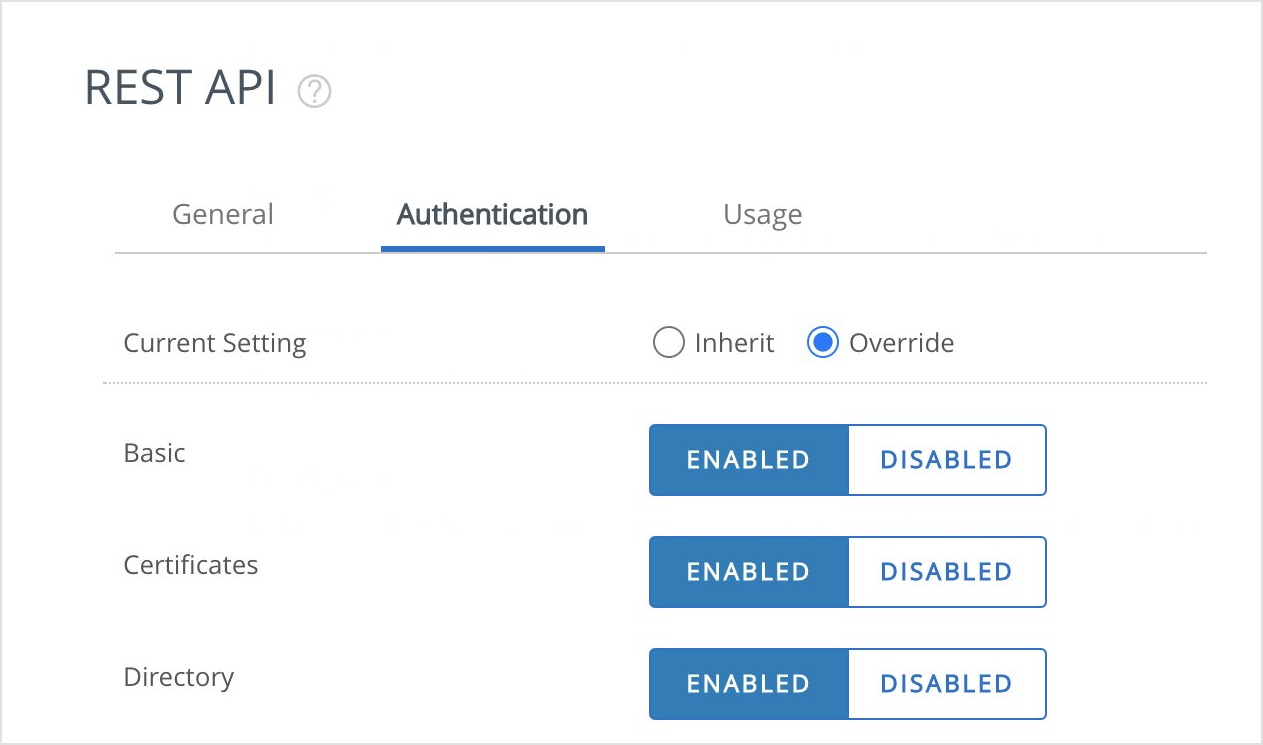
Going back, under the General tab, create an API Key for Bitdefender. This is used in the Mobile Security Console for the integration.
Enable API Access if it is not already enabled.
To create a unique REST API key, click the + Add button.
In the new entry that shows up, enter the new service name - BitdefenderAPI and set the account type to Admin.
Click Save.
Copy the new REST API Key for use in the Mobile Security console.
Creating an API administrator role
Select or create an Administrator account within Workspace ONE UEM console with the proper access by performing these steps:
In the Workspace ONE UEM console, select Global and then select the customer-level organization group.
Navigate to Accounts.
Expand Administrators and click Roles.
Click Add Role, and in the window that opens, provide the name and a description.
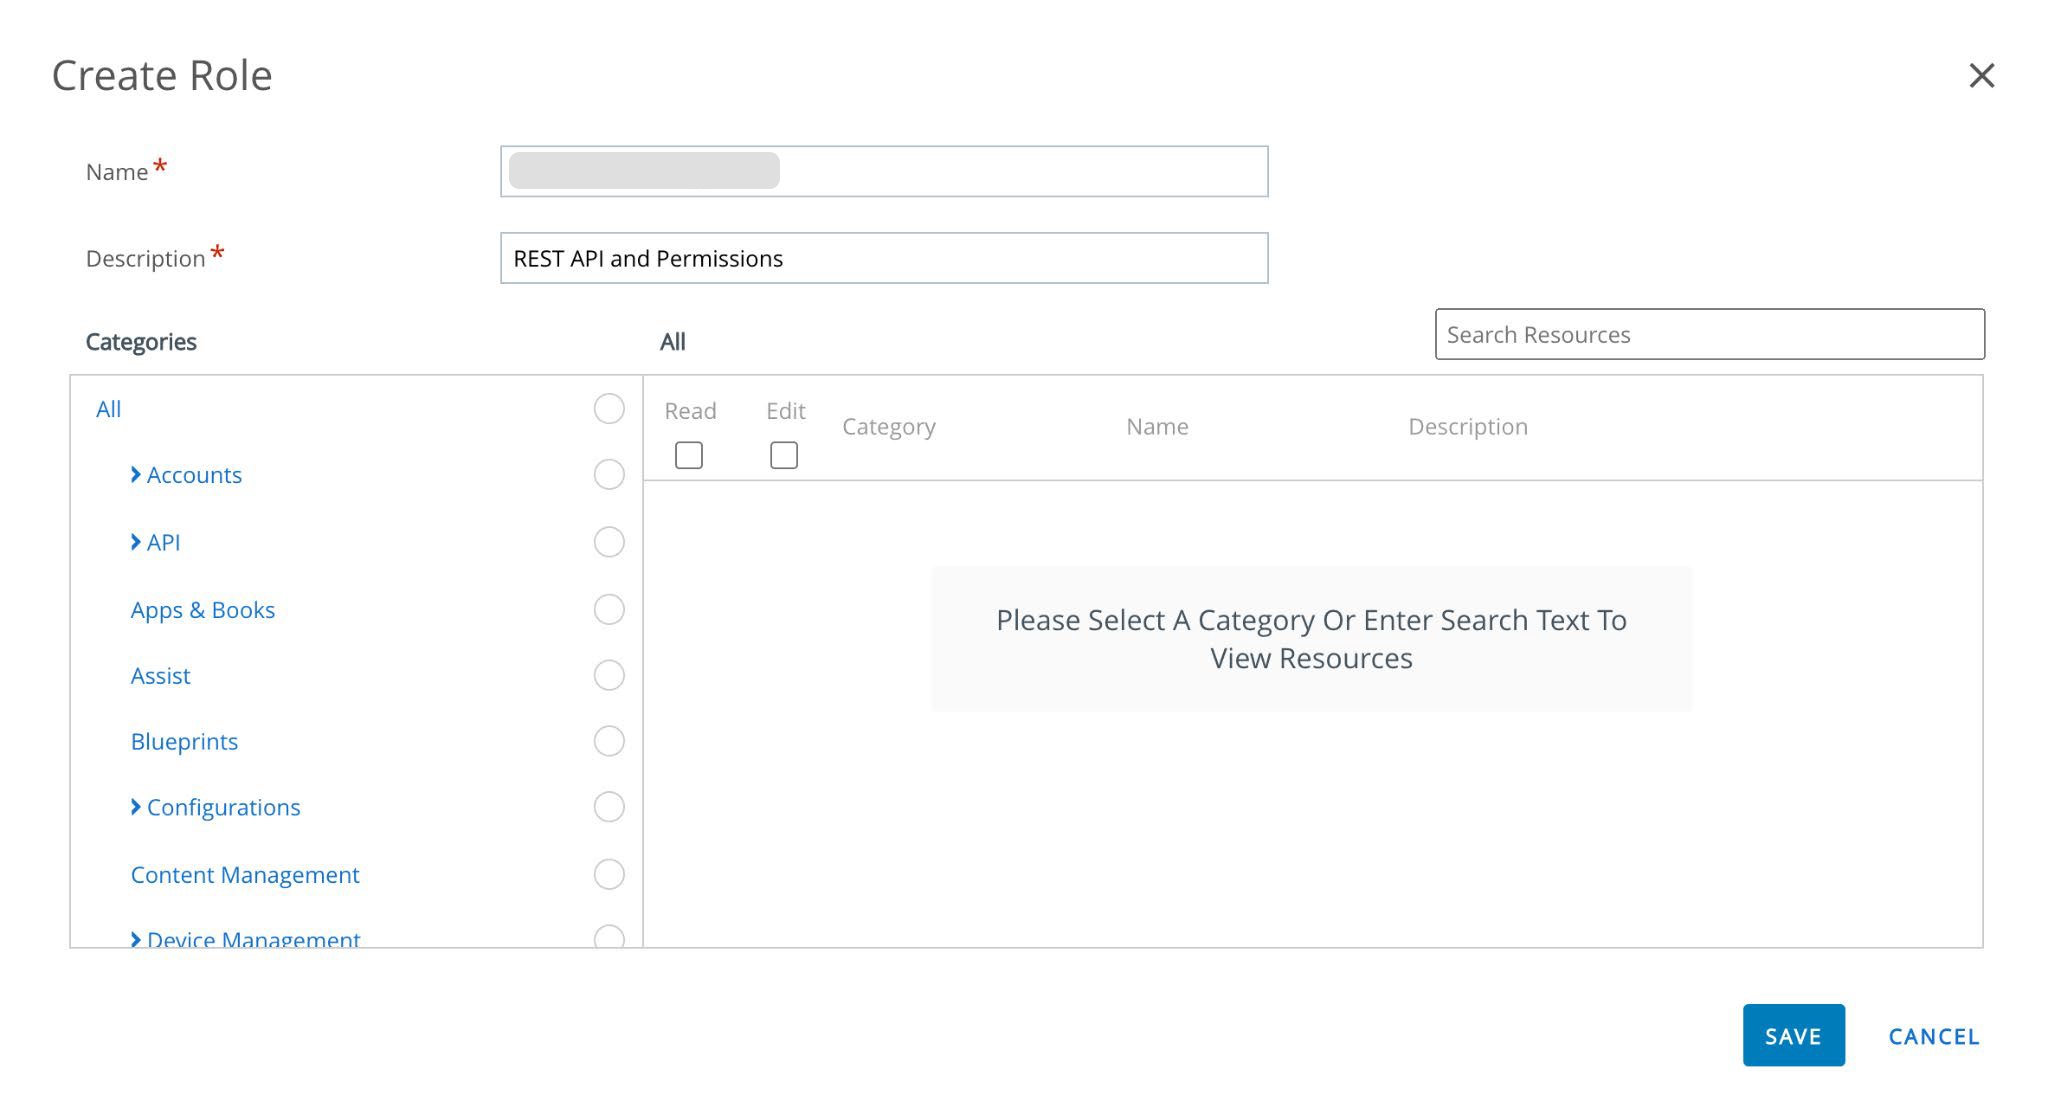
In the Categories section, expand API and click REST. A list of possible resources is displayed.
Click Details to see more of the resources, and select the resources needed.
Permission
Category
Subcategory
Description
Edit
API/REST
Devices
REST API MDM Smart Groups
Edit
API/REST
Devices
REST API MDM Profiles
Edit
API/REST
Devices
REST API MDM Devices
Edit
API/REST
Devices
REST API Devices Advanced
Read
API/REST
Devices
REST API Devices Read
Edit
API/REST
Groups
REST API Smart Groups Write
Edit
API/REST
Groups
REST API Smart Groups Execute
Edit
API/REST
Groups
REST API Smart Groups Delete
Read
API/REST
Groups
REST API Smart Groups Read
Read
API/REST
Profiles
Updates Policy Read access
Read
API/REST
Profiles
Rest API Profiles Read
Edit
API/REST
Profiles
Rest API Profiles Write
Edit
API/REST
Profiles
Rest API Profiles Execute
Edit
API/REST
Profiles
Rest API Profiles Delete
In the Categories section, expand Device Management and select Bulk Management.
The list of possible resources displays.
Click Details to see more of the resources, and select the resources.
Permission
Category
Subcategory
Description
Edit
Device Management
Bulk Management
Device Bulk Management assign Tags
In Categories, expand Settings and select Tags, if this option is available on your installation. The list of possible resources displays.
Click Details and select the resources.
Permission
Category
Subcategory
Description
Edit
Settings
Tags
Create Tag
Edit
Settings
Tags
Edit Tag
Edit
Settings
Tags
Delete Tag
Read
Settings
Tags
View Tag
Click Save.
Creating a new administrator user in Workspace ONE
To create a new administrator user in the Workspace ONE console follow these steps:
Log in to Workspace ONE.
Create a Workspace ONE UEM Administrator User by navigating to Account > Administrators > List View > Add > Add Admin.
Give the administrator user the role and permissions that you set up previously.
Click Roles > Select one or more Smart Groups intended to contain the managed devices > Select the API Role created above > Apply the role to one or more Smart Groups if necessary.
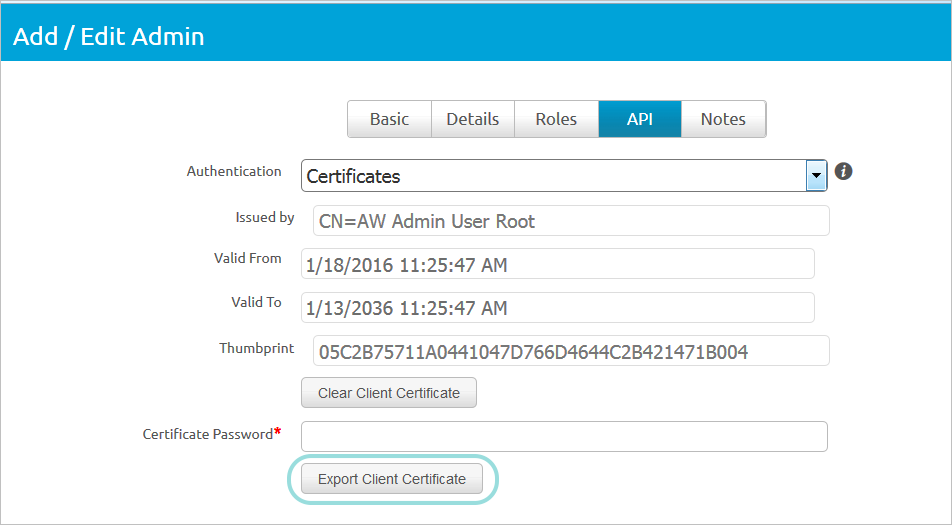
Click the API tab > Enable Certificates and create the certificate password.
You need the password to the certificate twice in this process, to export the certificate, and to import the certificate into the the Mobile Security console. To finalize this process follow these steps:
Click Save
After saving the admin account, re-open the account
Enter the password created for the certificate, and export.
Identify or Create an Assignment Group Used for Initial Synchronization
Syncing between the Mobile Security console and Workspace ONE UEM requires selecting a specific assignment group or multiple assignment groups. This can be done by navigating to the Workspace ONE UEM console: Groups & Settings > Groups > Assignment Groups.
Set Up User and Device Synchronization in Mobile Security console
To set up the MDM integration in Mobile Security console:
Log in to Mobile Security console.
Go to the Manage page.
Select Integrations.
Click on Add MDM and select the MDM integration you want to use.
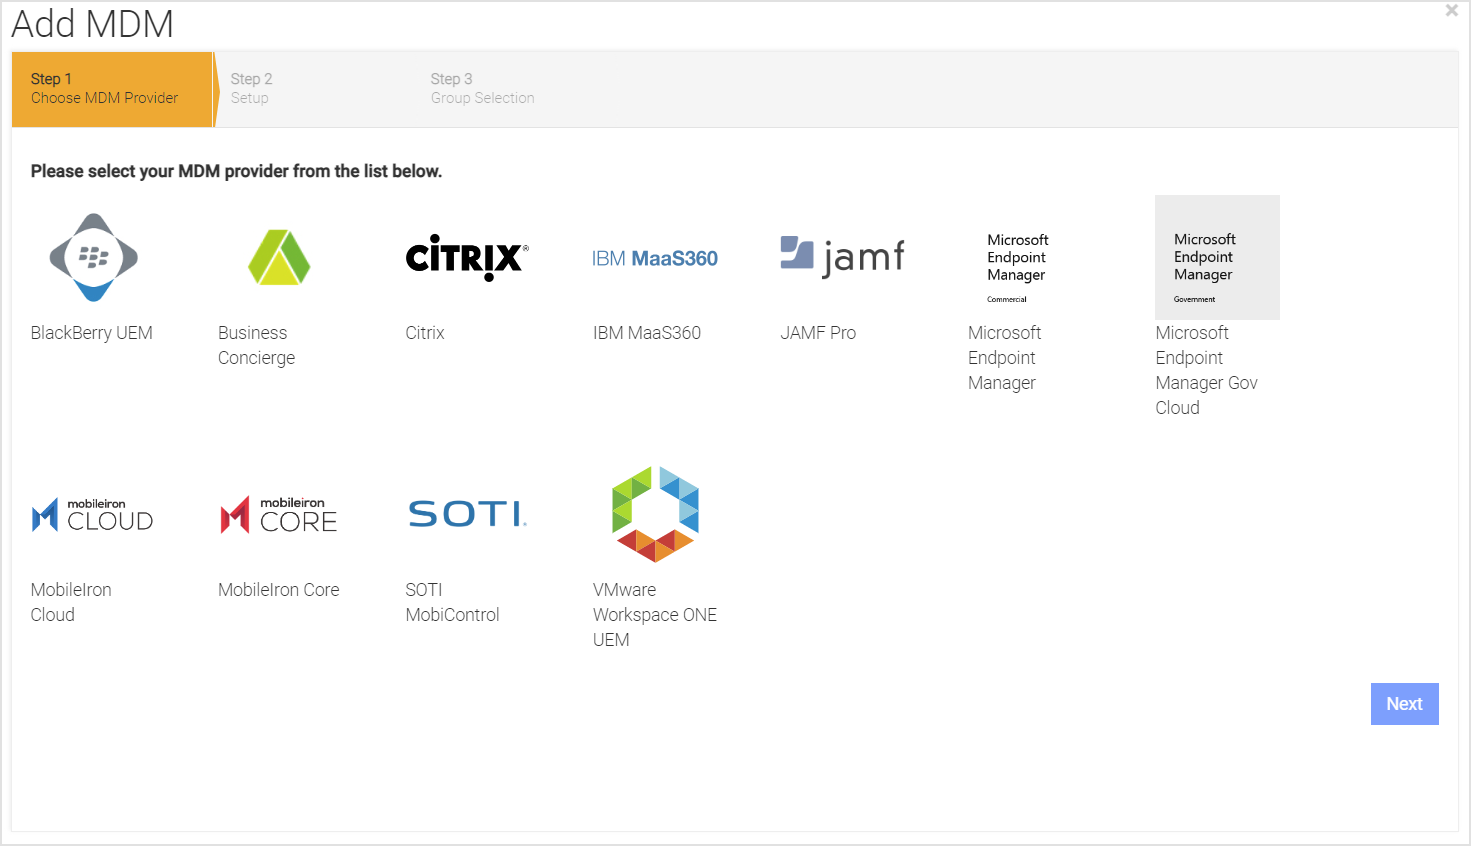
Click Next, and a window opens containing fields to input the Workspace ONE API URL, admin account, and name of the UEM system, along with other configuration fields to integrate the two systems.
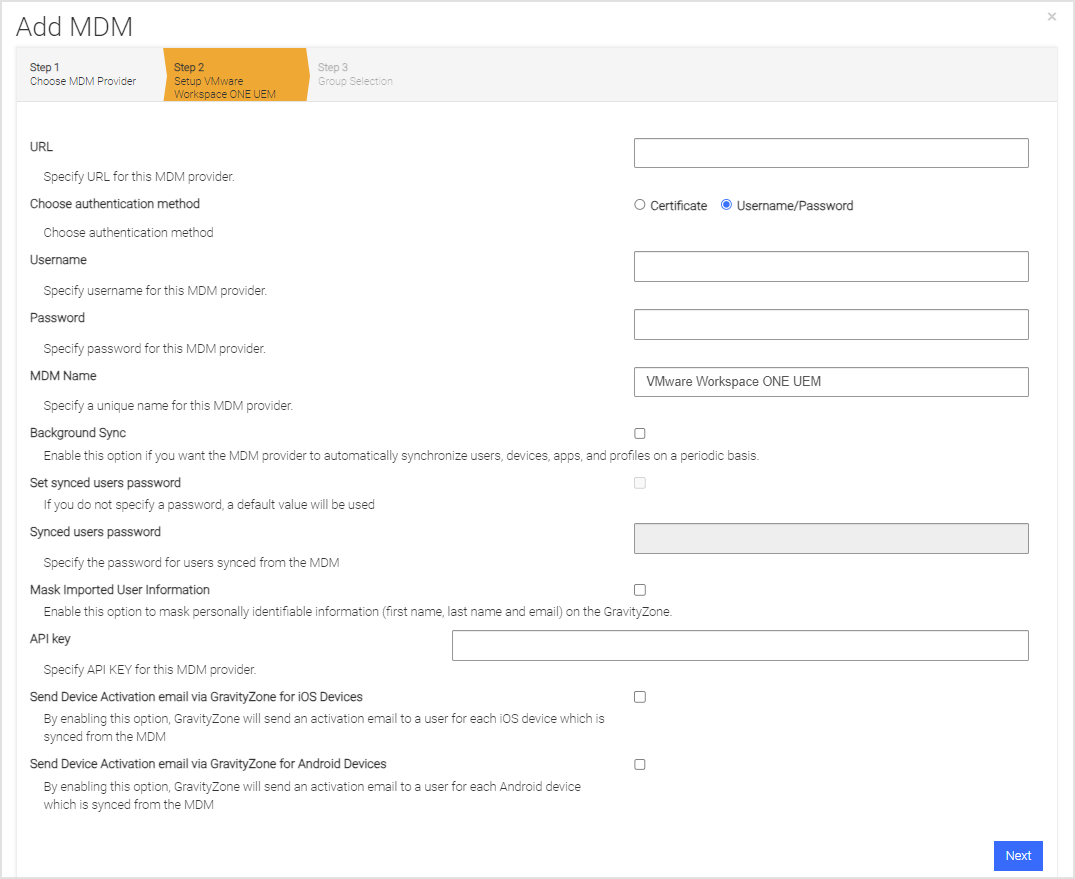
Enter information pertinent to the UEM integration list in the table, and click Next.
Item
Specifics
URL
URL of the Workspace ONE UEM API Server.
Choose Authentication Method
Select either Certificate or Username/Password for the desired method of authentication.
Username
Workspace ONE UEM Administrator created with the API role access.
Password
The password of the Workspace ONE UEM Administrator.
Certificate
If a Certificate authentication method is chosen then upload your certificate for authorization.
Passphrase
If a Certificate authentication method is chosen then provide your passphrase for the certificate.
MDM Name
The name used in the Mobile Security console to reference this MDM integration. This is prepended to the group name to form the Mobile Security console group name.
Background Sync
Click the checkbox to ensure devices are synchronized with the Workspace ONE UEM Smart Groups chosen on the next page.
Set synced users’ password
Click the checkbox to override the default password during user sync. If this is not checked a default password is computed as follows for all users that are synchronized. Start with the Bitdefender environment name, change all uppercase letters to lowercase, and also change all spaces to dashes. Then append ‘1234!’ to the end.
Synced users’ password
Override the value of the password to use for each user when they are synchronized.
Mask Imported Users Information
Check this box to mask personally identifiable information about the user when displayed such as name and email address.
API Key
The API Key is used for secure authentication to the API Server.
Send Device Activation email via the Mobile Security console for iOS Devices
Check this box to send an email to the user for every iOS device synced with the MDM.
Send Device Activation email via the Mobile Security console for Android Devices
Check this box to send an email to the user for every Android device synced with the MDM.
Click Next and choose the User Group(s) to synchronize. The available groups show up in the Available Device Groups list and can be moved to the Selected Mobile Security console Groups list by clicking on the plus sign (‘+’). This can be reversed by clicking on the minus sign (‘-’).
Click Next.
Specify the MDM alerts if you want to be notified when there are MDM sync errors. If you want more than one email address, separate them by a comma.
Click Finish to save the configuration and start the first synchronization by clicking Sync Now.
User and device synchronization
A scheduled synchronization process runs on a set interval to add new device records and new users, with only the email address and first and last name being synced for users.
New Enrollments: If the additional users or devices join any Groups that are being used for synchronization, they are added along with their devices to Mobile Security console.
Unenrolled Devices or Users: If users or devices appear removed or unenrolled, then they are removed from the Mobile Security console. Doing this does not remove any of the events associated with that user or device.
GravityZone MTD configuration and deployment
Application deployment
You can configure both types of apps to use auto-login methods for iOS and Android for Enterprise devices. It is recommended to use auto-activation when possible.
Recommended method with public apps
To deploy the application through Workspace ONE UEM, access the iOS version from the App Store and the Android version from the Google Play Store.
Create a new public application and search the appropriate store for GravityZone MTD.
For Workspace ONE UEM, the Google Play Store link can be used with a referrer attribute for the app activation.
iOS configuration and activation
The iOS application takes advantage of Managed Application Configuration to provide the best user experience. There are several activation options to choose from, which will best suit your needs.
Zero-Touch Activation
Auto-Activation VPN
The GravityZone MTD managed application configuration
The Managed Application Configuration preconfigures the iOS application with the necessary information. The configuration of the managed app is performed within the Workspace ONE UEM platform. When configuring the mobile application, there is a feature available to specify the Application Configuration while assigning the Smart Group.
To configure the app, follow these steps:
On this page, click Send Application Configuration.

Use the following configuration keys and values as needed for the configuration.
Configuration Key
Value Type
Configuration Value
Additional Notes
MDMDeviceID
String
{DeviceUid}
Required
tenantid
String
Retrieve from the Mobile Security console
Required Copy the value from the Tenant ID field on the Mobile Security console Manage page under the General tab.
defaultchannel
String
Retrieve from the Mobile Security console
Required Copy the value from the Default Channel field on the Mobile Security console Manage page under the General tab.
tracking_id_1
String
Use a desired identifier
(Optional) This is a tracking identifier.
tracking_id_2
String
Use a desired identifier
(Optional) This is a tracking identifier.
display_eula
String
no
(Optional)
If this key is not used, the End User License Agreement (EULA) displays by default unless
zero_touch_activationis set to true.assume_vpn_permission_granted
String
True
(Optional) The values are true or false. Set this value to true to grant this permission. If this is used, ensure this is in the MDM app-configuration key list. This only applies to iOS.
Click Publish and Save to push this to devices in the Smart Group.
Zero-Touch activation
This feature allows an administrator to activate app protection on managed devices without requiring the end-user to click on the installed application. This figure gives an overview of the interactions.
To configure zero-touch activation, perform these steps:
Log in to the VMware Workspace ONE console.
Navigate to Groups & Settings > Groups > Assignment Groups and add a new smart group.
Note
Ensure that the smart group associated with the VPN Profile and the Device Group are not the same.
On the left navigation menu, navigate to Resources > Profiles and Baselines > Profiles and add a new profile.
Click Add > Add Profile.
Select the Apple iOS platform, and then select Device Profile.
Enter the name for your profile.
Click Add on the Custom Settings row and immediately move the Enable Customer Lookup Value toggle to the right. This allows the "{DeviceUID}" macro to work.
Paste in your edited XML. You can also edit it in this form, since there are just a few to alter.
Click Next.
Assign the profile to the assignment group(s) of interest, take the defaults on the other fields, and click Save & Publish.
To finish the configuration for zero-touch activation, perform these steps:
Log in to the the Mobile Security console.
Navigate to the Manage > Integrations, and add the VMware Workspace ONE MDM.
Navigate to threat policies on the Policy page and the Threat Policy tab.
Select the group from the Selected Group field. This value is the original Smart Group for devices.
Update the App Pending Activation threat with MDM Action and Mitigation Action field values.
Save and Deploy your changes.
Android configuration and activation
When using Android, there are these set-up options:
Native Android setup for Cloud infrastructure
To activate the app for native Android devices you can use the activation URLs. These can be sent to end-users via the the Mobile Security console or the MDM. To access activation links, use the Manage page and select the Integrations tab and the MDM tab. After the MDM has been added, the activation link is provided for devices.
This activation link is used along with appending the MDM device identifier The activation link is used along with the MDM device identifier and can be regenerated. The administrator sends the concatenated activation link by email or text to users, along with instructions to accept the app being pushed.
Native Android setup for on-premise environments
The recommended approach is to use the public Google Play Store build to deploy Android Enterprise. If the user is not configured to use Android Enterprise, they can use the activation links available from the Mobile Security console or contact Customer Support.
Android Enterprise configuration keys
Android Enterprise users can continue to use the managed app configuration for activations. Make sure the right device identifier value is passed for the configuration parameter.
Configuration key | Value type | Configuration value | Additional notes |
|---|---|---|---|
MDMDeviceID | String | {DeviceUid} | Required |
UUID | String | {DeviceUid} | Optional |
tenantid | String | Copy the value from the Tenant ID field on the Mobile Security console Manage page under the General tab. | Required |
defaultchannel | String | Copy the value from the Default Channel field on the Mobile Security console Manage page under the General tab. | Required |
tracking_id_1 | String | Any string identifier | (Optional) Use the desired identifier. |
tracking_id_2 | String | Any string identifier | (Optional) Use the desired identifier. |
display_eula | String | no | (Optional) If this key is not used, the default displays the End User License Agreement (EULA) unless zero_touch_activation is set to true. |
Additional configuration keys and values for auto-activation and reporting for the personal profile in an Android Enterprise configuration.
Configuration key | Value type | Configuration value | Additional notes |
|---|---|---|---|
share_activation_data | String | true or false | This is required if the users want to auto-activate the personal profile application. This defaults to |
activation_package | String | Bundle Id of the app to query for the activation information. | (Optional) This is only needed if share_activation_data is true. |
check_activation_status | Boolean |
| (Optional) Use if you want the GravityZone MTD on the work profile to report if the app on the personal profile is not installed and activated. The default is false. |
check_activation_status_seconds | Integer |
| (Optional but required if |
Android Enterprise - GravityZone MTD silent install and activation
Workspace ONE UEM has the ability to start or activate an app on the device through Android Enterprise and Provisioning. The Android app is able to start up in either foreground or background mode. However, the Corporate Owned Personally Enabled (COPE) mode is not supported by Workspace ONE UEM with Provisioning, resulting in a single work profile on the device with no provisions for a personal profile.
App Setup on the Workspace ONE UEM Console
To set up the app on the Workspace ONE UEM console, follow these steps:
Add the public Android app to Workspace ONE UEM.
Add the app configuration parameters described the Android Enterprise Configuration Keys section.
When assigning the app, set it up to be auto deployed by navigating to Apps > Books and select Native.
Click Public.
Click the Android GravityZone MTD configured in the environment.
Click Assign and find the appropriate Smart Group.
Modify it and ensure that the entry for App Delivery Method is set to
AUTOand click Add.Select Save and Publish > Publish.
Provisioning setup on the Workspace ONE UEM console
To provision the auto-start feature on the Workspace ONE UEM Console, perform the following steps:
Navigate to Devices and select Provisioning.
Click Components and select Files/Actions.
Click Add Files/Actions and choose Android.
Fill in the General Information. Enter a name and description.
Click the Manifest tab.
Under Install Manifest, click Add Action and select Run Intent.
Enter one of the options below for the command line information:
Start MTD in the Foreground. In this option, the user sees it start.
com.bitdefender.gravityzone.securityformobile.MainActivityStart MTD in the Background. In this option, the user does not see it start.
com.bitdefender.gravityzone.securityformobile.ui.DormancyStartActivity
Select '-1' for the Timeout value and click Save.
Click Save again, and this action shows up in the list.
Navigate to Devices and select Provisioning.
Click Product List View and select Add Product.
Select Android and provide a name value.
Select the same associated Smart Groups.
Click Manifest and then select Add.
Select Install Files/Actions.
In the Files/Actions entry box, select the action created above and click Save.
Click Activate and then click Save.
The Product List View displays the current status of the device with MTD Actions.
Setting Up a Silent Install
Setting up a silent installation is optional. When the MTD app is initially started up, there are several permission questions that Android enforces to provide access to storage, location, and other capabilities.
For a silent install, answer these questions ahead of time using profiles through the Workspace ONE UEM Console and perform the following steps:
Navigate to Devices and select Profiles and Resources then click Profiles.
Click Add, then click Add Profile and choose Android.
Fill in the General information and select the Smart Groups associated with the desired devices for protection.
On the left column, select Permissions and then click Configure.
For the Permission Policy option, choose Prompt user for permission
Select the app under Exceptions.
Click Configure to select the answers to use for the installed questions.
Choose Grant for all the questions that are set to pre-answer.
Note
Typically, choose Grant for all options. Any other choice can prompt the user in the app for a response and can be adjusted as needed.
Click Save and then click Publish.