Antispam
The Antispam module in the Exchange Protection section of the policy offers you multiple layer protection against spam and phishing by using a combination of various filters and engines to determine whether emails are spam or not.
Note
Antispam filtering is available for:
Exchange Server 2016/2013 with the Edge Transport or Mailbox role
Exchange Server 2010/2007 with the Edge Transport or Hub Transport role
If you have both Edge and Hub roles in your Exchange organization, it is recommended to enable the antispam filtering on the server with the Edge Transport role.
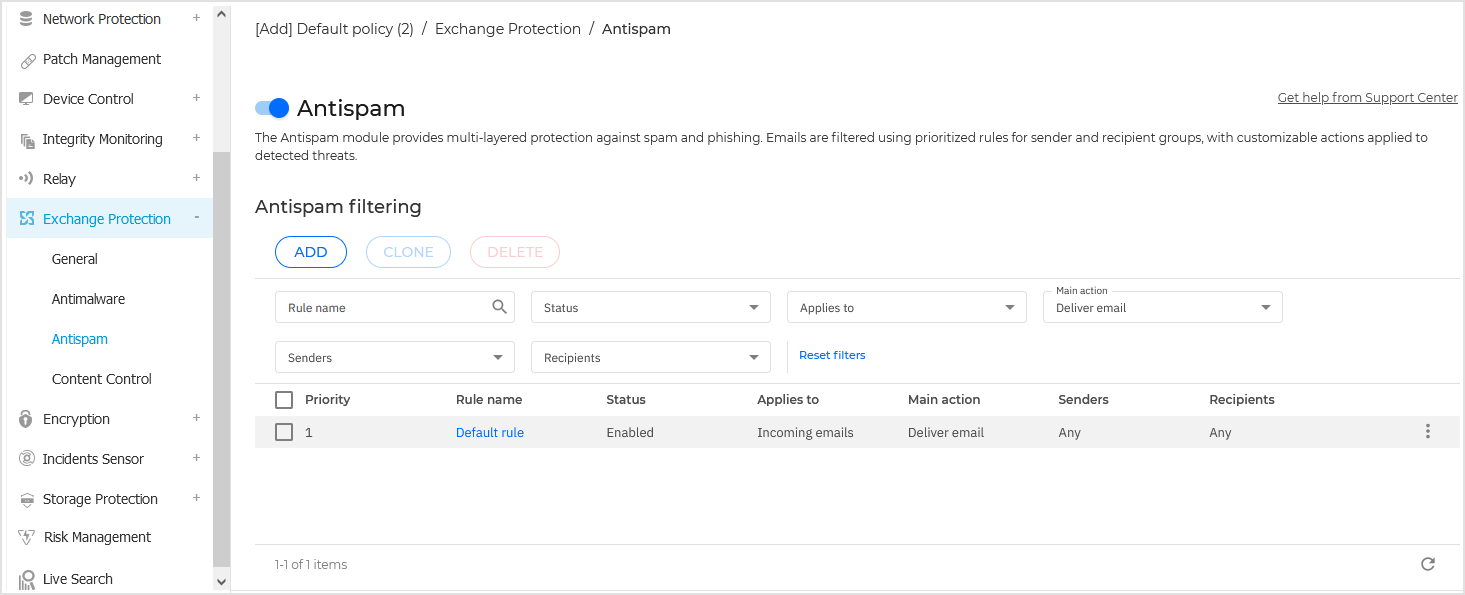
Spam filtering is automatically enabled for incoming emails.
Click the toggle to disable and re-enable Antispam.
Antispam filters
An email is checked against the antispam filtering rules based on the sender and recipients groups, by order of priority, until it matches a rule. The email is then processed according to the rule options, and actions are taken on the detected spam.
Certain antispam filters are configurable and you can control whether to use them or not. This is the list of the optional filters:
Charset filter. Many spam emails are written in Cyrillic or Asian charsets. The Charset Filter detects this kind of emails and tags them as SPAM.
Sexually-explicit content. Spam that contains sexually oriented material must include the warning SEXUALLY-EXPLICIT: in the subject line. This filter detects emails marked as SEXUALLY-EXPLICIT: in the subject line and tags them as spam.
URL filter. Almost all spam emails include links to various web locations. Usually, these locations contain more advertising and offer the possibility to buy things. Sometimes, they are also used for phishing.
Bitdefender maintains a database of such links. The URL filter checks every URL link in an email against its database. If a match is made, the email is tagged as spam.
Real-time Blackhole List (RBL). This is a filter that allows checking the sender’s mail server against third party RBL servers. The filter uses the DNSBL protocol and RBL servers to filter spam based on mail servers' reputation as spam senders.
The mail server address is extracted from the email header and its validity is checked. If the address belongs to a private class (
10.0.0.0,172.16.0.0to172.31.0.0or192.168.0.0to192.168.255.0), it is ignored.A DNS check is performed on the domain
d.c.b.a.rbl.example.com, whered.c.b.ais the reversed IP address of the server andrbl.example.comis the RBL server. If the DNS replies that the domain is valid, it means that the IP is listed in the RBL server and a certain server score is provided. This score ranges between 0 and 100, according to the confidence level you granted to the server.The query is performed for every RBL server in the list and the score returned by each one is added to the intermediate score. When the score has reached 100, no more queries are performed.
If the RBL filter score is 100 or higher, the email is considered spam and the specified action is taken. Otherwise, a spam score is computed from the RBL filter score and added to the global spam score of the email.
Heuristic filter. Developed by Bitdefender, the Heuristic filter detects new and unknown spam. The filter is automatically trained on large volumes of spam emails inside the Bitdefender Antispam Lab. During training, it learns to distinguish between spam and legitimate emails and to recognize new spam by perceiving its similarities, often very subtle, with the emails it has already examined. This filter is designed to improve signature-based detection, while keeping the number of false positives very low.
Bitdefender Cloud query. Bitdefender maintains a constantly evolving database of spam mail "fingerprints" in the cloud. A query containing the email fingerprint is sent to the servers in the cloud to verify on the fly if the email is spam. Even if the fingerprint is not found in the database, it is checked against other recent queries and, provided certain conditions are met, the email is marked as spam.
Managing antispam rules
You can view all existing rules listed in the table, together with information on their priority, status and scope. The rules are ordered by priority with the first rule having the highest priority.
Any antispam policy has a default rule that becomes active once the module is enabled. What you need to know about the default rule:
You cannot copy, disable or delete the rule.
You can modify only the scanning settings and the actions.
The default rule priority is always the lowest.
Creating rules
To create a rule from scratch:
Click the Add button at the upper side of the table to open the configuration window.
Configure the rule settings. For details regarding the options, refer to Rule options.
Click Add. The rule is added to the list.
To create rule by cloning an existing one:
Select the rule that you want from the table.
Click the Clone button at the upper side of the table to open the configuration page.
Alternatively, open the
 More menu and select Clone.
Adjust the rule options according to your needs.
Click Add. The rule is listed first in the table.
Editing rules
To edit an existing rule:
Click the rule name to open the configuration window.
Enter the new values for the options you want to modify.
Click Save. If the rule is active, changes take effect after the policy is saved.
Setting rule priority
To change the priority for a rule:
Open the corresponding
More menu and select Edit priority.Use the arrows to change the priority.
Click the
 OK icon to confirm the changes.
To set a rule to be first in the list, click the
More menu and select Move to top.Removing rules
To delete one or more rules, select them and click the Delete button at the upper side of the table.
To delete a single rule, click the corresponding
More menu and select Delete.
Rule options
The following options are available:
General. In this section you must set a name for the rule, otherwise you cannot save it. Select the Active check box if you want the rule to be effective after the policy is saved.
Rule scope. You can restrict the rule to apply only to a subset of emails, by setting the following cumulative scope options:
Apply to (direction). Select the email traffic direction to which the rule applies.
Senders. You can decide whether the rule applies for any sender or only for specific senders. To narrow the senders range, click the Specific button and select the desired groups from the table on the left. View the selected groups in the table on the right.
Recipients. You can decide whether the rule applies for any recipient or only for specific recipients. To narrow the recipients range, click the Specific button and select the desired groups from the table on the left. You can view the selected groups in the table on the right.
Note
The addresses in the Cc and Bcc fields also count as recipients.
Important
The rules based on user groups apply only to Hub Transport and Mailbox roles.
Settings. Click the security level that best suits your needs (Aggressive, Normal or Permissive). Use the description on the right side of the scale to guide your choice.
Additionally, you can enable various filters. For detailed information regarding these filters, refer to Antispam filters.
Important
The RBL filter requires additional configuration. You can configure the filter after you have created or edited the rule. For more information, refer to Configuring the RBL Filter.
For the authenticated connections you can choose whether to bypass or not the antispam scanning.
Actions. There are several actions which you can take on detected emails. Each action has, at its turn, several possible options or secondary actions. Find them described herein:
Main actions:
Deliver email. The spam email reaches the recipients mailboxes.
Quarantine email. The email is encrypted and saved in the quarantine folder from the Exchange Server, without being delivered to recipients. You can manage the quarantined emails in the Quarantine page.
Redirect email to. The email is not delivered to the original recipients, but to a mailbox you specify in the corresponding field.
Reject / Delete email. On servers with Edge Transport role, the detected email is rejected with a 550 SMTP error code. In all other cases, the email is deleted without any warning. It is advisable to avoid using this action.
Secondary actions:
Integrate with Exchange SCL. Adds a header to the spam email, allowing Exchange Server or Microsoft Outlook to take action according to the Spam Confidence Level (SCL) mechanism.
Tag the email subject as. You can add a label to the email subject to help users filter detected emails in the email client.
Add an email header. A header is added to emails detected as spam. You can modify the header name and value by entering the desired values in the corresponding fields. Further on, you can use this email header to create additional filters.
Save email to disk. A copy of the spam email is saved as a file to the specified folder. Provide the absolute path of the folder in the corresponding field.
Note
This option supports only emails in MIME format.
Archive to account. A copy of the detected email is delivered to the specified email address. This action adds the specified email address to the email Bcc list.
By default, when an email matches the rule scope, it is processed exclusively in accordance with the rule, without being checked against any other remaining rule. If you want to continue checking against the other rules, clear the checkbox Stop processing more rules.
Configuring the RBL filter
If you want to use the RBL filter, you must provide a list of RBL servers.
To configure the filter:
In the Antispam page, click the Settings link to open the configuration window.
Provide the IP address of the DNS server to query and the query timeout interval in the corresponding fields. If no DNS server address is configured, or if the DNS server is unavailable, the RBL filter uses the system's DNS servers.
For each RBL server:
Enter the server hostname or IP address and the confidence level you have assigned to the server, in the fields from the table header.
Click the Add button at the upper side of the table.
Click Save.
Configuring sender whitelist
For known email senders, you can prevent unnecessary server resource consumption, by including them into lists for trusted or untrusted senders. Thus, the mail server will always accept or reject emails coming from these senders. For example, you have an intense email communication with a business partner and to make sure you receive all emails, you can add the partner to the whitelist.
To build a whitelist of trusted senders:
Click the toggle switch to enable Whitelist.
Enter the email addresses you want to add to the list.
You can use the following wildcards to define an entire email domain or a pattern for email addresses:
Asterisk (*), replacing zero, one or more characters.
Question mark (?), replacing any single character.
For example, if you enter
*.gov, all emails coming from the.govdomain will be accepted.Click the
 Add button to add the email addresses to the list.
To copy the email addresses, click the Copy to clipboard icon.
To delete an address, click the corresponding X button. To delete all addresses, click Clear list.
Note
To blacklist known spam senders, use the Connection Blacklist option from the Exchange Protection > General > Settings section.