SecureMail
Overview
SecureMail is a feature in GravityZone Security for Email that provides a simple and effective solution for user-based encryption of specific messages. This is particularly useful for sending sensitive messages that should not be stored in the recipient’s inbox, like a traditional email message would be.
Add a customizable keyword at the start of any email to convert it to a SecureMail message . When you send the email:
The contents will be converted and added to a secure server.
The recipient will receive an email with a link to the secure server and log in instructions.
The contents of the email can be accessed after logging in.
SecureMail complements the policy-based encryption capabilities integrated within Email Security, with the ability to enforce the use of TLS for specified domains, as well as to use Opportunistic TLS for all messages, falling back to non-encrypted connections only if the receiving email server does not support TLS.
Concepts
In their relation to the sender of the secure message there are two types of SecureMail users:
Internal - users that have access to the GravityZone Security for Email product with the SecureMail license activated. Internal users can be both senders and recipients of SecureMail communications and can send messages to both internal and external recipients.
To send a SecureMail message compose an email message in your standard email client (e.g., Outlook) that meets the trigger criteria for matching the SecureMail rule.
To view and respond to replies to your SecureMail messages, you must be enrolled in the End User Portal.
External - any user with a valid email address that does not have access to SecureMail.
To view and respond to SecureMail messages external users access an isolated web-based SecureMail dashboard and they are required to register with their email address and password.
Note
The URL of the external interface is displayed in the SecureMail Settings section.
Depending on the permissions that have been set in the SecureMail Settings, external users can respond to or only view the message.
Example Scenarios
Internal to Internal
Company A is a bank that has regular communications with it's software developer Company B. Often sensitive information needs to be sent back and forth between companies. Both use GravityZone Security for Email product and have the SecureMail product licensed, thus they are both internal users.
Both sender and recipient will access the SecureMail dashboard via the End User Portal and neither need to register for a SecureMail account in order to participate. Both users should be enrolled in the End User Portal.
Internal to External
Company C is a medical clinic that is using GravityZone Security for Email and has the SecureMail product licensed. They often send communications to their clients that contain sensitive or personal information. Regular clinic users do not have access to GravityZone Security for Email, thus they are external users, while the clinic is considered to be an internal user.
This is an internal to external scenario. The external user - the clinic's client - will first receive a notification that they have a SecureMail message. They will be able to view the message and, if SecureMail settings allow, reply to it, after registering and logging in to the isolated SecureMail dashboard.
External to Internal
Company D is an insurance agency that is using GravityZone Security for Email and has the SecureMail product licensed. They will be considered an internal user. John Smith is one of their clients and has just received a message from them sent through SecureMail. He does not have access to Email Security, thus he will be considered an external user.
Company D has enabled external users to reply to emails so John is able to reply to the email by registering and logging in to the isolated SecureMail dashboard. Company D employees will be able to view the reply via the End User Portal.
External to External
Not supported. The sender must be an GravityZone Security for Email product customer with the SecureMail product licensed or replying to an email sent by one.
Enrolling internal users
SecureMail users can be managed from Products > Settings > Administrators.
All internal users are able to send emails through SecureMail, but they will require an end user role enabled for their mailbox to be able to access and reply to encrypted messages through the End User Portal.
There are two ways to enroll internal users:
Manually adding each email address.
Importing a .CSV file containing the email email addresses.
Once the end-user role has been assigned to a specific mailbox an automated verification and activation process will trigger. SecureMail will send an email containing instructions on how to activate and access the end-user portal.
Note
You can find more information on how to create an end user account and the activation process under Administrators.
As soon as the account has been verified, the user will be able to log in to the end user page and access encrypted messages.
Configure the SecureMail Trigger Rule
To configure this feature follow the steps below:
Go to Products > Email Security > Message Rules.
Create a new rule and give it a descriptive name. Make sure it contains the Secure Deliver final action.
Note
You can find the steps to creating a new message rule here.
Place the rule between the Deliver Inbound and Deliver Outbound rules

Note
The rule can later be edited and moved however it should always be placed before the Deliver Outbound default rule to avoid unexpected behavior.
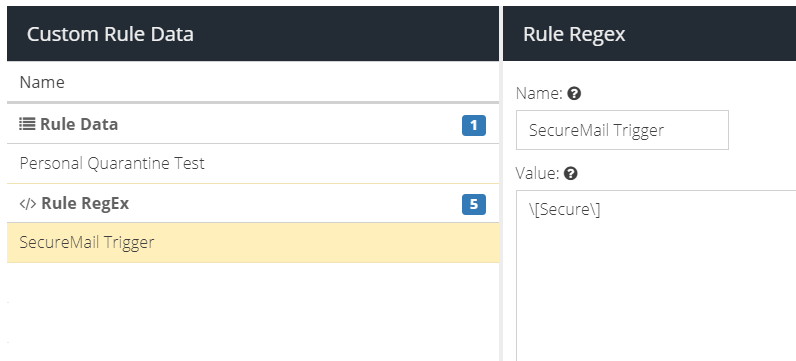
By default, a new Custom Rule Data regular expression entry is created containing the trigger word [secure] which is then attached to the Subject rule condition. This means that for the message to be processed by SecureMail, the sender should include the [secure] trigger word somewhere in the message subject. The rule can be edited, for example, if you prefer the keyword to trigger on the message body or use an entirely different trigger such as a special header or list of sender email addresses.
The trigger word can be edited by navigating to Products > Email Security > Custom Rule Data and clicking the SecureMail Trigger entry.
Configuring Securemail Settings
To configure the SecureMail settings, follow the steps below:
Go to Products > GravityZone Security for Email > Product Configuration
Click SecureMail Settings.
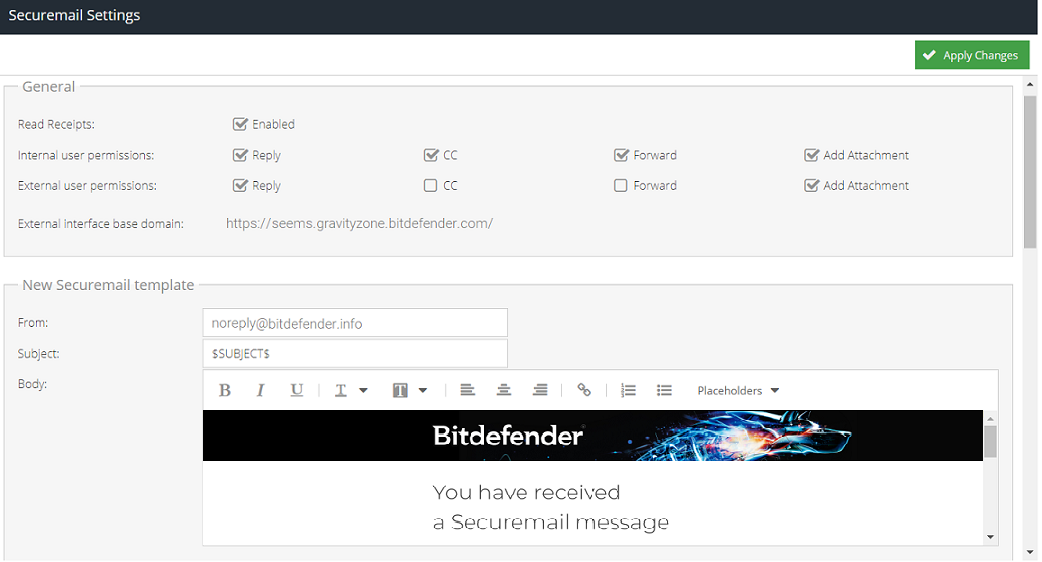
Edit the settings explained below:
Note
The settings control the behavior of the SecureMail experience for recipients.
General
Read Receipts - sends a reciept to the sender once the recipient has opened the message.
Internal user permissions - enables permissions for internal users, such as the ability to add a CC or Forward address. These permissions apply to all SecureMail Messages that are sent.
External user permissions - enables permissions for external users, such as the ability to add a CC or Forward address. These permissions apply to all SecureMail Messages that are sent.
External users are required to use 2FA - enables the requirement for external users to set up two-factor authentication to log in to their SecureMail account. Users will receive a SMS text delivery to set up 2FA.
Note
Users created prior to enabling 2FA will be required to add two-factor authentication on their next sign-in.
Send a copy of replies via SMTP - enables delivering replies from SecureMail users instead of requiring access to the portal.
Warning
This feature is for certain use cases where the message content can be delivered as a standard email.
External interface base domain - (read only) the base domain of the SecureMail dashboard used by external users to view and respond to secure messages. Please contact your service provider for further information.
Secure messages expires in - the number of days before secure messages will be automatically deleted. This includes replies, forwards and deletions for all members of the thread that participate in SecureMail. The value must be between 3 and 365 days.
Admin email for notifications - an email address for system notifications such as password reset requests and auto-expiry notifications.
Templates
It is possible to fully customize the SecureMail templates using the inbuilt HTML editor. The following templates are available:
New SecureMail template - sent to the recipient when they receive a new SecureMail message.
SMTP Reply template - used if the Send copy of replies via SMTP option is enabled but the system was unable to deliver the email to the recipient mail server.
Read Receipt template - sent to the sender when the recipient opens the SecureMail message for the first time (if the Read Receipts setting is enabled).
Confirm Registration template - sent to the recipient after they have registered for access to SecureMail.
Registration Activation template - sent to the recipient when their SecureMail account is ready to use.
Auto Expire Notification template - sent to the sender when their SecureMail message is about to expire based on the "Auto-Expiry" option. If more than one message is due to expire, this template will include a digest of all messages.
User reset password started notification - sent to the recipient when they begin a password reset flow through a Forgotten Password link.
Admin reset password started notification - sent to the administrator, if specified, when an external user requests a password reset. This can be used for auditing.
User reset password finished notification - sent to the recipient when their password reset is successful.
Admin reset password finished notification - sent to the administrator, if specified, when an external user successfully resets their password. This can be used for auditing.
When creating templates, several built-in placeholders are available:
Placeholder | Description |
|---|---|
| The subject of the secure message being sent. |
| The recipient of the secure message. |
| The link for the recipient to press. This will be in the context of the template in use. |
| This is the UTC timestamp of when the secure email message was sent. |
| The UTC timestamp of when a message was opened. This is used typically in the Read Receipt template. |
| The public facing IPv4 address of the user. |
| The country name determined from the IPv4 address. |
| The city name determined from the IPv4 address. |
| For Auto-Expiry, the number of days before expiry. |
Composing a new SecureMail message
To compose a new SecureMail message follow the steps below:
Compose a new message in their your email client (i.e. Outlook, Outlook Web Access)
Ensure the trigger conditions are met.
Note
By default, the trigger condition is that the subject should contain the pattern
[secure].Send the email.
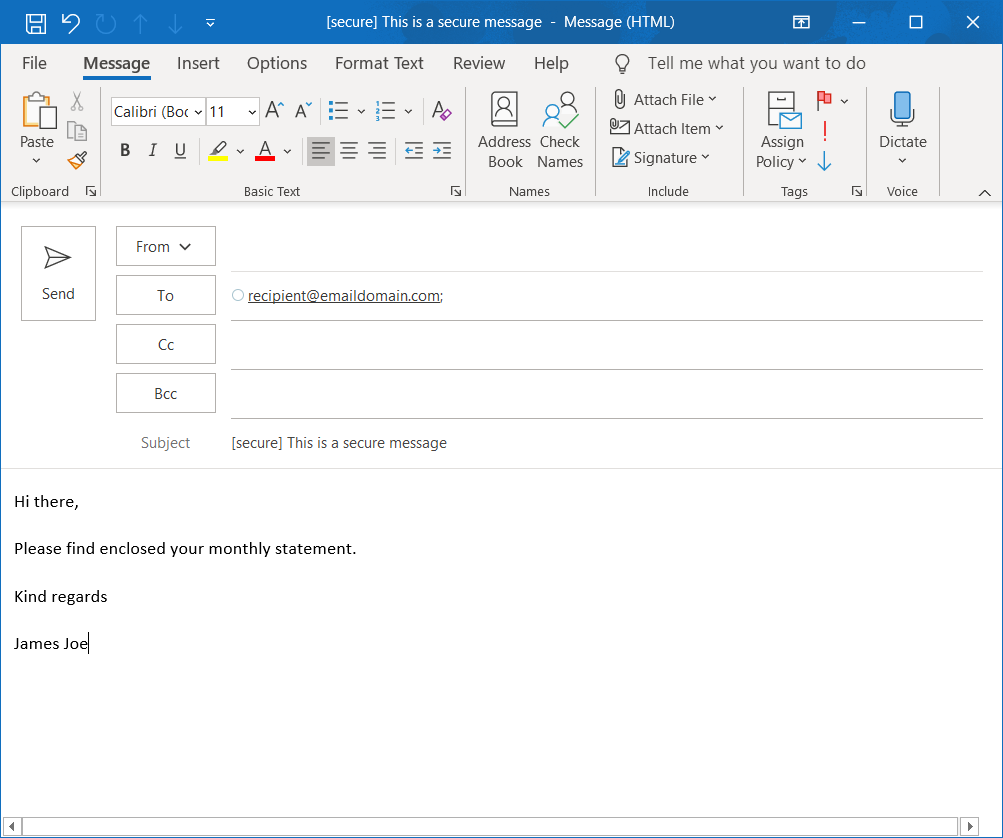
Note
Secure messages cannot be sent to recipients within your own email domain(s). For a message to trigger the SecureMail service it must be sent outbound through the Email Security MTA to the recipient.
Using the SecureMail dashboard
The SecureMail dashboard is a convenient and responsive web application for viewing secure messages. It is very similar to other web mail-based applications, making it familiar and easy for users to use.
Accessing the SecureMail dashboard
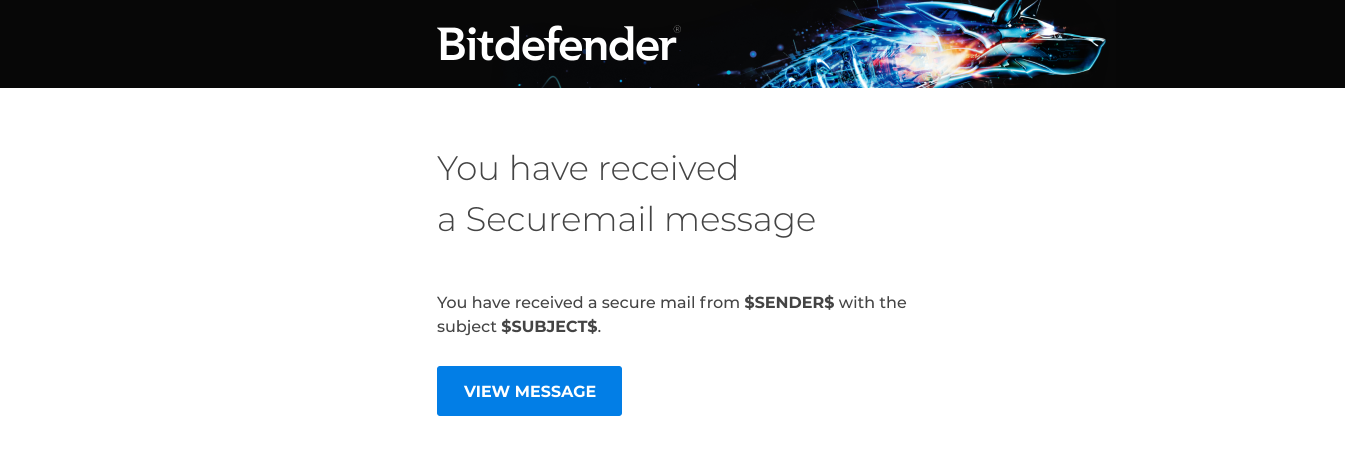
When a recipient receives a new secure message, they will receive an email notification containing a link to View Message. Clicking this button will open the SecureMail dashboard:
The SecureMail dashboard provides the same functionality for both internal and external users.
Internal users access the interface through an existing End User Portal
External users access the interface by accessing an isolated SecureMail web-based dashboard and logging in.
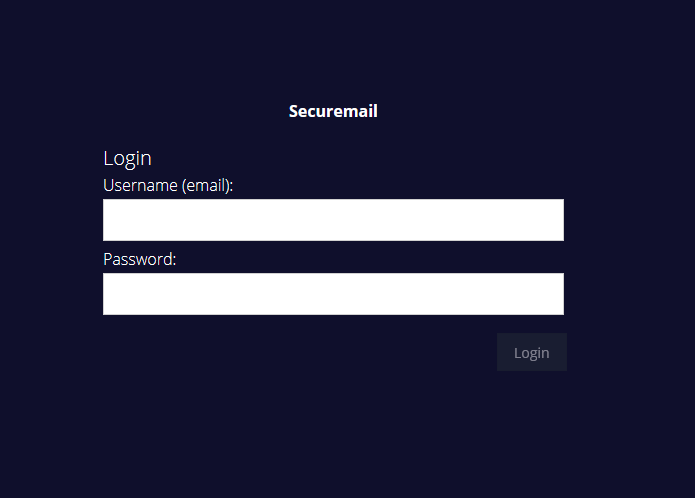
Note
The first time external users receive a new secure message they will be prompted to create a new account. The registration process will be handled automatically by the SecureMail system
Using the SecureMail dashboard
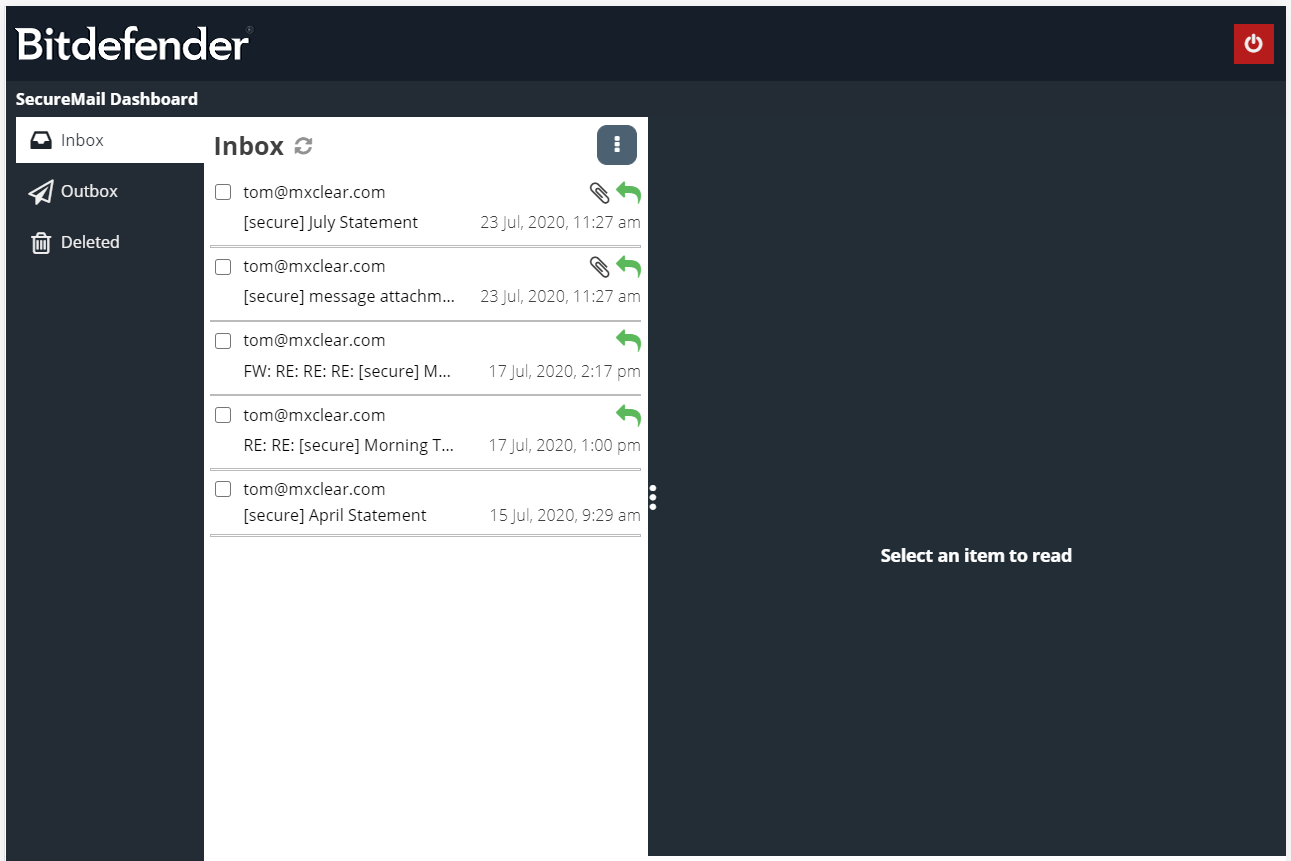
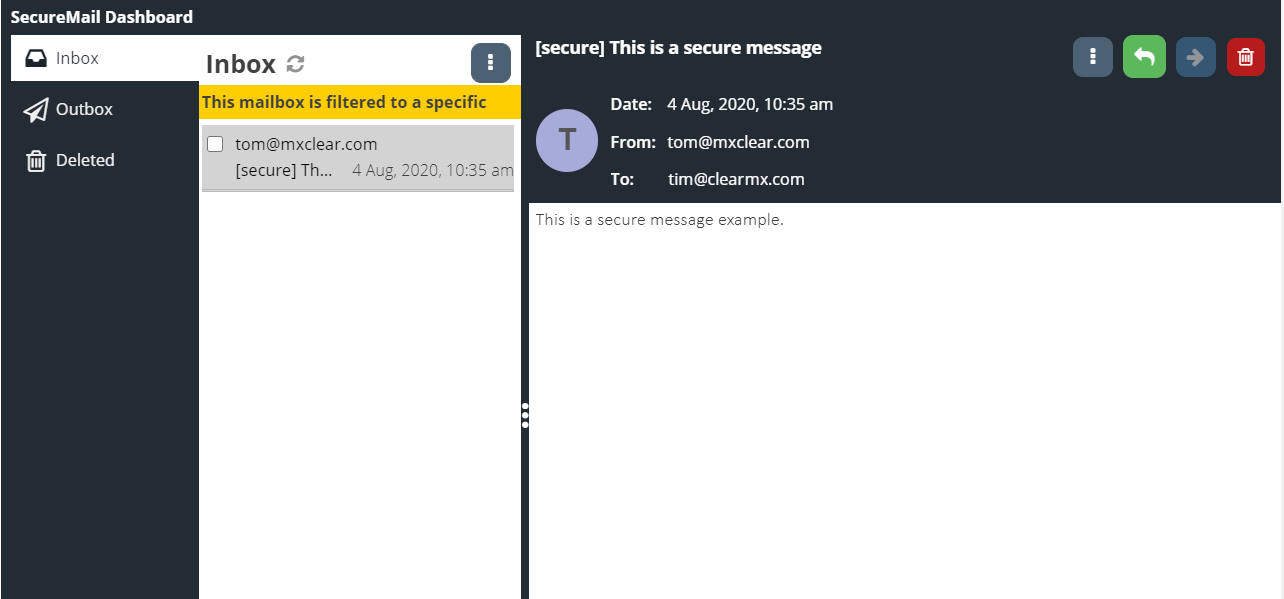
After logging in, you will be directed to the the SecureMail dashboard, which is essentially a web-based email client:
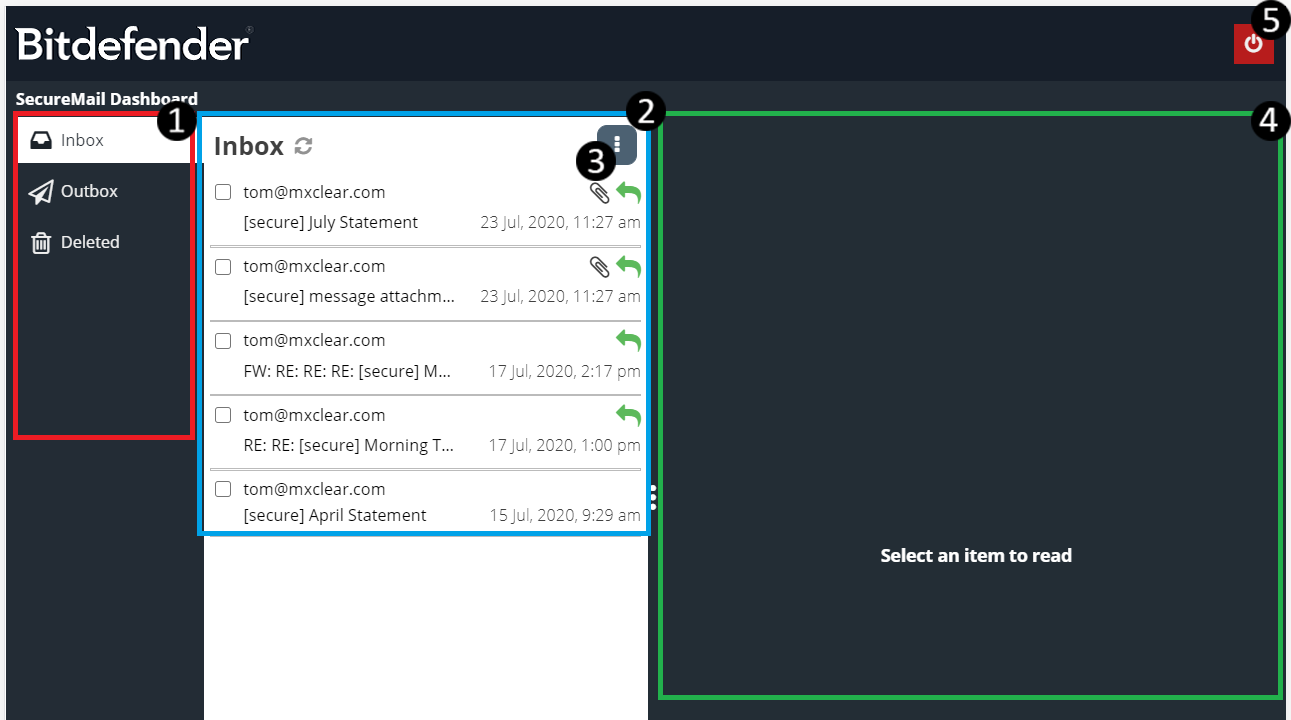
The left hand panel (red border) shows the folder list. The options are:
Inbox - a list of secure messages you have received
Outbox - a list of secure messages you have sent
Deleted - a list of secure messages you have deleted
Selecting a folder will update the message list (blue border). The message list shows the list of secure messages in the selected folder. Unread messages will appear with a bold subject line. Messages will automatically be marked as read once they have been opened.
The vertical 3-dot menu provides a list of options for managing multiple messages, or a right-click context menu is available for managing a specific message. The options are:
Mark Read - mark the selected message(s) as read
Mark Unread - mark the selected message(s) as unread
Delete - move the selected message(s) to the Deleted folder
Close - close the message from being viewed in the message panel (green border)
The right hand message panel (green border) is the area used to view the secure message. A splitter is available on desktop view to alter the size of the message panel area. On mobile view, the layout changes to fit a smaller screen size.
The Close button is used to exit SecureMail
Viewing Messages
There are multiple ways of accessing messages in Securemail:
Accessing SecureMail dashboard directly. Once logged in you can navigate between folders and view individual emails.
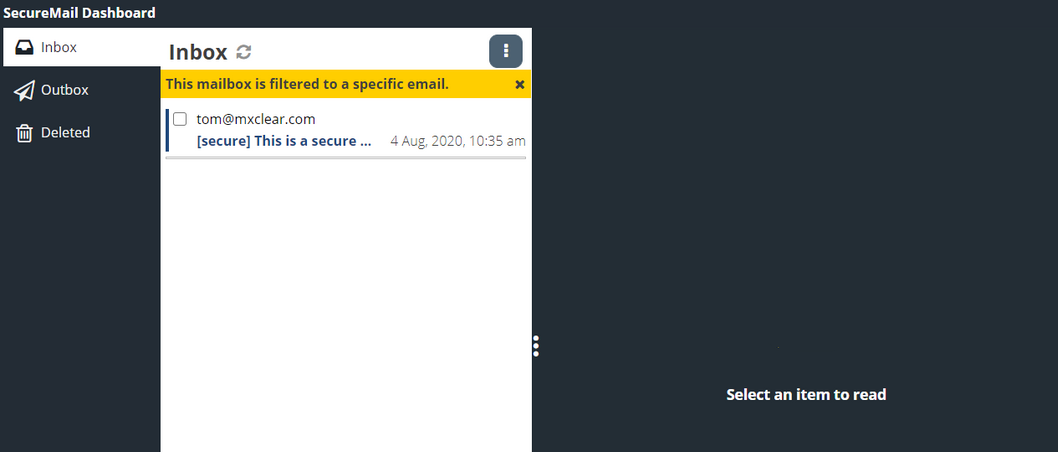
From an email notification, clicking the View Message link will open the Inbox and display only the new message for convenience. Clicking the close icon X in the yellow banner will reveal all the messages in the inbox..
Responding to Messages
To respond to a message open the message panel by clicking a message in a folder. The message panel provides various options for responding to the message depending on the permissions set in the sender SecureMail account.
Note
If the permission is not available then a banner notice will be presented to inform the user.
The message panel provides the below options:
Reply to a message with a CC address (the CC'd recipient will also need to use the SecureMail dashboard to view and reply to the message)
Forward the message (the recipient will need to use the SecureMail dashboard to view and reply to the message)
Add attachments to your response (maximum 10 megabyte in size)
Note
Attachments are limited to 10 megabytes in size
Delete the message.
Respond to a message.
When responding to a message, you can use the rich text editor to compose a response. If the permission is granted, you will also be able to attach files to your response.
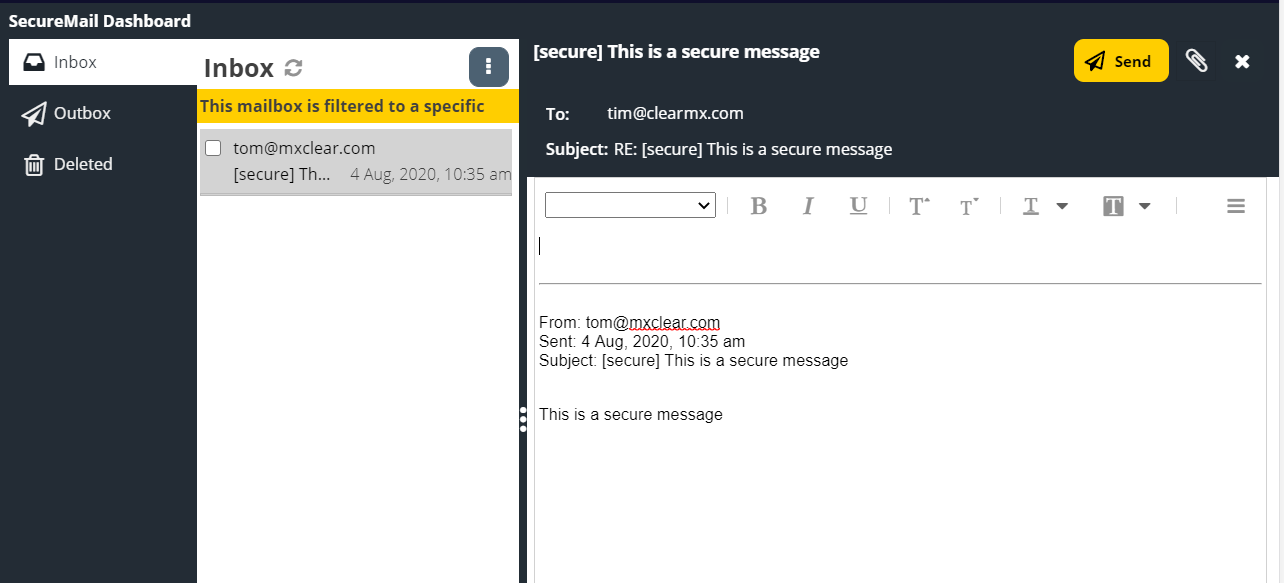
Click the Send button to send the response. A copy of the response will be stored in the Outbox folder.