Security Containers
For orchestrated container clusters/nodes
Prerequisites
Steps
To deploy a Security Container instance on a cluster, follow the steps below:
In the GravityZone Control Center, go to Network > Installation packages.
Select the package you want to use for the installation process.

The package must have the Container Protection module enabled.
Tip
For information on how to edit or create a new package, refer to Create installation packages.
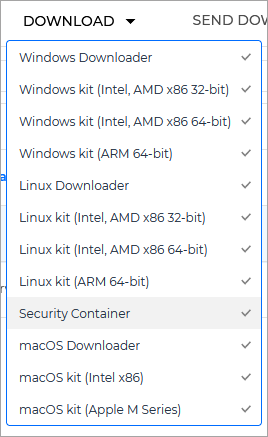
Click Download and select Security Container:
This opens the Download Security Container screen. The screen provides scripts for installing Security Containers on all supported Kubernetes environments.

Important
Currently, Openshift environments are compatible only with Azure Kubernetes Service (AKS) and VMware.
Select the
 Copy button next to the environment on which you want to install the Security Container.
Go to your Kubernetes environment and run the script.
Note
This will deploy an instance of Security Container on every host in your designated cluster.
Verify the deployment using either of these options:
In your Kubernetes environment, use the
kubectl get pods -n bitdefender-security-containerentry.In the GravityZone console, go to the Network page from the left side menu.
For Linux hosts
Prerequisites
Internet access on your container host is critical when deploying a Security Container.
You need to have a folder named
/mnt/dataon your machine.Ensure no instance of BEST is installed on the target container host. On the Network page of GravityZone Control Center, confirm that the host's management status is Unmanaged. For more information, refer to .
Steps
To install a Security Container on a Linux server with docker installed, run the following command :
docker run \
        --privileged \
        -d \
        -e "BSC_SERVER=10.17.14.154:7074" \
        -e "BSC_COMPANY=xxxxxxxxxxxxxxxxxxxxxxxx" \
        -e "BSC_CSRTOKEN=yyyyyyyyyyyyyyyyyyyyyyyy" \
        -v /mnt/data:/data \
        -v /sys:/mnt/host-sys \
        -v /proc:/mnt/host-proc \
        -v /etc/os-release:/mnt/host-os-release \
        -v /:/mnt/host \
        --pid host \
        --net host \
        -u :10000 \
        --name=BSC \
        --stop-timeout 60 \
        bdfbusiness/bitdefender-security-container:7.0
The variables used in the command are:
Variable | Mandatory | Description |
|---|---|---|
| yes | Get the address of the communication server appliance by downloading any BEST for Linux installation kit and opening the NoteThe format of the address is |
| no | The company ID required for GravityZone Cloud integrations. This is used on cloud environments only and can also be found in the |
| no | The desired log level which will be configured in |
| no | The group ID under which to run the product services. This environment variable is required if the |
| yes | The certificate signing request (CSR) token the security agent uses to establish the mutually authenticated link with GravityZone. Its value is in the |
Getting company-related information from a BEST for Linux installation kit
In GravityZone Control Center, go to Network > Installation packages.
Select your regular BEST for Linux package and click Send download links.
Expand the Installation links section and copy the link for Linux.
Go to the target machine and download the kit using this command:
curl <download link>
Extract the files from the archive:
tar -xzvf setup_downloader.tar
Open
installer.xmlusing this command:cat installer.xml
Get the communication server appliance address, the company ID, and the certificate signing request token. Check the following example.
Example 1. Extracting information frominstaller.xml<serverAddress strVar="EpagServer">cloudgz-ecs.gravityzone.bitdefender.com/hydra</serverAddress> <customerId strVar="EpagCustId">xxxxxxxxxxxxxxxxxxxxxxx</customerId> <epagConfig> <authToken strVar="EpagToken">yyyyyyyyyyyyyyyyyyyyyyyy</authToken> </epagConfig>
Command example
docker run \
        --privileged \
        -d \
        -e "BSC_SERVER=cloudgz-ecs.gravityzone.bitdefender.com" \
        -e "BSC_COMPANY=xxxxxxxxxxxxxxxxxxxxxxx" \
        -e "BSC_CSRTOKEN=yyyyyyyyyyyyyyyyyyyyyyyy" \
        -v /mnt/data:/data \
        -v /sys:/mnt/host-sys \
        -v /proc:/mnt/host-proc \
        -v /etc/os-release:/mnt/host-os-release \
        -v /:/mnt/host \
        --pid host \
        --net host \
        -u :10000 \
        --stop-timeout 60 \
        bdfbusiness/bitdefender-security-container:7.0
Getting the product logs
To get the product logs, follow these steps:
Display running containers on the current server:
docker ps
Get the ID of the container for which you want to view the logs.
Run a command to open a shell within the container.
docker exec -it <container id> bash
Now you can access the filesystem of the container.
Find the logs in
/opt/bitdefender-security-tools/var/log.