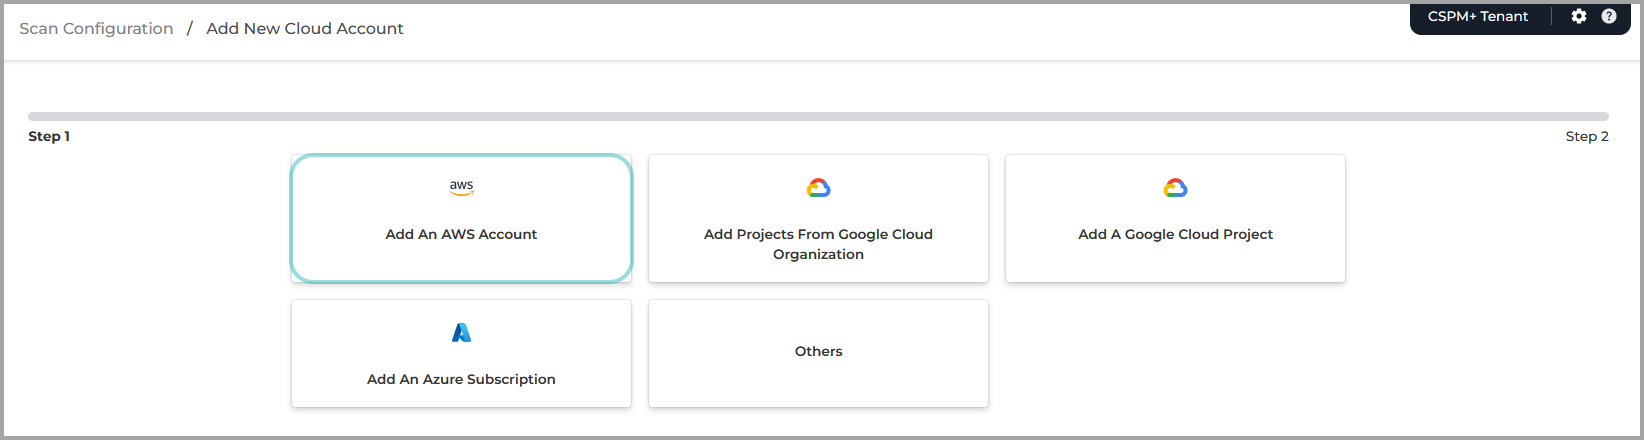
Onboarding an AWS account
There are two available methods to integrate an AWS account:
CloudFormation
Manual
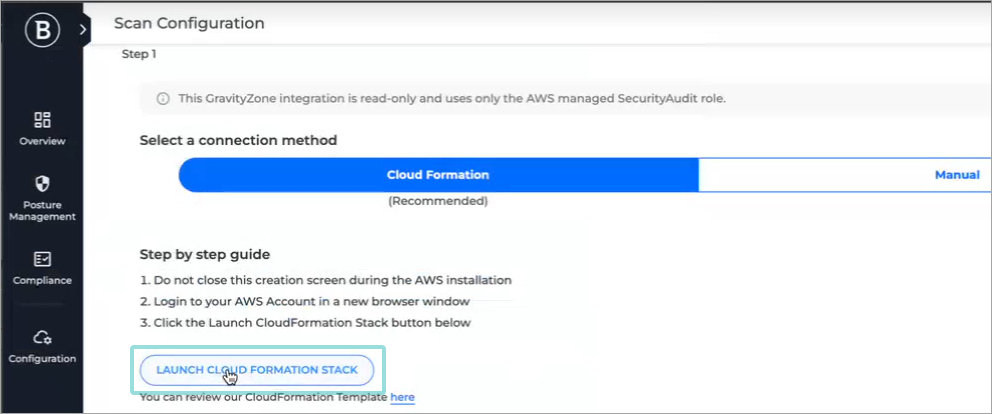
CloudFormation method (Recommended)
AWS CloudFormation is a service that helps you model and set up AWS resources so that you can spend less time managing resources and more time using the application.
Follow these steps to integrate the AWS account using the CloudFormation method:
Under Scan Configuration, select Add an AWS Account.
Under Select a connection method, select the CloudFormation method.
Important
Do not close this browser tab during the integration.
Open a new browser tab or window and log in to AWS Account with an administrator account.
Go back to the GravityZone Cloud Security Posture Management Scan Configuration browser page.
Click Launch CloudFormation Stack.
The Create stack page will be displayed in a new browser window. The information is automatically filled in for multiple sections of the page.
In the Create stack page, scroll down to the Capabilities section.
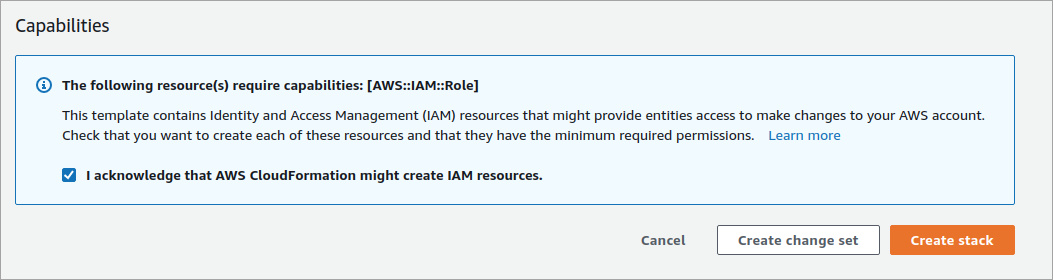
Check the I acknowledge that AWS CloudFormation might create IAM resources. checkbox and click Create Stack.
The Stack will now appear in your AWS account:
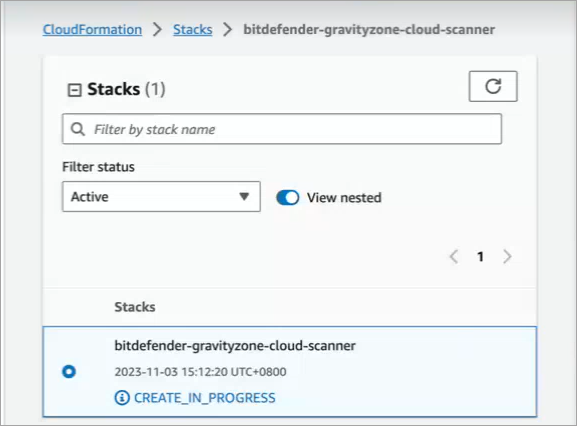
Wait until the CloudFormation Stack status shows CREATE_COMPLETE.
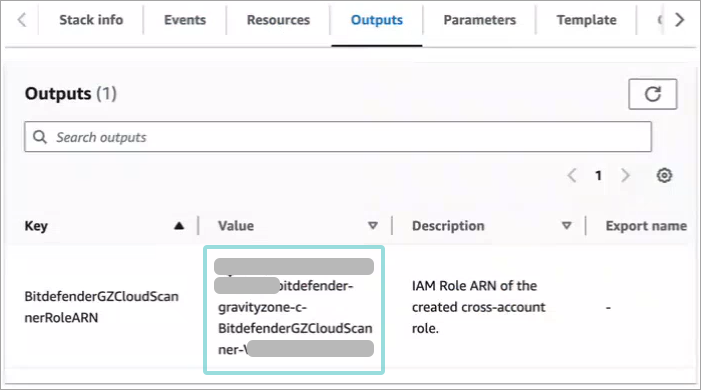
Go to the Outputs tab.
Copy the information from the Value column.
Go back to the Scan Configuration browser page.
Paste the key under Paste Role ARN here.
Type in a descriptive name for the account under Account name.
Click Add account.
Manual method (for advanced users)
You can adjust and limit to what degree you want GravityZone Cloud Security Posture Management to monitor your AWS cloud assets.
To use the manual integration method, follow these steps:
Under Select a connection method, select the Manual method.
Important
Do not close this browser tab during integration.
Open a new browser tab or window and log in to AWS Account in a new browser window with an administrator account.
Go to the IAM >Roles section and click Create role.
The Select trusted entity window is displayed.
Under Trusted entity type, select AWS Account.
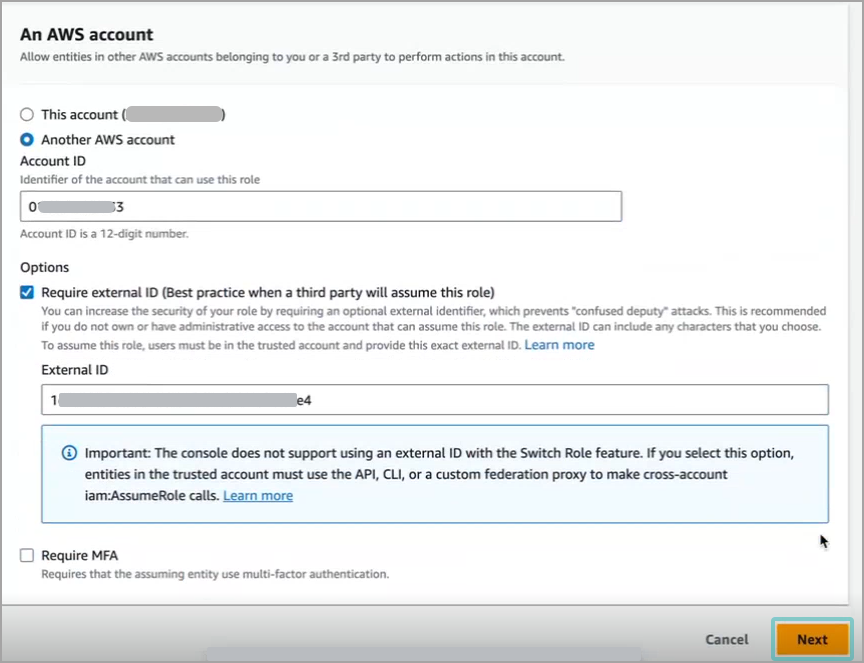
In the An AWS account section, select Another AWS account.
Go back to the Scan Configuration browser page and copy the Account ID.
Under Account ID, paste the information copied at step 6.
Check the Require external ID box.
Go back to the Scan Configuration browser page and copy the External ID.
In the External ID box, paste the information copied at step 9.
Note
Make sure the Require MFA checkbox is unchecked.
Click Next.
The Add permissions window is displayed.
Under Permission policies, select the box next to SecurityAudit.
Click Next.

The Create Role window will be displayed.
Fill in the information under the Role details section:
Under Role name type in a descriptive name such as
gravityzone-cloud-scanner.Type in a clear description for the role.
Scroll down to the bottom of the page and click Create role.
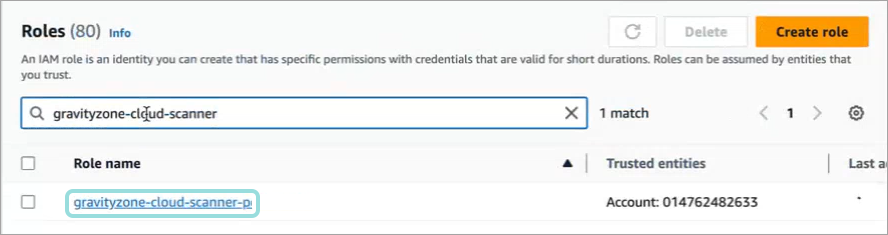
The Roles page is displayed.
Search for the newly created role by name and click it.
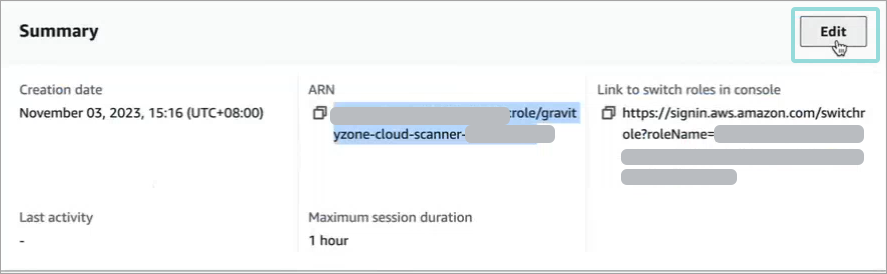
The Role page is displayed.
Click the Edit button under the Summary section.
The Edit description and session duration window is displayed.
Set the Maximum session duration to 4 hours and Save changes.
Click the Copy button under ARN in the the Summary section.
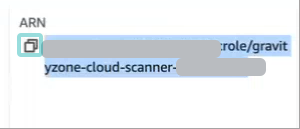
Go back to the Scan Configuration browser page.
Paste the ARN you copied under Paste Role ARN here.
Type in a descriptive name for the account under Account name.
Click Add account.