Onboarding a Google Cloud Platform (GCP) Project
Cloud accounts in the Google Cloud Platform (GCP) are referred to as projects. They can be grouped together in entities called organizations.
You can integrate a single cloud account (or a project), or a group of accounts (an organization).
Setting up GravityZone Cloud Security Posture Management in a GCP project can only be done manually.
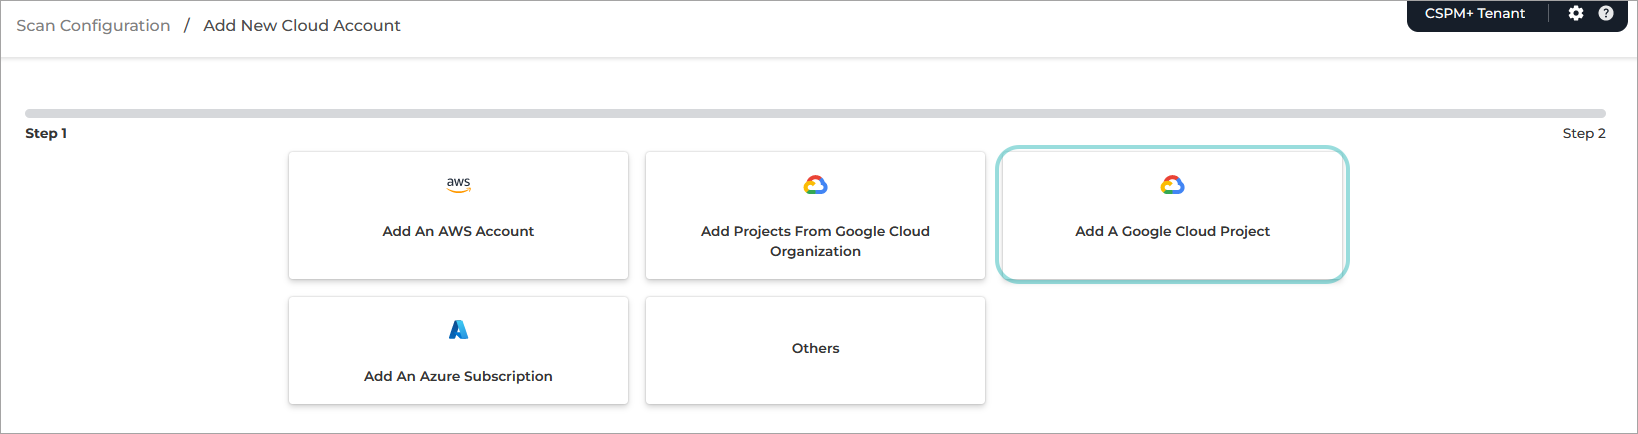
To start integrating a GCP project, follow these steps:
Under Scan Configuration, select Add a Google Cloud Project.
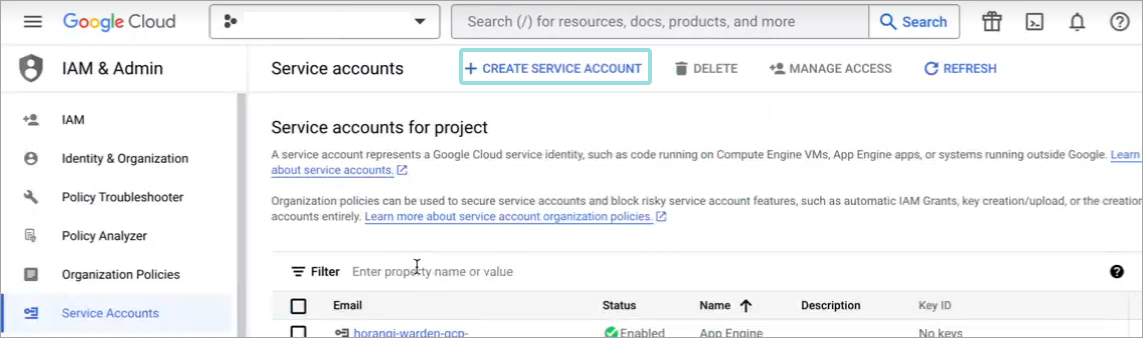
Open a new browser tab or window and log in to your Google Cloud Console.
Navigate to IAM Admin > Service Accounts and select the project to onboard.
Click on + Create Service Account.
The Create service account window is displayed.
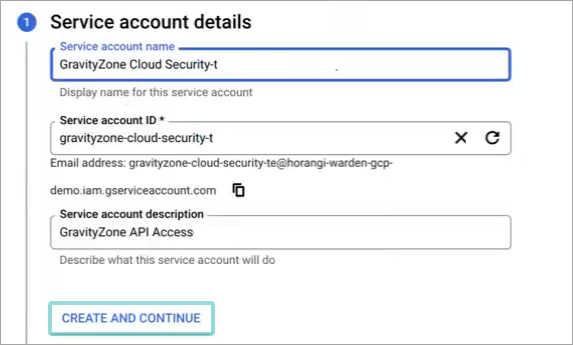
Fill in the information for the new account:
Under Service account name, type in a descriptive name, such as
GravityZone Cloud Security(Optional) Edit the Service account ID. This is automatically generated based on the account name you previously entered.
Type in a clear description for the service account under Service account description, such as
GravityZone API Access.
Click Create and continue.
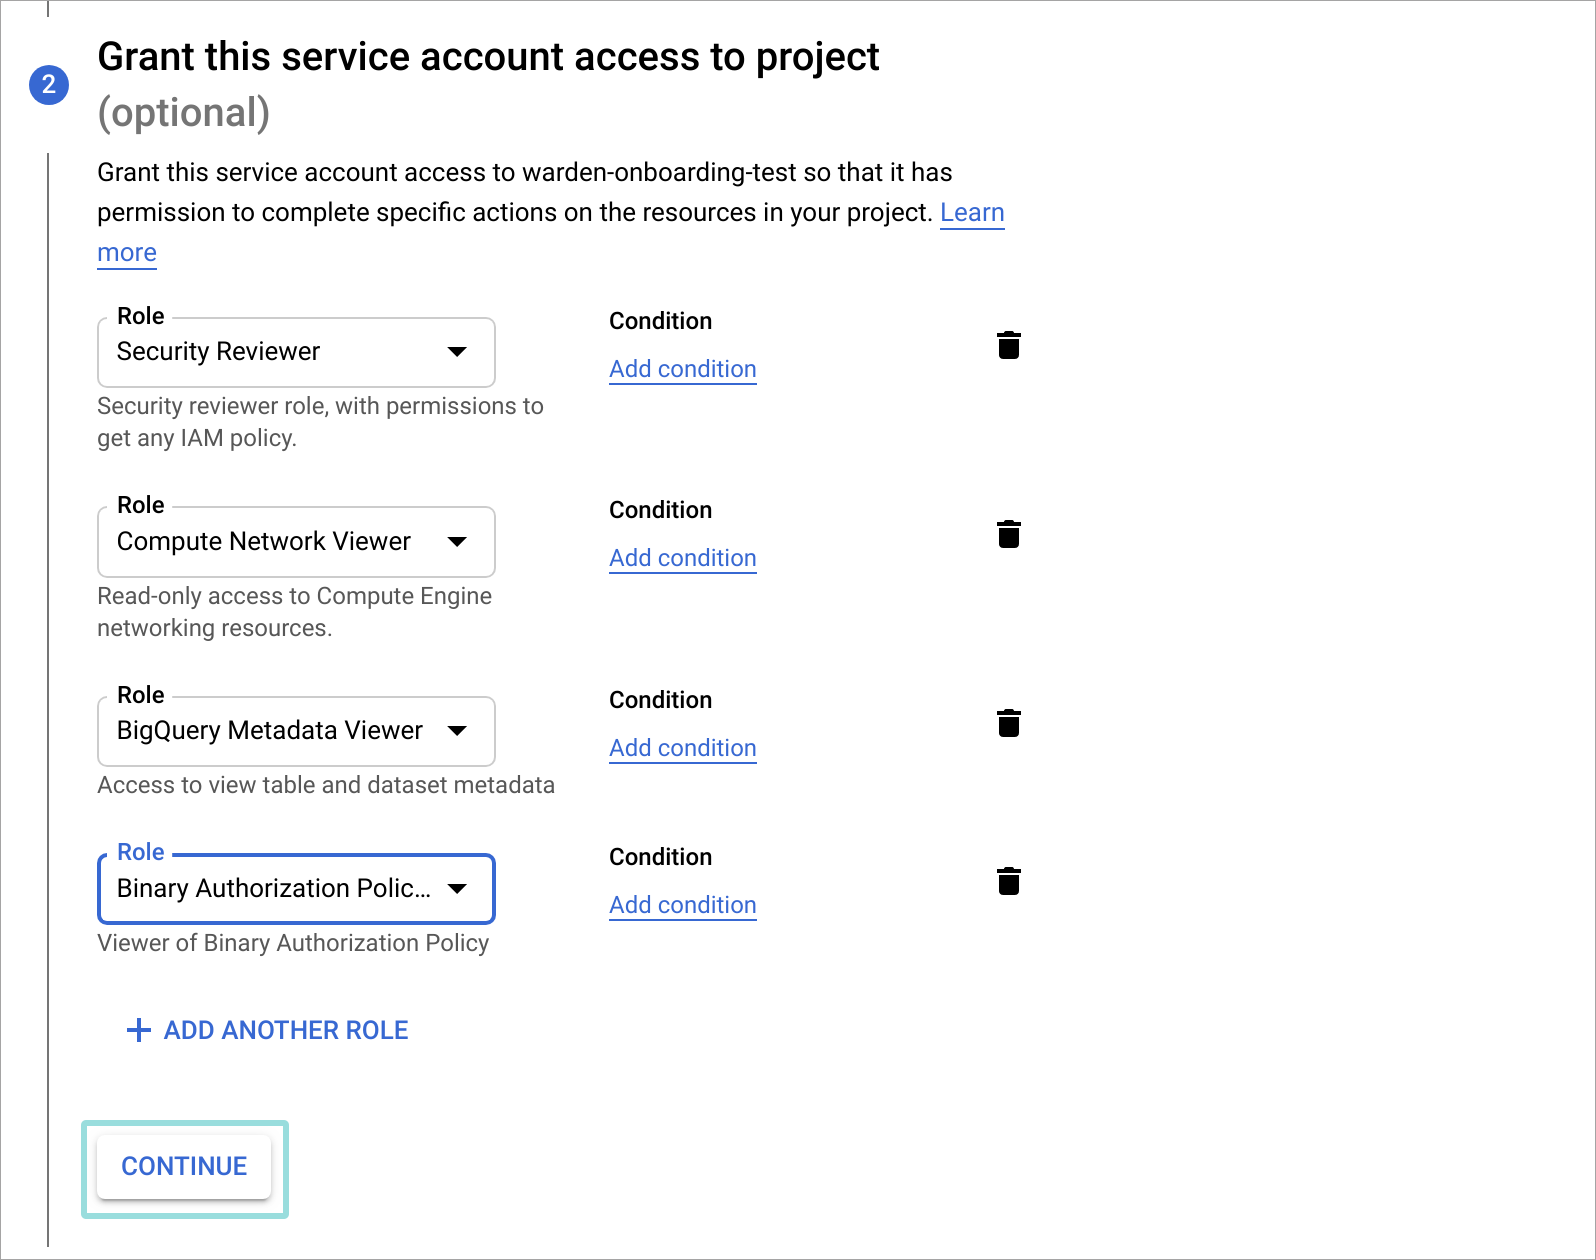
The Grant this service account access to project section is expanded.
Follow these steps to add a role:
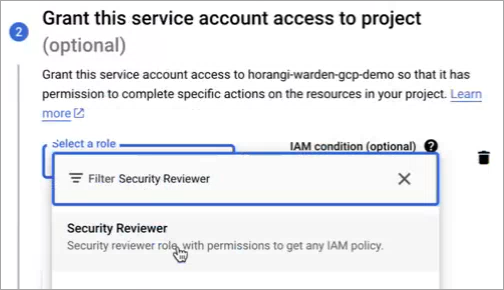
Click Select a role.
Click the Type to filter text box at the top of the window.
Type in the name of the role.
Select the role from the results below.
Click + Add another role.
Repeat these steps for all of the roles:
Security Reviewer
Compute Network Viewer
BigQuery Metadata Viewer
Binary Authorization Policy Viewer
Activity Analysis Viewer
Click Continue.
The Grant users access to this service account section is expanded.
Click Done.
The Service accounts page is displayed.
Click on the Filter on the top of the table and type in the name of the previously created account.
Click the button under the Actions column and select Manage keys.
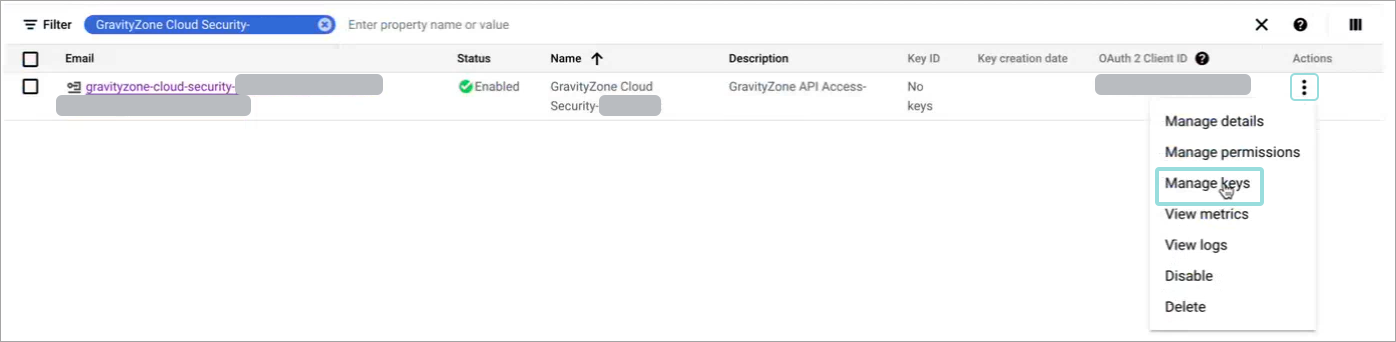
The Keys tab is displayed.
Click on Add Key > Create New Key.
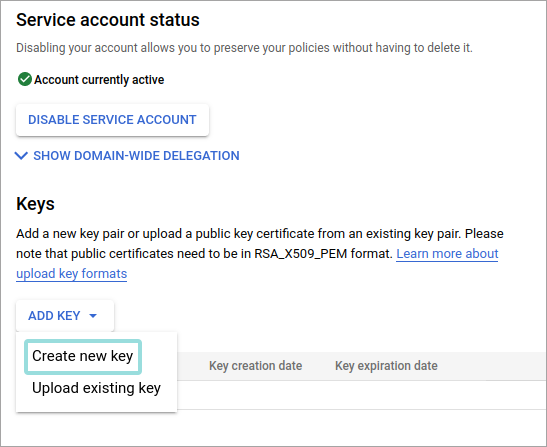
Under Key type, make sure JSON is selected and click Create.
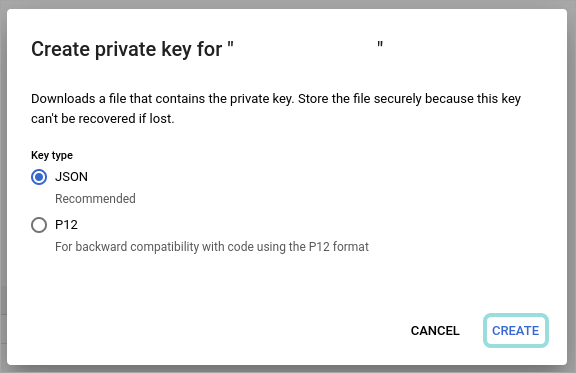
A
.JSONfile is downloaded to your computer.Enable the APIs necessary for GravityZone Cloud Security Posture Management to work. Select a method to enable the APIs:
From the GCP console, click the Activate Cloud Shell button on the upper right side of the screen.
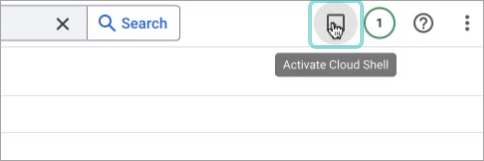
A Cloud Shell terminal is displayed on the lower part of the page.
Type in the following request:
gcloud services enable compute.googleapis.com sqladmin.googleapis.com storage.googleapis.com dns.googleapis.com cloudkms.googleapis.com iam.googleapis.com container.googleapis.com monitoring.googleapis.com logging.googleapis.com cloudresourcemanager.googleapis.com bigquery.googleapis.com binaryauthorization.googleapis.com policyanalyzer.googleapis.com
Go back to the Scan Configuration browser page.
Copy and paste the contents of the JSON file into the API Credentials field.
Click on Add account.
Asset inventory onboarding
Enabling GravityZone Cloud Security Posture Management to scan Google Workspace Identities provides you a more accurate representation of your cloud environment, by providing access to identity related metadata.
Tip
Once enabled, the benefits will apply to the information available in the Identities page, along with the Identities with access tab in the Resource Details panel from the Resources page.
To enable the workspace, you need admin permissions on the workspace account.
Enable GravityZone Cloud Security Posture Management to scan Google Workspace Identities for a new Google Cloud Platform (GCP) account
To enable GravityZone Cloud Security Posture Management to scan Google Workspace Identities for a new GCP account, follow the steps listed here and after that process is completed, continue with the below:
Open a new browser tab or window and log in to admin.google.com.
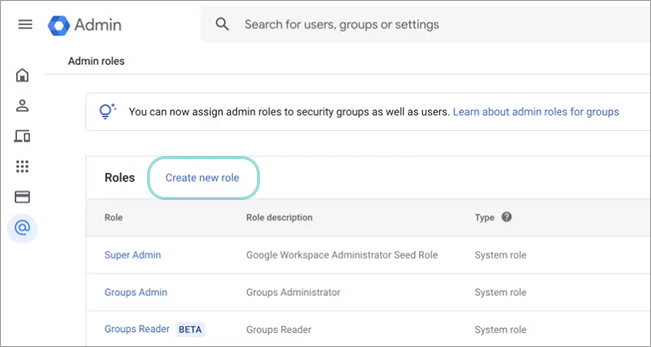
Navigate to Account > Admin Roles.
Click Create New Role.
Under Name, type in a descriptive name, such as
GravityZone Cloud Security.Click Continue.
Scroll down to Admin API privileges, check the following checkboxes:
Users > Read
Groups > Read
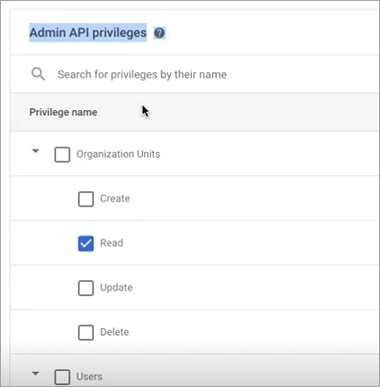
Click Continue.
You will see 2 privileges selected.
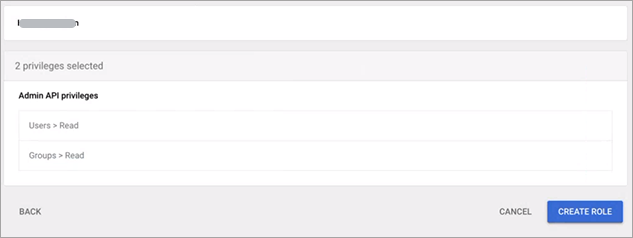
Click Create role.
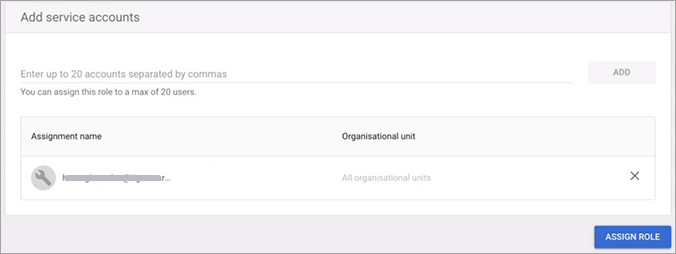
Click Assign service accounts.
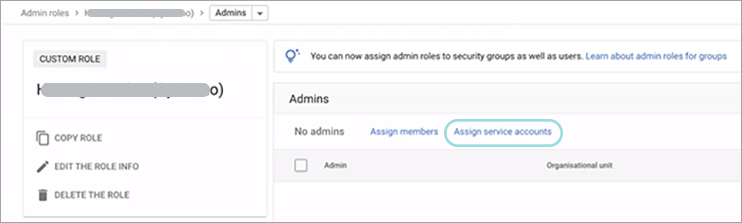
Enter the email of the previously created account.
Click Add.

Click Assign Role.
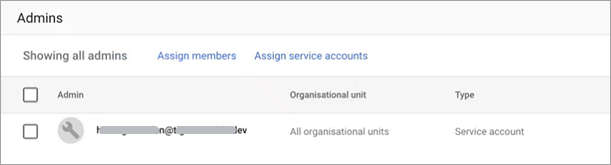
The role is added with the permissions selected previously.
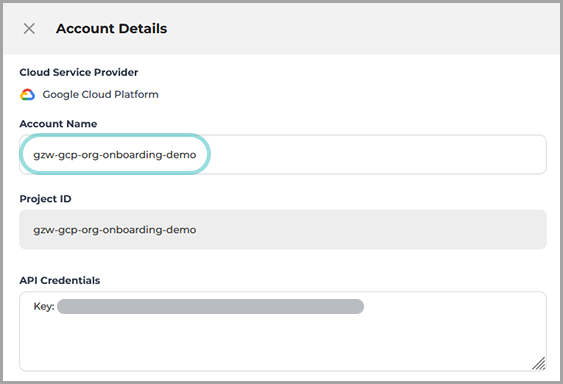
Navigate to Scan Configuration page, select the account and click the Edit icon to view the Account details > API Credentials.
Note
Once the Asset Inventory is enabled, it also applies to all other projects and organizations inside the same Google workplace.
If you have an additional workspace, you need to enable this option again for one of its Projects or Organizations.
Enable GravityZone Cloud Security Posture Management to scan Google Workspace Identities for an existing Google Cloud Platform (GCP) account
To enable GravityZone Cloud Security Posture Management to scan Google Workspace Identities for an existing GCP account, you need to follow the exact same steps as for a new account. The only difference is that you need to obtain the email of the previously created account.
To find the email of the previously created account, refer to the steps below:
Navigate to Scan Configuration page, select the account and click the Edit icon.
From the Account Details panel, copy the Account Name details.
Open a new browser tab or window and log in to your Google Cloud Console.
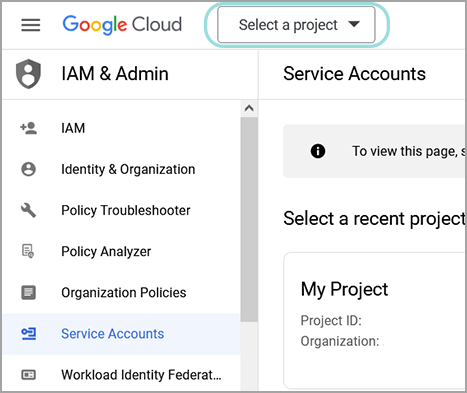
Navigate to IAM & Admin and click Search a project.
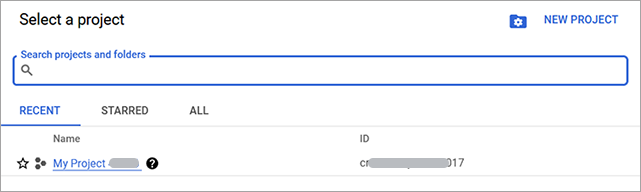
In the Search projects and folders field, type in or paste the info copied at step 2.
Once the project is selected, navigate to Service Accounts page and search for the API Credentials. You can copy the API Credentials from the Account Details panel (step 2).
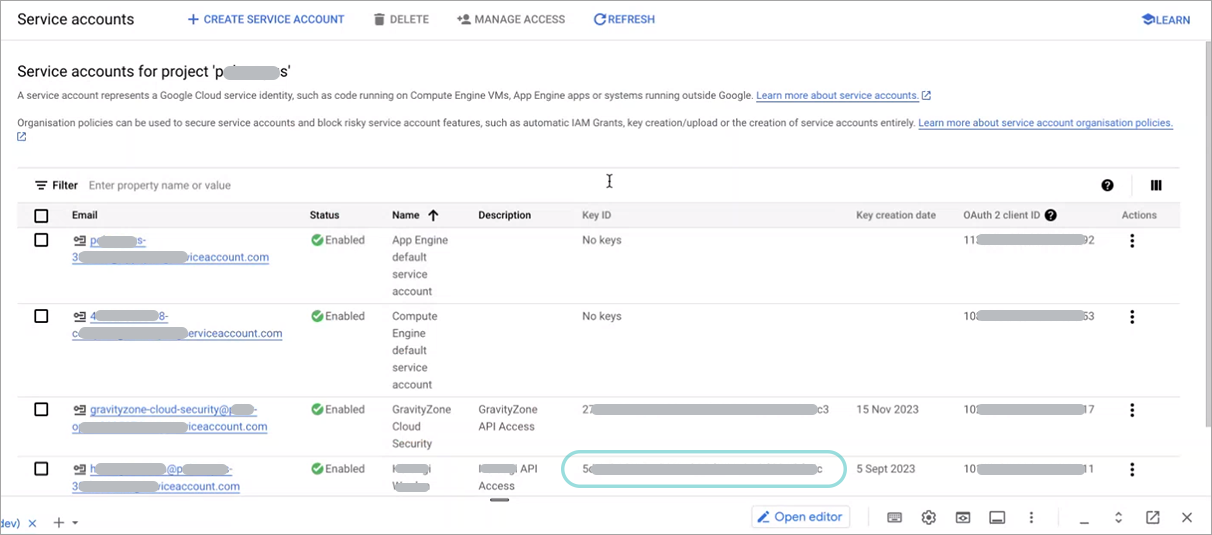
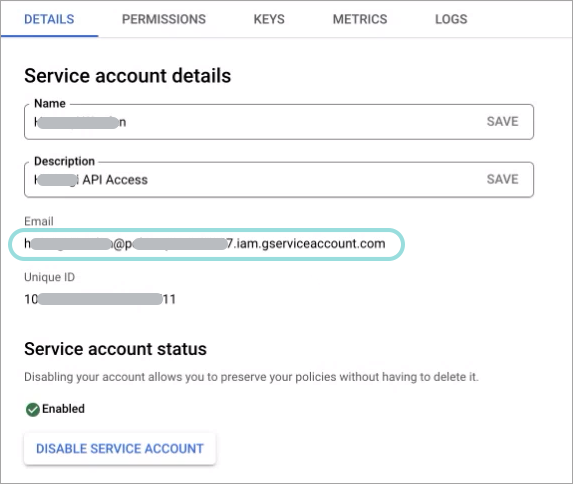
Click the service account corresponding to the API Credentials.
From the Service account details page, you can then copy the email address which you can use to complete the enabling process.