Message Rule examples
All message rules are applied to each message in the order that they appear in the Message Rule page. This will go on until all message rules have been processed or a Final Action has been applied that interrupts the process.
One of the many applications of Message Rules is to set and filter out spam messages. This is done by adding values to each message depending on multiple factors and, based on the score decide if the email should be sent through, digested or quarantined.
For more information on the spam filtering, refer to Digest generation and Quarantines.
Avoiding false positives
IF you find the default spam setting to aggressive, there are a few ways you can modify them to better suit your company's needs.
Use Safe Lists
If you have a specific sender, domain, or IP address you can trust you can add it to your Company's Spam Safe List.
Warning
Having a large Spam Safe List can be a security risk. A faked email address that matches a domain on your Safe List will bypass any spam checks.
Increase the threshold for confirmed spam
Go to Products > Email Security > Message Rules.
Double click the Confirmed Spam rule to start editing it.
Under the Selected Conditions column, edit the Spam Score condition by clicking on Configure.
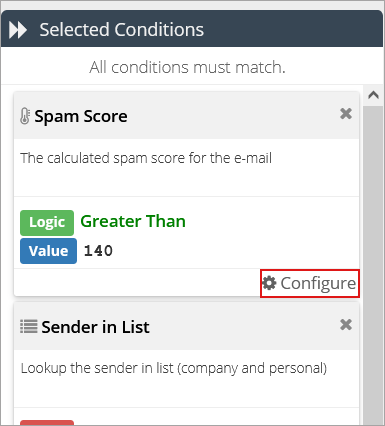
Change to Condition Value to a higher limit, such as 170.
Click Save.
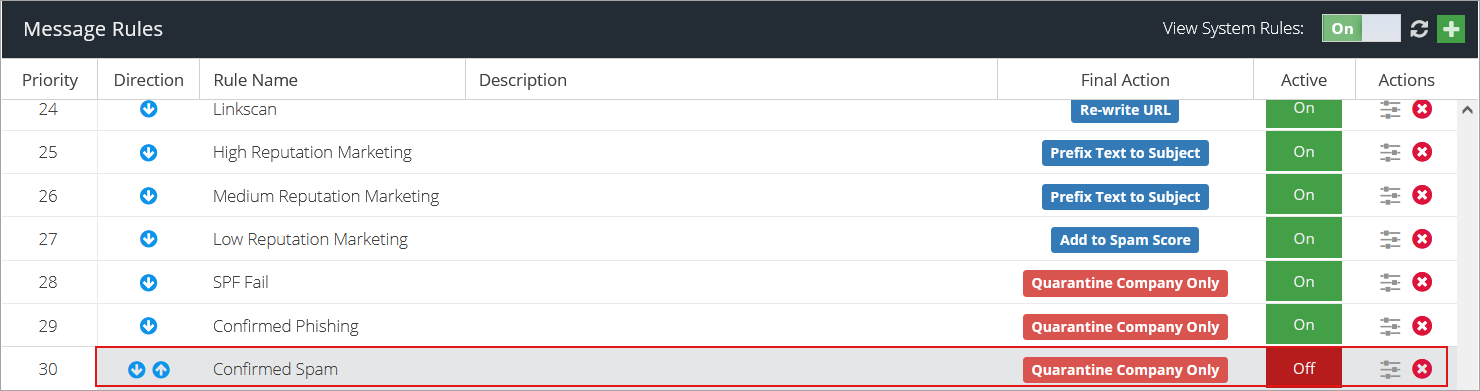
Disable the Confirmed Spam rule
Warning
This will significantly reduce Email Security's ability to detect and handle spam, and may result in an increase in the number of spam emails that reach your company's employees.
Go to Products > Email Security > Message Rules.
Click on the button under the Status column for the Confirmed Spam rule to turn it off.
This Rule detects phishing attacks that target high-profile employees such as the CEO or CFO and quarantines them.
You can activate executive tracking for specific email addresses from the Mailboxes screen. for Active Directory groups you can go to the Group Management screen.
Note
These types of attacks are directed at employees with high level positions who tend to have access to sensitive data by manipulating the victim into authorizing high-value wire transfers to the attacker.
Warning
In order for Executive Tracking to work properly, you need to be running the AD Connect tool, rather than AD export or LDAP export.
To set up this Rule:
Go to Products > Email Security > Message rules.
Click the Add Rule
 button.
Add a rule name and click the Add
 button
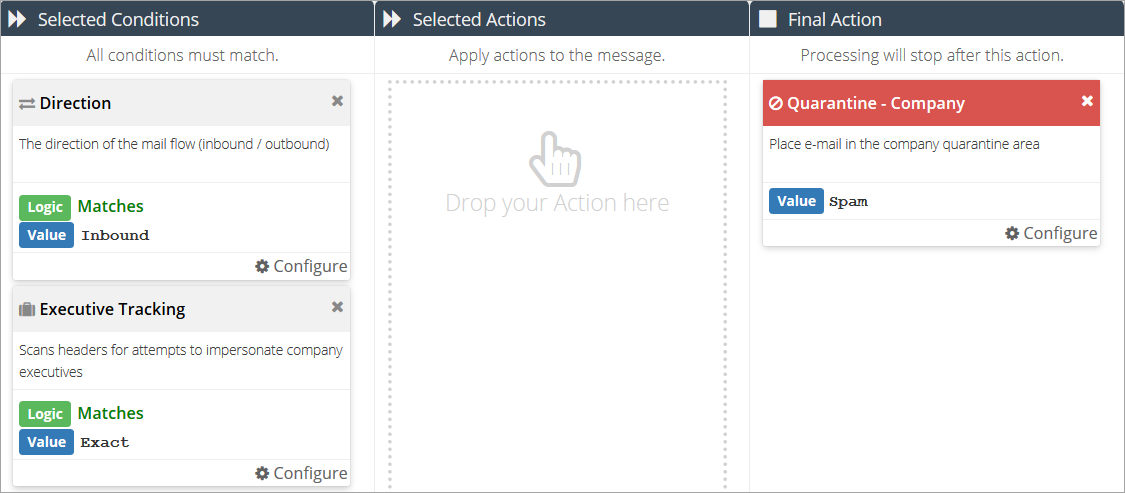
Add a Direction condition and set it to Inbound.
Add an Executive Tracking condition, and set it to Matches: Exact.
Add a Quarantine - Company final action, and set it to Spam.
Click the Save
 button.
Decide the priority of the rule in relation the other existing rules and drag it to the appropriate position in the Message Rule window.
Note
Unless the Active button is set to On, the rule will not be processed.
Excluding Email Addresses from Tracking
Go to the Custom Rule Data page and select the Executive Tracking Safelist entry.
Add or update the Regular Expression so that it remains in this format, specifying multiple email addresses with a pipe | character:
^(addr1@domain\.com|addr2@domain\.com|addr3@domain\.com)$
Excluding Email Domains from Tracking
Go to the Custom Rule Data page and select the Executive Tracking Safelist entry.
If you need to add entire domains in to the Regular Expression you can use the following format (e.g. for domain1.com):
^(addr1@domain\.com|addr2@domain\.com|addr3@domain\.com)$|domain1\.com$|domain2\.com$
Some Gmail accounts (either legitimate accounts that have been hacked or created specifically for spam) will send emails with little or no content. (e.g. an empty email with a subject line of "hi"). These emails have very little content to analyze and it is difficult to automatically determine if the email is legitimate or not.
GravityZone Security for Email can detect these types of attempts and block them. Here is how to set up a rule for that purpose:
Go to Products > Email Security > Custom Rule Data
Click the Add New button and select Rule Data. Give it a descriptive name (e.g. Gmail domains) and click Update.
Click the Save
button.In the value field, enter:
gmail.com
googlemail.com
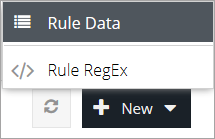
Click the Add New button and select Rule RegEx. Give it a descriptive name (e.g. Gmail spam) and click Update.

Click the Save
button.In the value field, enter
^$|^Hi$Note
You may need to update this RegEx with additional values if you're regularly receiving spam emails with different subject lines. You can test out your new RegEx value at https://regex101.com/.
Go to Products > Email Security > Message rules.
Click the Add Rule
button.Add a rule name and click the Add
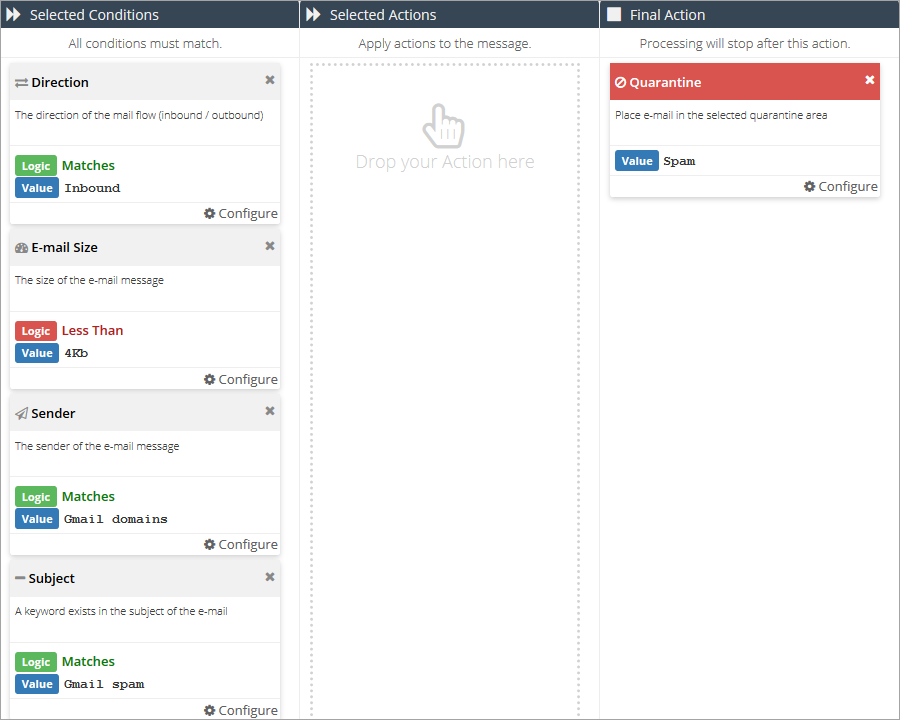
buttonAdd a Direction condition and set it to Inbound.
Add an Email Size condition and set it to Less Than: 4kb.
Add a Sender condition and set it to Matches: Gmail domains (or the name you gave the Rule Data in step 2).
Add a Subject condition. Set the logic to Matches: Gmail spam or (the name you gave the Rule RegEx in step 5).
Add a Quarantine final action and set it to Spam.
Click the Save
button.Decide the priority of the rule in relation the other existing rules and drag it to the appropriate position in the Message Rule window.
Note
Unless the Active button is set toOn, the rule will not be processed.
If all detected emails are spam, you can change this Rule to use a Quarantine - Company final action instead.
This rule can be adapted and used to prevent any user or groups of users to receive specific types of documents:
Go to Products > Email Security > Custom Rule Data
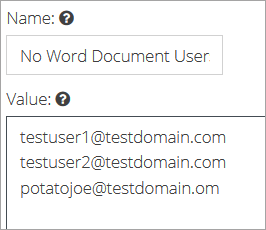
Click the Add New button and select Rule Data. Give it a descriptive name (e.g. no Word document users) and click Update.
Add the email addresses for the users you want to include in the list, each on a separate line:
Click the
button.Click the Add New button and select Rule RegEx. Give it a descriptive name (e.g. Word documents) and click Update.
Type in the following as the RegEx Data field:
^.+\.(?:(?:[dD][oO][cC][xX]?))$
Click the Save
button.Go to Products > Email Security > Product Configuration > Custom Quarantine.
Click the Add
buttonType in a descriptive domain name, check the Permit User Access box, and click on the Add
button.
Go to Products > Email Security > Message rules.
Click the Add Rule
button.Add a descriptive rule name and click the Add
buttonAdd a Direction condition and set it to Inbound.
Add a Recipient condition and set it to Matches: No Word Document Users (or the name you gave the Rule Data in step 2).
Add an Attachment Name condition with the value set to Matches: Word documents (or the name you gave the Rule Regex in step 5).
Add a Notify Sender action and type in the message you want to be sent to the sender.
Add a Quarantine final action and set it to Matches: World file emails. (or the name you have the domain in step 10).
Click the Save
button.Decide the priority of the rule in relation the other existing rules and drag it to the appropriate position in the Message Rule window.
Note
Unless the Active button is set to On, the rule will not be processed.
To set up a rule that detects possible credit card numbers, follow the below steps:
Go to Products > Email Security > Custom Rule Data.
Click the Add New button and select Rule RegEx. Give it a descriptive name (e.g. Credit Card numbers) and click Update.
Type in the following as the RegEx Data field:
\b4\d{3}([\ \-]?)\d{4}\1\d{4}\1\d{4}\b(?!([^<]+)?>)Note
The example given above will detect Visa cards. The following RegEx patterns can be used to detect other credit card types. You'll need to create a new Custom Rule Data for each one.
Mastercard
\b5[1-5]\d{2}([\ \-]?)\d{4}\1\d{4}\1\d{4}\b(?!([^<]+)?>)Discover or Diners
\b6(?:011|22(?:1(?=[\ \-]?(?:2[6-9]|[3-9]))|[2-8]|9(?=[\ \-]?(?:[01]|2[0-5])))|4[4-9]\d|5\d\d)([\ \-]?)\d{4}\1\d{4}\1\d{4}\b(?!([^<]+)?>)JCB (China)
\b35(?:2[89]|[3-8]\d)([\ \-]?)\d{4}\1\d{4}\1\d{4}\b(?!([^<]+)?>)American Express
\b(?<!\-|\.)3[47]\d\d([\ \-]?)(?<!\d\ \d{4}\ )(?!(\d)\2{5}|123456|234567|345678)\d{6}(?!\ \d{5}\ \d)\1(?!(\d)\3{4}|12345|56789)\d{5}(?!\-)(?!\.\d)\b(?!([^<]+)?>)Click the Save
button.Go to Products > Email Security > Message rules.
Click the Add Rule
button.Add a descriptive rule name and click the Add
button.Add a Body or Subject Condition, and set it to Matches: Credit Card numbers (or the name you gave the Rule RegEx at step 2).
Add your desired Action or Final Action.
Click the Save
button.Decide the priority of the rule in relation the other existing rules and drag it to the appropriate position in the Message Rule window.
Note
Unless the Active button is set to On, the rule will not be processed.
To disable spam filtering for specific mailboxes follow the steps below:
Note
The Rule is designed to work for Inbound emails only. You can redo steps 5-12 for Outbound steps as well, replacing Matches: Inbound with Matches: Outbound in step 9.
Go to Products > Email Security > Custom Rule Data.
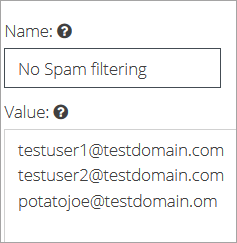
Click the Add New button and select Rule Data. Give it a descriptive name (e.g. No Spam filtering) and click Update.
Type in the email addresses you want to exclude from spam filtering, each on a separate line.
Click the Save
button.Go to Products > Email Security > Message rules.
Click the Add Rule
button.Add a descriptive rule name and click the Add
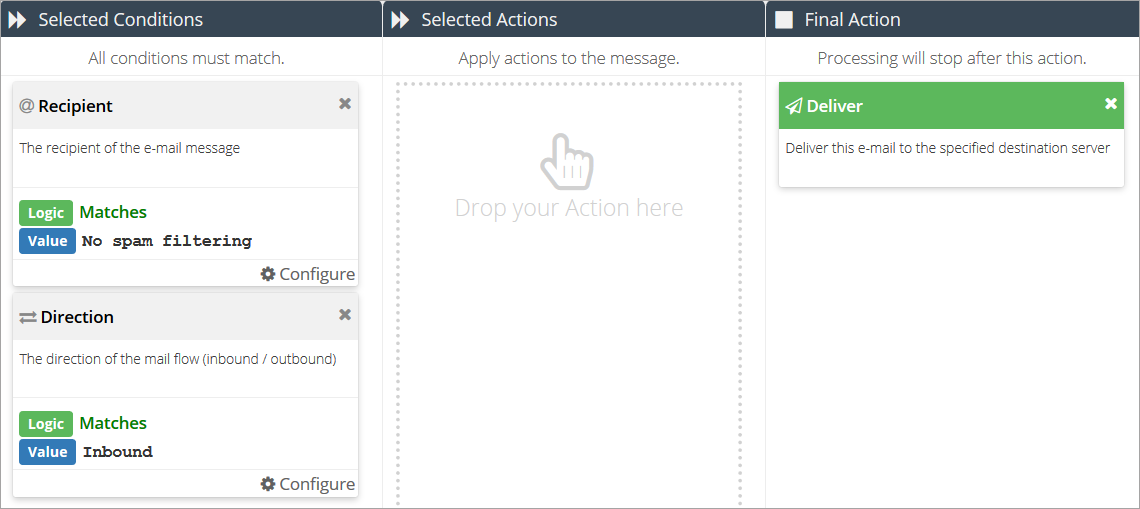
button.Add a Recipient condition and set it to Matches: No Spam Filtering (or whatever you named the rule data in step 2).
Add a Direction condition, with the logic set to Matches: Inbound.
Add a Deliver final action.
Click the Save
button.Decide the priority of the rule in relation the other existing rules and drag it to the appropriate position in the Message Rule window.
Note
Unless the Active button is set to On, the rule will not be processed.
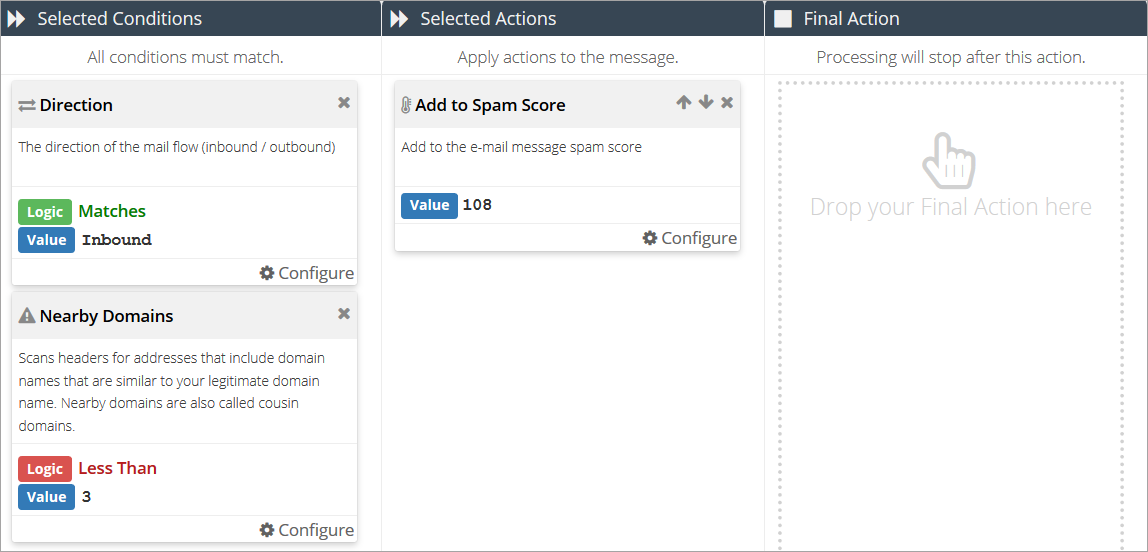
This rule is meant to catch spam emailed that are designed to appear on casual inspection as if they originate from your domain.
It will trigger when domains in the header are very similar to (but not identical to) your configured domains. For example (e.g. bytdefender.com and bitdefender.com).
To set it up follow the below steps:
Go to Products > Email Security > Message rules.
Click the Add Rule
button.Add a descriptive rule name and click the Add
button.Add a Direction condition and set it to Matches: Inbound.
Add a Nearby Domains condition and set it to Less Than: 3.
Note
The rule can be configured between 1 and 10, however we recommend 3 is a good starting point. You can then monitor the results and adjust as necessary.
Add an Add to Spam Score action and type in 108. This will make sure the message will be identified as spam.
Click the Save
button.Decide the priority of the rule in relation the other existing rules and drag it to the appropriate position in the Message Rule window.
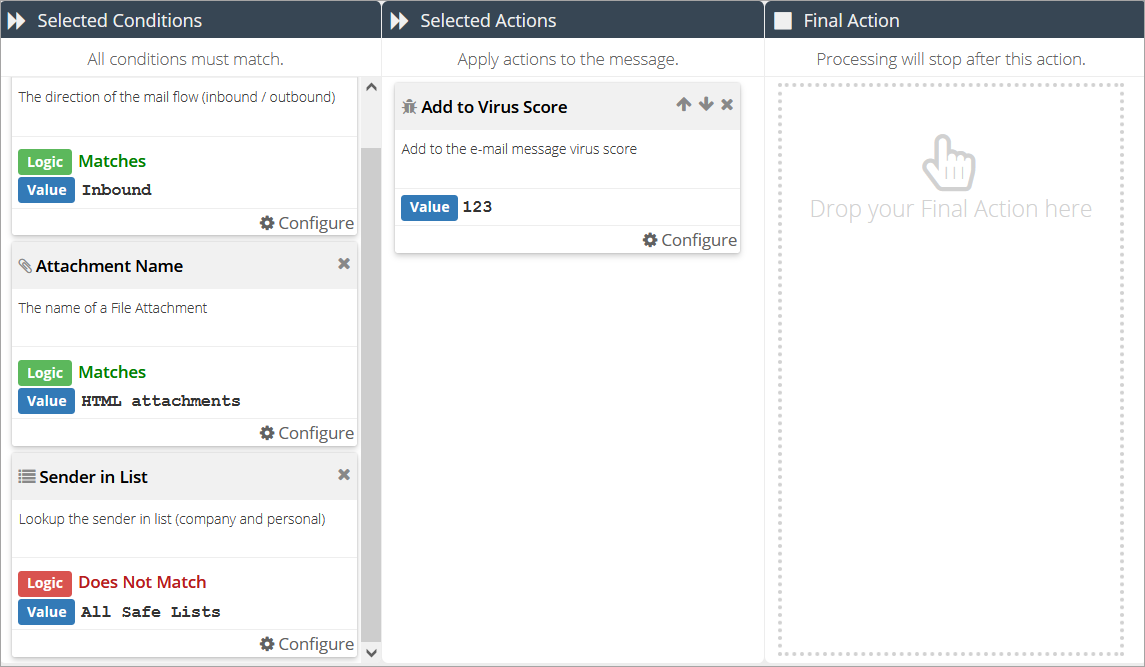
This rule is meant to protect against attacks that involve sending an email with very little content and an HTML attachment containing malware or other malicious software.
Note
This rule will appear for all customers provisioned after September 2021 but it will be disabled by default.
To manually create the rule, follow these steps:
Go to Products > Email Security > Message rules.
Click the Add Rule
button.Add a descriptive rule name and click the Add
button.Add a Direction condition and set it to Matches: Inbound.
Add a Attachment Name condition and set it to Matches:HTML attachments.
Add a Sender in List condition and set it to Does Not Match:All Safe Lists.
Add an Add to Virus Score action and type in 123. This will make sure the message will be identified as a potential threat.
Click the Save
button.Move or drag the rule above the Confirmed Spam and Possible Spam rules so that it triggers before them.
Note
You can further modify the rule to match your company's needs by adding additional conditions.
To create a rule to quarantine marketing messages to one or more users, follow the steps below:
Note
For more information on GravityZone Security for Email policies regarding marketing emails, refer to How marketing emails are flagged
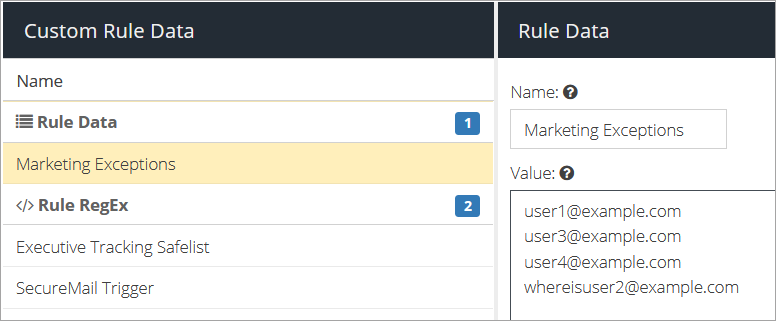
Create a list of users you want the rule to apply to:
Create a new Rule Data list.
Note
For more information on creating a new data list refer to Custom Rule Data
Add the email addresses of the users you want the rule to apply to:
Click on
.
Go to Products > Email Security > Message rules.
Click the Add Rule
button.Add a descriptive rule name and click the Add
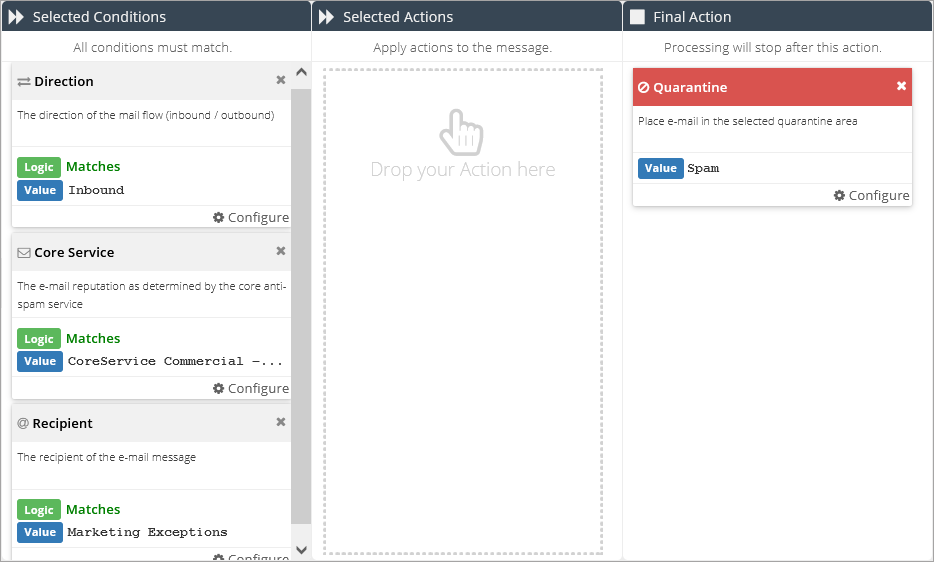
button.Add a Direction condition and set it to Matches: Inbound.
Add a Core Service condition and set it to Matches: CoreService Commercial Medium Reputation.
Note
You can replace CoreService Commercial Medium Reputation with CoreService Commercial High Reputation however, if you wish to quarantine both types of emails. you need two separate rules.
Add a Recipient condition and set it to Matches:Marketing Exceptions (or whatever name you gave the rule data list in step 1.
Add a Quarantine final action and set it to Matches: Spam.
Click on
Move the newly created rule above the already existing Medium Reputation Marketing rule.

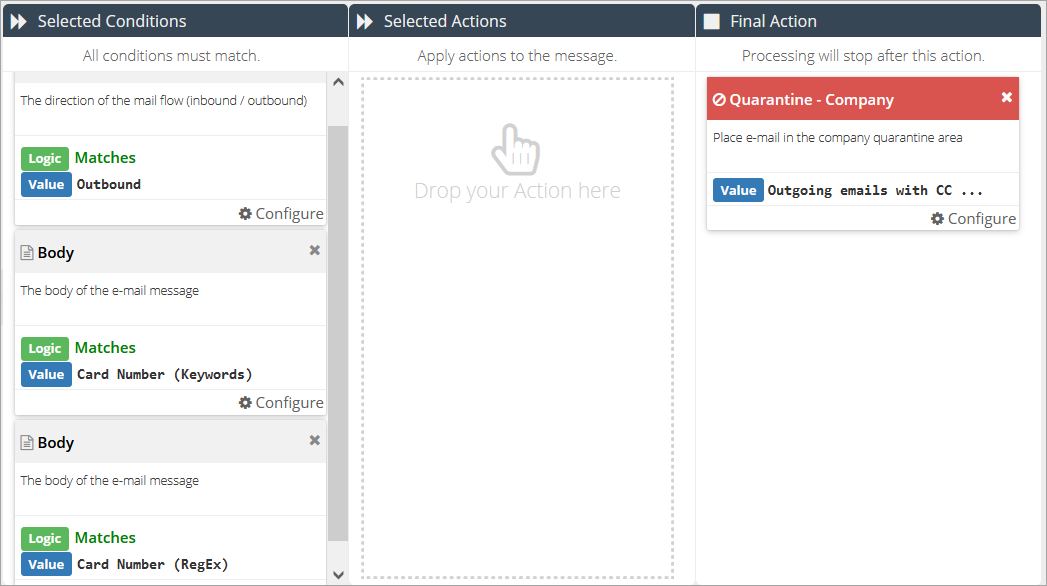
To create a rule for detecting Credit Card Numbers on outbound emails and quarantine them in a custom area for review by the administrator:
Go to Products > Email Security > Product Configuration > Custom Quarantine.
Click the Add
button.Add a descriptive name and click the Add
button.Go to Products > Email Security > Message rules.
Click the Add Rule
button.Add a descriptive rule name and click the Add
button.Add a Direction condition and set it to Matches: Outbound.
Add a Body condition and set it to Matches: Card Number (Keywords).
Add a Body condition and set it to Matches: Card Number (RegEx).
Add a Quarantine final action and set it to Matches: Outgoing emails with CC info (or the name you have the quarantine are in step 3).
Click on
Note
For more information on available Data Loss Prevention dictionaries refer to this kb article.
To add a message to all emails received from outside your company, create a rule with the following settings:
Rule component | Component type | Match type | Condition value |
|---|---|---|---|
Condition | Matches |
| |
Action | (for simple text) OR (for HTML) | Value | Configure the message you require. TipYou can edit the message HTML code directly by clicking the Edit Source button in the upper right side of the Configure: Prefix HTML window. Examples Simple text: WARNING! This message originated outside of Bitdefender. Do not click on links or open attachments unless you recognize the sender and KNOW the content is safe. In HTML source code: <p><span style="color: #ff0000;"><strong>WARNING!</strong></span><strong> This message originated outside of Bitdefender. Do not click on links or open attachments unless you recognize the sender and KNOW the content is safe.</strong></p> |
Decide the priority of the rule in relation the other existing rules and drag it to the appropriate position in the Message Rules window.
Note
Unless the Active button is set to On, the rule will not be processed.
You can use TLS to encrypt the tunnel between sending and receiving SMTP servers. This increases the security of your emails, and makes interception less likely.
There are two methods of setting up the TLS encryption using message rules:
Enforced TLS - This option will cause the server to only send an email if TLS is supported by the remote site.
Opportunistic TLS - This option will cause Email Security to attempt a TLS connection if TLS is advertised by the remote site. If this fails, Email Security will fall back to a non-TLS connection (and plain-text SMTP).
Configure Enforced TLS
To set up enforced TLS encryption follow these steps:
Create a Custom Data Rule that contains the domains on which you want to enforce TLS:
Go to Products > Email Security > Custom Rule Data.
Click the Add New button and select Rule Data. Give it a descriptive name (e.g. Domain for TLS enforcement) and click Update.
Add the domains you want to enforce TLS for, each on a separate line.

Click the
button.
Go to the Message Rules page.
Create a rule with the following settings:
Rule component
Component type
Match type
Condition value
Condition
Matches
OutboundCondition
Matches
The name of the Custom Data Rule you created at step 1.
Action
Value
x-TLSLevel:RequireDrag and drop this Rule above the Deliver Outbound rule.
Configure Opportunistic TLS
To set up opportunistic TLS encryption follow these steps:
Go to the Message Rules page.
Create a rule with the following settings:
Rule component
Component type
Match type
Condition value
Condition
Matches
OutboundAction
Value
x-TLSLevel:TryDrag and drop this Rule above the Deliver Outbound rule.
Configure the use of both Enforced and Opportunistic TLS together
To set up both enforced and opportunistic TLS encryption follow these steps:
Create a Custom Data Rule that contains the domains on which you want to enforce TLS:
Go to Products > Email Security > Custom Rule Data.
Click the Add New button and select Rule Data. Give it a descriptive name (e.g. Domain for TLS enforcement) and click Update.
Add the domains you want to enforce TLS for, each on a separate line.
Click the
button.
Go to the Message Rules page.
Create a rule with the following settings:
Rule component
Component type
Match type
Condition value
Condition
Matches
OutboundCondition
Matches
The name of the Custom Data Rule you created at step 1.
Action
Value
x-TLSLevel:RequireCreate another rule with the following settings:
Rule component
Component type
Match type
Condition value
Condition
Matches
OutboundCondition
Does not match
The name of the Custom Data Rule you created at step 1.
Action
Value
x-TLSLevel:TryDrag and drop the Rules above the Deliver Outbound rule, with the rule created on step 3 above the other one.
The delivery engine will look for the first x-TLSLevel header entry, and will use that to process the email. Adding this additional Rule Condition avoids emails ending up with two x-TLSLevel headers (which could give unexpected results).