Add your mailboxes to Email Security
Important
If you have shared mailboxes, you need to Exclude synchronized Azure Active Directory mailboxes from billing.
Add your user mailboxes to GravityZone Security for Email . Each mailbox is associated to a user.
The following methods are available for importing your Mailboxes:
You can perform an Azure Active Directory synchronization.
You can perform an On Premise Active Directory synchronization.
You can manually add each mailbox from Products > Email Security > Mailboxes.
Note
This procedure is meant for use with a .csv file downloaded from Microsoft Exchange Online, however you can also use a manually created .CSV file.
In Microsoft Exchange Online go to Exchange Admin Center.
Go to the Mailboxes page.
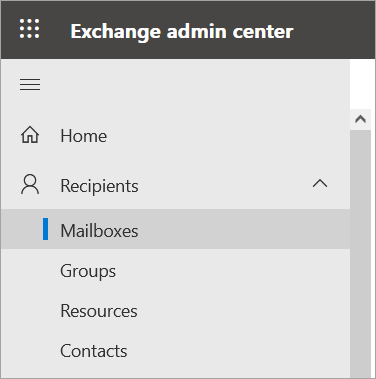
Select Export mailboxes option from the top of the mailbox list.

Go back to Products > Mailboxes in Email Security.
Click the
 Import button in the upper right side of the screen.
 The following window will appear:
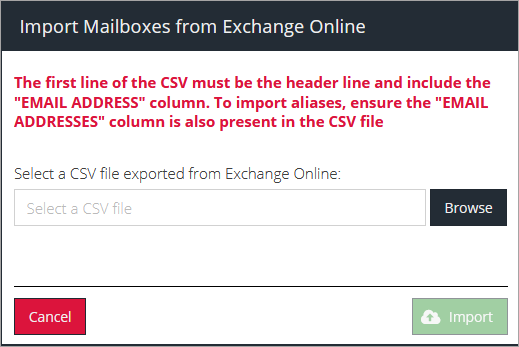
Click Browse and select the CSV file exported from Microsoft Exchange Online.
Click the Import button.
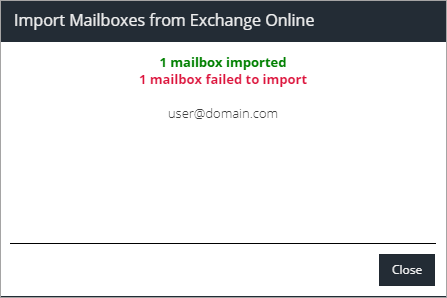
A window will appear with the results of the import:
Important
Mailboxes will fail to import if:
If the email addresses not part of a domain that Email Security is tracking.
Note
You can add new domains from the Product Configuration page.
The email addresses are associated with already existing users, as a primary email address or an alias.
The information in the .CSV file has an invalid format or does not meet its requirements.
Manually creating a .CSV file
You create your own .CSV file rather than download it from Exchange Online. You can build your file in Notepad++ or Excel.
Important
If you using Excel to create the file, do not enclose the headers nor their values in quotes.
For a file to be imported in the EMS console, it must meet these requirements:
A column with the
"EMAIL ADDRESS"header, containing an email address in a valid format.A column with the
"MAILBOX TYPE"header. The value here must be eitherUserorGroup(use theGroupvalue for shared mailboxes).
You can add more headers depending on each organization needs, including aliases. See the below examples:
"EMAIL ADDRESS","MAILBOX TYPE"
"email@domain.com","User"
"FIRST NAME","LAST NAME","MAILBOX TYPE","EMAIL ADDRESS"
"David","Smith","User","david.smith@domainemail.co.uk"
"FIRST NAME","LAST NAME","MAILBOX TYPE","EMAIL ADDRESS","EMAIL ADDRESSES"
"David","Smith","User","david.smith@domainemail.co.uk","smtp:davidsmith@domainemail.co.uk"
This method involves performing an Azure Active Directory synchronization and adding a domain to GravityZone Security for Email.
Tip
For additional information on synchronizing Active Directory, including requirements and general information, refer to User Directory
Note
Before adding a domain make sure it is configured in the Product Configuration > Domains section.
Click the Add domain
 button on the upper right of the screen and select Azure Active Directory.
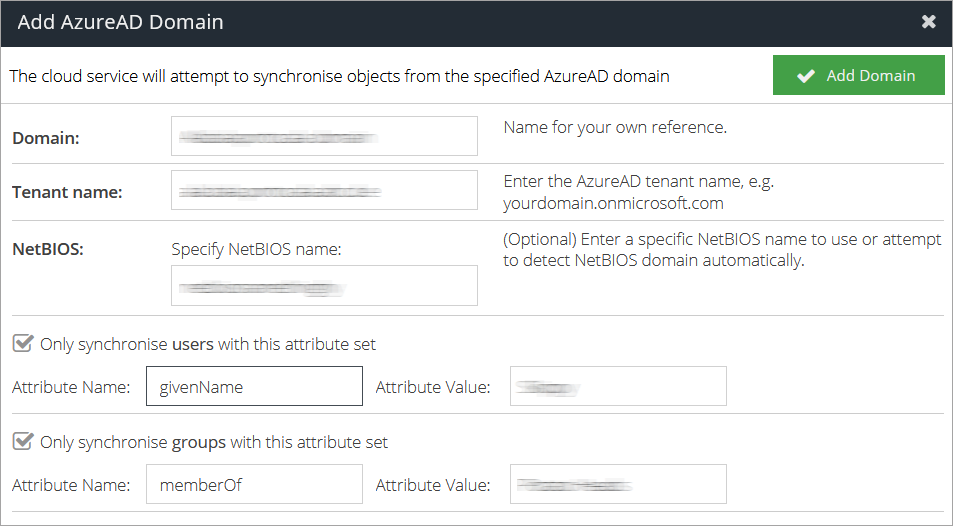
Enter a name under Domain. This will be used to identify this domain in the list shown in the Active Directory screen.
Add your AzureAD tenant name under Tenant Name.
Note
For information on how to find your tenant name refer to this Microsoft kb article.
Important
You only need one Azure synchronization item. You can use it for all your domains.
(optional) Enter a specific NetBIOS name under NetBIOS. This will only import date from a specific NetBIOS domain instead of searching automatically.
(optional) Check the Only synchronize users with this attribute set box and enter the attribute name and value. This will only import the users that have this specific attribute to Email Security.
(optional) Check the Only synchronize groups with this attribute set box and enter the attribute name and value. This will only import the groups that have this specific attribute to Email Security.
Click the Add domain button in the upper right side of the screen.
Tip
For additional information on synchronizing Active Directory, including requirements and general information, refer to User Directory
This method involves performing an On Premise Active Directory synchronization and adding a domain to GravityZone Security for Email.
Note
Before adding a domain make sure it is configured in the Product Configuration > Domains section.
Click the Add domain
 button on the upper right of the screen and select On Premise Active Directory.
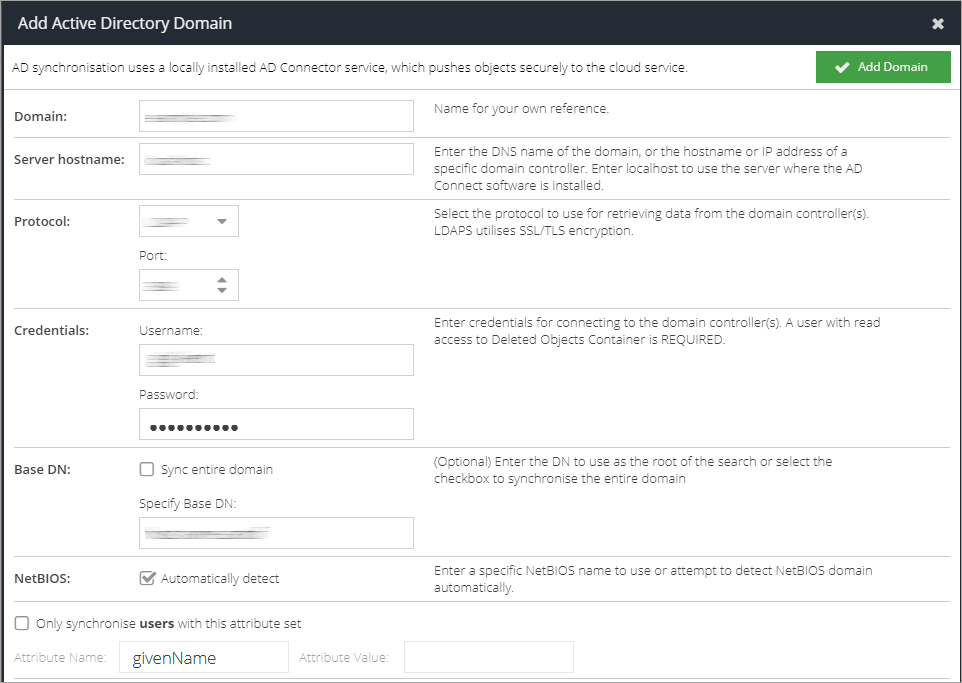
Fill in the domain information:
Enter a name under Domain. This will be used to identify this domain in the list shown in the Active Directory screen.
Under Server Hostname enter the DNS name of the domain, or the hostname or IP address of a specific domain controller.
Note
To use the server where the AD Connect software is installed enter localhost.
Enter a valid Username and Password to connect to your domain.
(optional) If you don't want to sync all the domain, uncheck the Sync Entire Domain box and enter a Enter a base DN to use as the root of the search.
(optional) If you don't want to automatically detect NetBIOS names, uncheck the Automatically Detect box and enter a specific NetBIOS name to use.
(optional) Check the Only synchronise users with this attribute set box and enter the attribute name and value. This will only import the users that have this specific attribute to Email Security.
Note
You may specify multiple values using a semi-colon separator. For example:
attribute name = officeLocation value = London;Paris
Click the Add domain button.
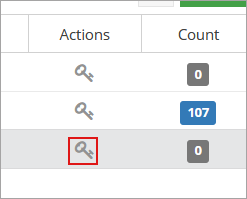
Click the Generate key button.
Click the Add API key button.

Copy the provided Client ID and Client Secret.
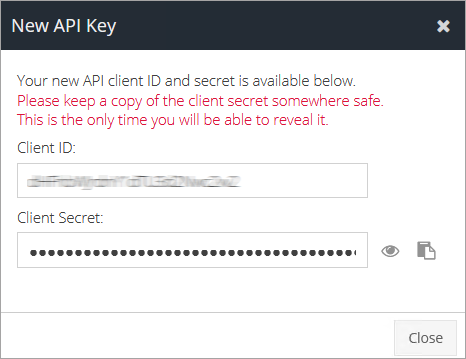
Use the credentials to configure AD Connect.
Note
To configure AD Connect you need to use the AD Connect Setup Tool, which is added automatically as part of the AD Connect installation.
To manually add the Mailboxes follow the steps below:
Go to Products > Email Security > Mailboxes.
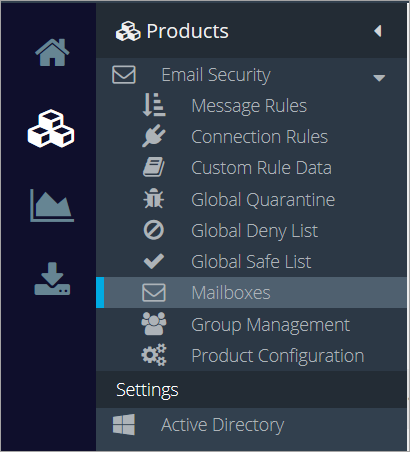
Click the Add button and add an email address.

Note
A real name can be added to improve the chances of emails being correctly captured by Message Rules. This is currently only supported through Active Directory synchronization. Click here for a step by step guide on importing mailboxes from Microsoft Exchange Online
Press Enter.
Note
If the email address is not on a domain that has previously been added it will result in an error message:

Configure the following settings:
Exec Tracking - enable this checkbox to mark the email as belonging to a company executive for the purpose of the Executive Tracking Condition.
Note
You can activate executive tracking for specific Active Directory groups from Group Management.
Manage Variants - add or remove multiple variants of a user's name to improve tracking (name variations, maiden names, middle names, etc.).
To add a name variant click the Add button, type in the name variant and press enter.
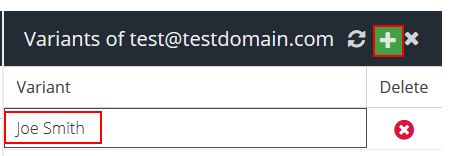
To remove the variant, click the
 Delete button.
Groups - add or remove the user from specific Active Directory Groups
To add the user to a AD group, click the Add Group Membership button, select the check box for the groups to which you want to assign the user, and then click Select.
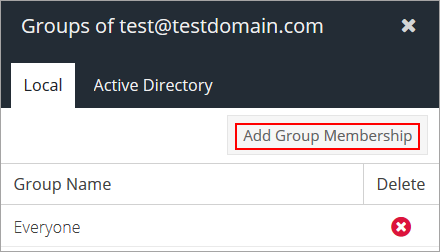
To remove a user from a group, click the
 Delete button next to the group.
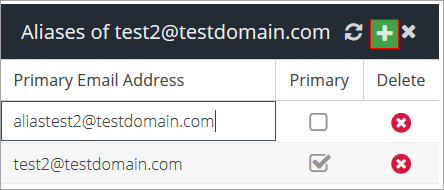
Aliases - add multiple email addresses to a single user.
Note
Aliases allow email destined for variants of the primary mailbox address to be accepted through the DHA rule.
To add a new email address to a user, click the Add button, enter the email address, and press Enter.
Note
You will have to mark one of the email addresses as primary by selecting the checking box in the Primary column.
Repeat the process for any additional aliases belonging to this primary email address.
To delete an alias, click the
 Delete button next to the email address.