Threat logging
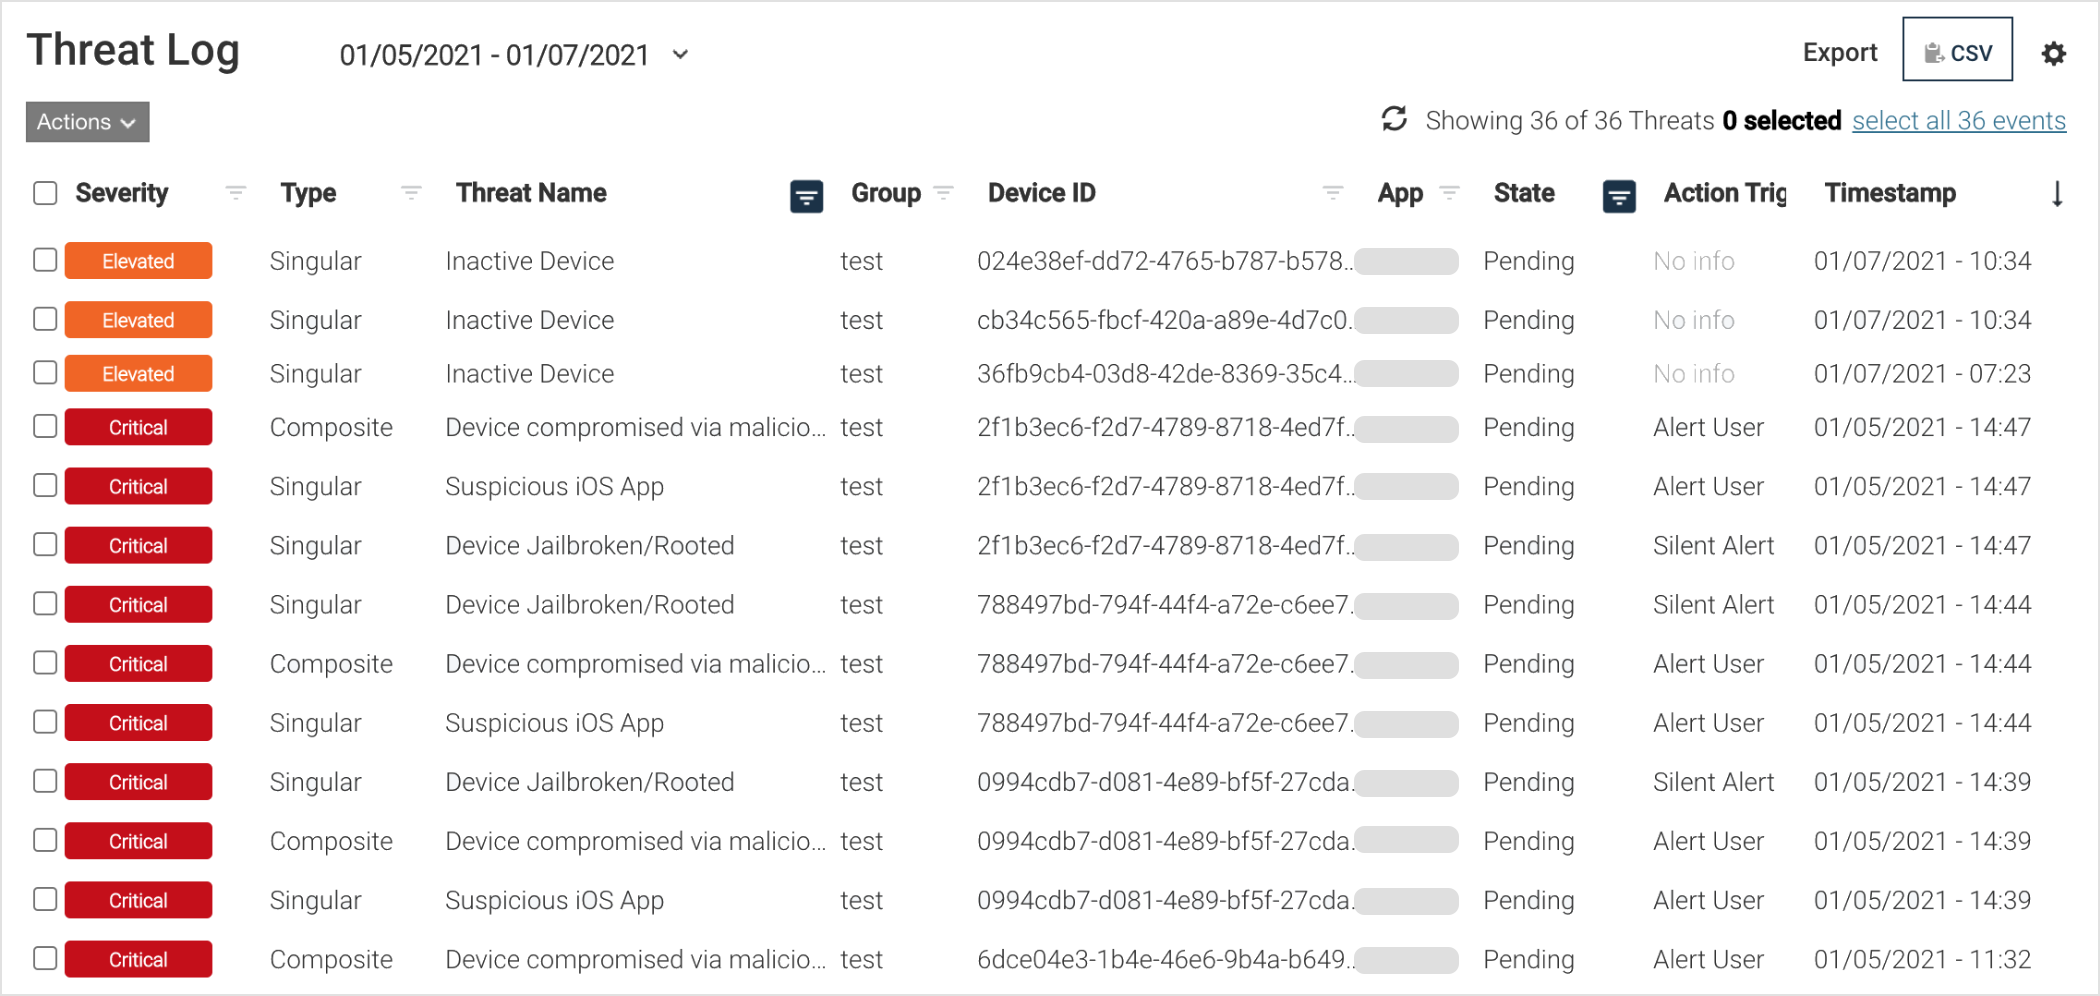
The Threat Log page provides visibility into all threats seen from protected devices running the mobile app or the threat engine embedded in applications.
Administrators can modify which data is displayed for easy forensics review.
Click a threat row in the list to view the complete forensics information
Click the date drop-down list to request a different date range of threats
Forensics information that you can see:
Time of the threat event on the device.
Relevant IP and MAC addresses.
Routing table.
Running processes.
Nearby networks.
Network connections.
ARP tables as relevant to the event.
Threat Log columns and filters
Threat logs contain detailed forensics information that correlates to the type of threat being reported. To display only threats of interest, the administrator can modify the filters at the top of the Threat Log page in the column titles.

Threat detail data
Threat detail data is additional information about a threat event, which reflects the state of the device during the threat event. This data changes depending on the threat event and type, and is governed by the privacy policy and permissions on the device. This list is in alphabetical order.
Threat workflow
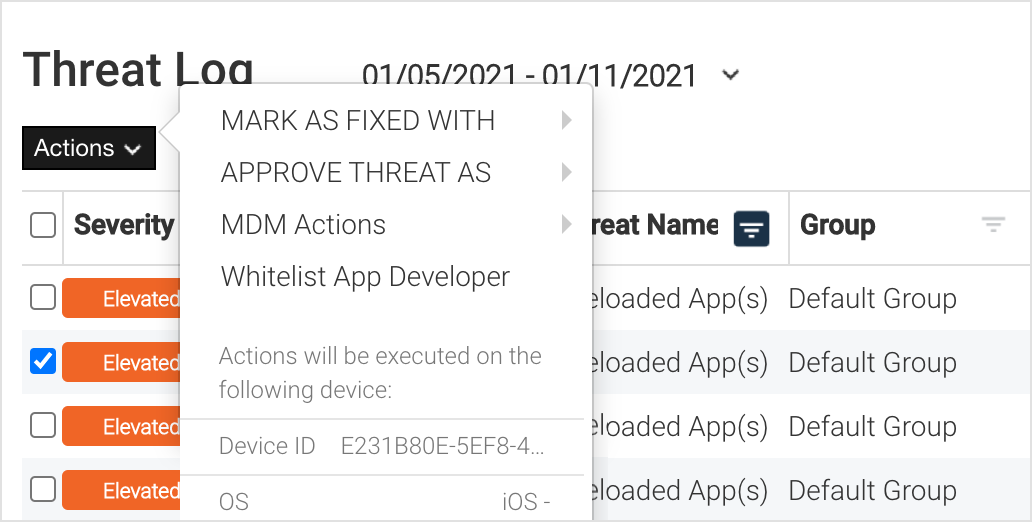
An admin can execute a workflow for a specific threat or event by clicking on the checkbox and choosing from the Actions drop-down list.
Options for resolving threats
There are several methods in the Mobile Security console to show that the threat is addressed and is identified as either Fixed or Approved in some manner. This section identifies the various manners to address a potential threat.
Selecting the date/range of dates
The Threat Log page defaults to the current date and if the threat was detected at an earlier date, the date at the top of the threat log needs to be changed. To change the date, click the drop-down menu arrow next to the date and select one of these options:
Today
Last week
This month
Last 30 days
To go back further in time, click to go back to previous months, select a start and end date, and click Apply to apply the new date range.
Approving a threat
The option to mark the event as approved sets that specific event as whitelisted by the administrator. To approve the event, click the down arrow in the Actions button, select Approve Threat As, then select the reason:
Developer Testing.
Known App.
User was Instructed.
Other - If the event is approved due to another resolution, enter the reason in the text box.
Once the Approve Threat is selected, the event is removed from this screen but stays in the Threat Log page marked as Approved.
Marking as fixed
The option to mark the event as Fixed clarifies that this specific event was considered a security problem, such as a malicious app found on a device, and was resolved by the Incident Response team or admin.
To approve the event:
Click the down arrow in the Actions button.
Click Mark as Fixed With, and select the reason:
Developer Testing.
Known App.
User was Instructed.
Other.
If you select Other because the event is approved due to another resolution, enter the reason in the Other field.
Then the event is removed from this screen but stays in the Threat Log page marked as Fixed.
Whitelisting App Developer option
Users can whitelist Sideloaded App events from iOS or Android devices that are still connected to the Mobile Security console. Whitelisting a developer certificate ensures that all corresponding applications are approved and permitted. Whitelisted apps are not flagged as threats, unlike enterprise sideloaded apps.
To whitelist a developer certificate from the Threat Log:
In the Threat Name field, find the name of the threat to be whitelisted, such as Sideloaded App(s) and click the checkbox to the left on that row.
Click the down arrow at the top of the page on the Action drop-down menu.
Select the Whitelist App Developer option.
When successful, a box opens to indicate that the selected app developer is now whitelisted.
Click Close to close the box.
MDM actions option from the Threat Log
Selecting the option to run a specific MDM action displays the available actions. This list is dynamic and pertains to MDM actions in the environment. Clicking an action performs it on the associated device. The event remains on the list until it is labeled as Fixed or Approved.
Note
To apply an MDM action to multiple threats, select a single MDM group from the Group column filter.
Types of MDM actions that are available from the Threat Log page:
Lock Device - This locks the device until the threat is resolved.
Selective Wipe - This is a selective wipe of the corporate information on the device.
Inform EMM - This sends the risk posture to the EMM/MDM.
Exporting the Threat Log
Events are exported from the Threat Log screen by using the export CSV button. This includes the filtered event log only and is downloaded as a CSV file. The CSV file is sent through a link in an email to the requesting administrator.
Purging Logs with data retention settings
Bitdefender provides 90 days of threat and audit log information, which grows over time. If you have different data retention requirements you can export the data to an external system to retain data for a longer period of time.