Exclusions
The Exclusions page enhances your control over the content of policies by creating and managing exclusion lists that can be tailored to the profile of every segment in your environment.
This single-source exclusion management system bypasses the need to inherit the settings from one policy to another in order to reuse exclusions, by allowing you to create and manage exclusions and exclusion lists outside the policy.
You can reuse an exclusion in one or multiple lists, and then assign these lists to one or multiple policies, thus allowing you complete freedom to customize the content that will be excluded from scanning. Furthermore, when you assign a list of exclusions to a policy, you will be able to view how many endpoints will be impacted by the change.
This will result in having and using leaner and more targeted policies, which will increase the overall performance and stability of your environment, and reduce the workload of your SOC team by lowering the amount of false-positive events.
Important
Bitdefender security agent can exclude from scanning certain object types. Antimalware exclusions are to be used in special circumstances, or following Microsoft or Bitdefender recommendations. For an updated list of exclusions recommended by Microsoft, please refer to this web article.
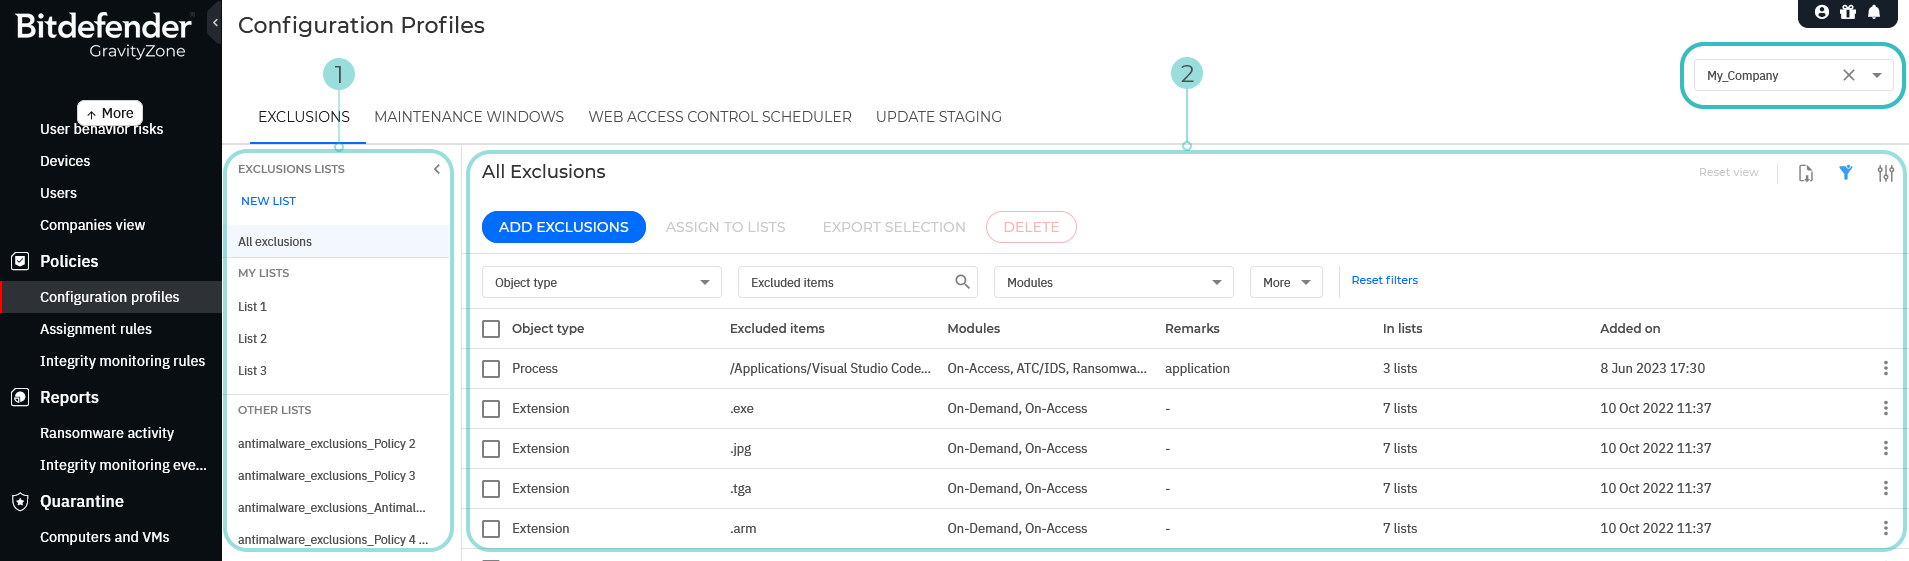
The Exclusions page includes two major areas:
The Exclusions lists panel, where you can create and manage exclusion lists.
The Exclusions page, where you can create new exclusions, or manage exclusions already assigned to exclusion lists.
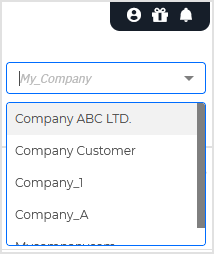
As a partner, you can only view exclusions and exclusion lists for one company at a time. To switch companies, click the X icon next to the current company's name in the selector located in the upper-right corner of the page.
The Exclusion lists panel
In the Exclusion lists panel you can create new lists and manage them, and also have access to all the available lists created in your company by other users with manage network rights.
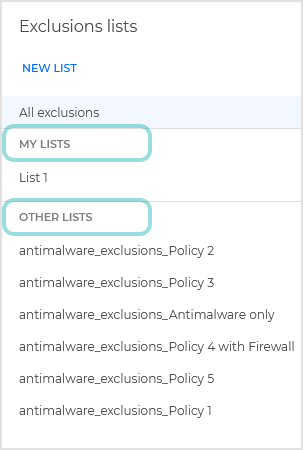
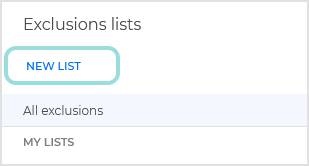
The My lists section includes only the lists of exclusions you have created.
The Other lists section includes all the lists of exclusions available in your company created by all the users with manage network rights.
You can create a new list by clicking the NEW LIST button.
The Exclusions grid
In the Exclusions grid area you can create new exclusion rules from scratch, edit and delete them, use the extensive filtering options to manage existing exclusions and assign them to lists.
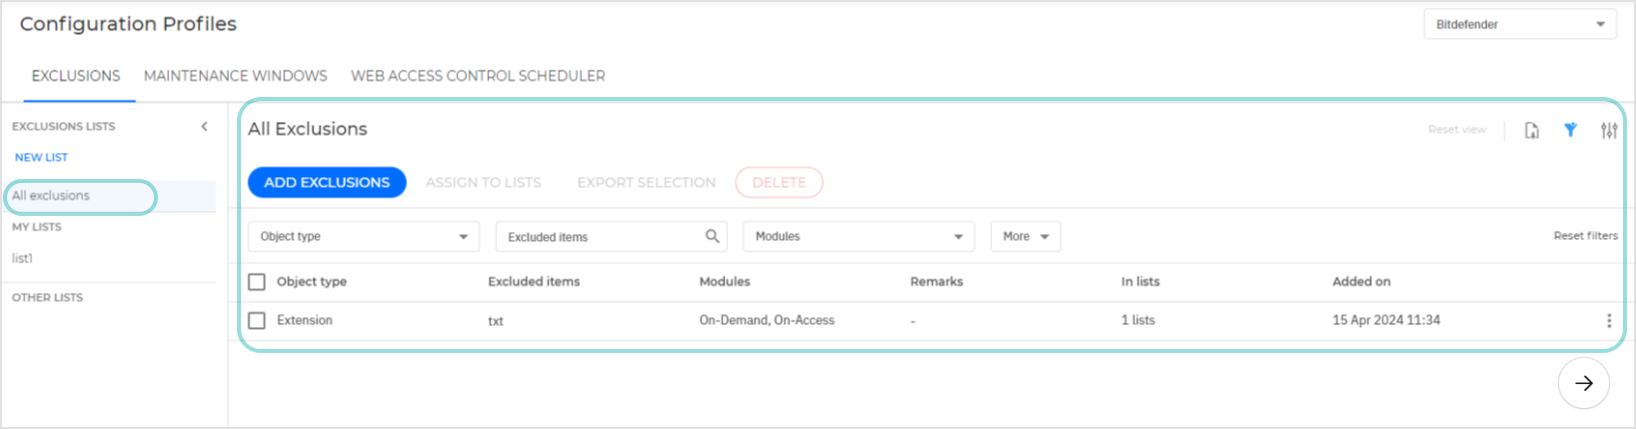
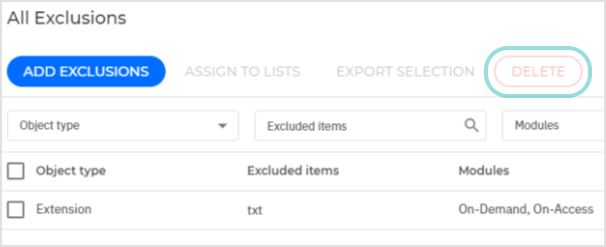
If you click the All Exclusions bar at the top of the lists section the grid area will populate with all the exclusion rules created so far in your environment, regardless if they are assigned to a list or not.
Exclusions may be displayed on multiple pages. To navigate them, use the control buttons at the bottom.
If you select any of the exclusion lists the grid area will populate with the exclusion rules assigned to that list only.
To customize the grid area you can take the following actions:
Click the
 Show/Hide Filters button to show or hide the filters bar.
Click the
 Show/Hide Columns button to add or remove filter columns.
Click the
 Refresh button to refresh the list.
Click the Clear button to reset all filters.
Searching, filtering, and sorting exclusions
The grid area offers you multiple searching, filtering, and sorting options.
Note
You can only view exclusions for one company at a time. To change the company, use the selector in the upper-right corner of the page.
You can filter/search by:
Object type - select the desired object type from the drop-down and click APPLY to display the available exclusion rules.
Excluded items - type in the name of an excluded item to search and display all the rules that may contain it.
Modules - select the desired scanning technology to display all the exclusion rules applied to that module.
Remarks - search for exclusion rules with a specific keyword added to the Remarks field.
For excluded items and remarks, you can use the asterisk (*) as wildcard in searches to match zero, one or more characters. For example, use *text to find all items that contain text.
To sort exclusions, click the header of each of column, including In lists and Added on.
Creating and assigning exclusions to lists
In GravityZone, you can create exclusions individually, then assign them individually or collectively to one or more lists.
To create a new exclusion rule from scratch and assign it to a list:
Use the selector in the upper-right corner of the page to choose a company.
Click the Add exclusions button and start defining the new exclusion rule.
Select the exclusion object type from the menu:
File: only the specified file
Folder: all files and processes inside the specified folder and from all of its subfolders
Extension: all items having the specified extension
Process: any object accessed by the excluded process
File hash: the file with the specified hash (in SHA-256 format)
Certificate hash: all the applications and PowerShell scripts (for Windows endpoints) under the specified certificate hash (thumbprint, in SHA-1 and SHA-2 format)
Threat name: any item having the detection name (available for Windows and macOS operating systems)
Command line with regex: the specified command line using regular expressions (available for Windows operating systems)
Command line: the specified command line (available for Windows and macOS operating systems)
IP/mask: The IP address or IP mask (0-255 format) for which inbound and outbound traffic will be excluded from scanning.
Provide the details specific to the selected exclusion type:
File, Folder or Process
Enter the path to the item to be excluded from scanning. You have several helpful options to write the path:
Declare the path explicitly.
For example:
C:\tempTo add exclusions for UNC paths, use any of the following syntaxes:
\\hostName\shareName\filePath\\IPaddress\shareName\filePathSupported path delimiters are the backslash character (\), the slash character (/), and the colon (:).
Use wildcards.
The asterisk (*) substitutes for zero or more characters. Double asterisk (**) substitutes for zero or more characters. The question mark (?) substitutes for exactly one character. You can use several question marks to define any combination of a specific number of characters. For example, ??? substitutes for any combination of exactly three characters.
For example:
C:\Test\*.*– excludes all files in the Test folder.C:\Test\*.png– excludes all PNG files in the Test folder.C:\Test\*- excludes all files in the Test folder.**\file.txt- excludes all the files that have the namefile.txt, regardless where these files are located.**\my_folder\*\file.txt- excludes all the folders on all levels abovemy_folderand all subfolders on a single level undermy_folderthat containfile.txt.**\application*.exe- excludes all the files that have the nameapplicationand variations of this name followed by one or more characters, regardless where the files are located.C:\MyApp\**- excludes all files and folders inMyAppfolder, regardless of the depth level.C:\Program Files\WindowsApps\Microsoft.Not??.exe– excludes the Microsoft Notes processes.Note
On macOS, the asterisk (*) and the question mark (?) can substitute path delimiters, unlike on Windows and Linux. Only the double asterisk (**) on Windows substitutes path delimiters.
The double asterisk (**) can lead to undesired exclusions when misused, therefore we recommend caution.
The double asterisk (**) is not available on macOS. On this operating system you can only use the asterisk (*) and the question mark (?) as wildcards.
Use predefined locations. When you enter a predefined location, it applies to all endpoints regardless of the operating system.
GravityZone supports predefined locations as described below.
Extension
Enter one or more file extensions to be excluded from scanning, separating them with a semicolon ";". You can enter extensions with or without the preceding dot. For example, enter
txtto exclude text files.Note
On Linux-based systems, file extensions are case sensitive and the files with the same name but with different extension are considered distinct objects. For example,
file.txtis different fromfile.TXT.File hash, Certificate hash, Threat name, Command line, or Command line with regex
Enter the file hash, certificate thumbprint (hash), the exact name of the threat or the command line depending on the exclusion rule. You can use one item per exclusion.
Note
Command line exclusions don’t support wildcards, only plain exclusions. For complex cases needing multiple path matches or variable processes, use Command line with regex exclusions.
Command line examples:
npm install
npx nx format
tester.exe acceptance --run-all-tests
Command line with regex example:
C\:\\Users\\[a-z]+\\Desktop\\app.exe param1 param2.value
Select the scanning methods to which the rule applies. Some exclusions may be relevant for just one of the scanning modules (On-access scanning, On-demand scanning, ATC/IDS, Ransomware Mitigation, LSASS Protection), while others may be recommended for all of the modules.
Optionally, click the Show remarks button to add a note in the Remarks column about the rule.
Click the
 Add button.
The new rule will be added to the list.
To remove a rule from the list, click the corresponding
 Delete button.
Important
On-demand scanning exclusions will not apply to contextual scanning. Contextual scanning is initiated by right-clicking a file or folder and selecting Scan with Bitdefender Endpoint Security Tools.
To assign an exclusion rule to one or multiple lists:
In the table area, click the
 More button, and then Edit list assignment.
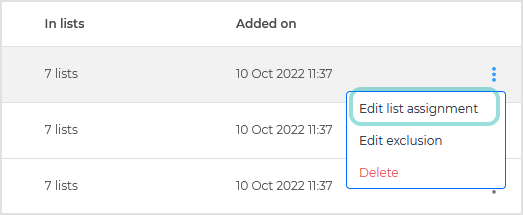
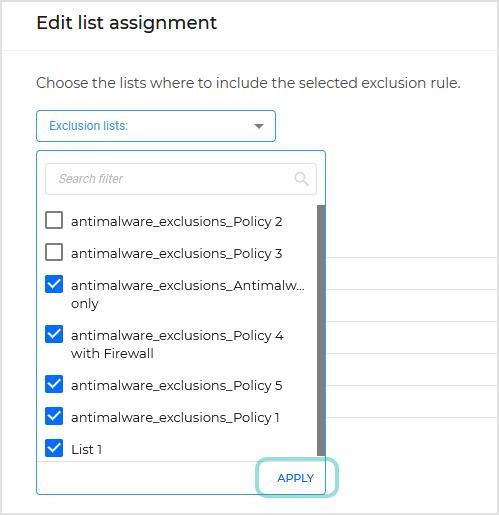
In the configuration page, from the drop-down menu, select the lists that will add the exclusion rule to their content and click Apply.
In the Lists preview area you can see the exclusion lists you are about to update.
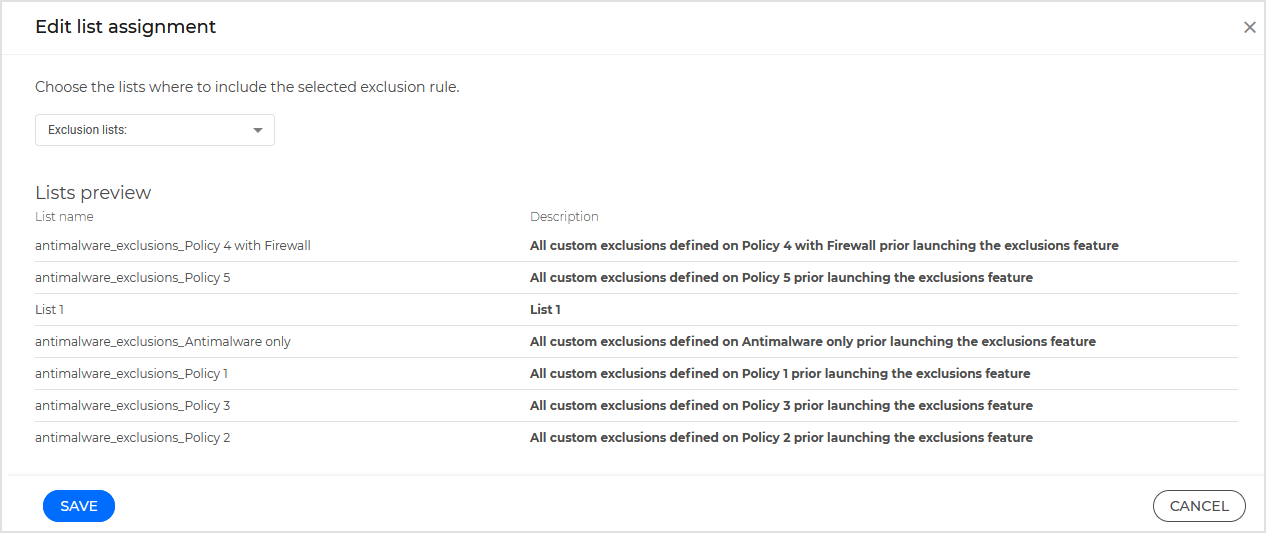
Click Save to complete the process.
To assign multiple exclusion rules to multiple lists:
In the table area, select one or more exclusions.
Click the Assign to lists button.
In the configuration page, from the drop-down menu, select the lists that will add the exclusion rules to their content and click Apply.
In the Lists Preview area you can see the exclusion lists you are about to update.
Click Assign to complete the process.
Editing exclusions inline
To edit an exclusion rule inline:
Go to the desired exclusion, click the
More button and Edit exclusion.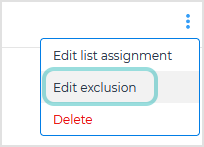
Make changes in the following columns:
Excluded items
Modules
Remarks

Click the
 confirmation icon to save the changes.
Exporting exclusions
To export one or more exclusions in CSV format:
Select the corresponding check boxes in the grid.
Click the Export selection button at the top of the page.
In the confirmation page, check the listed exclusions. Only the first five selected items are displayed. The CSV file will include the entire selection.
Confirm the action.
To export all exclusions displayed on all pages at a certain moment, click the  Export view button in the upper-right corner of the grid.
Deleting exclusions
To delete a specific exclusion:
Go to the desired exclusion, click the
More and Delete buttons.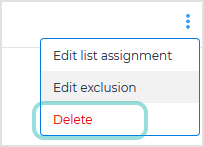
In the confirmation window, review the lists and the policies affected by your action.
Confirm the action.
To delete multiple exclusions:
Select the corresponding check boxes in the table.
Click the Delete button at the upper side of the table.
In the confirmation window, review the number of exclusions, lists and policies affected by your action.
Confirm the action.
Creating a new exclusion list
To create a new exclusion list:
Use the selector in the upper-right corner of the page to choose a company.
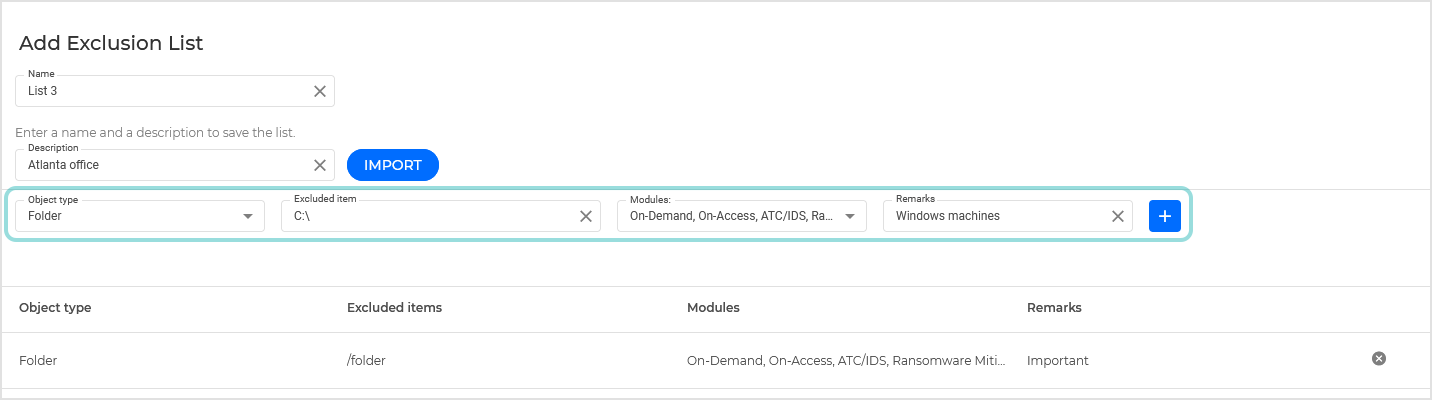
Click the NEW LIST option to open the window where you can define your new list.
Name your new list by filling out the Name field.
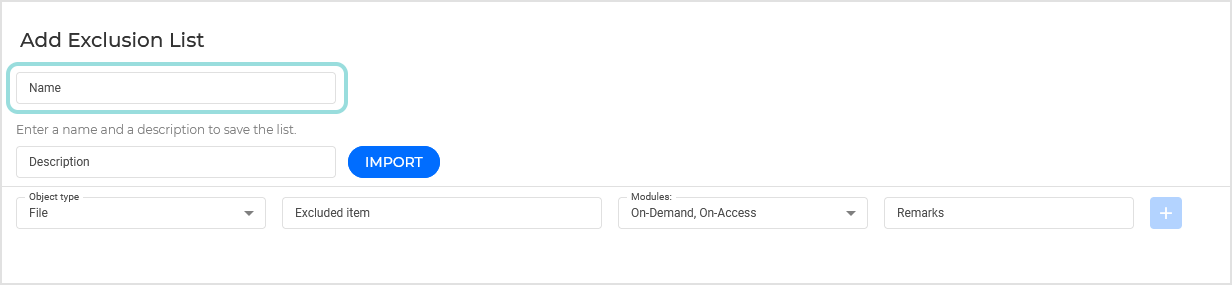
Note
This field is mandatory.
Add relevant details about the list in the Description field.
After naming and describing your list you can start defining the exclusion rules.
Select the excluded object type from the menu:
File: only the specified file.
Folder: all files and processes inside the specified folder and from all of its subfolders.
Extension: all items having the specified extension.
Process: any object accessed by the excluded process.
File Hash: the file with the specified hash. GravityZone supports the SHA-256 hash algorithm.
Certificate Hash: all the applications and PowerShell scripts (for Windows endpoints) under the specified certificate hash (thumbprint).
Threat Name: any item having the detection name (not available for Linux operating systems).
Command Line: the specified command line (available only for Windows operating systems).
IP/Mask: The IP address or IP mask (0-255 format) for which inbound and outbound traffic will be excluded from scanning.
Warning
In agentless VMware environments integrated with NSX, you can exclude only folders and extensions.
Provide the details specific to the selected exclusion type:
File, Folder or Process
Enter the path to the item to be excluded from scanning. You have several helpful options to write the path:
Declare the path explicitly.
For example:
C:\tempTo add exclusions for UNC paths, use any of the following syntaxes:
\\hostName\shareName\filePath\\IPaddress\shareName\filePathSupported path delimiters are the backslash character (\), the slash character (/), and the colon (:).
Note
To accommodate Linux requirements, GravityZone supports up to 4096 characters when defining paths. To apply this limit on Windows, make sure MAX_PATH is set to support this value on the target machines. Learn more in Microsoft documentation.
Use the system variables available in the drop-down menu.
For process exclusions, you must also add the name of the application's executable file.
For example:
%ProgramFiles%- excludes the Program Files folder%WINDIR%\system32– excludes folder system32 within Windows folder%SystemDrive%- excludes the drive where the Windows folder was placed, usually driveC:Note
It is advisable to use system variables (where appropriate) to make sure the path is valid on all target computers.
Use wildcards.
The asterisk (*) substitutes for zero or more characters. Double asterisk (**) substitutes for zero or more characters. The question mark (?) substitutes for exactly one character. You can use several question marks to define any combination of a specific number of characters. For example, ??? substitutes for any combination of exactly three characters.
For example:
C:\Test\*.*– excludes all files in the Test folder.C:\Test\*.png– excludes all PNG files in the Test folder.C:\Test\*- excludes all files in the Test folder.**\file.txt- excludes all the files that have the namefile.txt, regardless where these files are located.**\my_folder\*\file.txt- excludes all the folders on all levels abovemy_folderand all subfolders on a single level undermy_folderthat containfile.txt.C:\Program Files\WindowsApps\Microsoft.Not??.exe– excludes the Microsoft Notes processes.
Note
On macOS, the asterisk (*) and the question mark (?) can substitute path delimiters, unlike on Windows and Linux. Only the double asterisk (**) on Windows substitutes path delimiters.
The double asterisk (**) can lead to undesired exclusions when misused, therefore we recommend caution.
The double asterisk (**) is not available on macOS. On this operating system you can only use the asterisk (*) and the question mark (?) as wildcards.
Extension
Enter one or more file extensions to be excluded from scanning, separating them with a semicolon ";". You can enter extensions with or without the preceding dot. For example, enter
txtto exclude text files.Note
On Linux-based systems, file extensions are case sensitive and the files with the same name but with different extension are considered distinct objects. For example,
file.txtis different fromfile.TXT.File hash, Certificate hash, Threat name, or Command line
Enter the file hash, certificate thumbprint (hash), the exact name of the threat or the command line depending on the exclusion rule. You can use one item per exclusion.
Select the scanning methods to which the rule applies. Some exclusions may be relevant for just one of the scanning modules (On-access scanning, On-demand scanning, ATC/IDS, Ransomware Mitigation), while others may be recommended for all of the modules.
Note
The Modules field will pre-select by default all the modules relevant for the selected Object type.
Click the
Add button to add it to the list.Optionally, you can import already defined rules from a CSV file.
To remove any of the created exclusions from the list just click the
 Remove icon.
After defining all the exclusion rules you want in the list click Save.
The newly created list will be available in the My lists section. See Assigning exclusion lists to policies for details on how to assign an exclusion list to one or multiple policies.
Assigning exclusion lists to policies
To assign an exclusion list to one or multiple policies:
Use the selector in the upper-right corner of the page to choose a company.
Select the desired exclusion list from the Exclusion lists panel.
The grid area will be populated with all the exclusion rules assigned to the selected list.
Here you can add new exclusions, delete existing ones, or filter them by multiple criteria. See The Exclusions grid for more details on how to configure the grid area and filter exclusions.
Click the list name to open its side details panel.
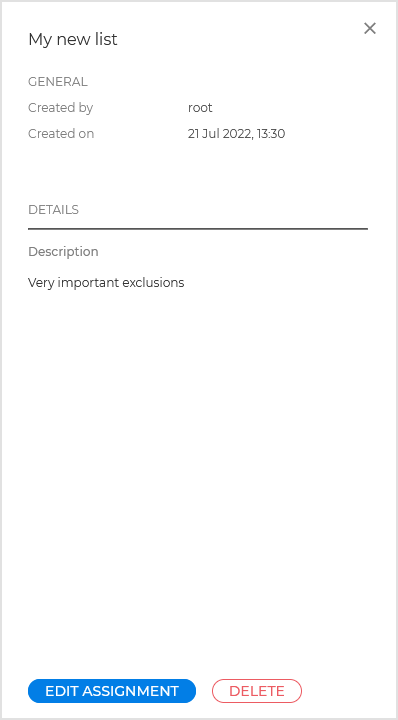
The details panel includes general information about the lists origins, relevant details, and actions you can take.
Click the Edit assignment to assign the exclusion list to one or multiple policies.
From the drop-down menu, select the policies that will add the exclusion list to their content and click Apply.
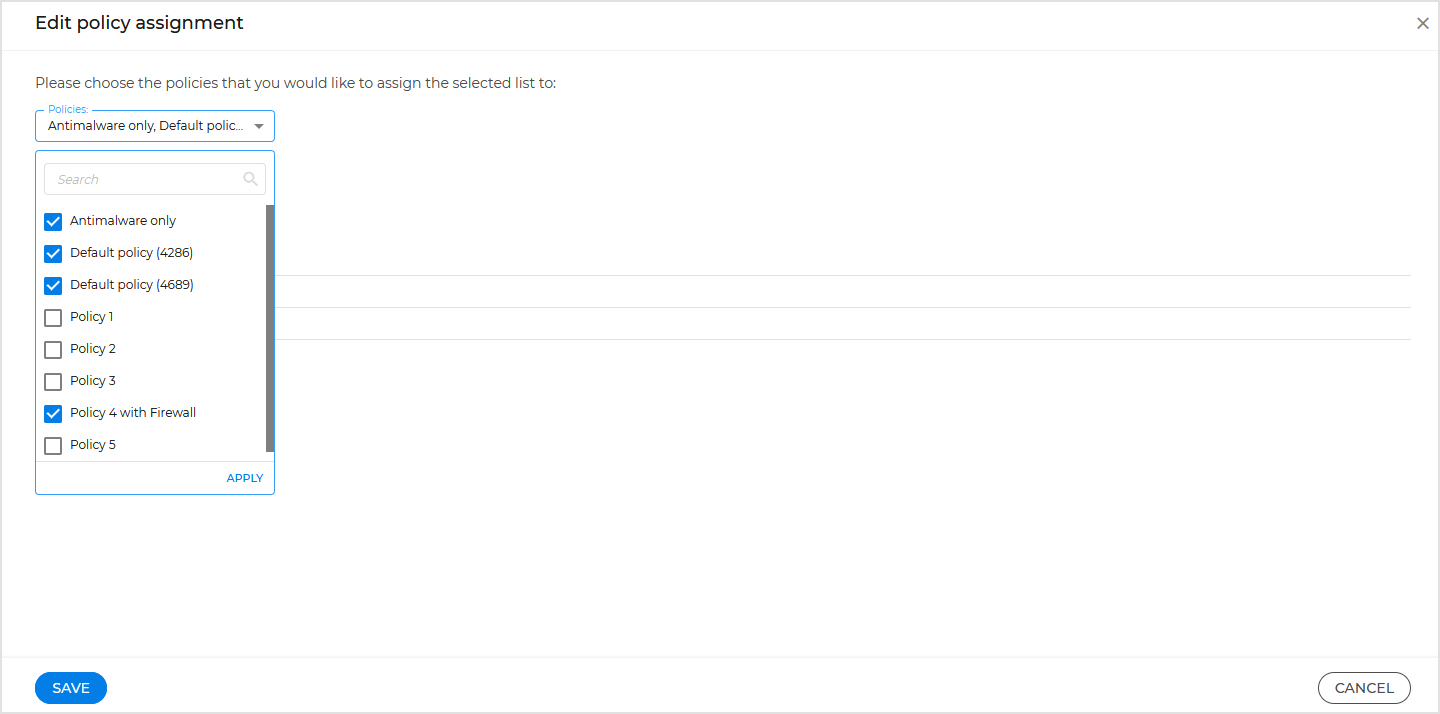
In the Policies Preview area you can see the policies you are about to update.
Click Save to complete the process.
Editing an exclusion list
To edit an exclusion list:
Click the list name in the left-side panel.
In the grid area, click the Edit list buton.
In the configuration page, you can make these changes:
Edit title
Edit description
Add new exclusions manually or by importing them from a CSV file.
For details on configuring an exclusion list, refer to Creating a new exclusion list.
Click the Update button to confirm the changes.
Add exclusions from the Blocked Applications report
To add exclusions to the Configuration profiles section directly from the Blocked Applications report, follow these steps:
Go to the Reports section from the left side menu of Control Center and create a Blocked Applications report.
For generic details on report configuration, refer to Creating reports.
After creating the report, go to the details area and select the processes blocked by the Antimalware and Advanced Anti-Exploit modules.
Click the Add exclusion option and select To profiles.
GravityZone redirects you to the Configuration profiles section.
In the exclusions grid, one or two entries are automatically created for each selected process, depending on the module that has blocked it:
One entry as a process exclusion when blocked by the ATC/IDS module. The exclusion rule displays the path in the Excluded items column and mention the ATC/IDS module.
Two entries, one as a process exclusion and another as a file exclusion, when blocked by the Antimalware module. The process exclusion displays the path in the Excluded items column and mentions the On-Access and ATC/IDS modules. The file exclusion displays the path in the Excluded items column and mentions all modules corresponding to the
fileobject type.
Click the
More icon and Edit list assignment to add these exclusions to any list.Click the Back button at the top-left corner of the Configuration profiles section to return to the Blocked Applications report.
Deleting an exclusion list
To delete an exclusion list:
Expand the exclusion list's detail's panel and click DELETE.
You will be prompted a confirmation message, displaying the policies that will have the list removed, and how many endpoints you will impact if you decide to delete the exclusion list.
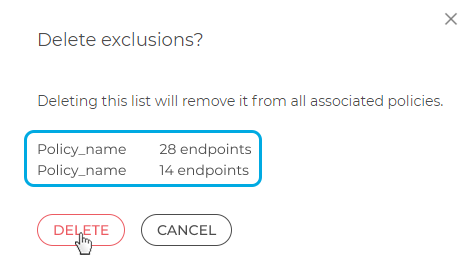
Click DELETE to go through with the deletion, or CANCEL to exit the operation.
Monitoring changes in User activity
You can monitor the changes made to exclusion rules and exclusion lists in the User activity section.
As a partner, you can only view changes for one company at a time. To change the company, make a different selection from the drop-down list in the upper-right corner of the page.
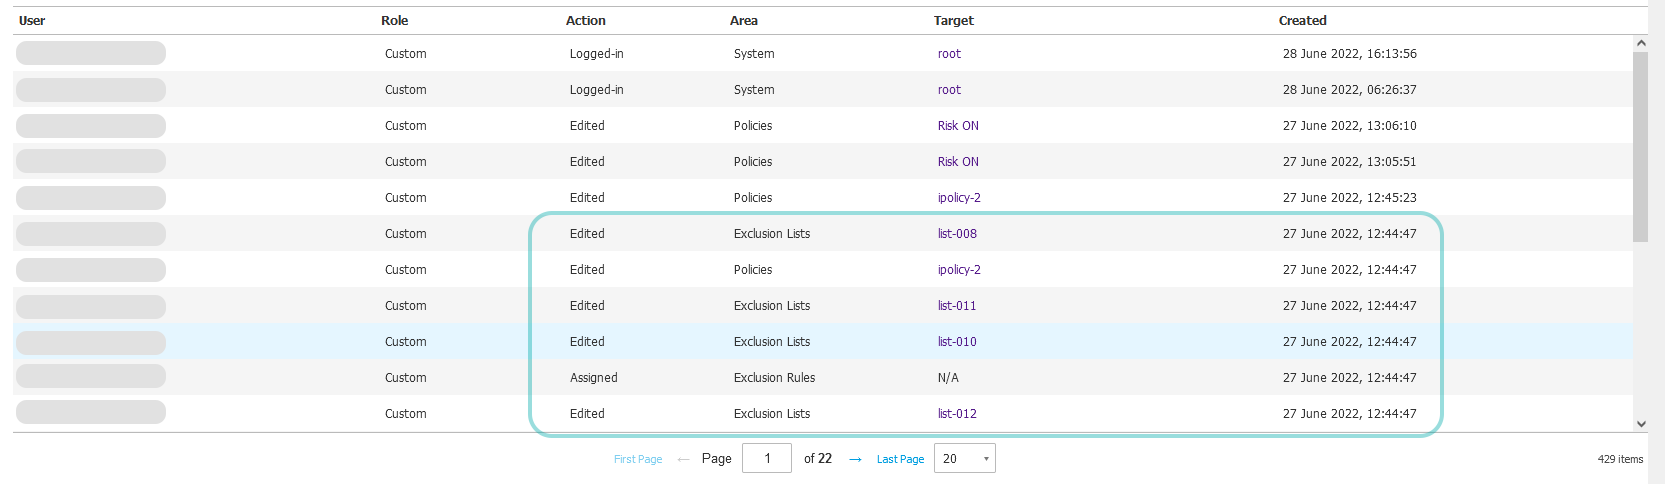
When creating, editing, deleting or assigning an exclusion rule to a list, entries for the Exclusions Rules area indicate each of these changes. If the exclusion rule is assigned to multiple lists, GravityZone Control Center displays an entry for each affected list for the Exclusions Lists area. If the list is assigned to a policy, then an entry for the Policies area indicates this change as well.
For example, editing an exclusion rule that is assigned to three lists, of which one is assigned to four policies, generates eight entries in User activity:
One entry for the exclusion rule.
Three entries for the affected exclusion lists.
Four entries for the affected policies.
All these entries have the same creation date and time, so you can easily monitor them.
GravityZone records the following edited elements of an exclusion: object type, excluded items, modules and list assignments. However, the section does not record changes for remarks.