Configure F5 BIG-IP VE ASM for Security for Storage
BIG-IP VE ASM is service platform from F5 Networks that provides speed, availability, and security for applications and networks.
This topic describes how to configure the F5 BIG-IP VE ASM platform to use it with GravityZone Security for Storage on VMware ESXi.
Overview
F5 BIG-IP VE ASM is a layer between users (clients) and the internet (web server) that can integrate Bitdefender Security Server as an ICAP server to scan requests from users.
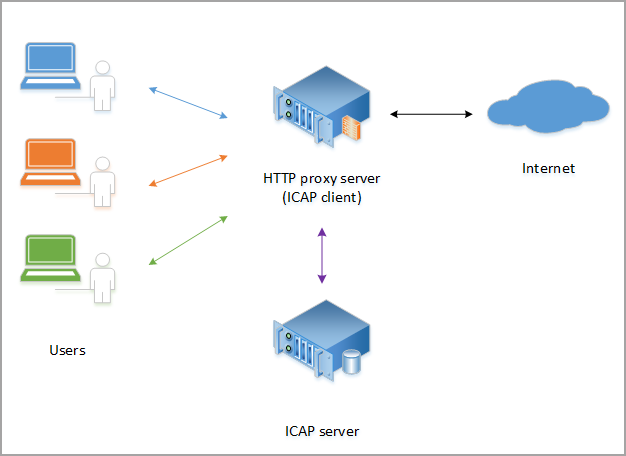
The figure above describes the integration components:
Users are clients who make requests to Internet.
HTTP proxy server is the ICAP client, in this particular case F5 BIG-IP VE ASM.
ICAP server is the Bitdefender Security Server with ICAP scanning enabled.
Internet is a web server.
Requirements and prerequisites
For using GravityZone Security for Storage with F5 BIG-IP VE ASM, you need the following:
A VMware ESXi server deployed and configured.
A GravityZone environment with Bitdefender Security Server deployed and configured to use ICAP scanning. For details on how to install Bitdefender Security Server on VMware ESXi, refer to Install Security Server on an Ubuntu machine. For details on enabling ICAP scanning, refer to Storage Protection.
You can use a single Security Server for testing purposes. In production we recommend you use two Security Servers to ensure availability and scanning load distribution.
A BIG-IP SE appliance deployed and configured. The following procedure contains several references to the F5 documentation and to other useful resources across the internet. Take your time to read them carefully to make sure everything is working as expected.
Deploy and configure BIG-IP VE ASM on VMware ESXi for ICAP scanning
The following procedure describes how to deploy and configure BIG-IP VE ASM on VMware ESXi and how the integrate the Bitdefender Security Server.
Download the .OVA file of the BIG-IP VE appliance. For information regarding the version compatibility, refer to this matrix in the F5 documentation.
Deploy the .OVA file of BIG-IP VE on a VMware ESXi host.
Configure the .OVA file to use a single network interface controller (NIC). That means removing the internal, the external, and the hardware accelerated (HA) NICs.
For information on how to change from multi-NICs to a single NIC, refer to the F5 documentation.
Request a BIG-IP VE license. You need to use a valid email address for registration. You will receive the license key by email.
If you plan to redeploy the BIG-IP VE appliance, the first step is to detach the license. For details, refer to F5 documentation.
Log in and set up BIG-IP VE. For initial configuration, take into account these details:
The default user is admin and the default password is also admin.
First set up the hostname, the IP address, and the date.
Enable Application Security Manager (ASM) from Resource Provisioning.
Configure VLANs.
For details, refer to this article from networkjutsu.com.
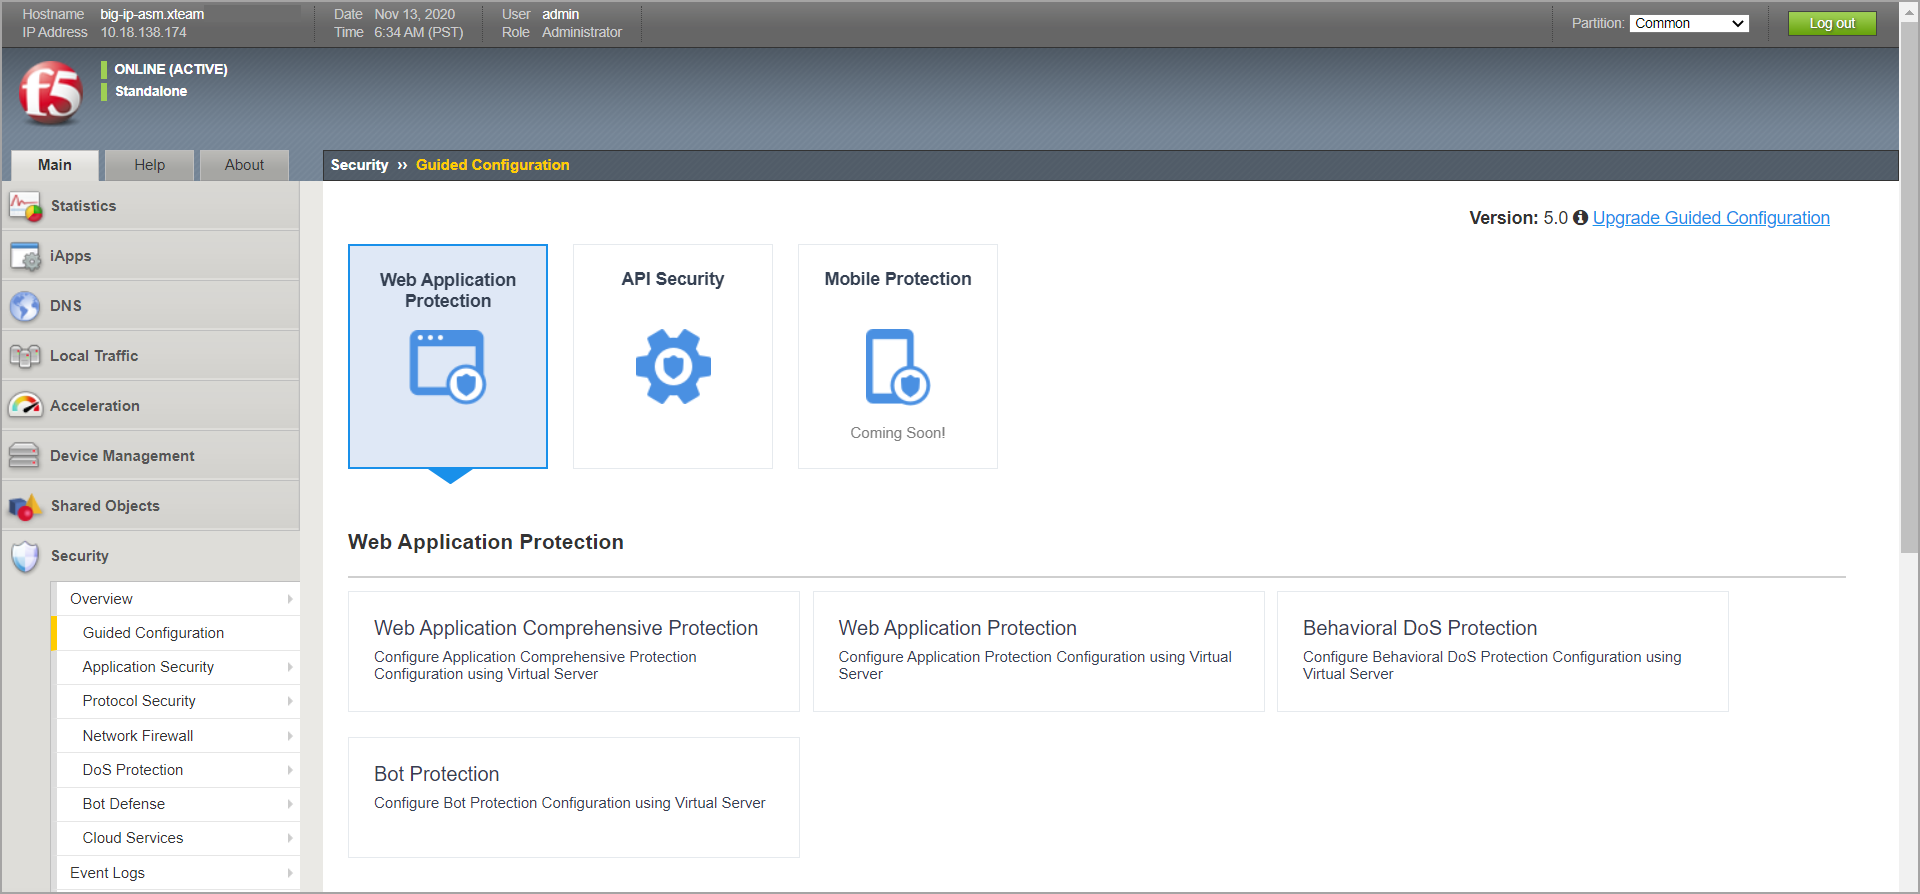
Set up the Virtual Server and pool servers. Follow these steps:
In BIG-IP VE ASM, go to Main menu > Security > Guided Configuration.
Select Web Application Protection.
In Web Application Security Policy Properties:
Set Security Policy Name.
Set Enforcement Mode to Blocking. Leave the other settings as default.
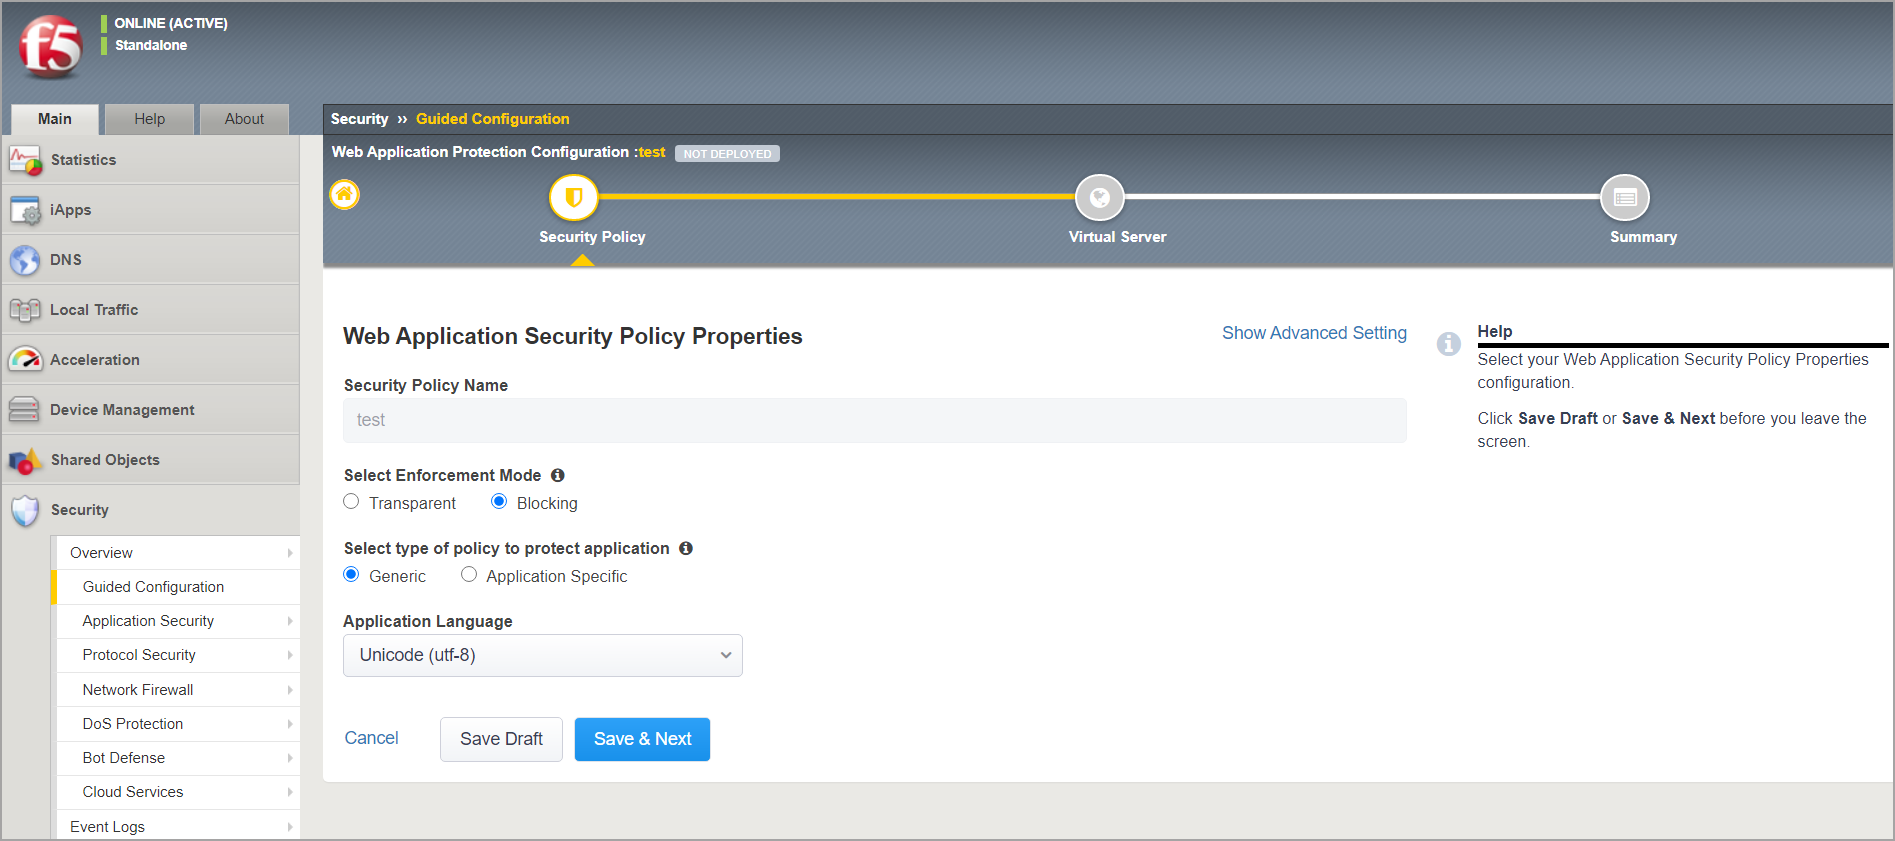
Click Save > Next.
In Virtual Server Properties:
Under Virtual Server, select Create New.
Enter an IP address and the port of your application.
Under Security Logging Profile, select Log all requests.
Under SSL Profile for Server Authentication, select Use Existing.
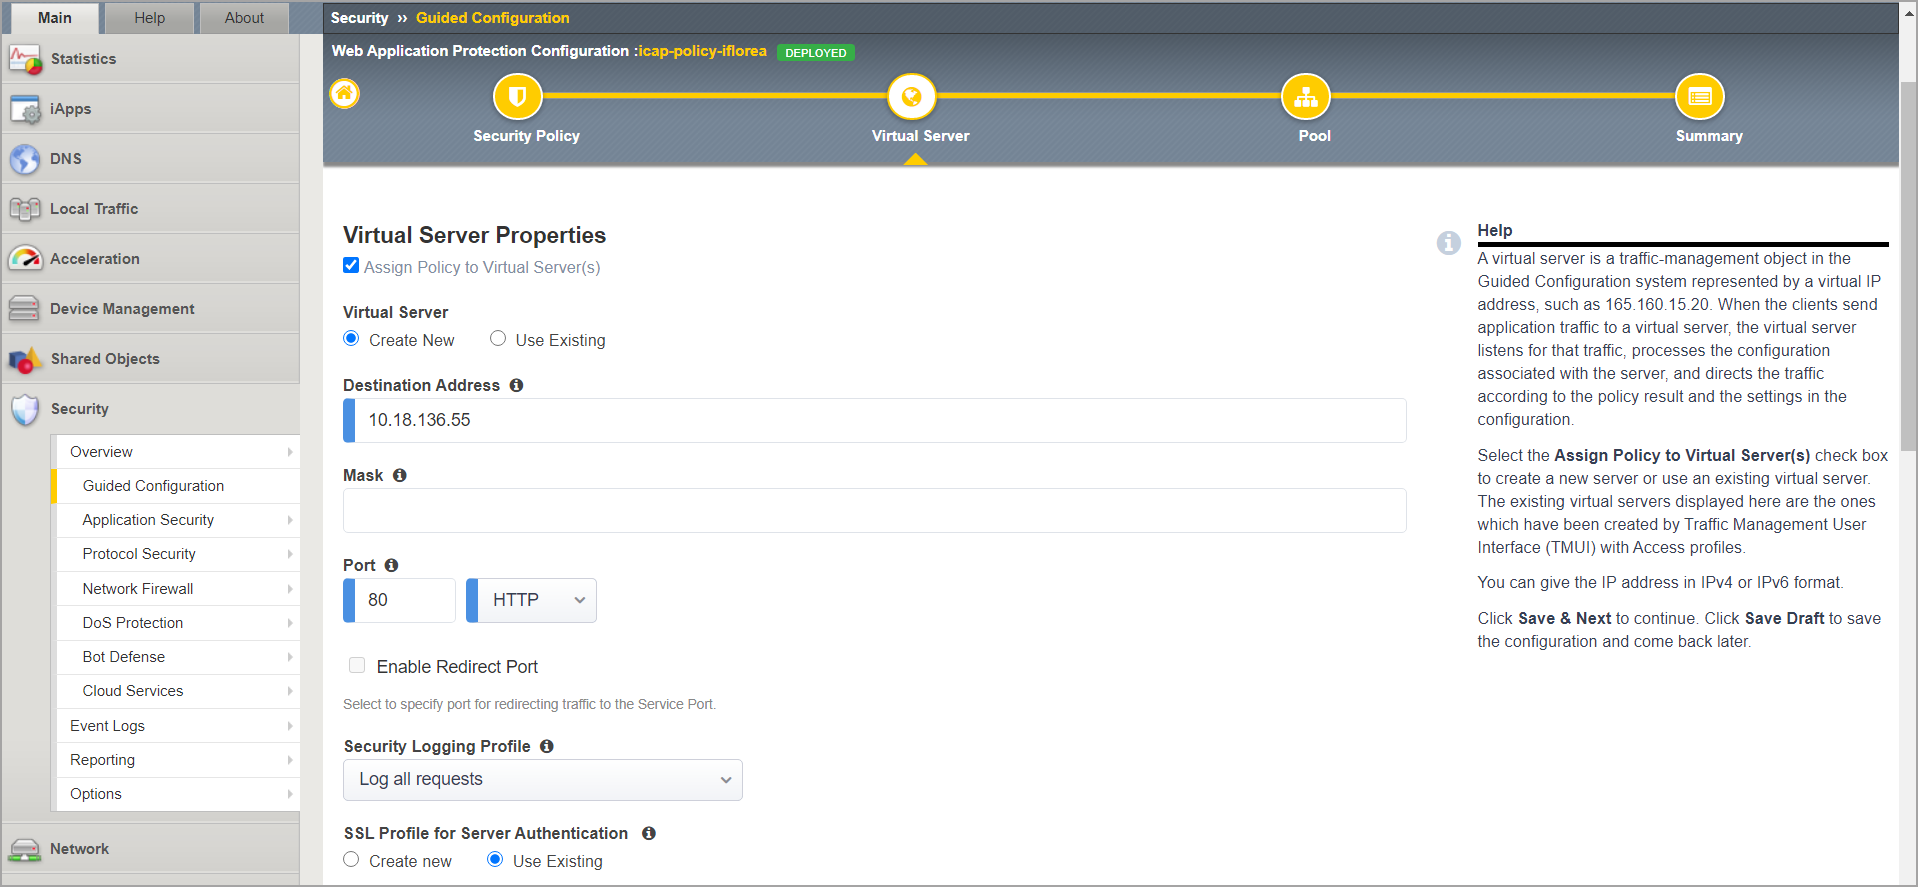
Click Save > Next.
In Pool Properties:
Select Create New.
For Load Balancing Method, select Round Robin.
Under Pool Servers, enter the IP address of the customer server, followed by port.
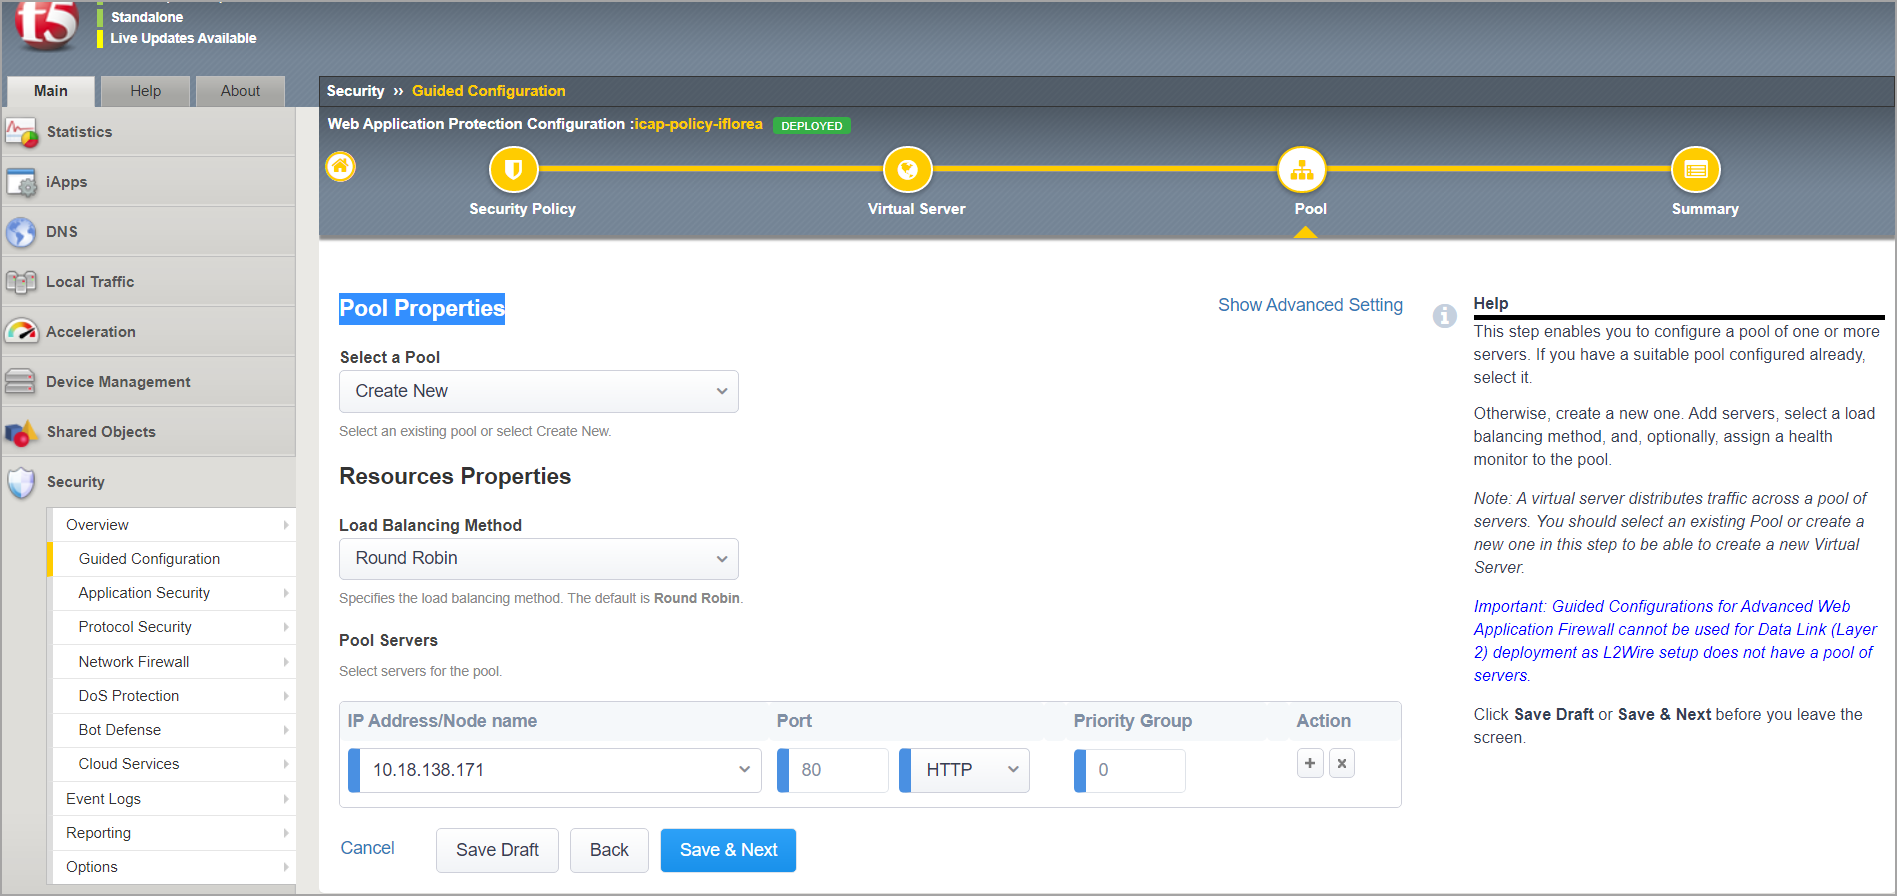
Click Finish. Wait until the settings are deployed.
Integrate a Bitdefender Security Server with ICAP scanning enabled. Follow these steps:
In the Main menu, under Security, go to Options > Application Security > Integrated Services > Anti-Virus Protection.
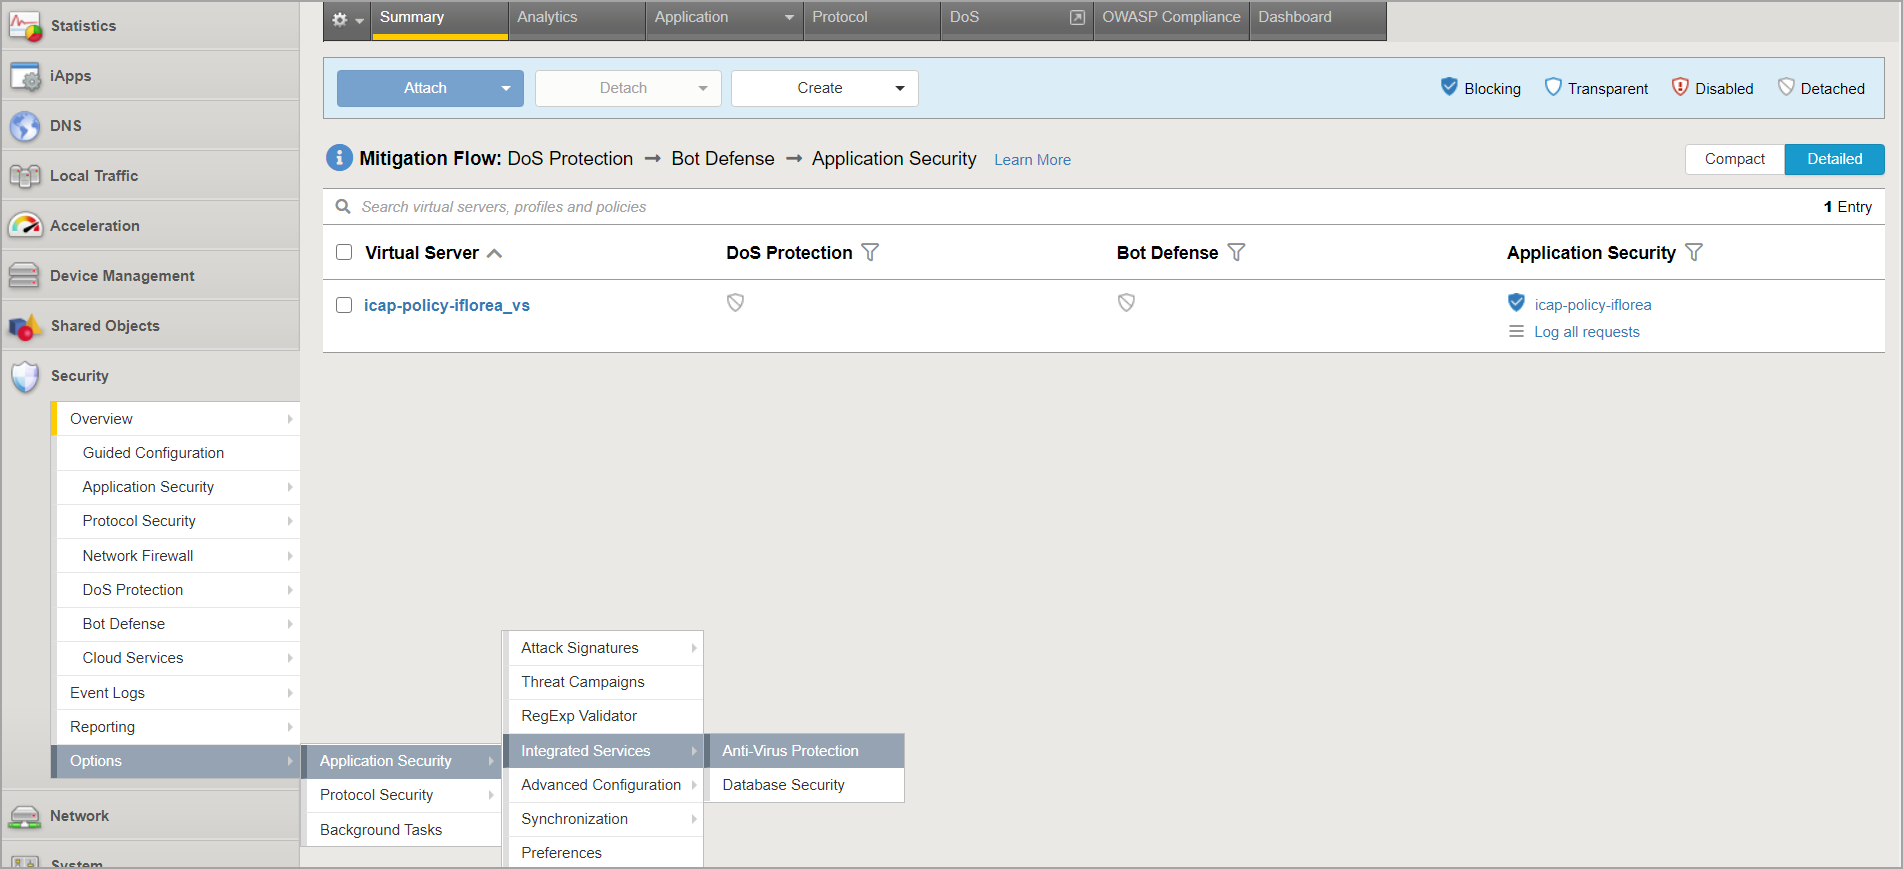
In the Integrated Services tab, for Server Host Name/IP Address enter the Bitdefender Security Server IP address. For Server Port Number, enter the port used by Bitdefender Security Server: 1344.
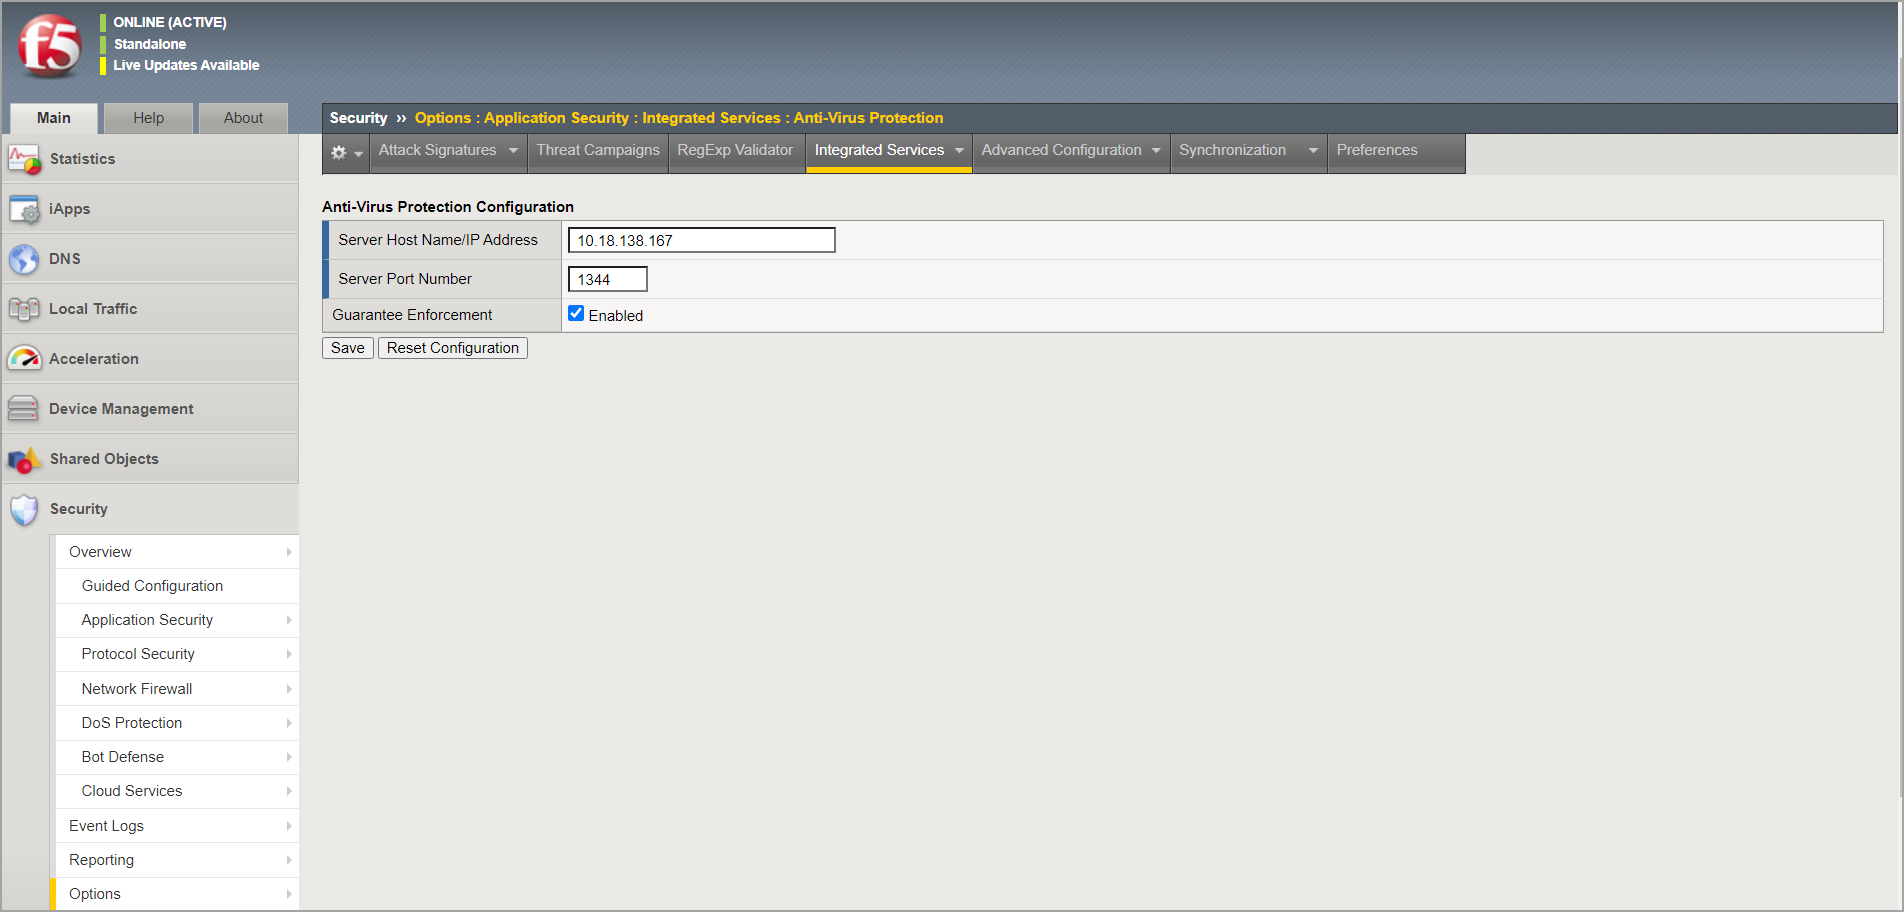
Click Save.
To activate the security policy changes immediately, select Apply Policy.
Go to Options > Application Security > Advanced Configuration > System Variables and do these operations:
For virus_name_header, enter X-Infection-Found,X-Virus-ID,X-Violations-Found
Connect over SSH to BIG-IP VE appliance and run:
tmsh restart sys service asm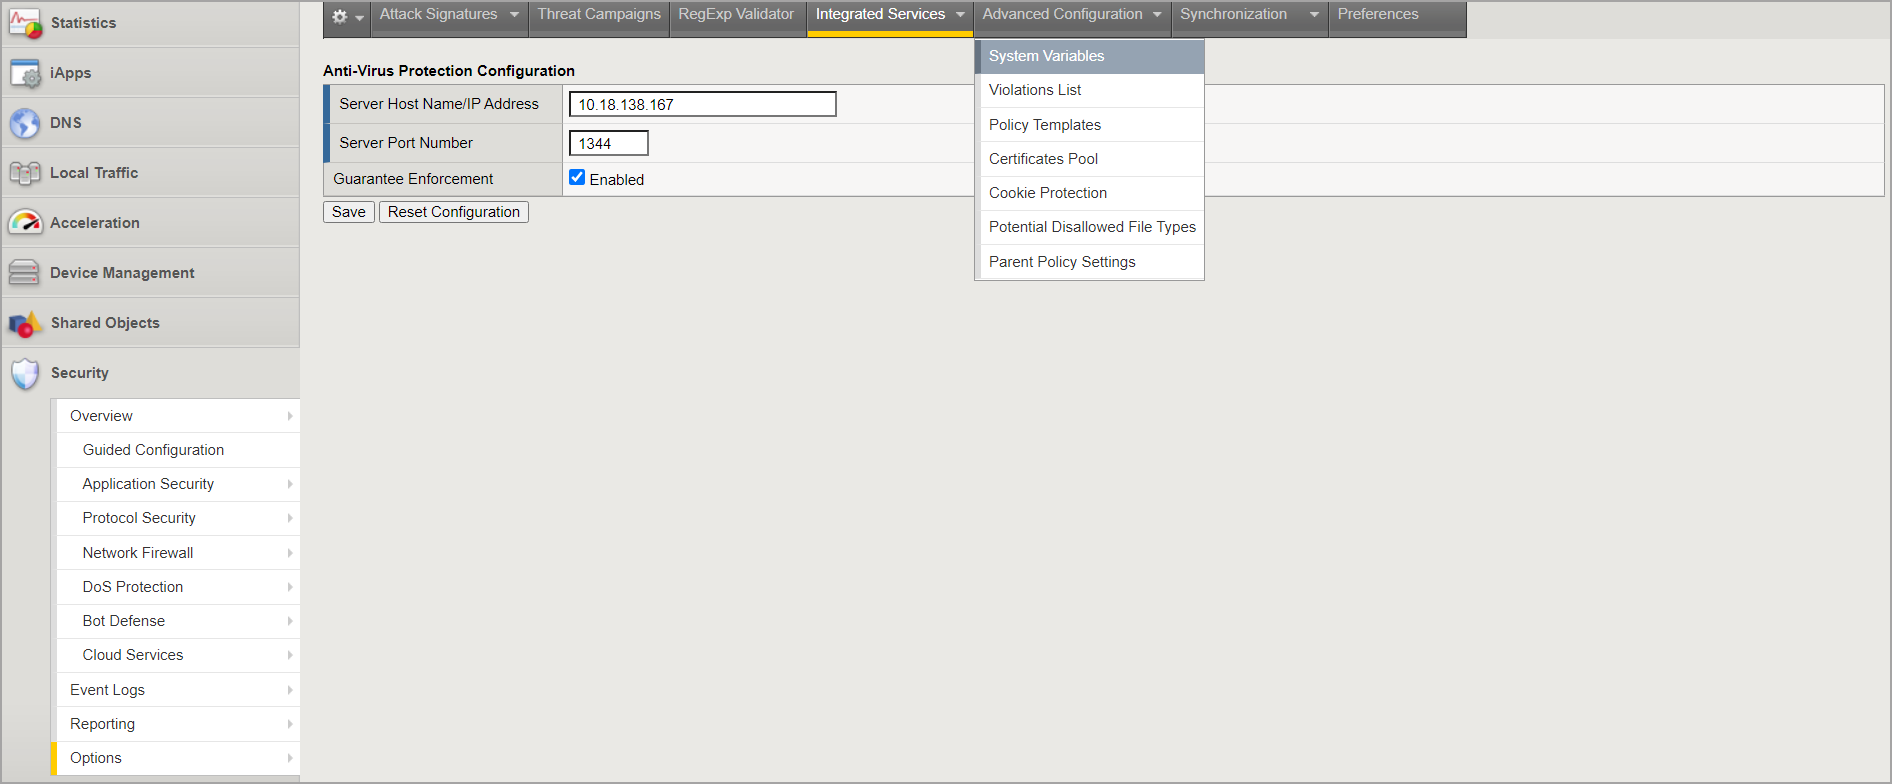
Configure antivirus settings. Follow these steps:
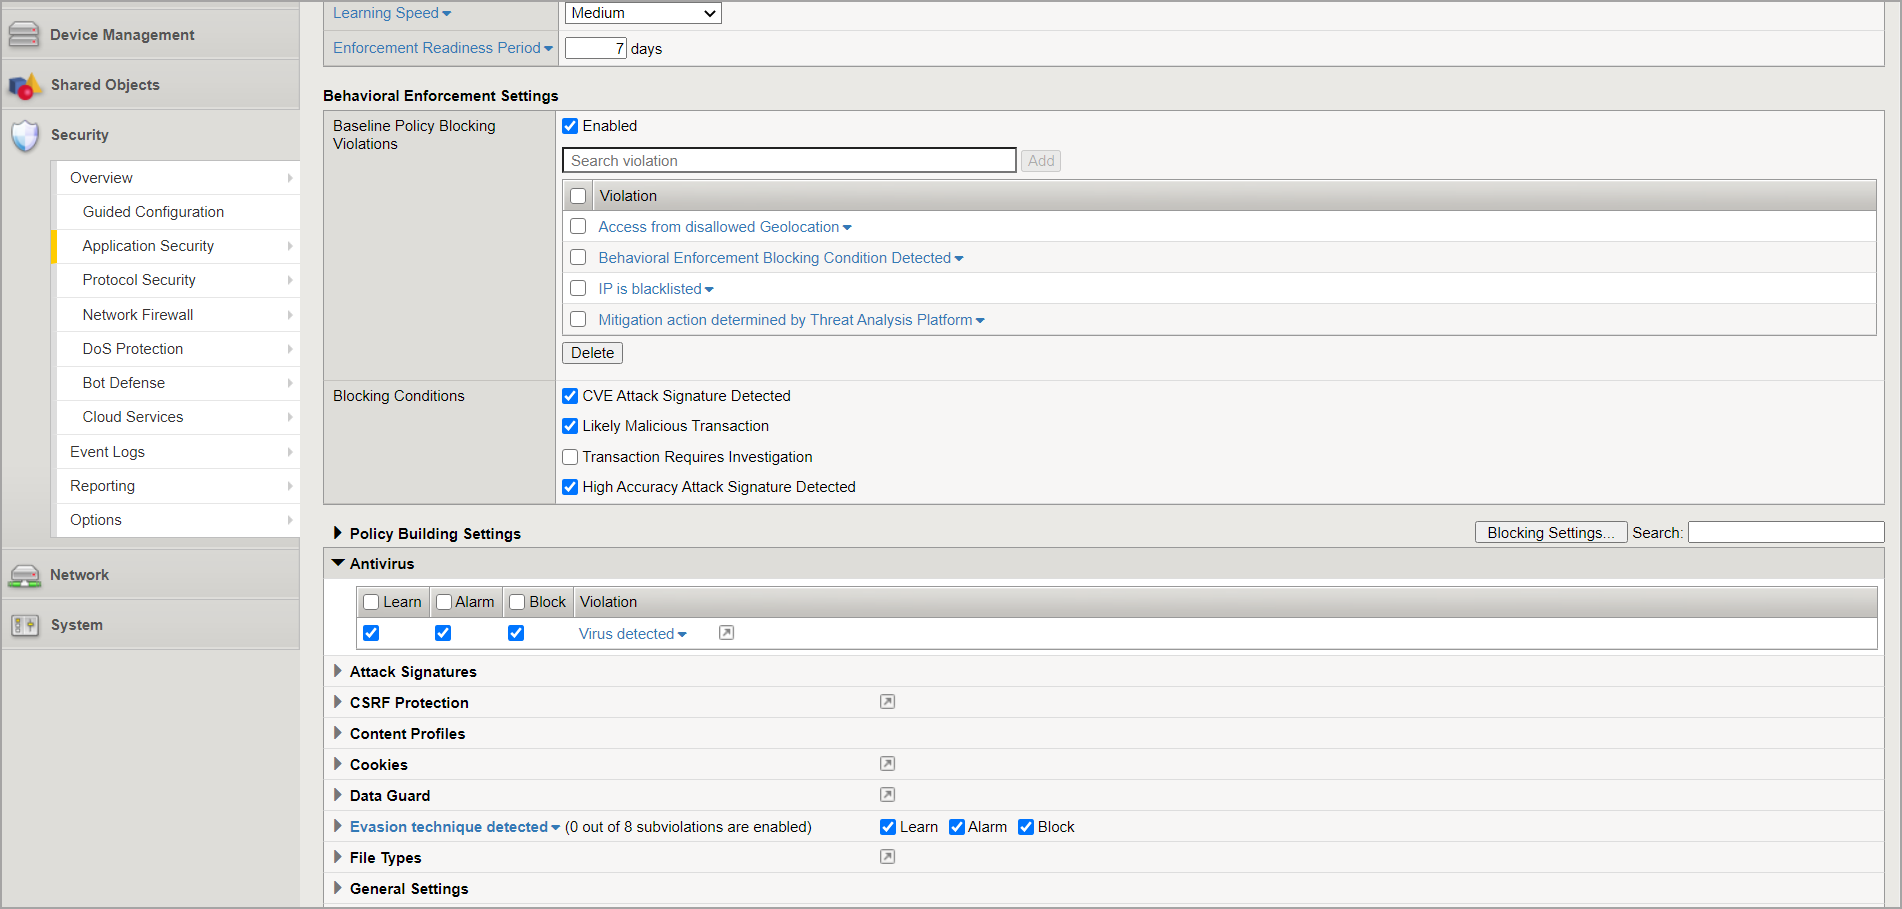
Go to Application Security > Policy Building and select Learning and Blocking Settings.

Go to Policy Building Settings > Antivirus and select the check boxes for Learn, Alarm, and Block.
Click Save.
To activate the security policy changes immediately, select Apply Policy.
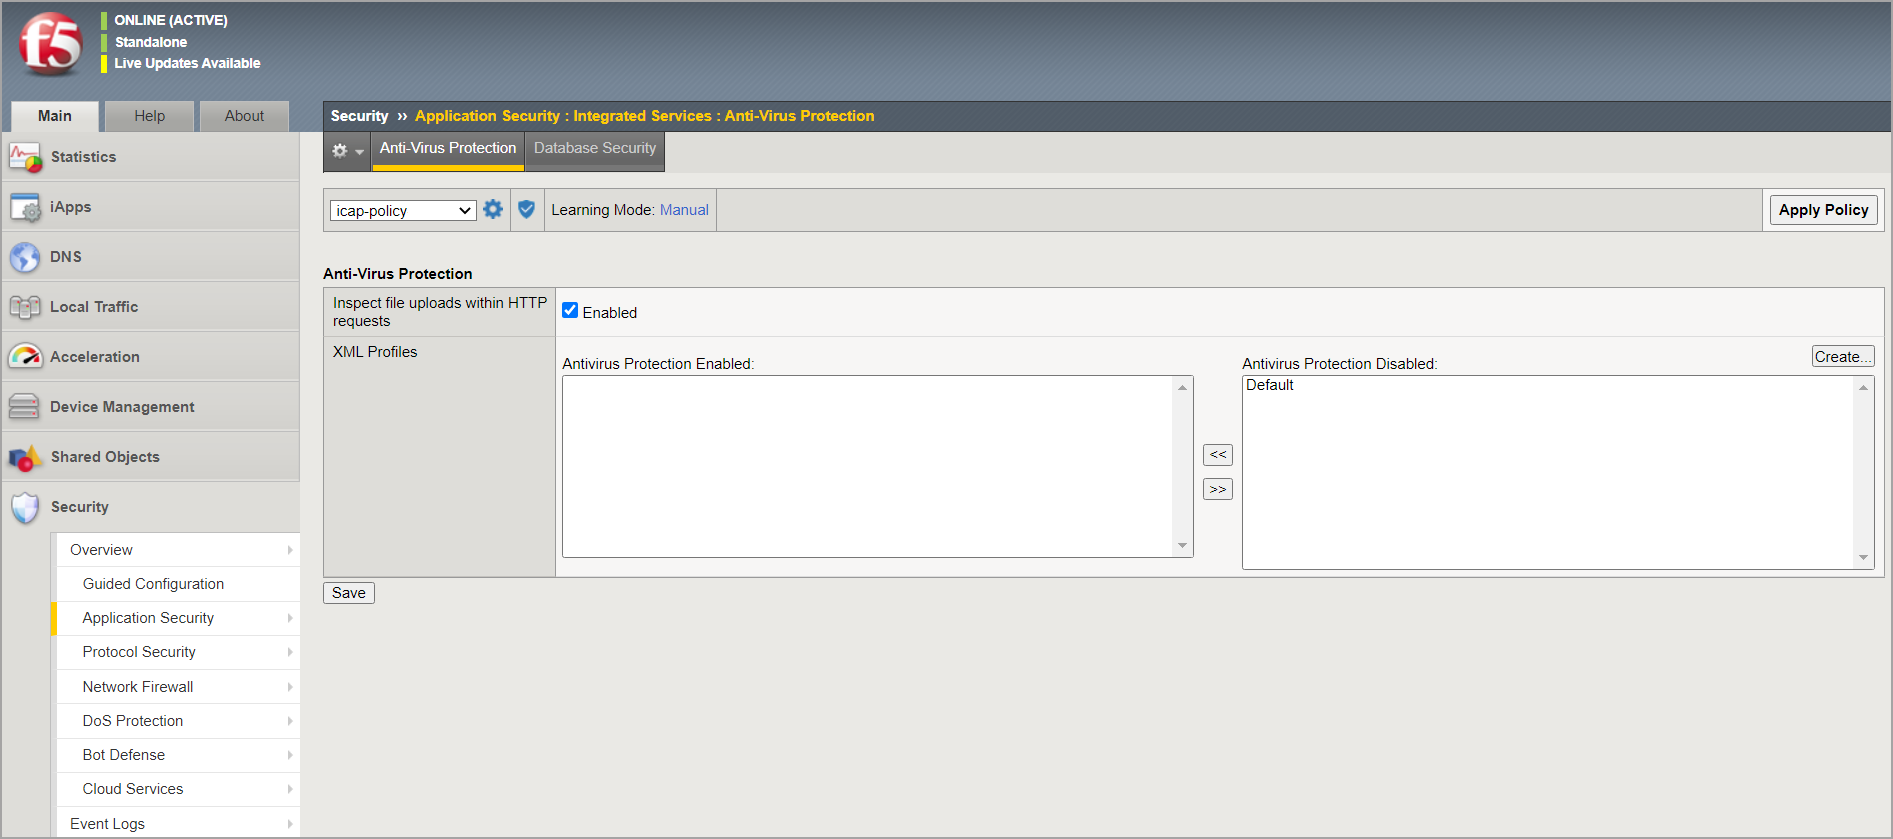
Go to Application Security > Integrated Services > Anti-Virus Protection and enable Inspect file uploads within HTTP requests.
Click Save.
To activate the security policy changes immediately, click Apply Policy.
To learn more about configuring the antivirus protection in F5 BIG-IP VE ASM, refer to this article.
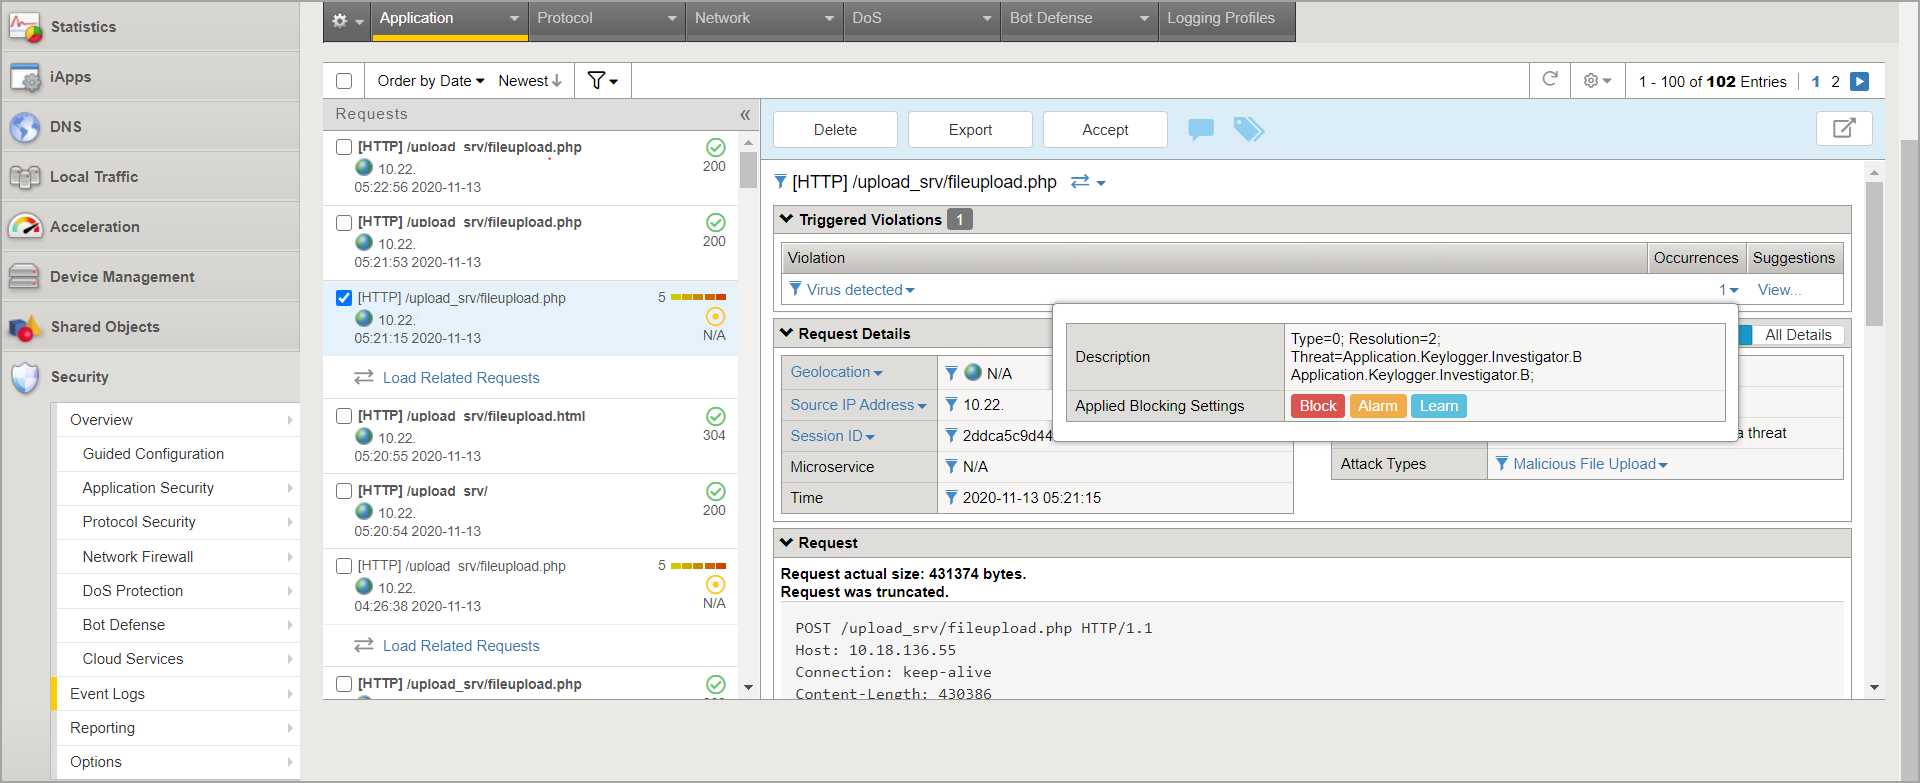
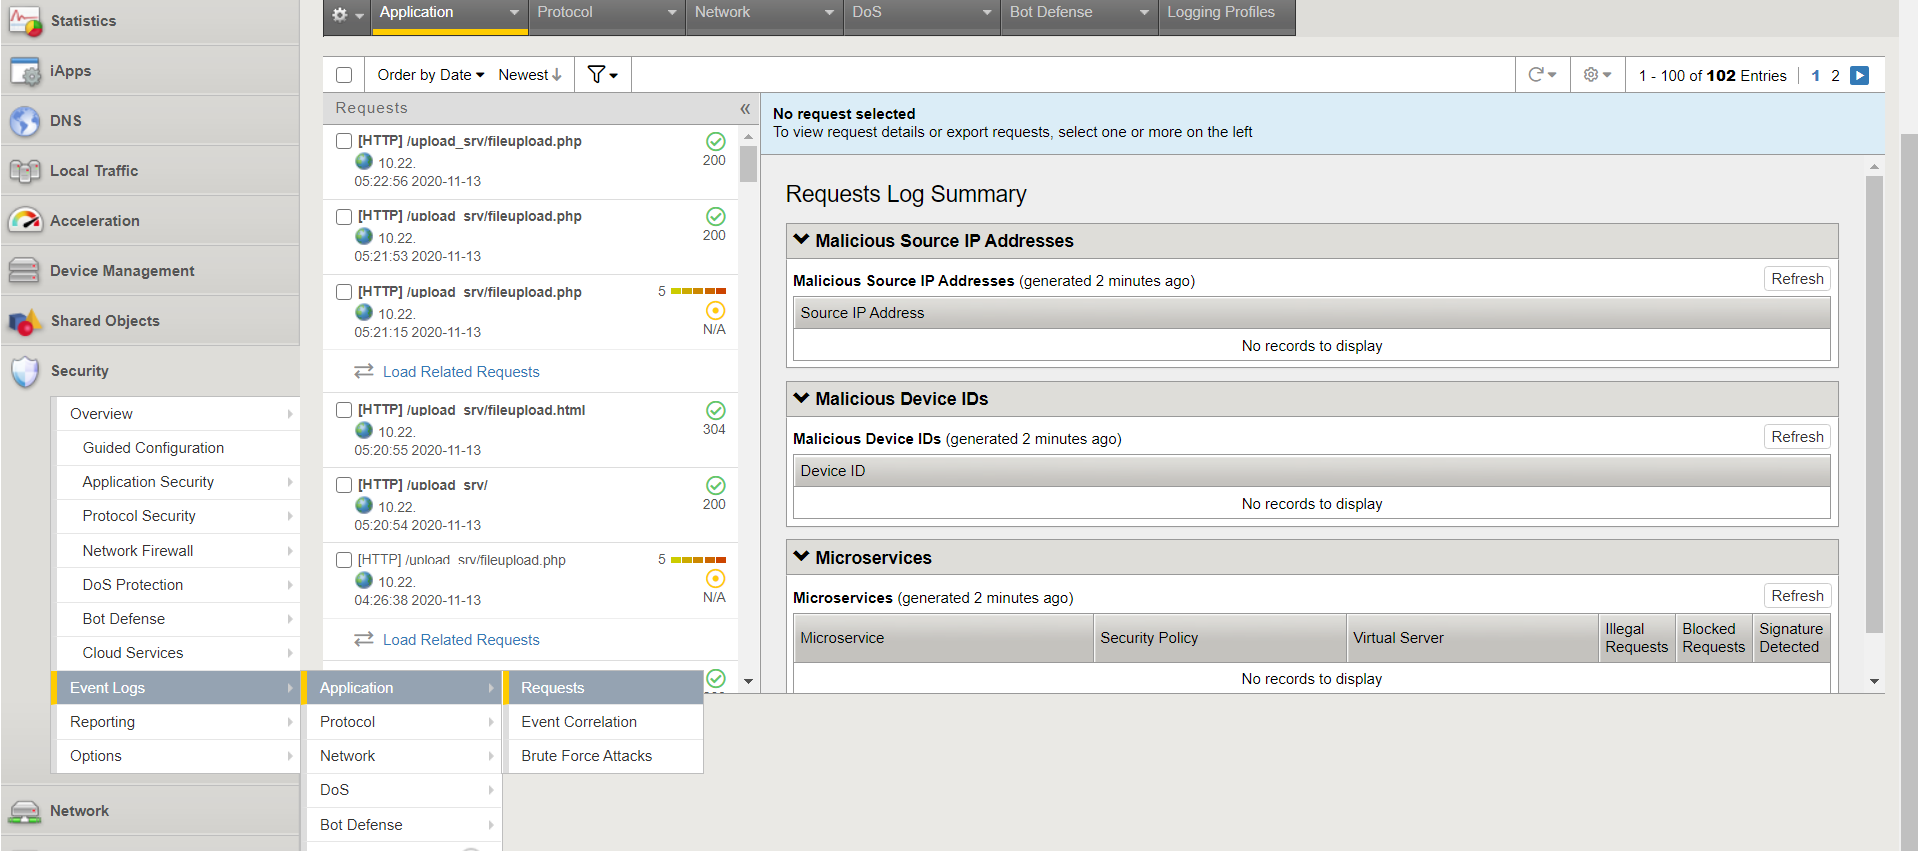
To view the application logs, in the Main menu, go to Security > Event Logs > Application > Requests.
Test the integration
After configuring BIG-IP VE ASM to use GravityZone Security for Storage, follow these steps to test the integration:
Make sure the Bitdefender Security Server has a GravityZone policy applied, with ICAP scanning enabled.
Access your application and upload an infected file.
Log in to BIG-IP VE ASM platform and check the Event Logs.