Migrating from Bitdefender Security for Labtech to ConnectWise Automate integration
Next to the existing Security for Labtech plugin, Bitdefender launched in the second quarter of 2018 a new integration between its GravityZone cloud solution for MSP and ConnectWise Automate (the former Labtech RMM solution). This new integration comes in the context of transition from the former Labtech to ConnectWise Automate solution.
This section will walk you through the process of migration from Security for Labtech to the new Bitdefender plugin for ConnectWise Automate.
Requirements for installing the Bitdefender plugin in ConnectWise Automate
ConnectWise Automate v12.
An MSP monthly subscription account in GravityZone cloud console, created by a Bitdefender partner or distributor.
Important
Make sure to uninstall the Bitdefender plugin for Security for Labtech before installing the Bitdefender plugin for ConnectWise Automate.
Install the Bitdefender plugin in ConnectWise Automate
Log in to ConnectWise Automate Control Center.
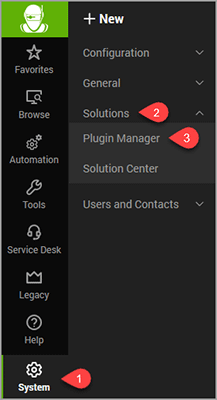
Go to System > Solutions > Solution Center.
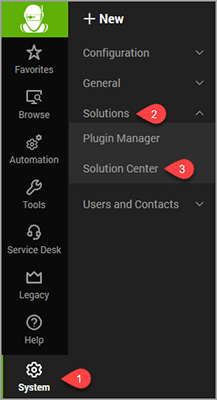
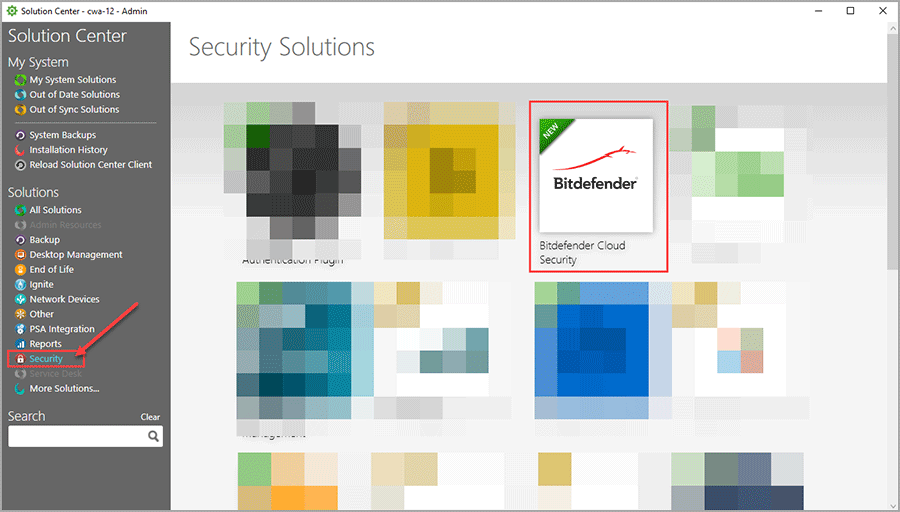
Select Security > Bitdefender Cloud Security.
Click Queue to add this solution in queue.
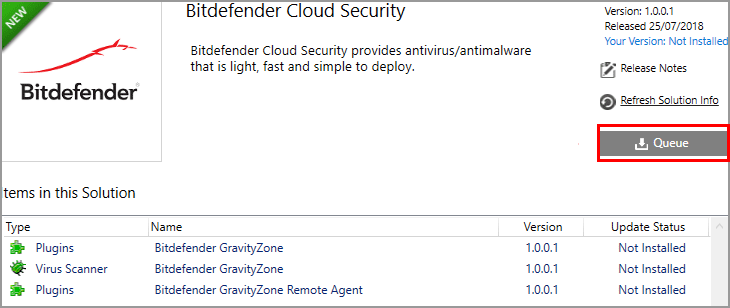
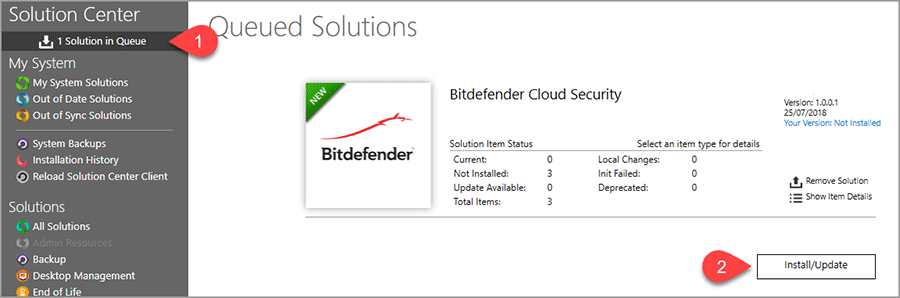
You will notice 1 Solution in Queue.
Click Install/Update, then exit the Solution Center.
Go to System > Solution > Plugin Manager.
Enable both the Bitdefender GravityZone and Bitdefender GravityZone Remote Agent plugins.
Note
When enabling the plugins you will be asked to restart the Database AgentService. Select No as this task will be performed later.
Go to Advanced > Reload Plugins and select Update Remote Agent Plugins.
This will restart the Database Agent and Remote Plugins.

After the Database Agent has successfully reloaded, reopen the ConnectWise Automate Control Center to continue configuring the Bitdefender GravityZone integration.
Integrate ConnectWise Automate with GravityZone
In ConnectWise Automate, go to Tools > Bitdefender GravityZone Settings.
Reload the Database Agent.
Go to Advanced > Reload Plugins > Update Remote Agent Plugins to trigger a remote agent plugin update.
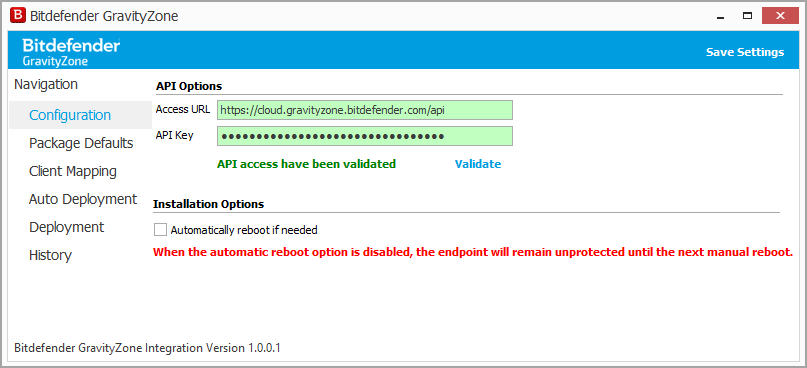
Enter the GravityZone API Details.
Note
When enabling the plugins you will be asked to restart the Database AgentService.
Select No as this task will be done later.
Make sure the Auto Deployment option is disabled.
Access in your browser the provisioned Bitdefender GravityZone web console address.
Follow the initial setup instructions to configure your GravityZone account. For more details, refer to the GravityZone guide available on Help & Support page.
Click the username in GravityZone's console ribbon and choose My Account.
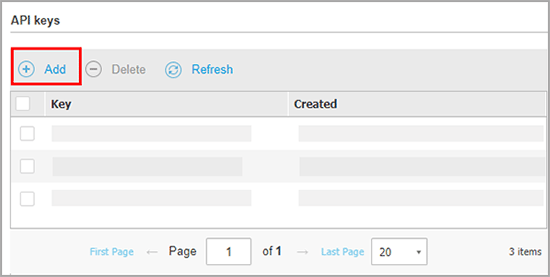
Go to the API keys section and click the Add button.
Enable the following APIs:
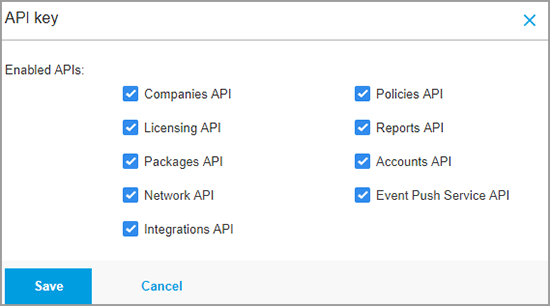
Click Save.
An API key is generated.
Note
To prevent the leaking of sensitive information, do not share or distribute your own generated API keys.
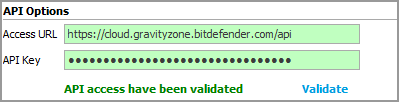
Copy the Access URL from the Control Center API section.

Enter the details into ConnectWise Automate and click Validate.
After validation, you will be able to access additional configuration options.
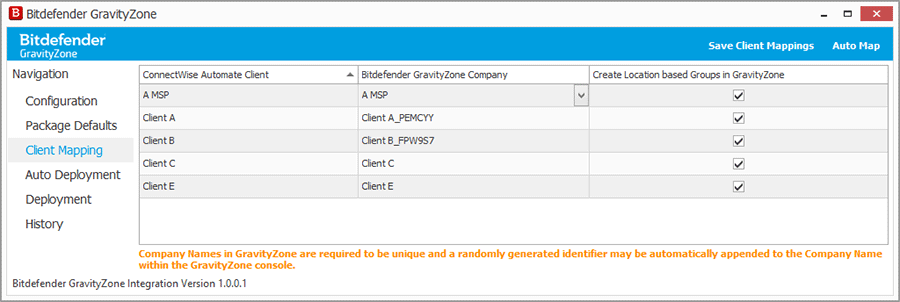
Configure the Client Mapping in Bitdefender plugin
Mapping a client is the process of linking a client from ConnectWise Automate to a company within Bitdefender GravityZone.
In the newly configured ConnectWise Automate plugin window you will find the Client Mapping section.
By checking the Create Location Based Groups in GravityZone, the plugin will create a Group and Deployment package in the GravityZone Portal for each location within ConnectWise Automate.
Important
Changing a client mapping does not automatically move installed agents between the previously and newly selected companies within the GravityZone Console. For this, you will need to uninstall the old Bitdefender agent and install the new one.
As a result, your ConnectWise Automate inventory will appear in GravityZone Control Center, where you can manage the security settings and take actions on endpoints.
Handle policies for ConnectWise Automate inventory in GravityZone
Because it is not possible to import security policies in GravityZone from Labtech, we recommend creating the policies that you need in GravityZone and assign them to companies with force inheritance for contained objects. In this way, newly deployed endpoints will get the assigned policy directly.
To create and apply a policy to a company in GravityZone, proceed as follows:
In GravityZone, go to the Policies page from the left side menu.
Click the Add button.
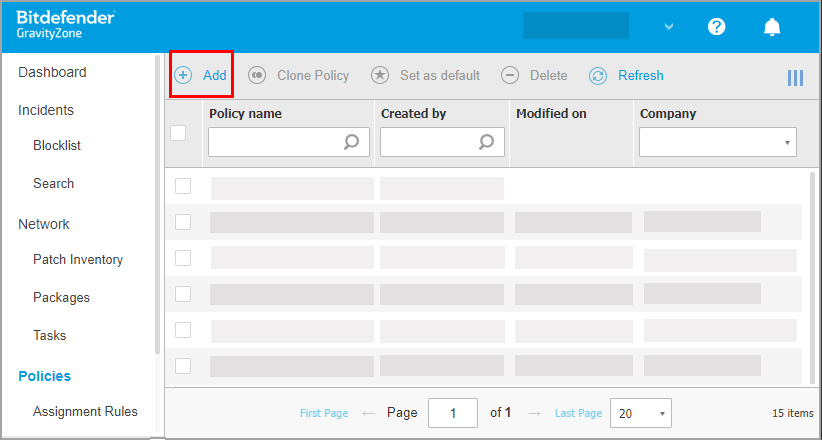
Configure the policy according to your needs, then save it with a relevant name.
Note
For more details, refer to the GravityZone guide available on Help & Support page.
Go to the Network page from the left side menu, and select the Companies inventory.
Select the company that you want and click the Assign policy button.
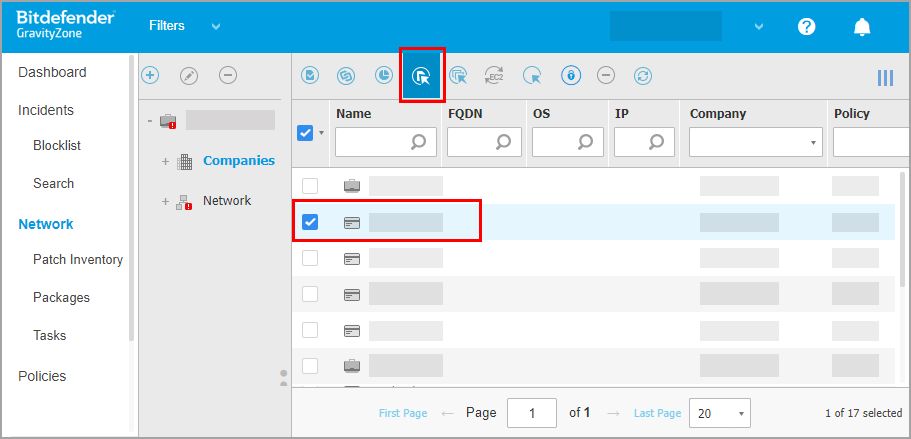
In the Policy Assignment window, make the following settings:
Select the policy you want to apply to the company.
Enable the option Force policy inheritance for objects.
Click Finish to apply.
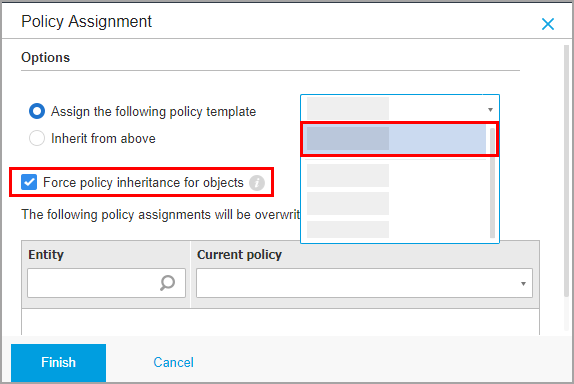
The policy will apply to all existing or future protected endpoint under the selected company.
Deploy Bitdefender Endpoint Security Tools agent in ConnectWise Automate
You can install manually the Bitdefender security agent (Bitdefender Endpoint Security Tools) on the endpoints of a company, or automatically, using the Auto Deployment option.
The plugin will automatically upgrade the existing Bitdefender security agent.
Manual deployment
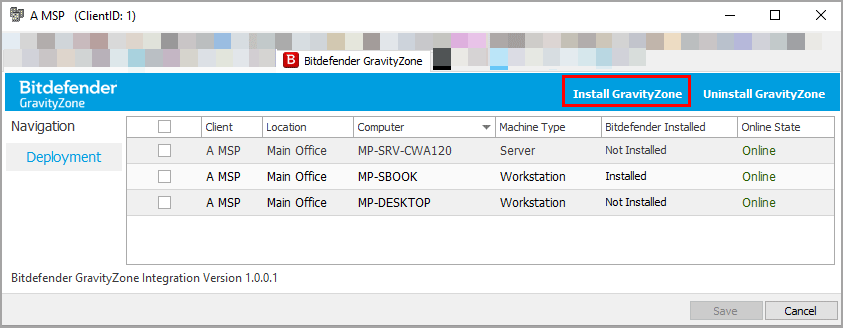
In ConnectWise Automate, select Deployment from the Bitdefender plugin window.
Select the clients you want to protect.
Click Install GravityZone on the upper-right side if the table.
Auto deployment
Through Auto Deployment, you are instructing the plugin to monitor a specific location for any Windows Workstation or Windows Server that does not have Bitdefender GravityZone installed, and to start the installation process.
In ConnectWise Automate, select >Auto Deployment from the Bitdefender plugin window and configure the settings as you want:
By selecting Workstations, you enable Auto Deployment for Windows workstations.
By selecting Servers, you enable Auto Deployment for Windows servers.
Note
Only clients and locations that are mapped to a company within GravityZone will appear in this list.
