Configuring notification settings
The type of notifications to be sent and the email addresses they are sent to can be configured for each user.
To configure the notification settings:
Log in to GravityZone Control Center.
Click the bell icon button
 at the right side of the menu bar to expand the Notifications panel.
Click See all notifications. A table containing all the notifications is displayed.
Click the
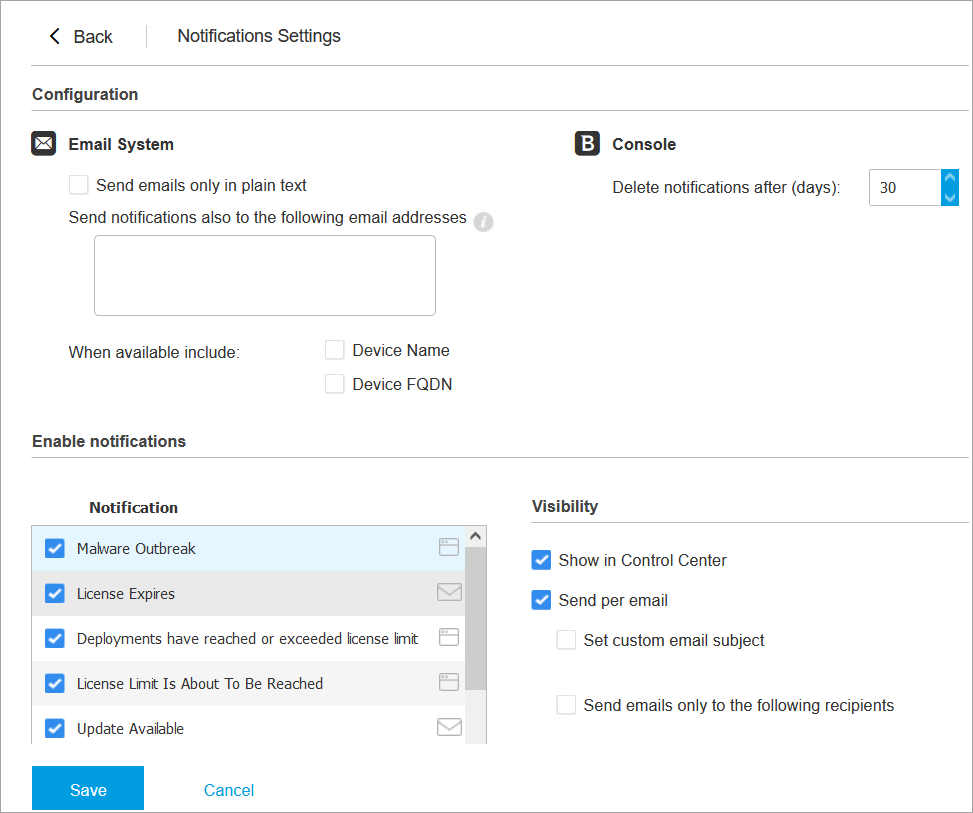
 Configure button at the upper side of the table. The Notification Settings window is displayed.
Note
You can also access the Notification Settings window directly using the
 Configure icon from upper-right corner of the Notification area window.
Under Configuration section you can define the following settings:
Automatically delete notifications after a certain period of time. Set any number you want between 1 and 365 in the Delete notifications after (days) field.
Additionally, you may send the notifications by email to specific recipients. Type the email addresses in the dedicated field, pressing
Enterkey after each address.
Under Enable Notification section you can choose the type of notifications you want to receive from GravityZone. You can also configure the visibility and sending options individually for each notification type.
Select the notification type that you want from the list. For more information, refer to Notifications Types. While a notification type is selected, you can configure its specific options (when available) in the right-side area:
Visibility
Show in Control Center specifies that this type of event is displayed in Control Center, with the help of
 Notifications button.
Send per email specifies that this type of event is also sent to certain email addresses. In this case, you are required to enter the email addresses in the dedicated field, pressing
Enterafter each address. Additionally, for several notifications, you can customize the email subject by selecting the Set custom email subject check box and typing in the subject.
Configuration
Use custom threshold - allows defining a threshold for the occurred events, from which the selected notification is being sent.
For example, the Malware Outbreak notification is sent by default to users that have at least 5% of all their managed network objects infected by the same malware. To change the malware outbreak threshold value, enable the option Use Custom Threshold, then enter the value that you want in the Malware Outbreak Threshold field.
Receive notifications for child companies - available for all events, referring by default to your network. Enable this option if you want to be notified when an event occurs on one of your managed companies.
For Security Server Status event, you can select the Security Server events that will trigger this type of notification:
Out of date - notifies each time a Security Server in your network is outdated.
Reboot required - notifies each time a Security Server in your network requires a reboot.
For Task Status, you can select the status type that will trigger this type of notification:
Any status - notifies each time a task sent from Control Center is done with any status.
Failed only - notifies each time a task sent from Control Center has failed.
Click Save.