Configuring single sign-on using a 3rd party identity provider
GravityZone supports SAML 2.0-based single sign-on (SSO) with third-party identity providers. This allows users to authenticate using their corporate credentials instead of GravityZone-specific passwords.
There are two separate SSO configurations available, each serving a different purpose:
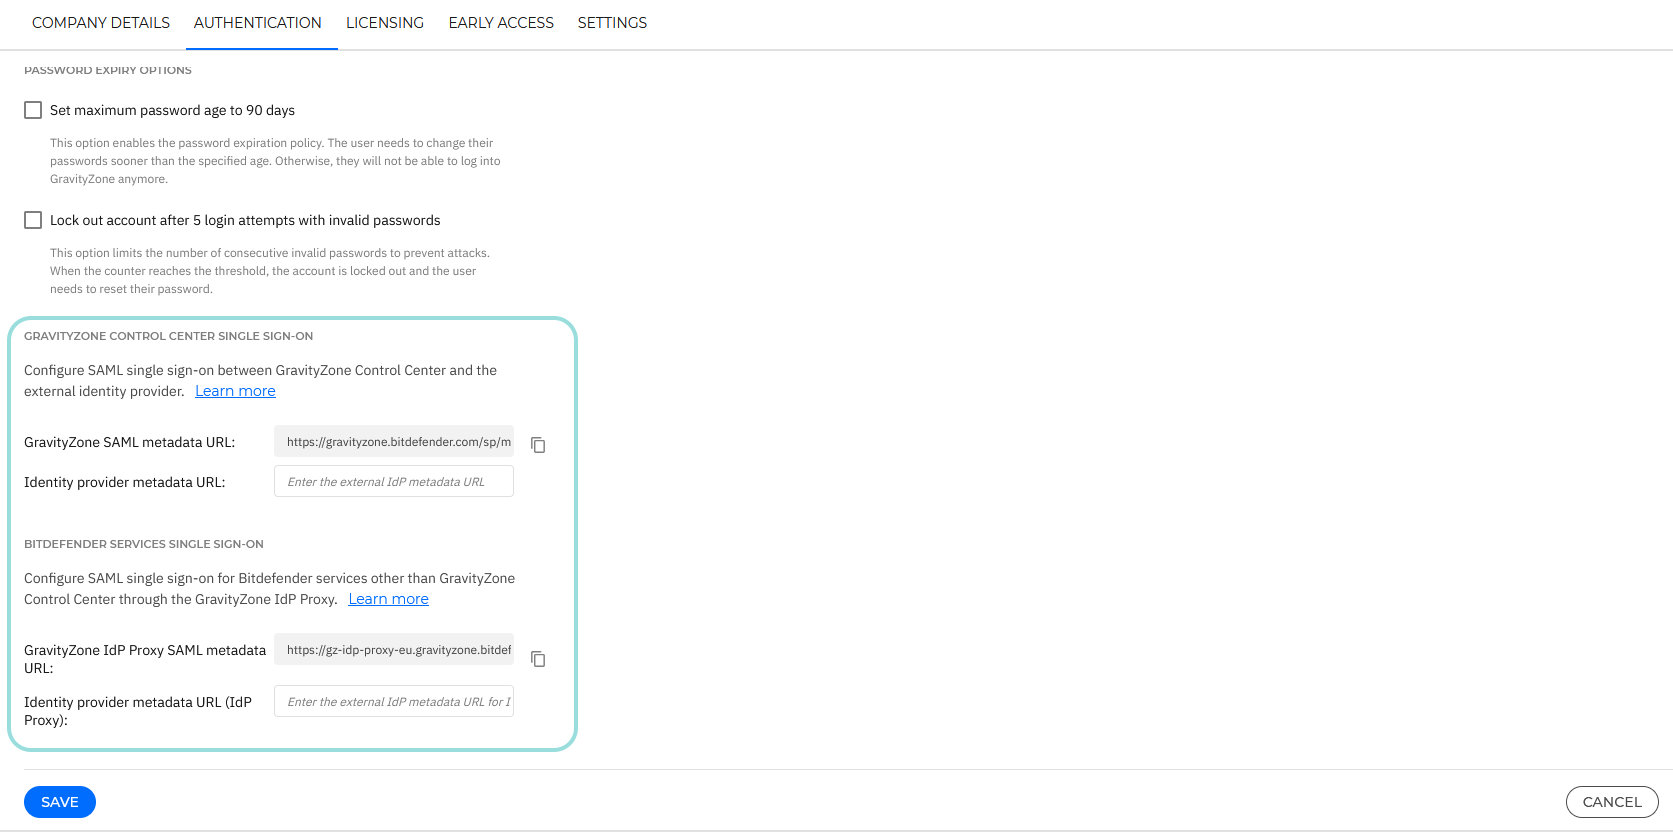
GravityZone Control Center single sign-on
This configuration enables users to log in to GravityZone Control Center using their corporate identity provider credentials. When configured, users navigate to the GravityZone login page, enter their email address, and are redirected to the corporate identity provider for authentication. After successful authentication, they are returned to GravityZone Control Center and granted access.
Bitdefender services single sign-on
This configuration enables users to log in to Bitdefender services and applications outside GravityZone Control Center, such as MDR portal, using the same corporate identity provider. This is achieved through the GravityZone IdP Proxy, which acts as a centralized authentication gateway between your external identity provider and Bitdefender services.
When a user navigates to a supported Bitdefender service, the service redirects them to the GravityZone IdP Proxy. The IdP Proxy identifies the user's corporate identity provider and redirects them there for authentication. After successful authentication, the IdP Proxy forwards the identity confirmation to the Bitdefender service, and the user is granted access.
The settings are available in the company's Authentication page.
Relationship between the two configurations
Bitdefender services SSO builds on top of GravityZone Control Center SSO:
GravityZone Control Center SSO must be configured first.
Users must be set to Login using your Identity Provider in their GravityZone account settings. This option appears in the user account settings after configuring SSO with a 3rd party IdP.
For Bitdefender services SSO, it is recommended that you use a separate application in your identity provider, configured with the GravityZone IdP Proxy metadata (not the GravityZone Control Center metadata).
Tested identity providers
The following identity providers have been officially tested with GravityZone SSO:
AD FS (2016 or later)
Okta
Microsoft Entra ID (formerly Azure AD)
GravityZone SSO can also work with other identity providers using SAML 2.0. However, if GravityZone SSO fails with another identity provider than those officially supported, this can happen because of that specific identity provider settings. Contact the Bitdefender Enterprise Support for possible recommendations. However, while we do our best to help you, the recommendations are not guaranteed to work for all identity providers.
Important
You cannot use at the same time single sign-on (SSO) and two-factor authentication (2FA) for GravityZone Control Center.
Both GravityZone Control Center SSO and Bitdefender services SSO only support service provider (SP) initiated login. IdP-initiated login is not supported.
Disable GravityZone Control Center SSO
To disable single sign-on for GravityZone Control Center:
Configuring GravityZone Control Center single sign-on using a 3rd party identity provider - Enable SSO for logging into GravityZone Control Center.
Configuring single sign-on for Bitdefender services using a 3rd party identity provider - Enable SSO for Bitdefender services other than GravityZone Control Center, such as MDR portal (requires GravityZone Control Center SSO to be configured first).