Configuring Bitdefender services single sign-on with Okta
GravityZone supports single sign-on (SSO) for Bitdefender services outside GravityZone Control Center, such as MDR Portal, through the GravityZone IdP Proxy. The IdP Proxy uses SAML 2.0 as authentication standard.
This topic describes how to configure single sign-on for Bitdefender services with Okta. For generic information on configuring other Identity Providers, refer to Configuring Bitdefender services single sign-on with Okta.
Prerequisites and requirements
You have an Okta account with administrator privileges to create, activate and assign applications to users.
You have a GravityZone Cloud administrator account to manage users, your company and other companies.
GravityZone users have Okta accounts with the same email addresses.
GravityZone Control Center SSO with Okta is already configured and working. Refer to Configure GravityZone Control Center single sign-on with Okta.
Users are configured with the Login using your Identity Provider authentication method in GravityZone account settings.
Note
This option is only available after GravityZone Control Center SSO has been configured at the company level.
Configure Okta
Single sign-on for Bitdefender services requires a separate Okta application specifically for the GravityZone IdP Proxy. This is in addition to the existing application used for GravityZone Control Center SSO.
This is how you configure an Okta application for GravityZone IdP Proxy:
Extract the GravityZone IdP Proxy SAML metadata
Log in to Bitdefender GravityZone as an administrator.
Click your user name in the upper-right side of the screen and select My Company or go to the company for which you want to configure the IdP SSO.
Go to the Authentication tab.
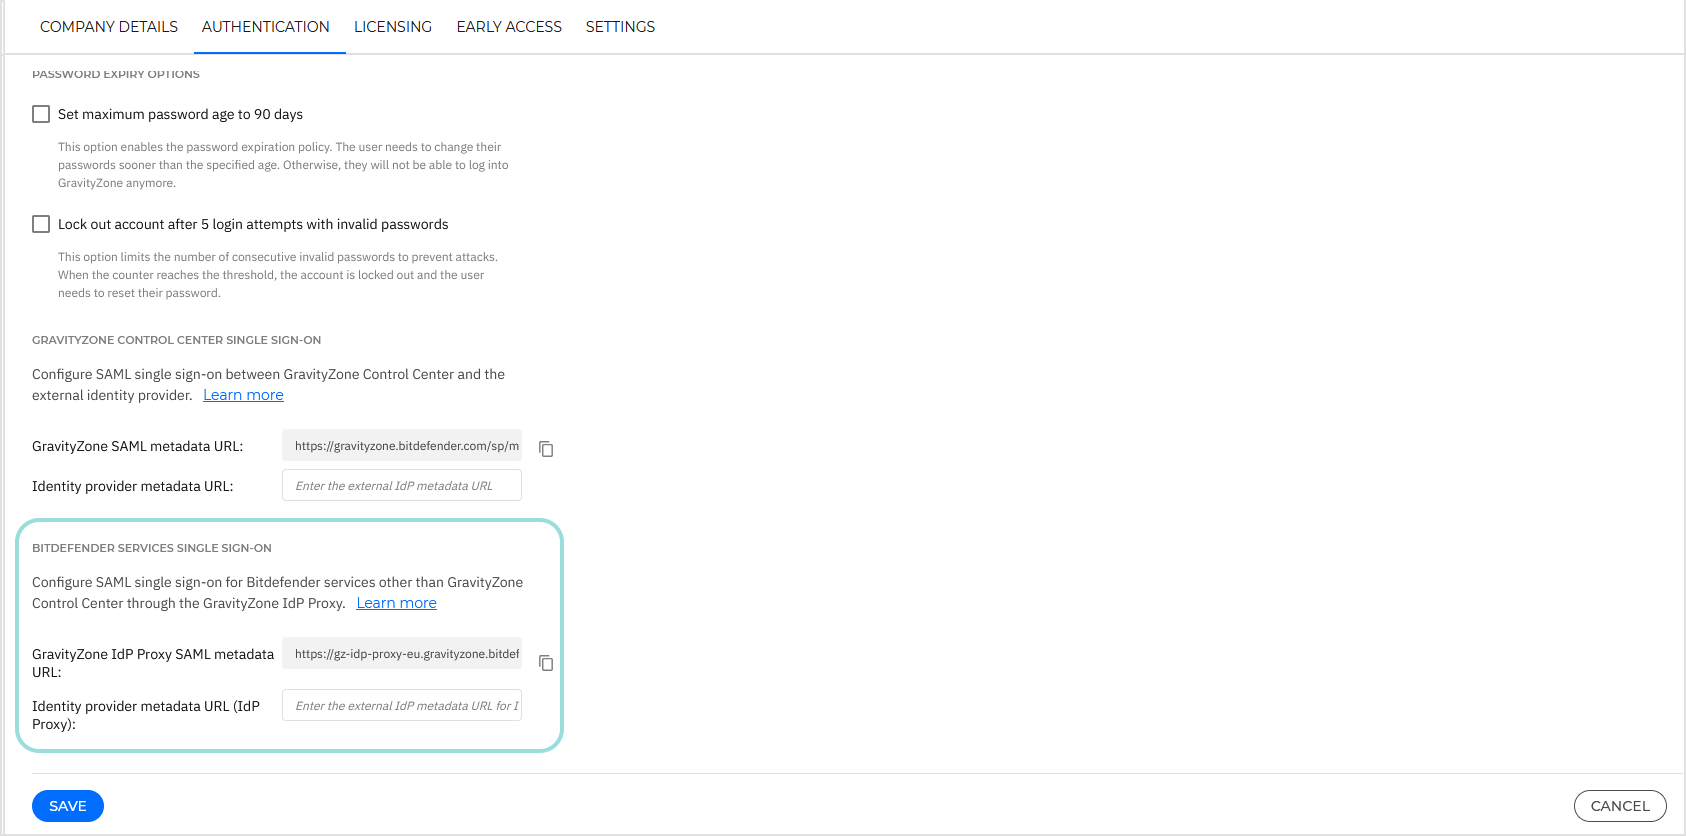
Under the Bitdefender services single sign-on section, click the button next to the GravityZone IdP Proxy SAML metadata URL field to copy the metadata URL.
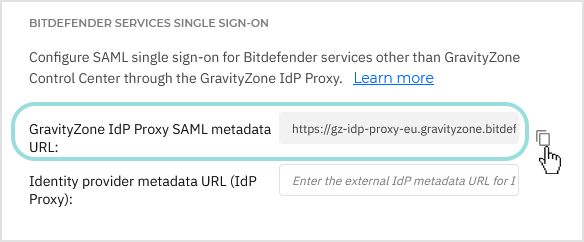
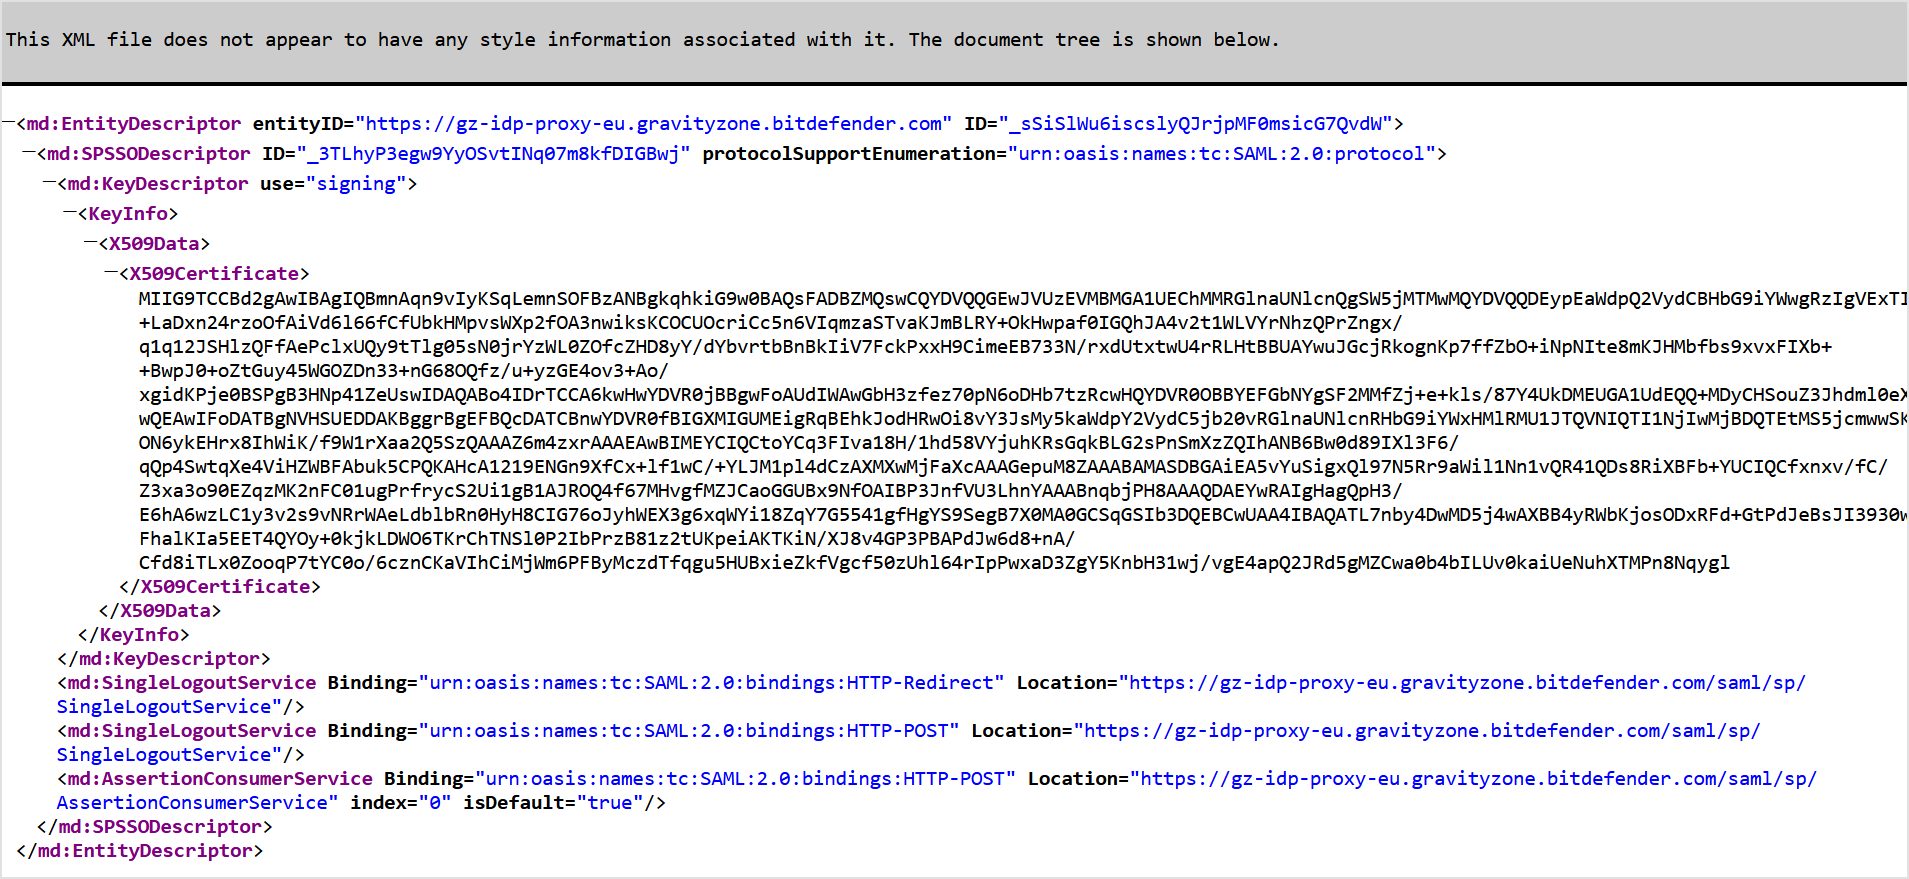
Open the metadata URL in a separate tab of your browser and save the page as a
metadata.xmlfile.
Keep the metadata.xml file open for reference during the Okta configuration. You will need the Entity ID and Assertion Consumer Service URL values from the metadata.
Create the SAML application
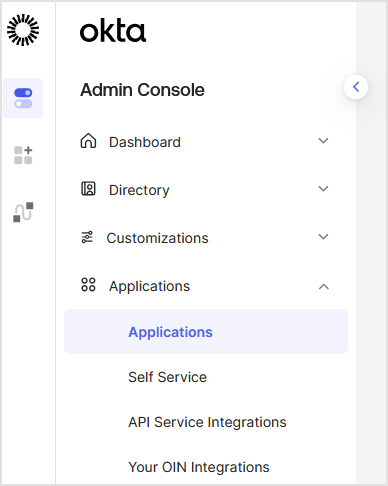
Log in to the Okta Admin Console.
In the left-side menu, go to Applications > Applications.
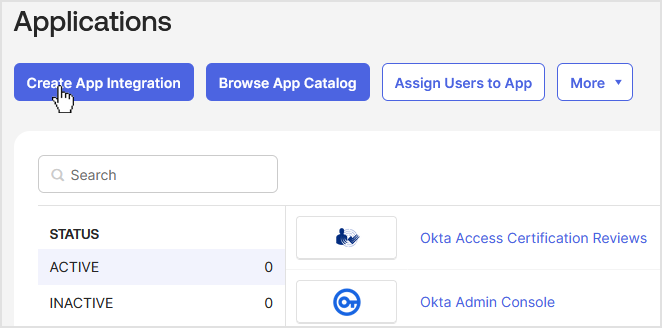
Click Create App Integration.
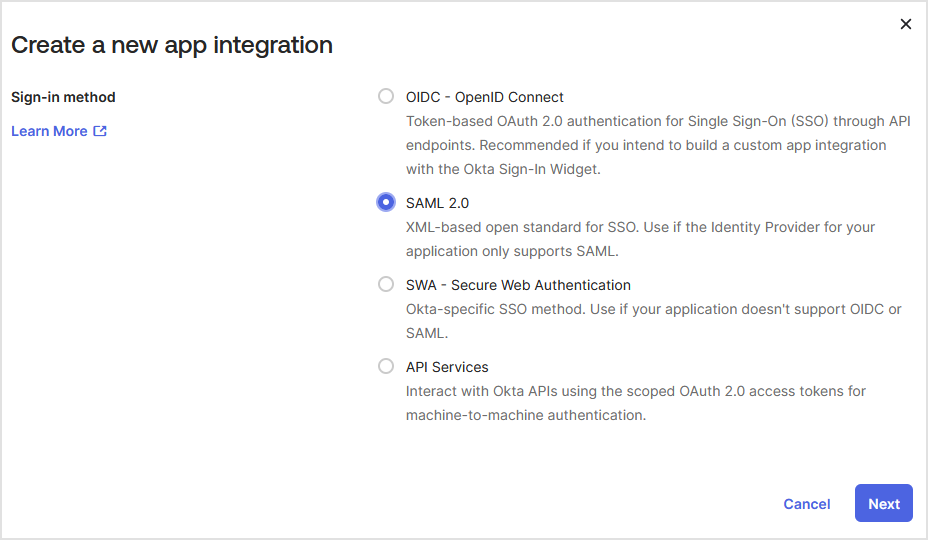
In the Create a new app integration window, select SAML 2.0 as sign-in method, and click Next.
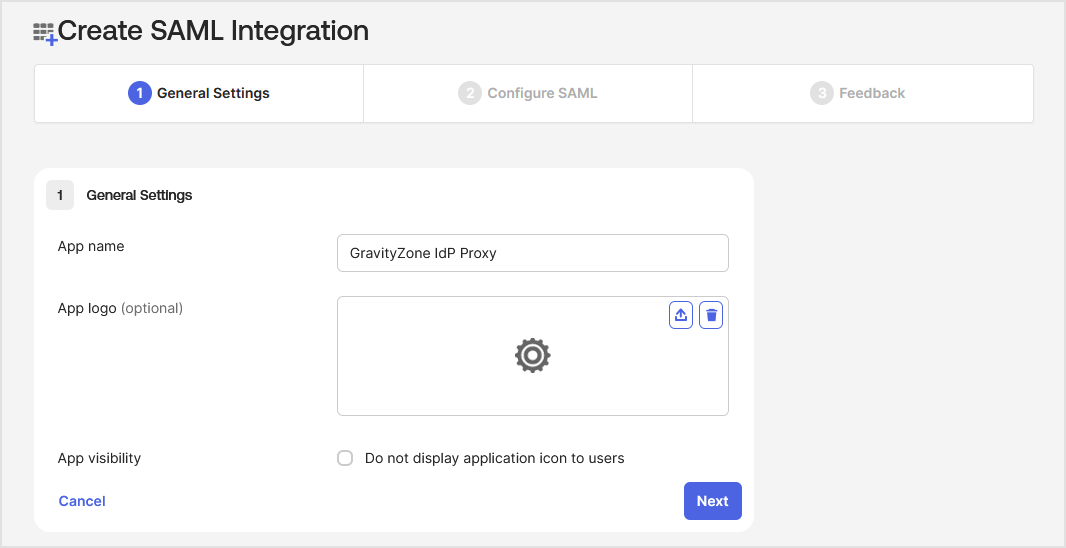
On the Create SAML Integration page, apply the following configuration:
Under the General Settings tab:
Enter an app name (for example,
GravityZone IdP Proxy).(Optional) Upload a logo image and set your app's visibility.
Click Next.
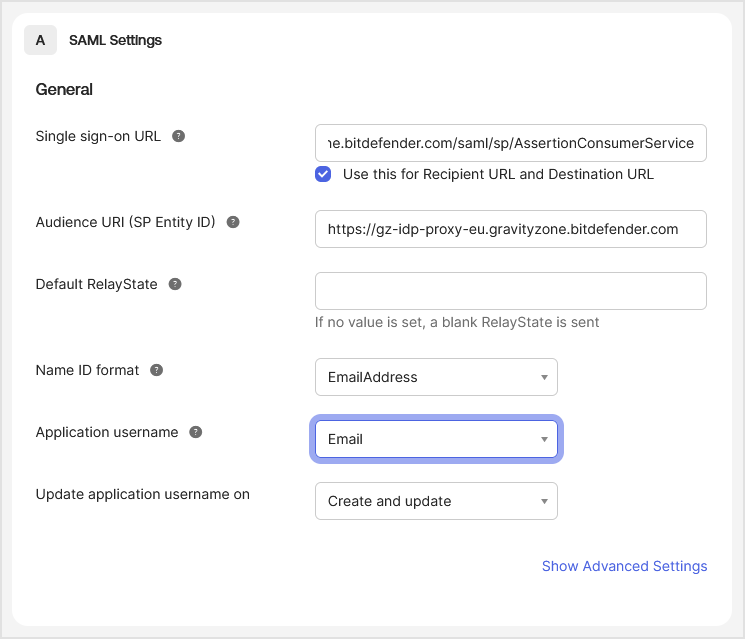
Under Configure SAML, follow the steps below:
Under Single sign-on URL, enter the Assertion Consumer Service URL from the IdP Proxy metadata XML and select the check box for Use this for Recipient URL and Destination URL.
Under Audience URI (SP Entity ID), enter the Entity ID from the IdP Proxy metadata XML.
For Name ID format, select EmailAddress.
For Application username, select Email.
Click the Show Advanced Settings link.
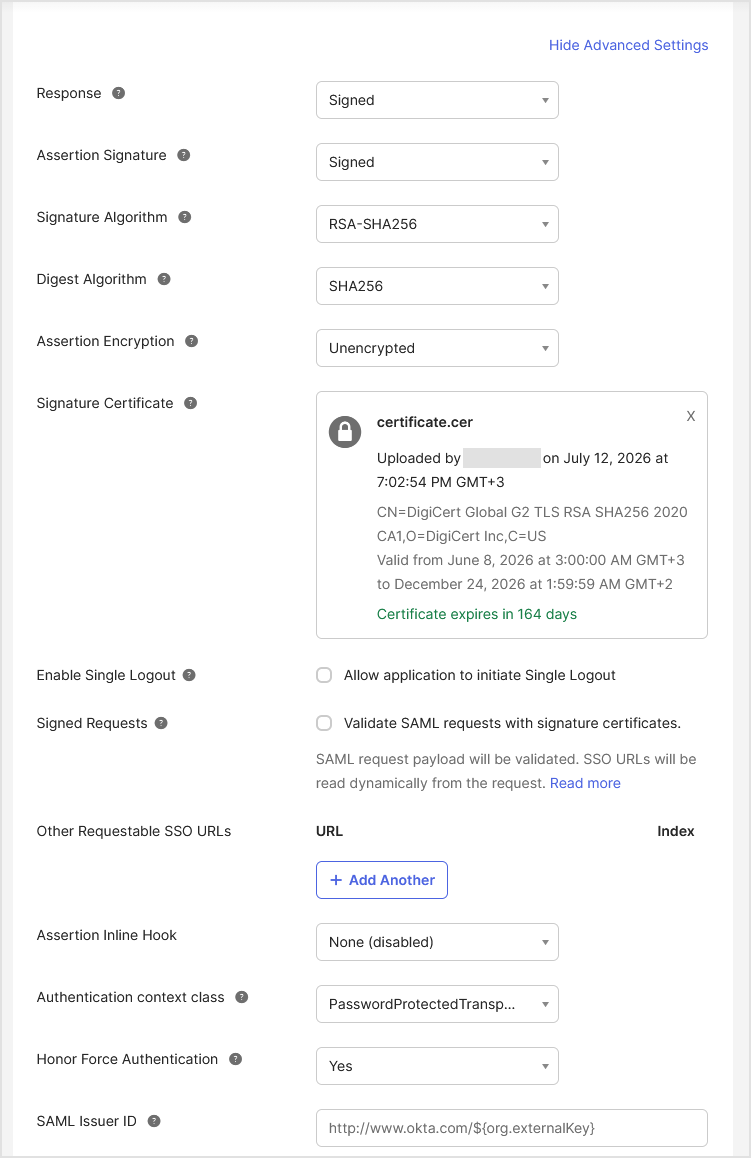
Apply the following configuration:
For Response, select Signed.
For Assertion Signature, select Signed.
For Signature Algorithm, select RSA-SHA256.
For Digest Algorithm, select SHA256.
For Assertion Encryption, select Unencrypted.
Under Signature Certificate, upload the GravityZone IdP Proxy certificate (
certificate.cer).To obtain the certificate:
Open the
metadata.xmlfile.Copy the
<X509Certificate>...</X509Certificate>value and paste it into a text editor.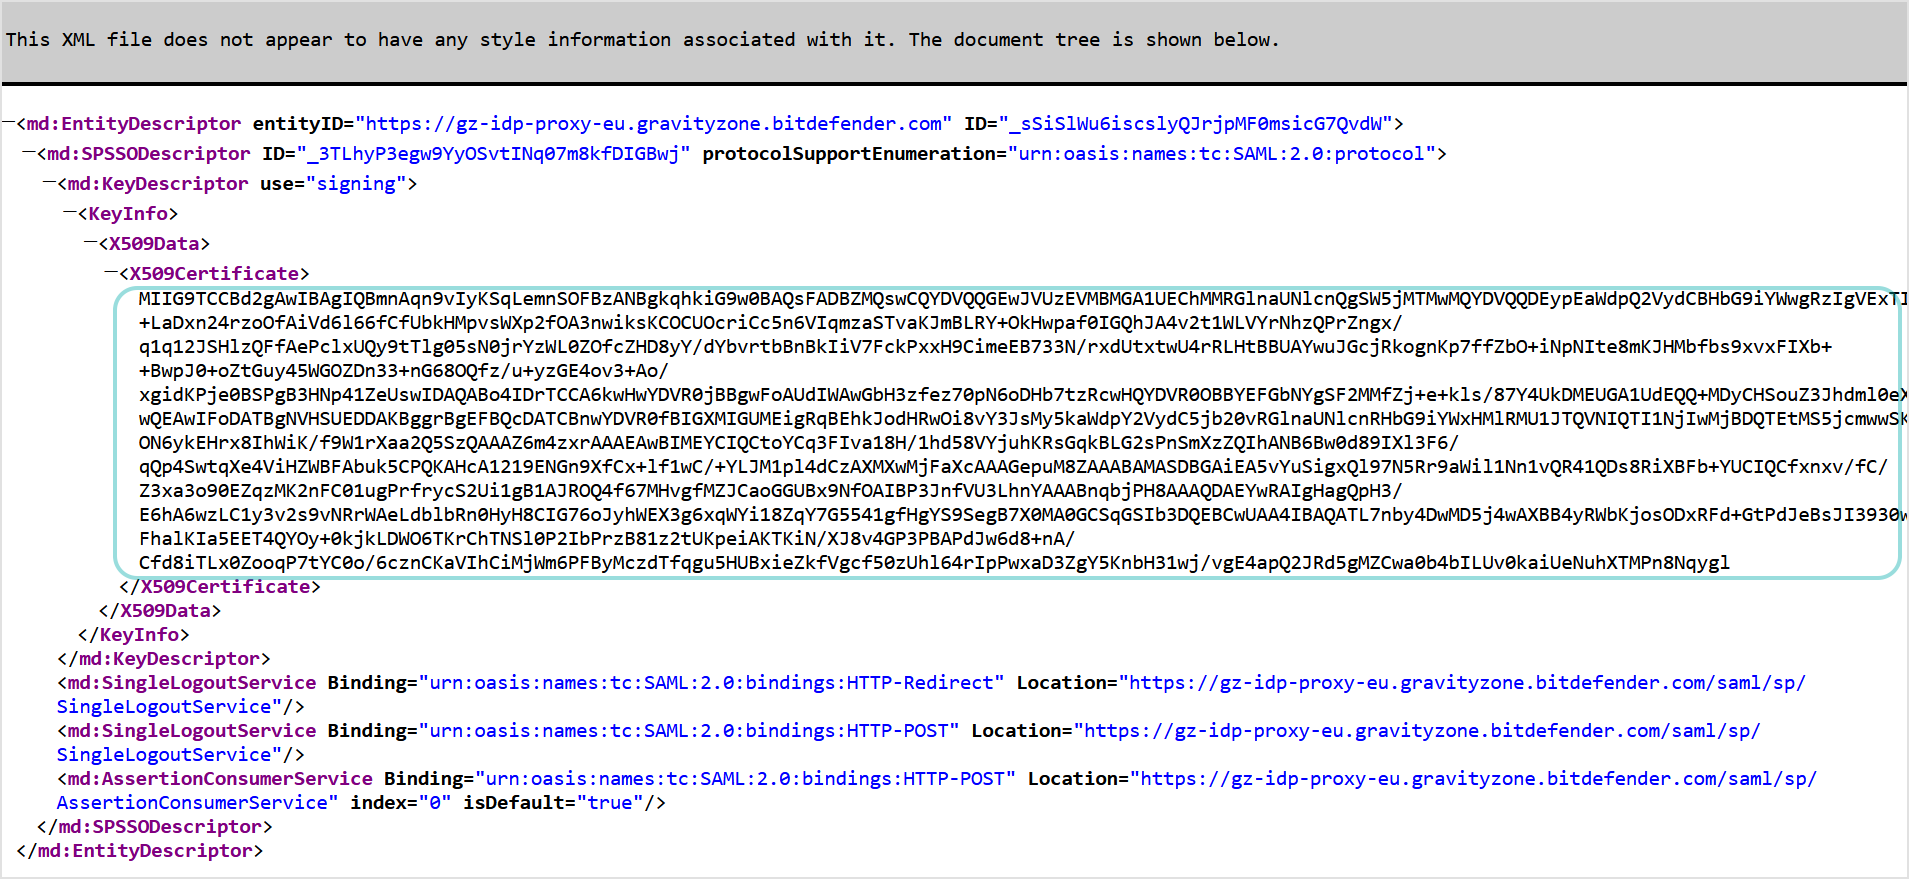
Add the following lines at the beginning and end of the file:
-----BEGIN CERTIFICATE-----
...
-----END CERTIFICATE-----
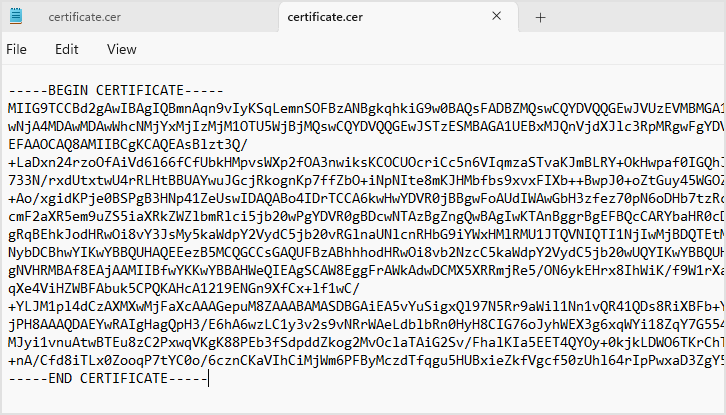
Save the file you created as
certificate.cer.
For Authentication context class, select PasswordProtectedTransport.
For Honor Force Authentication, select Yes.
For SAML Issuer ID, leave the default value:
http://www.okta.com/${org.externalKey}
Leave the rest of the fields blank.
Click Next.
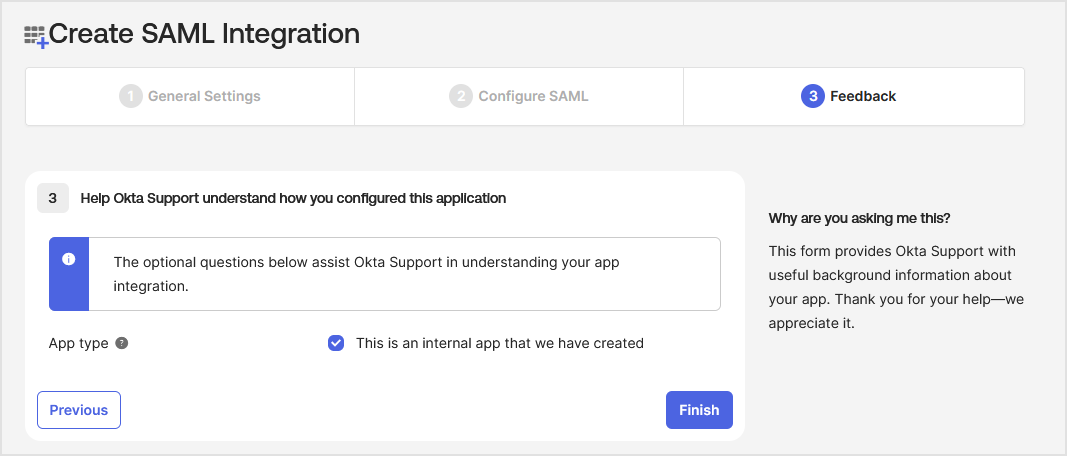
Under Feedback, select This is an internal app that we have created and click Finish.
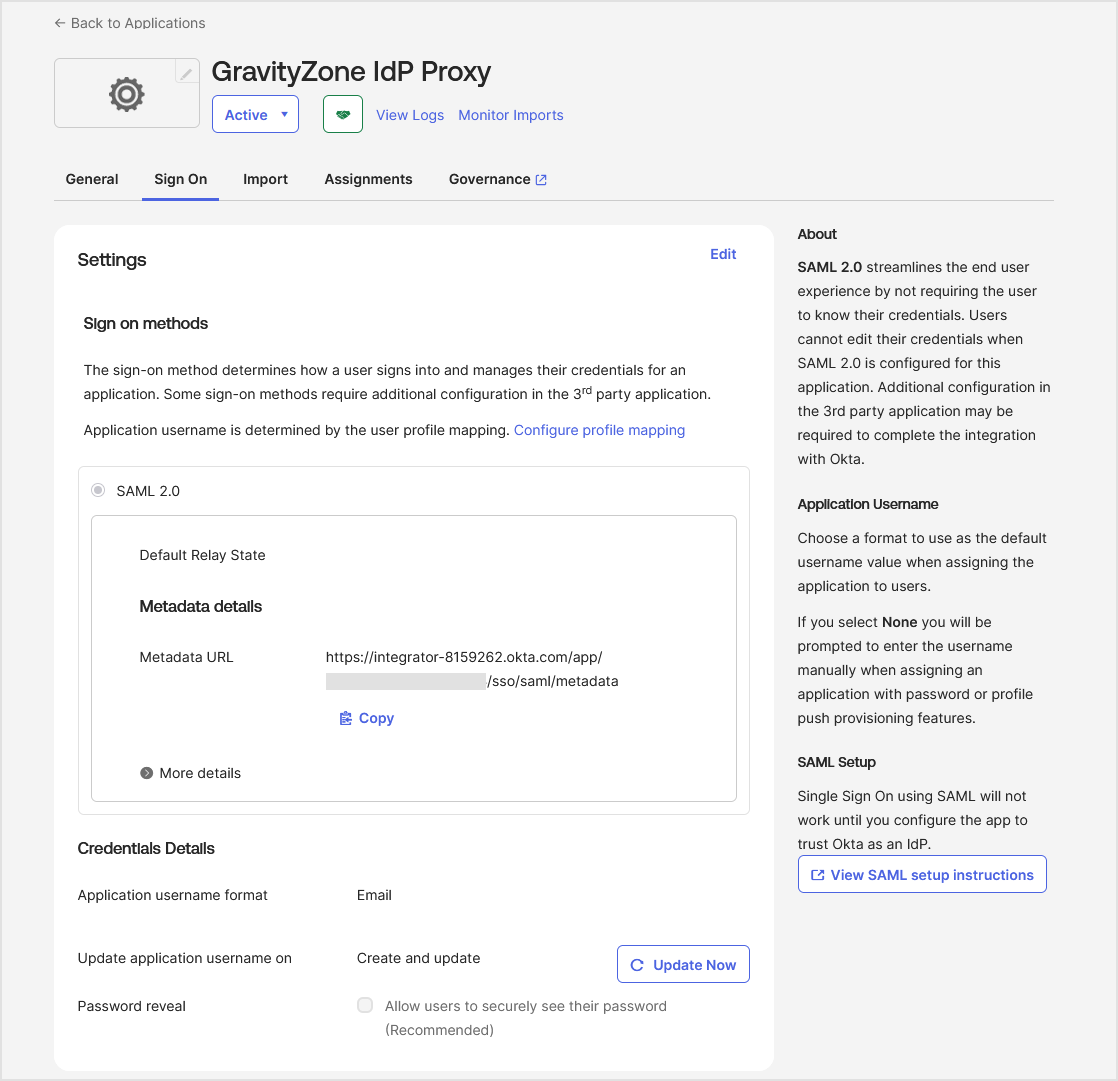
After finishing the configuration, Okta will redirect you to a page containing details about the application you have created.
Assign users to the application
In the Okta Admin Console, go to the application you just created.
Go to the Assignments tab.
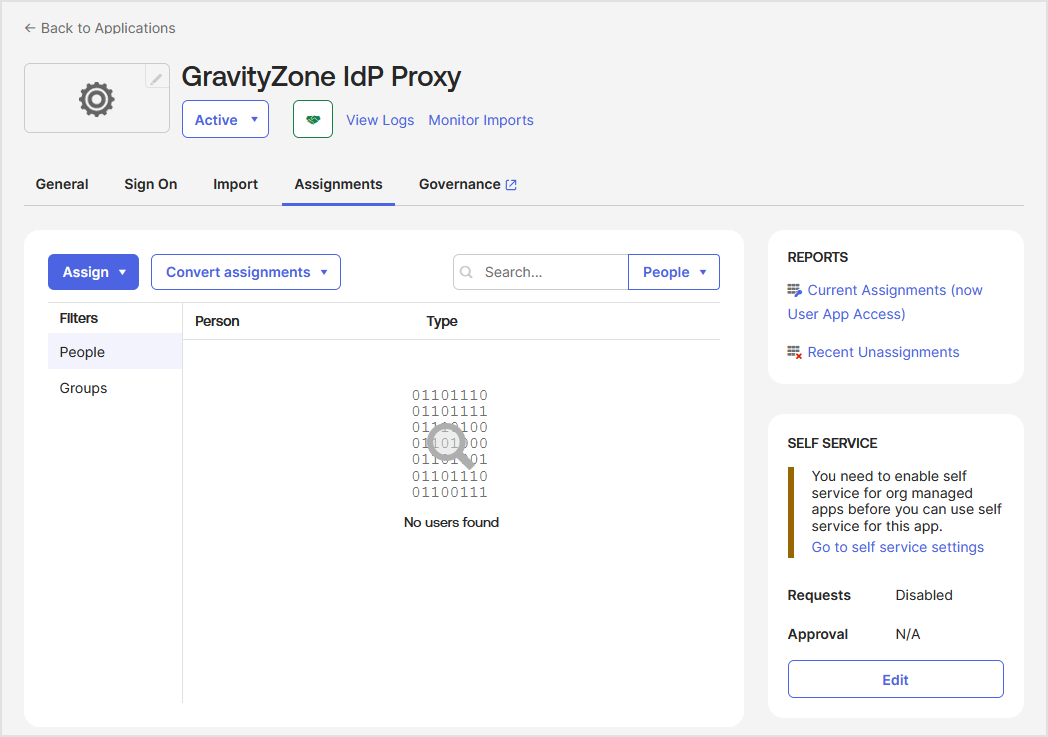
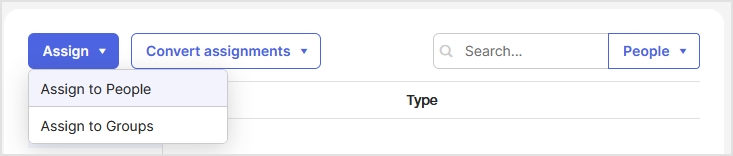
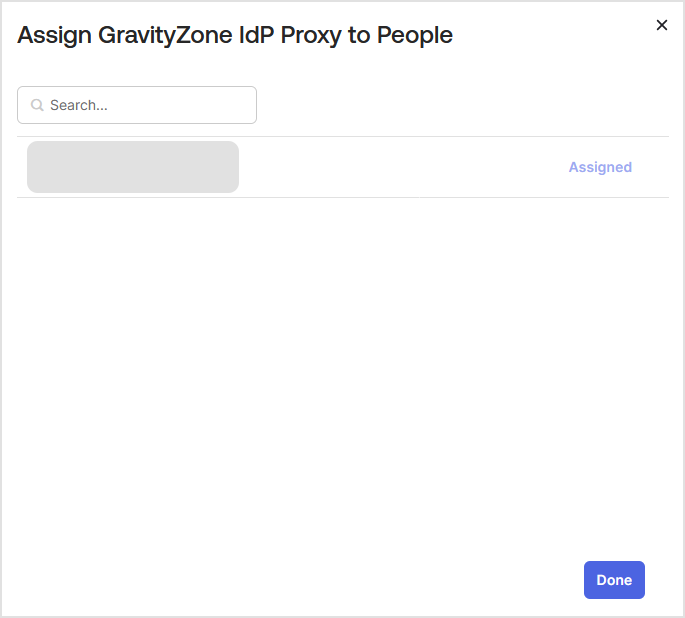
Click Assign and select Assign to People or Assign to Groups.
Select the relevant users or groups and click Assign for each, then click Done.
Get the Okta metadata URL
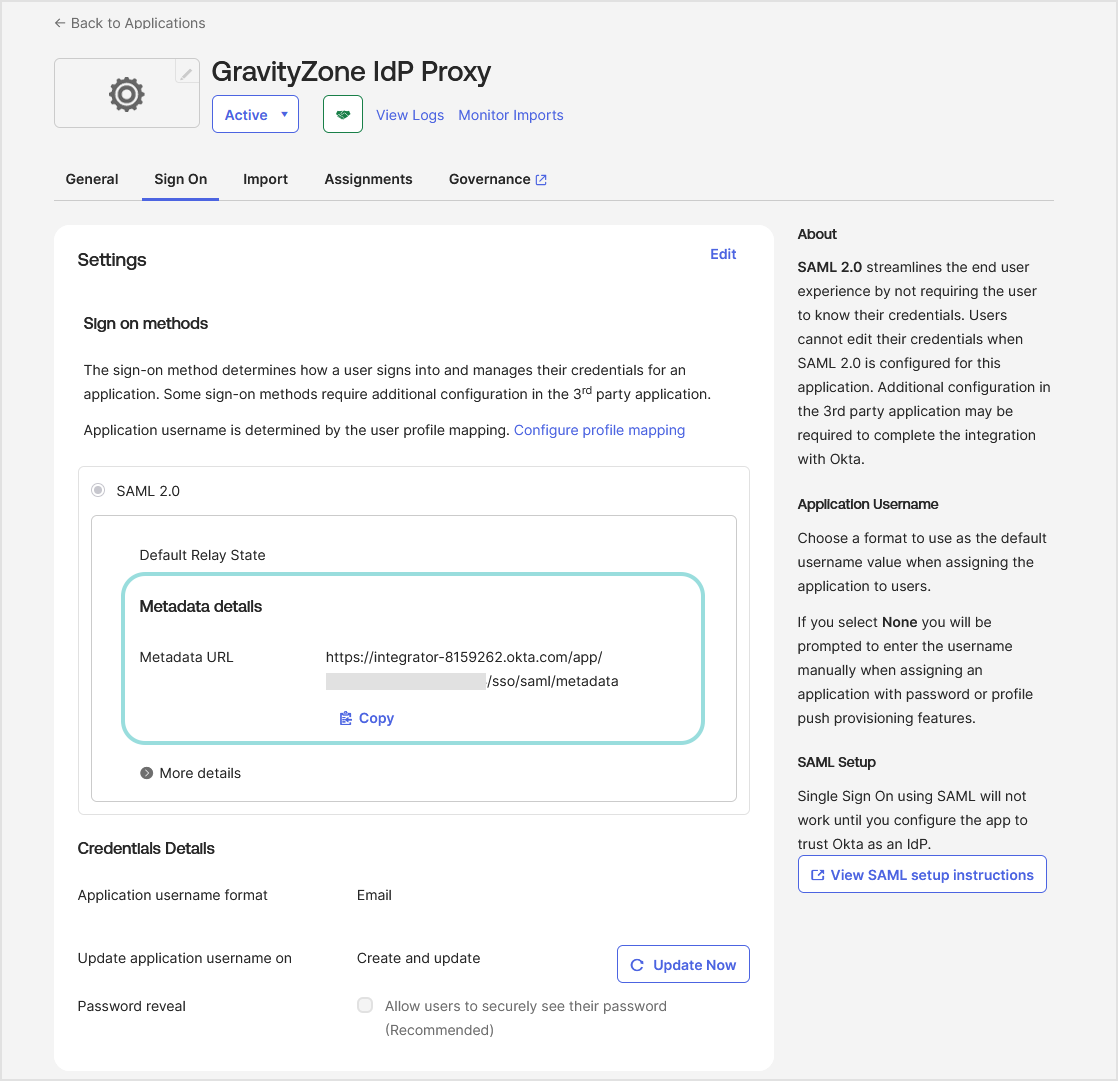
In the Okta Admin Console, go to the application you created.
Go to the Sign On tab.
Under the Settings > SAML 2.0 section, find the metadata URL.
This is the identity provider metadata URL you will need for GravityZone.
Click the Copy button to copy the URL to the clipboard.
You will paste this URL in the GravityZone console when enabling SSO for the company.
Go to the Applications page in Okta to verify the status of your application. The application must be Active.
Enable SSO for Bitdefender services in GravityZone
After configuring single sign-on in Okta, go to GravityZone Control Center to enable SSO for Bitdefender services.
Enable SSO for your company
This is how you enable SSO for Bitdefender services for your company:
In the upper-right corner of Control Center, click the user icon and then select My Company.
In the Authentication tab, under Bitdefender services single sign-on, enter the identity provider metadata URL in the Identity provider metadata URL (IdP Proxy) field. The other field, reserved for the GravityZone IdP Proxy SAML metadata URL, is non-editable.
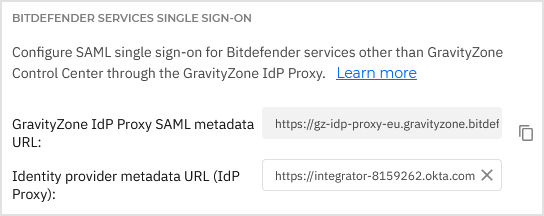
Click Save.
Enable SSO for managed companies
This is how you enable single sign-on for Bitdefender services for a company under your management:
Log in to GravityZone Control Center.
Go to the Companies page from the left side menu.
In the table, click the company's name.
Under Bitdefender services single sign-on, enter the identity provider metadata URL in the Identity provider metadata URL (IdP Proxy) field. The other field, reserved for the GravityZone IdP Proxy SAML metadata URL, is non-editable.
Click Save.
Verify the authentication method for users
Users must have their authentication method set to Login using your Identity Provider in GravityZone account settings. If GravityZone Control Center SSO is already configured and users are already logging in with your identity provider, no additional changes are needed.
If any users still use GravityZone credentials:
Log in to GravityZone Control Center.
Go to the Accounts page from the left side menu.
In the table, click the user's name.
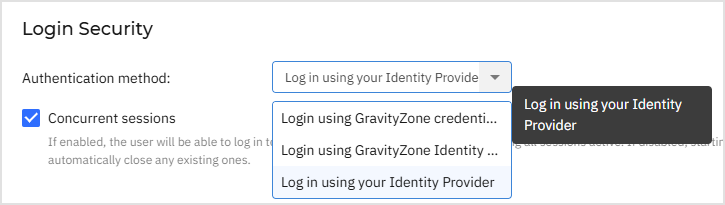
Under Login Security, go to Authentication method and select Login using your Identity Provider.
Note
This option is available after GravityZone Control Center SSO with an external identity provider has been configured at the company level.
Click Save.
Test Bitdefender services SSO
After configuring both the identity provider and GravityZone, you can test single sign-on as follows:
Log out from any Bitdefender services.
Log out from Okta.
Open MDR portal in a browser.
You should be redirected to GravityZone IdP Proxy, which will redirect you to Okta's authentication page.
Authenticate with your identity provider.
You will be redirected back to MDR portal and granted access.
Note
GravityZone IdP Proxy does not support IdP-initiated login, but only service provider initiated login. Therefore, you can test the single sign-on by going directly to the Bitdefender service (for example, MDR Portal), not by clicking the application's logo in Okta.
Disable Bitdefender services SSO
To disable single sign-on for Bitdefender services for your company or for a company under your management:
Delete the identity provider metadata URL from the Identity provider metadata URL (IdP Proxy) field in the configuration page of that company.
Click Save and confirm the action.
This does not affect GravityZone Control Center SSO, which remains configured separately.
To re-enable SSO for Bitdefender services, enter again the identity provider metadata URL in the Identity provider metadata URL (IdP Proxy) field and click Save.