MSP Simplified Customer Onboarding
MSP Simplified Customer Onboarding is an Early Access feature that allows partners to create and configure directly managed Customer companies using a single, guided workflow.
In the standard process, onboarding requires multiple steps across different pages in GravityZone Control Center:
In Companies, create the company and configure authentication and licensing.
In Policies, create or edit a policy.
In Network, assign the policy to the new company.
With simplified onboarding:
You complete all these actions in one place using the Onboard company option from the Companies page.
You can save configurations as templates for reuse.
Requirements
To use the simplified onboarding:
Your company must be of Partner type with a monthly subscription.
Your account must have the following permissions:
Manage Networks
Manage Endpoint Settings with Read and Write
Manage Companies
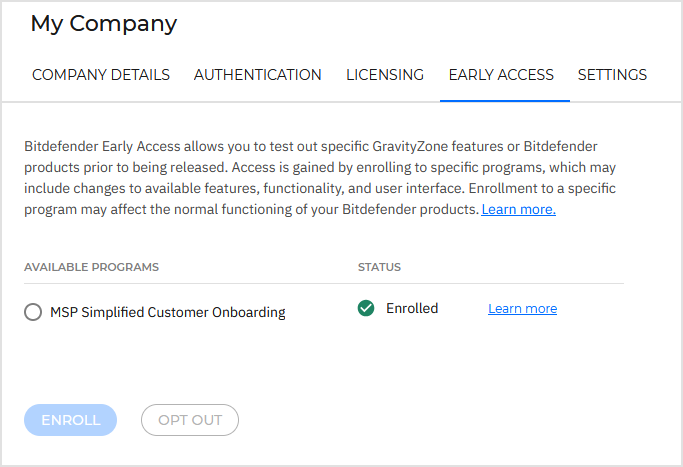
You must enroll in the Early Access program.
To enroll:
Go to My Company > Early Access.
Select MSP Simplified Customer Onboarding.
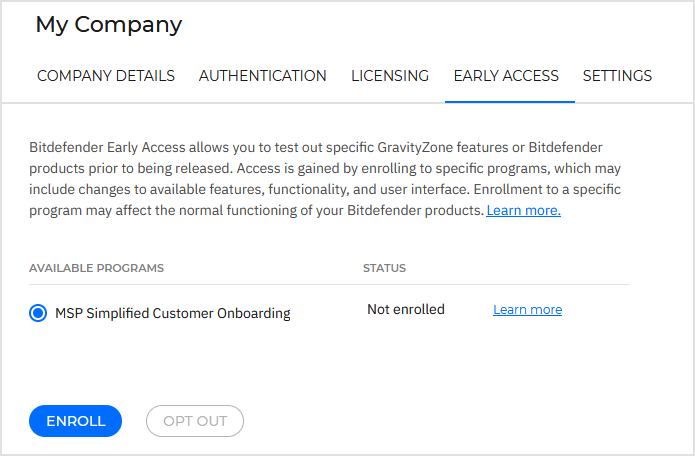
Click Enroll.
Refresh the page or log in again in to GravityZone for the new settings to load.
After enrollment:
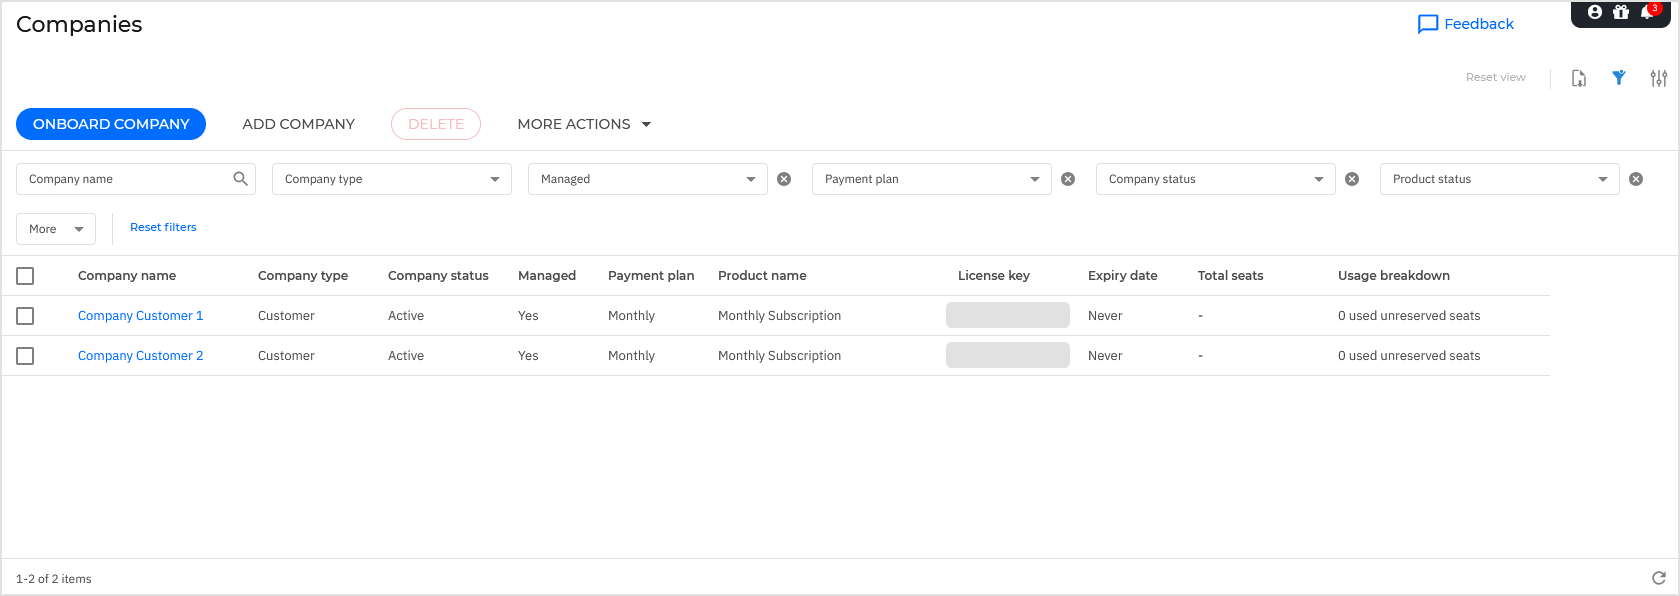
The Onboard company button becomes available in Companies
Companies created using this workflow are listed on the same page
If you opt out:
The Onboard company button is removed
Existing companies remain unchanged
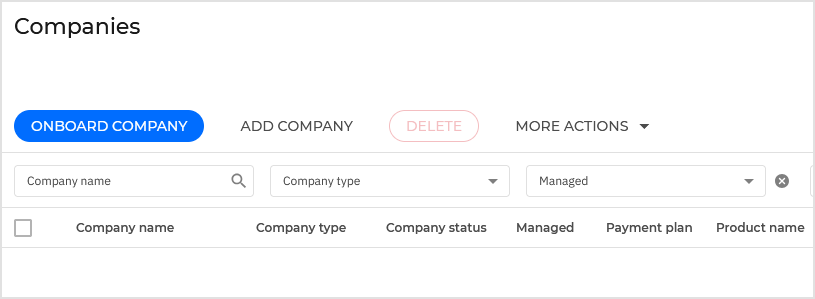
Onboard a customer company
To create a company:
Go to the Companies page.
Click Onboard company.
Complete the following steps:
These steps are detailed below.
Click Save and add company.
After completion, the company is added to the Companies table.
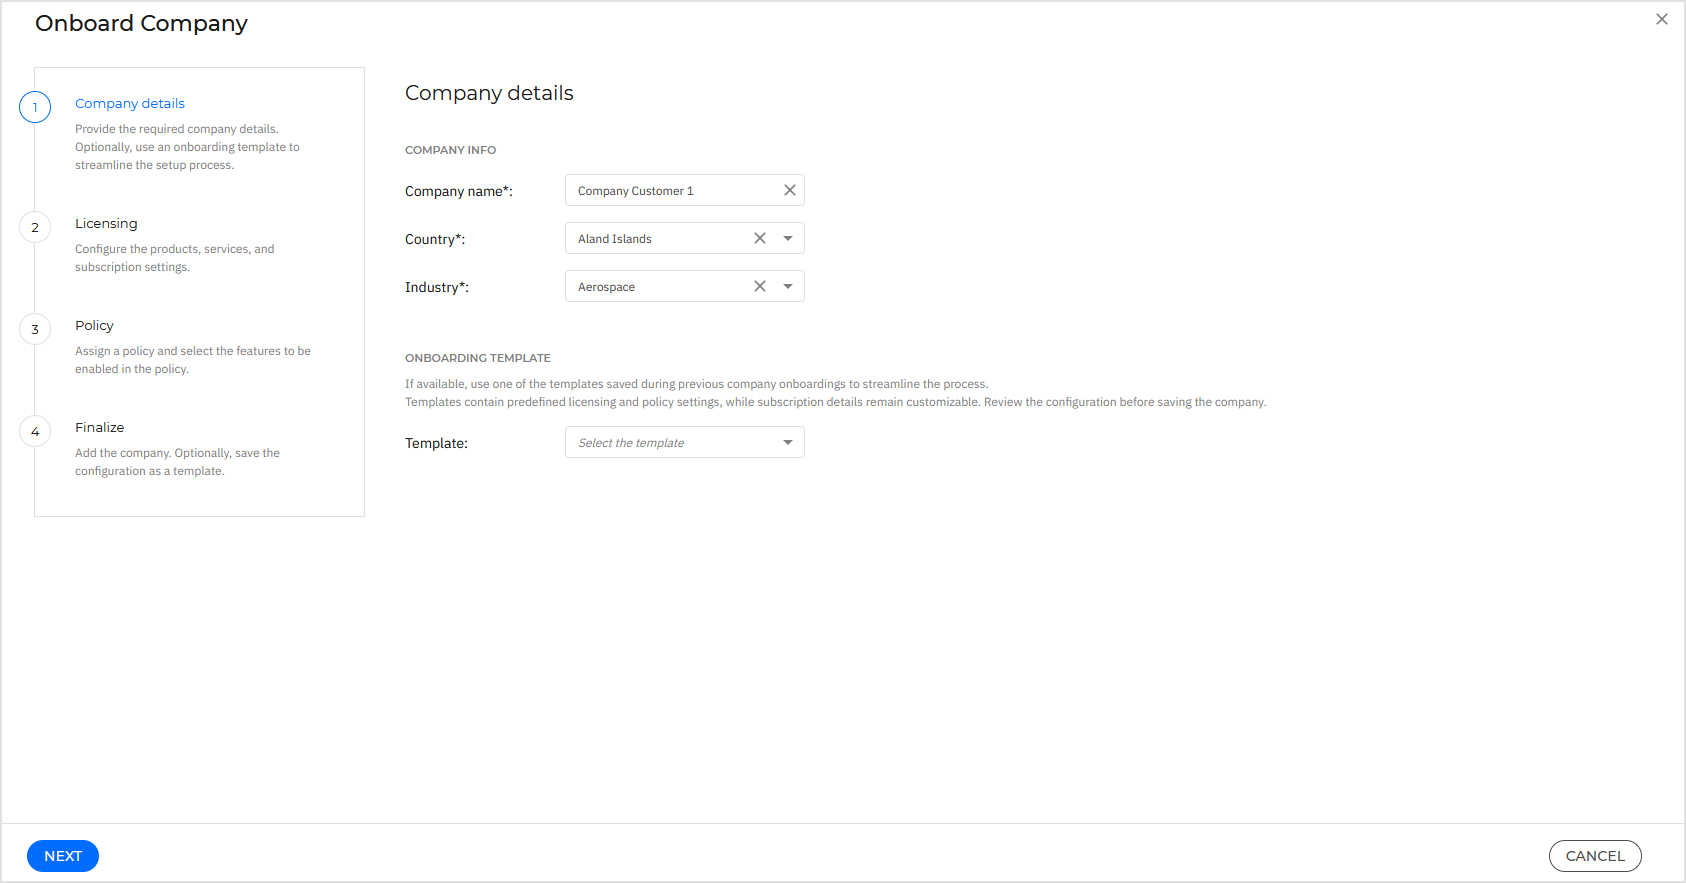
1. Company details
Provide basic information:
Company name
Country
Industry
Template (optional)
Templates are collections of licensing and policy settings saved during previous onboardings. However, templates do not include subscription details (number of reserved seats, end date etc.). These details can be configured with each onboarding.
Templates cannot be edited. To use different settings, you must save another template with a new onboarding.
When to use a template
Use a template if:
You onboard multiple Customer companies with similar setups.
You want consistent licensing and policy configurations.
If no template is available, continue without selecting one.
What happens in the background
The following settings are applied automatically:
Two-factor authentication is enforced.
Browser trust period is set to 7 days.
Password expiration is disabled.
Single sign-on can be configured later.
For details on editing authentication settings, refer to Authentication.
Additionally:
The new company is enabled to manage endpoint security.
The new company provides your company with the right to assist with security management.
These defaults ensure the company is functional immediately after onboarding.
2. Licensing
This step defines the products, services, and subscription behavior for the company.
By default, the company uses a monthly subscription.
Select a protection model:
A la carte - Custom-tailored protection allowing you to select the features that align with your specific requirements.
Secure - Actionable threat intelligence and prevention, and real-time threat detection and incident response.
Secure Plus - Enhances the Secure model by providing proactive incident response management services.
Secure Extra - Built upon the Secure Plus model, enriching detection sources with intelligence across your environment.
Important
You have access only to the protection models that your partner has made available to you.
Secure Plus and Secure Extra require the Contact details for MDR section to be completed in My Company.
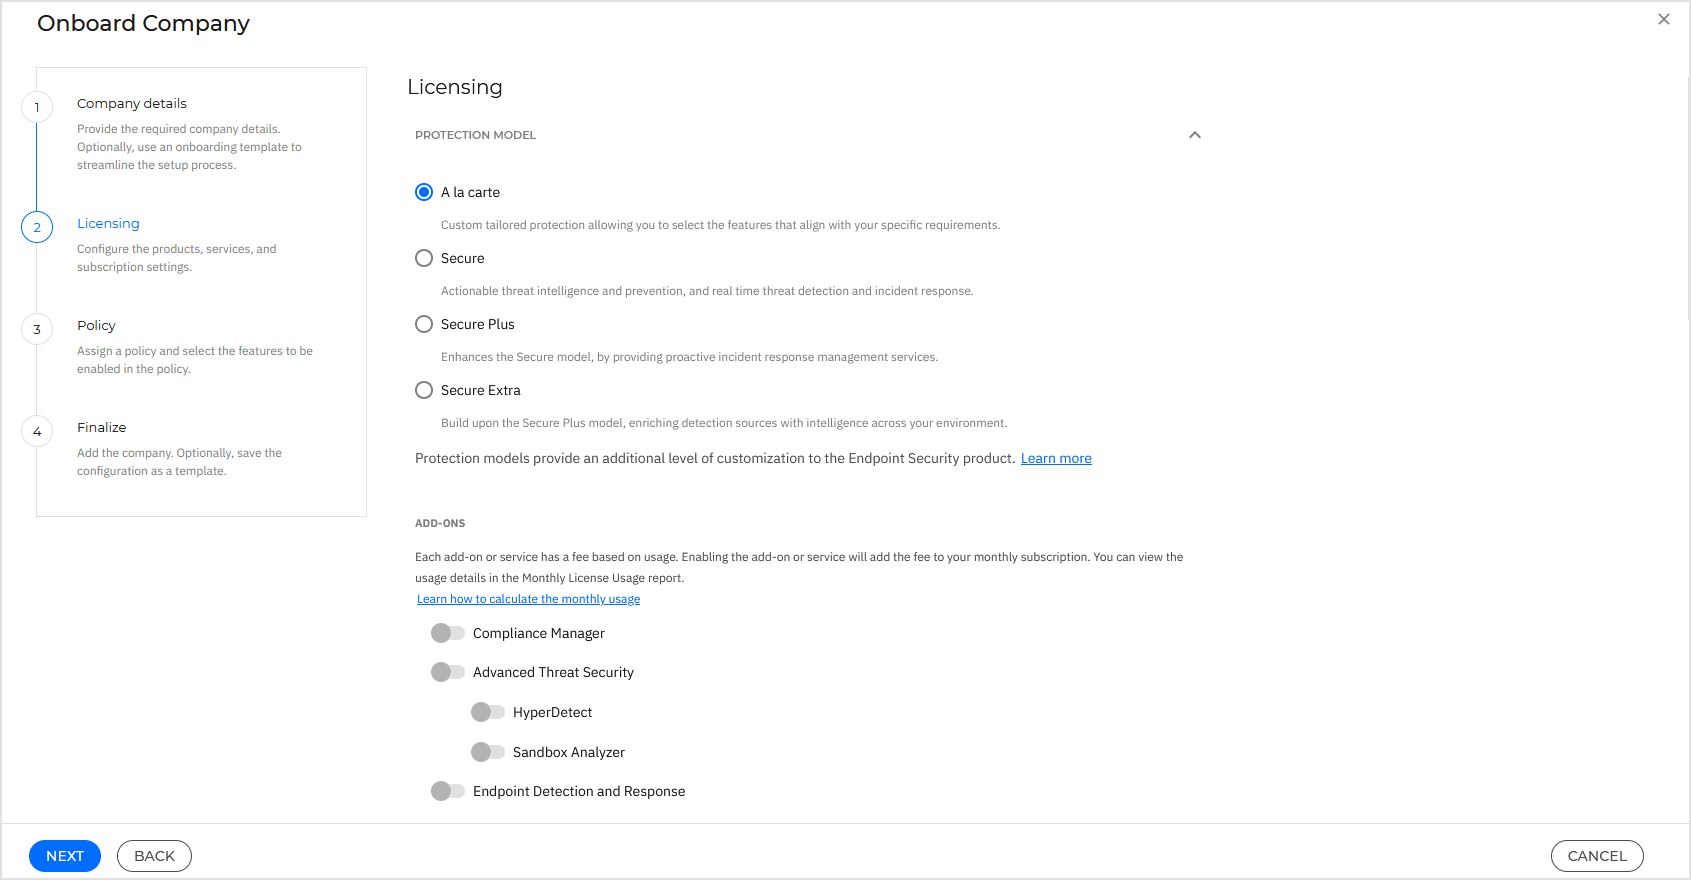
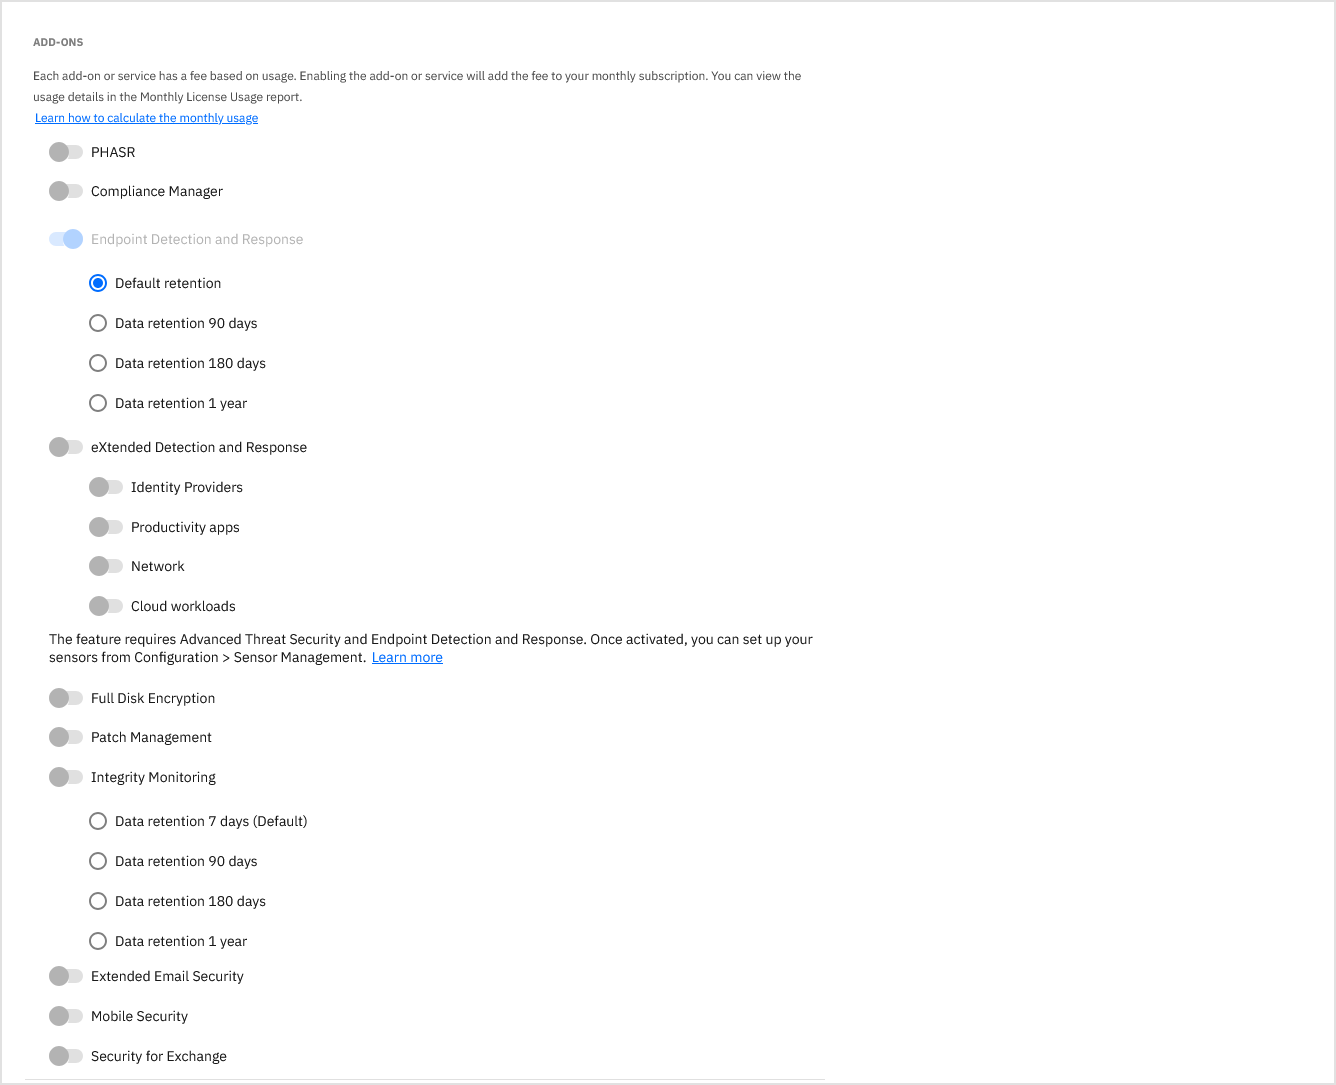
Select add-ons, based on customer needs.
Note
For more information on add-ons and the features they provide, refer to these articles:
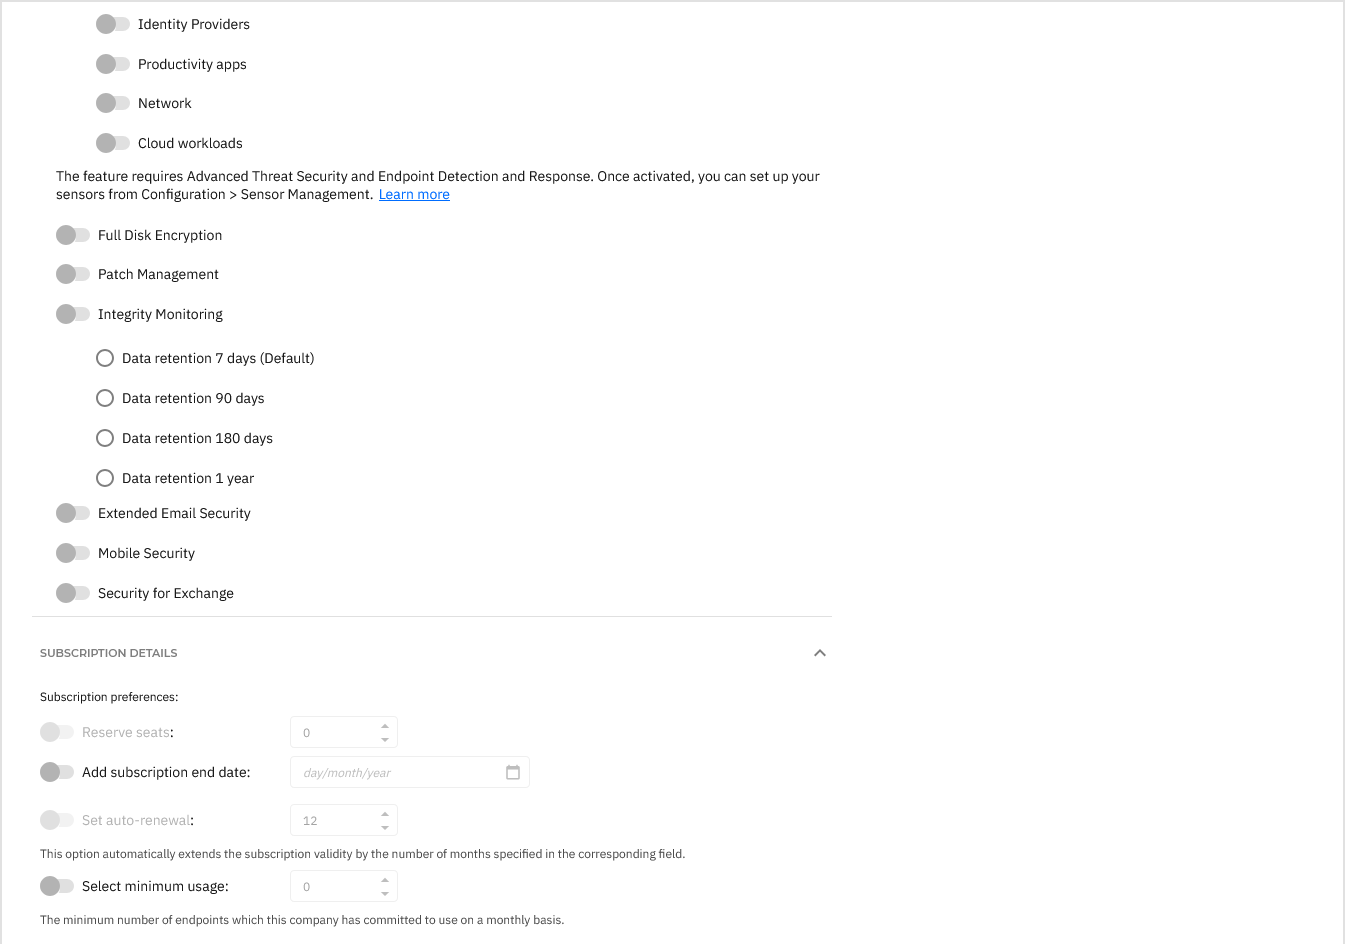
Configure subscription details:
Reserve seats
Enable this option to allocate a fixed number of seats.
Use this option when:
You want predictable usage.
You want to limit how many endpoints can be deployed.
Subscription end date
Enable this option to set when the subscription expires.
After expiration:
The company is suspended.
Agents expire and endpoints are no longer protected.
If this option is not enabled, the subscription continues without an end date.
Auto-renewal
Enable to extend the subscription automatically.
This option prevents interruption of protection and can be configured for a number of months.
Customer company inherits the end date from its parent company, unless it has own end date configured. Customer company can surpass the end date of its parent company only if the parent company has auto-renewal enabled.
Minimum usage
Set a baseline number of seats for billing.
This value is used unless actual usage exceeds it.
Minimum usage cannot exceed reserved seats.
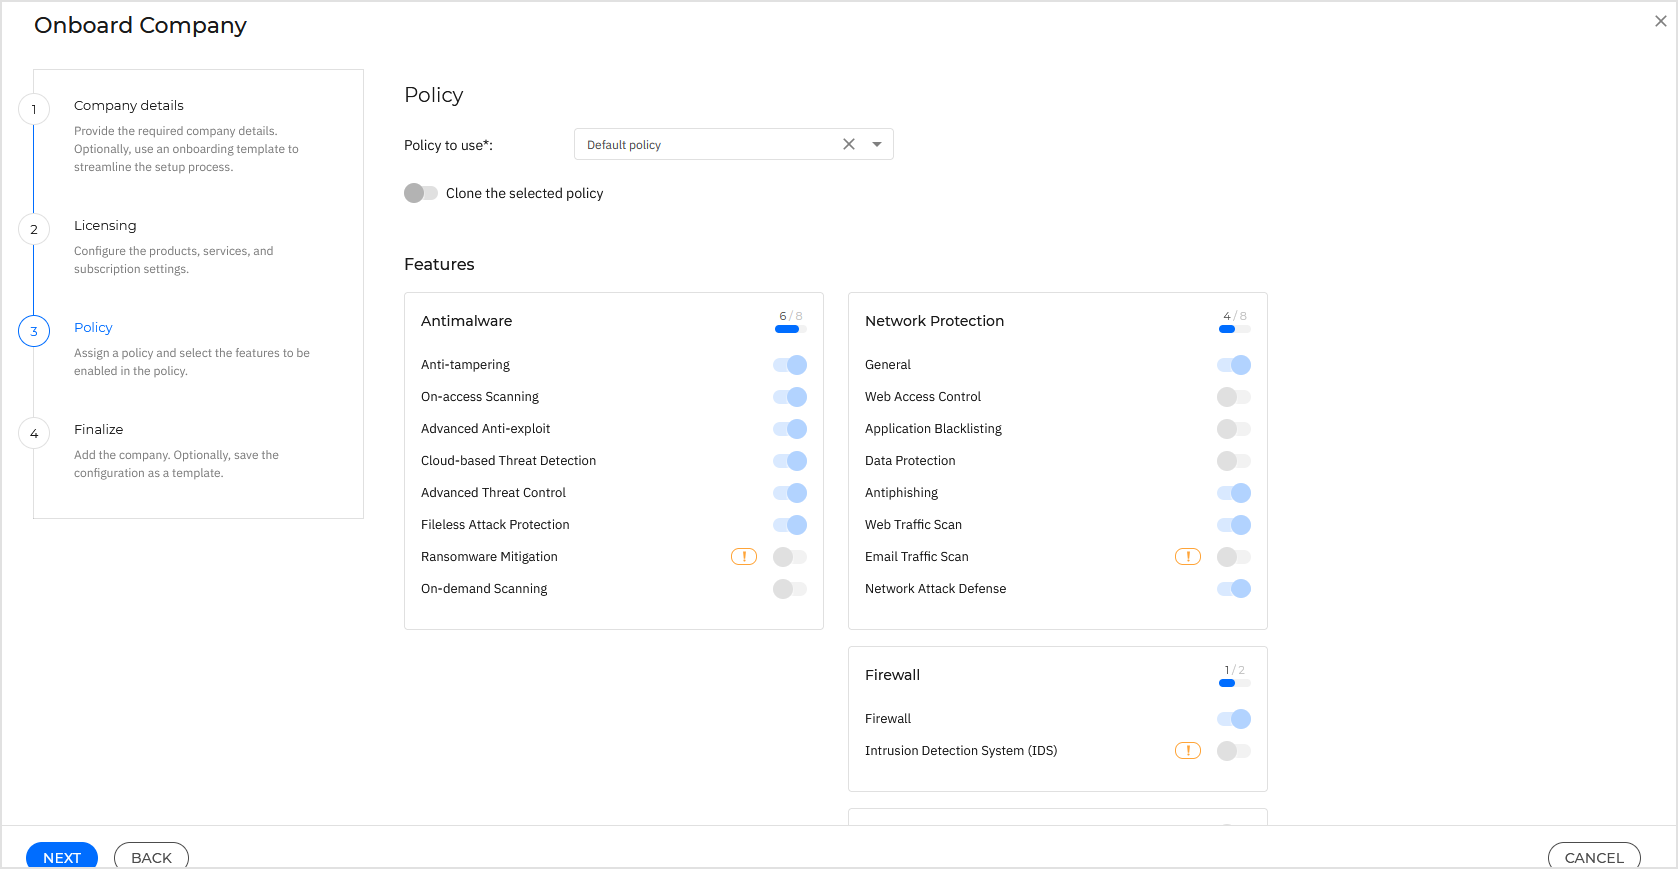
3. Policy
Assign and configure the security policy by choosing which licensed features are used.
Select a policy.
By default, you cannot modify the selected policy.
Important
The drop-down list does not include policies with inheritance rules.
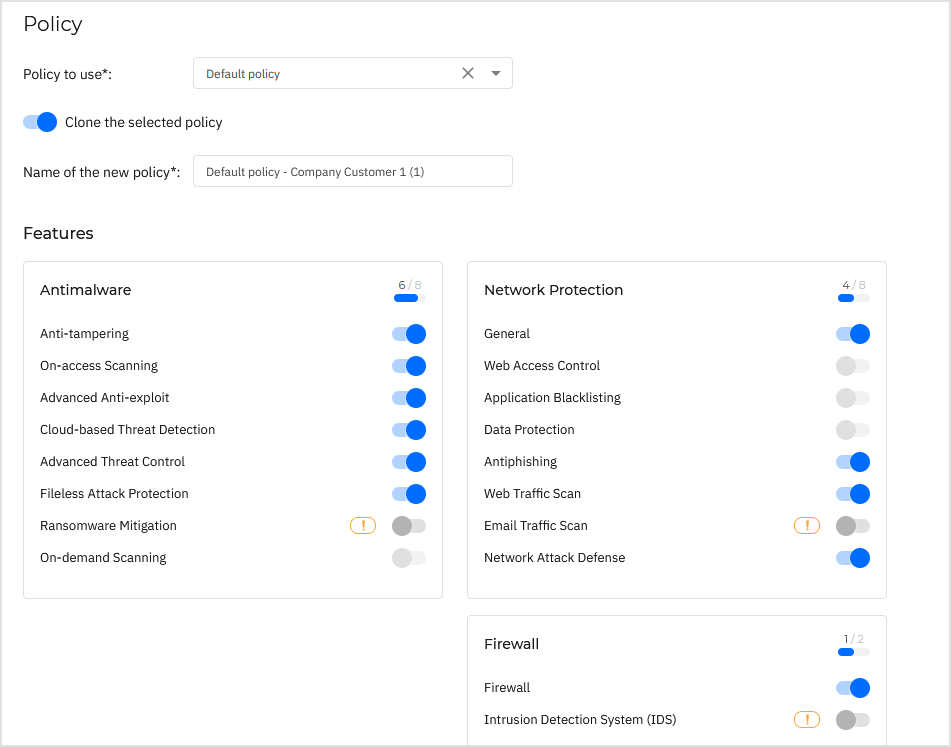
Customize the policy.
To modify settings:
Enable Clone the selected policy.
Enter a name.
Enable or disable features.
Note
The Clone the selected policy option is disabled when you selected a template on the Company details page.
Understand feature dependencies
The interface provides the following warnings:
Message | Explanation |
|---|---|
| The feature is enabled in Licensing, but is disabled in Policy. For example, Anti-tampering is enabled in Licensing and disabled in Policy. That means the company does not benefit from anti-tampering protection. |
| The disabled feature affects the functionality of other features. To use them, you must re-enable this feature. For example, if On-access Scanning is disabled, the company cannot use features such as Sandbox Analyzer automatic submission, HyperDetect, and Fileless Attack Protection. |
| Enabling a feature requires another feature to be re-enabled. For example, for company to use Fileless Attack Protection, you must first enable On-access Scanning. |
| The feature requires additional changes that cannot be made during the onboarding process. . For example, Patch Management requires a maintenance window to be assigned to the policy on the Policies page. |
4. Finalize
In this step, you can save the configuration as a template and complete the onboarding.
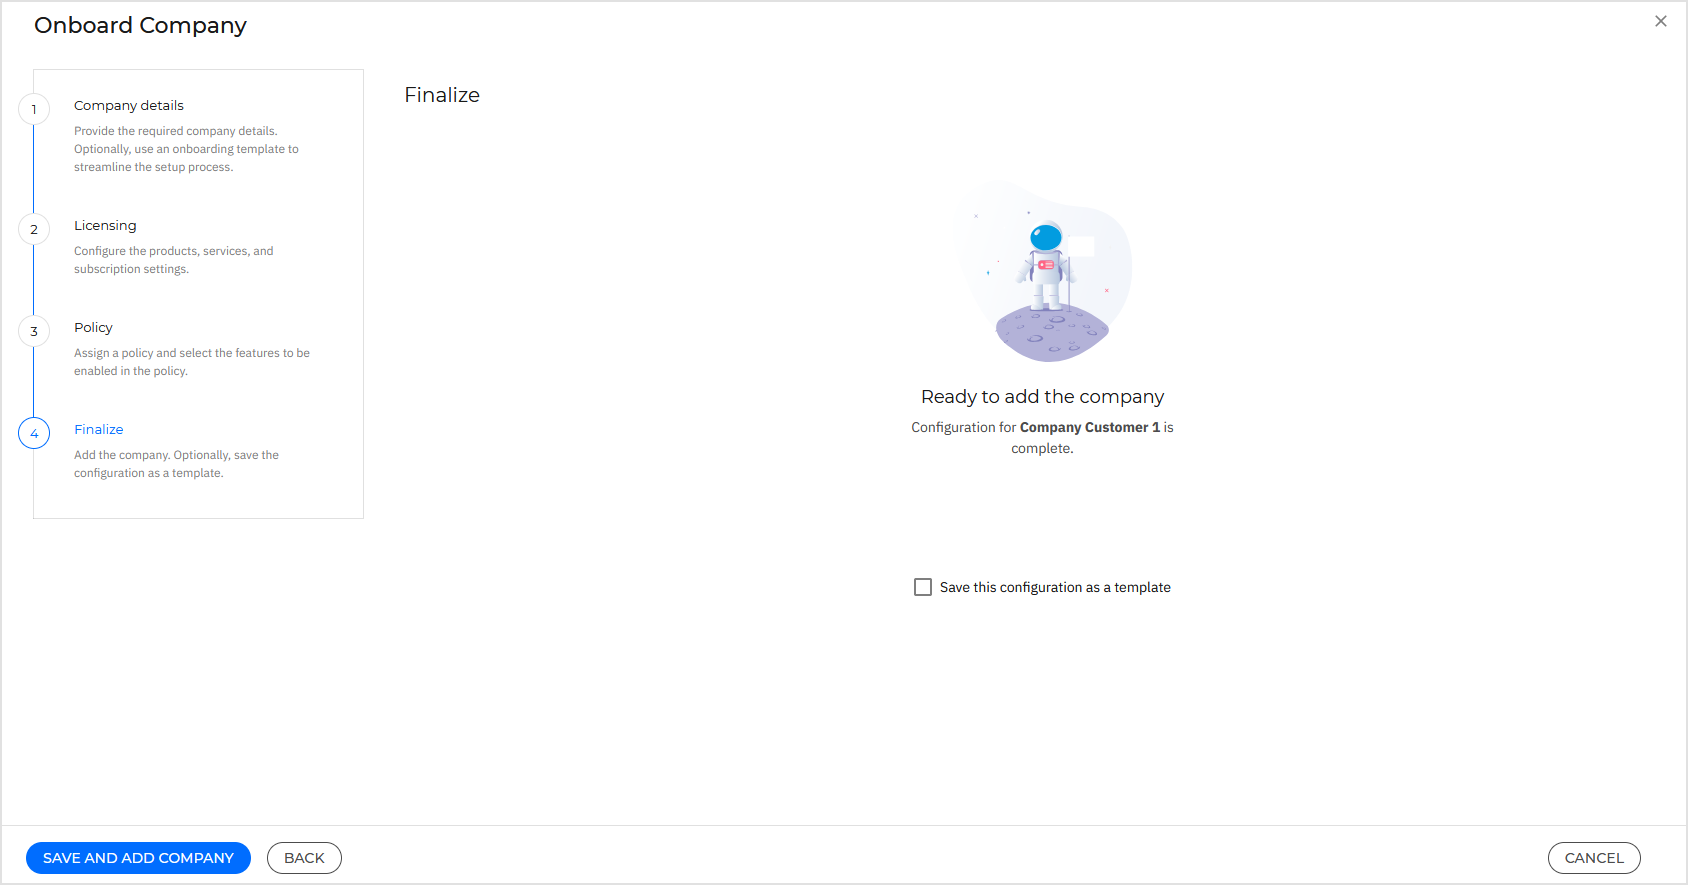
Enable Save this configuration as a template if:
You want to reuse this setup.
You onboard similar Customer companies frequently.
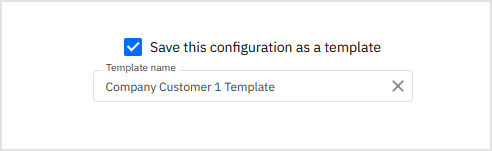
Note
The Save this configuration as a template option is disabled when you selected a template on the Company details page.
The template will be available for selection when creating another company using the Onboard company option.

Click Save and add company.
After completion, the company is added to the Companies table.
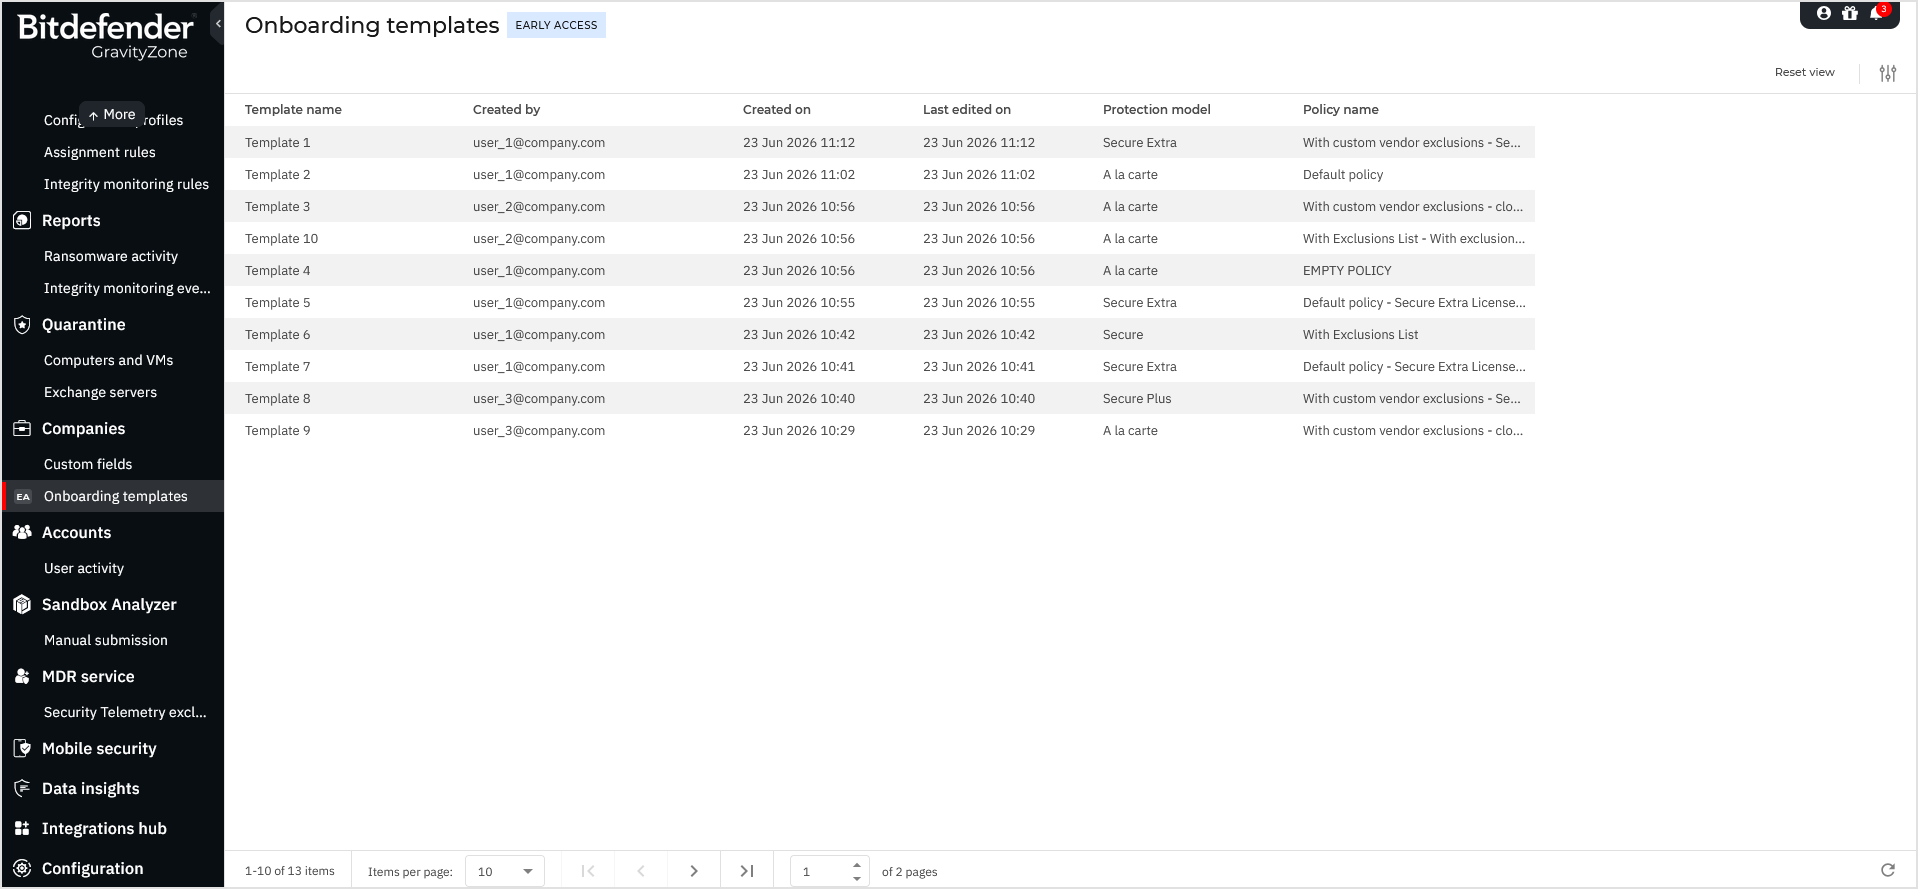
View the list of templates
The templates created by all users in your Partner company are available on the Onboarding templates page. This page becomes available under Companies in the GravityZone main menu after you enroll in the Early Access program.
For each template, the page displays the following information:
Template name – the name of the template.
Created by – the user who created the template.
Created on – the date and time when the template was created.
Last edited on – the date and time of the most recent modification.
Protection model – the protection model configured for the template.
Policy name – the policy associated with the template.
You can sort templates by Template name and Created on. Templates are sorted by newest first by default.
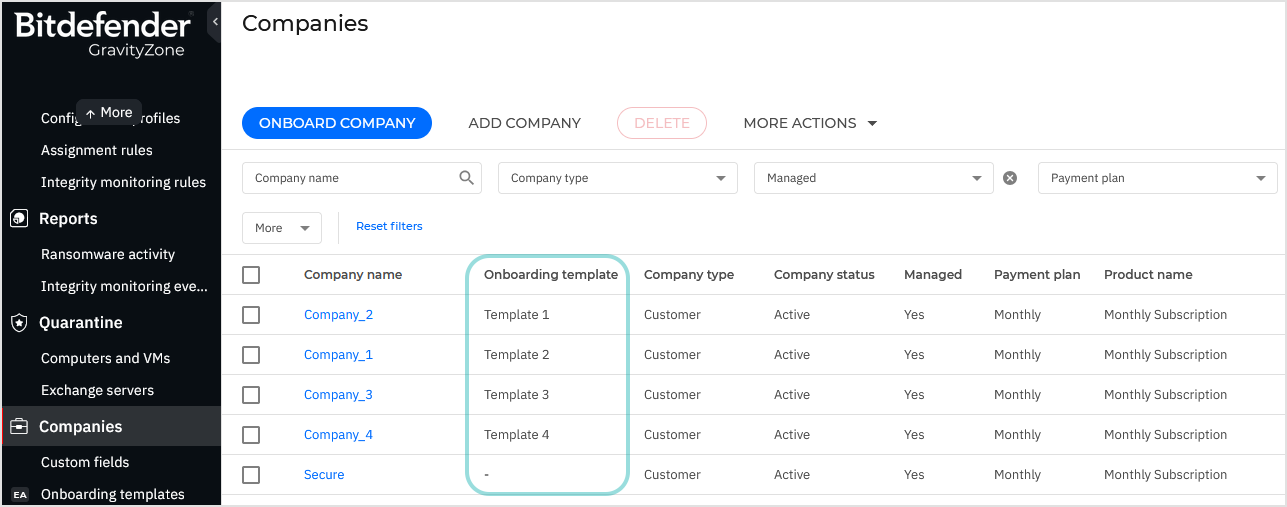
View the companies using templates
The Companies page displays a new column called Onboarding template that helps you identify companies that were created using an onboarding template. The column is empty when companies have been created without a template.
This column becomes available after you enroll in the Early Access program.
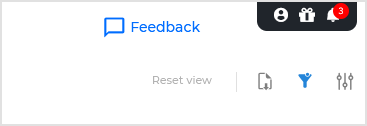
Submit feedback
Let us know your thoughts by using the Feedback button available in the upper right corner of the Companies page. We eagerly await and value your input on this feature.