Configuring Bitdefender services single sign-on with Microsoft Entra ID
GravityZone supports single sign-on (SSO) for Bitdefender services outside GravityZone Control Center, such as MDR portal, through the GravityZone IdP Proxy. The IdP Proxy uses SAML 2.0 as authentication standard.
This topic describes how to configure single sign-on for Bitdefender services with Microsoft Entra ID (formerly Azure Active Directory). For generic information on configuring other identity providers, refer to Configuring single sign-on for Bitdefender services using a 3rd party identity provider.
Configuring SSO with Microsoft Entra ID involves many small steps, mostly in the Microsoft Entra admin center, so follow the procedure described below carefully.
Note
Microsoft Entra ID was formerly known as Azure Active Directory (Azure AD). The functionality is the same; only the product name and admin portal have changed.
Prerequisites and requirements
You have a Microsoft Entra ID account with at least the Cloud Application Administrator or Application Administrator role assigned.
You have a GravityZone Cloud administrator account to manage users, your company and other companies.
GravityZone users have Microsoft Entra ID accounts with the same email addresses.
GravityZone Control Center SSO with Microsoft Entra ID is already configured and working. Refer to Configuring GravityZone Control Center single sign-on with Entra ID.
Users are configured with the Login using your Identity Provider authentication method in GravityZone account settings.
Note
This option is only available after GravityZone Control Center SSO has been configured at the company level.
Configure Microsoft Entra ID
To enable single sign-on for Bitdefender services with Microsoft Entra ID, you can configure a separate enterprise application for the GravityZone IdP Proxy. This is in addition to the existing application used for GravityZone Control Center SSO.
This is how you create and configure the application:
Extract the GravityZone IdP Proxy SAML metadata
Log in to Bitdefender GravityZone as an administrator.
Click your user name in the upper-right side of the screen and select My Company.
Go to the Authentication tab.
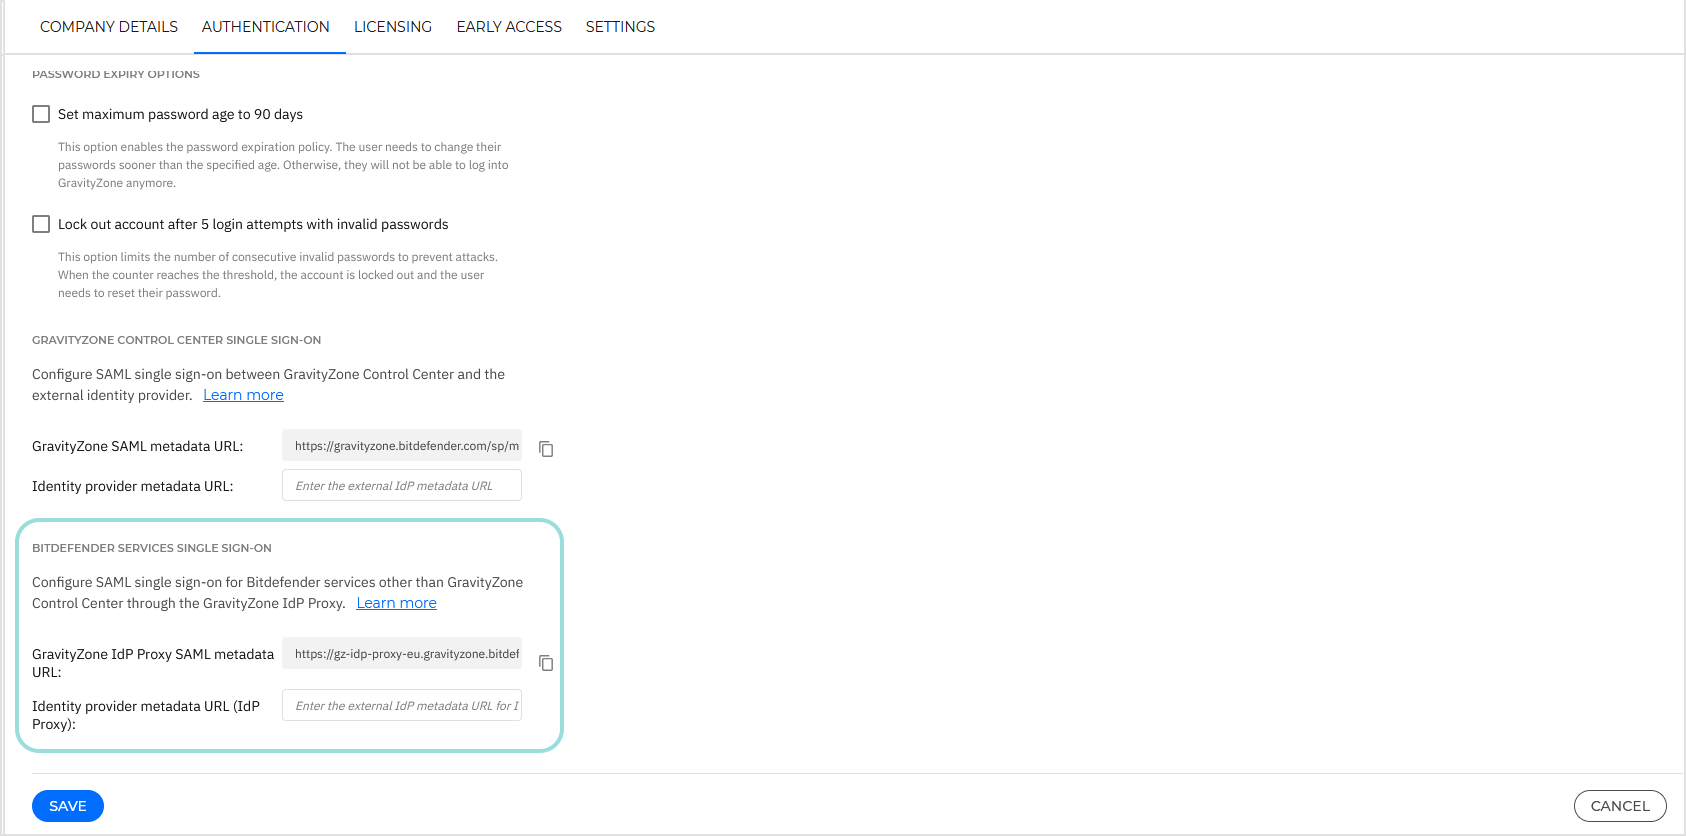
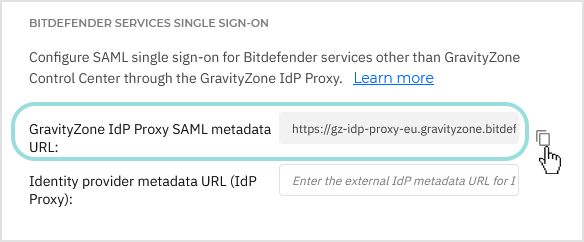
Under the Bitdefender services single sign-on section, click the button next to the GravityZone IdP Proxy SAML metadata URL field to copy the metadata URL.
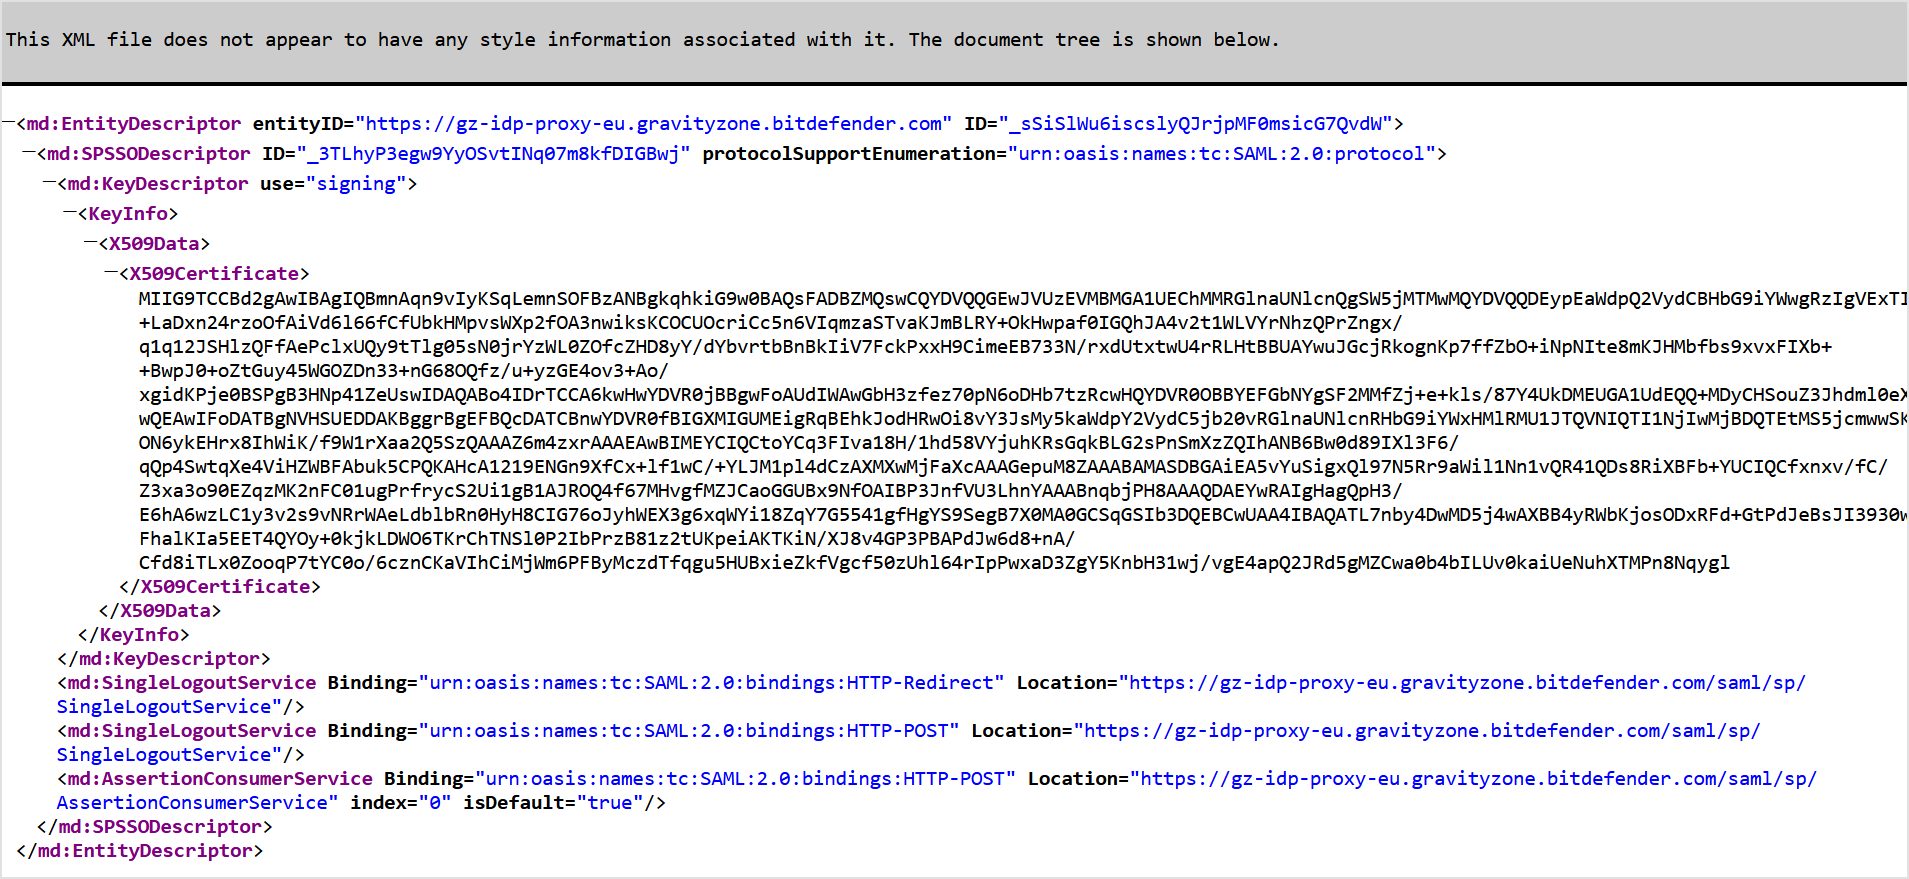
Open the metadata URL in a separate tab of your browser and save the page as a
metadata.xmlfile.
Keep the metadata.xml file open for reference during the Okta configuration. You will need the Entity ID and Assertion Consumer Service URL values from the metadata.
Set up your application
Log in to the Microsoft Entra admin center:
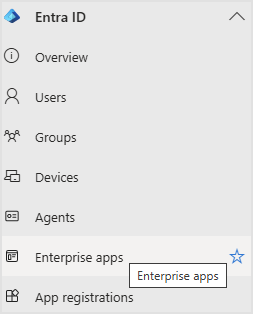
https://entra.microsoft.comIn the left-side navigation, under Entra ID, go to Enterprise apps.
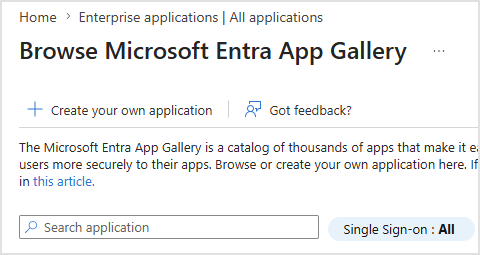
At the top of the page, click + New application.
Click Create your own application.
In the Create your own application panel:
Enter a relevant name (for example,
GravityZone IdP Proxy),Select Integrate any other application you don't find in the gallery (Non-gallery).
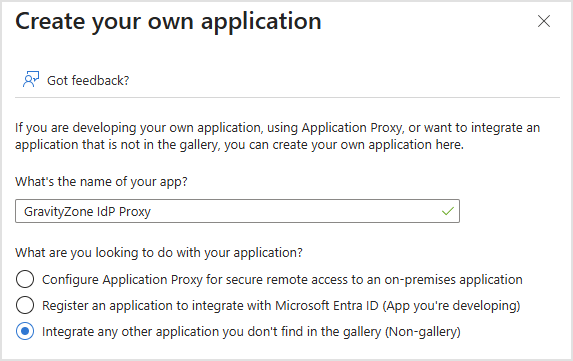
Click Create.
Assign users and groups
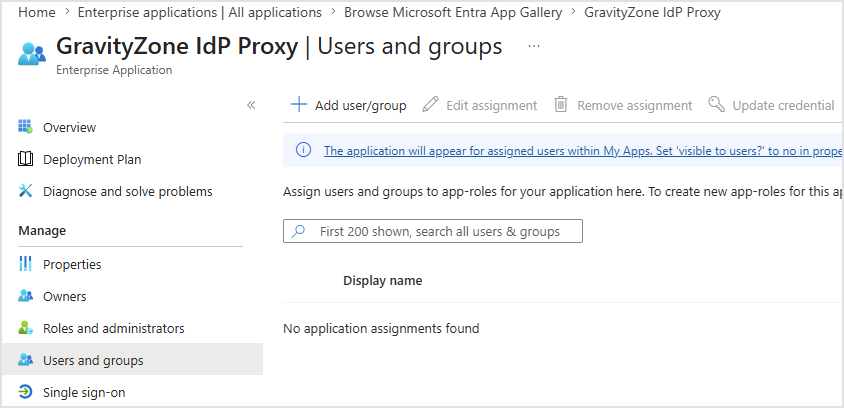
In the application overview page, go to Users and groups in the left-side navigation.
Click + Add user/group.
In the Add Assignment page, click None Selected under Users and groups.
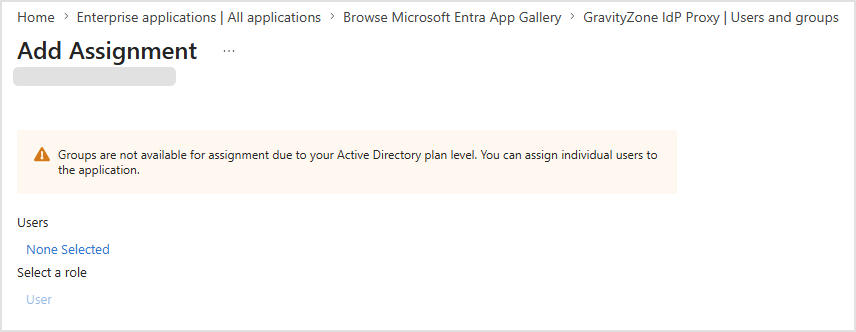
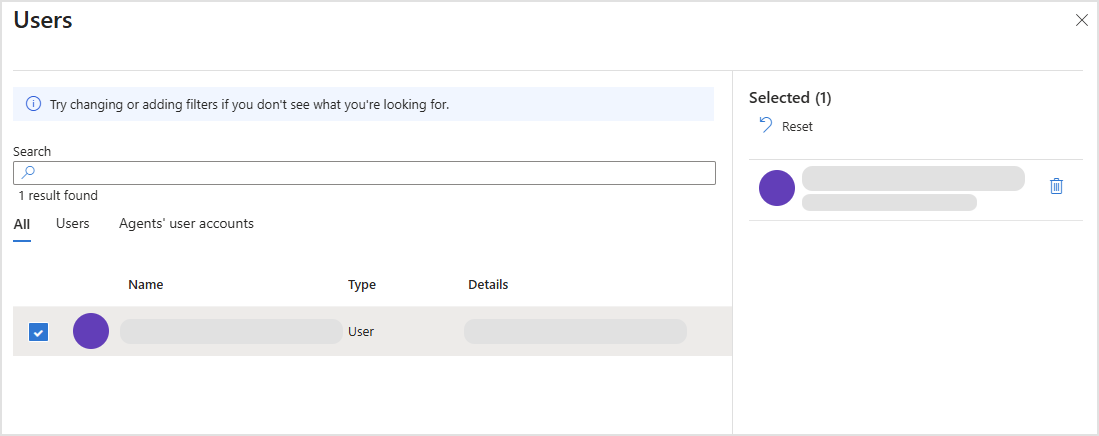
In the right-side panel, select the users or groups that should have access to Bitdefender services through GravityZone IdP Proxy and click Select.
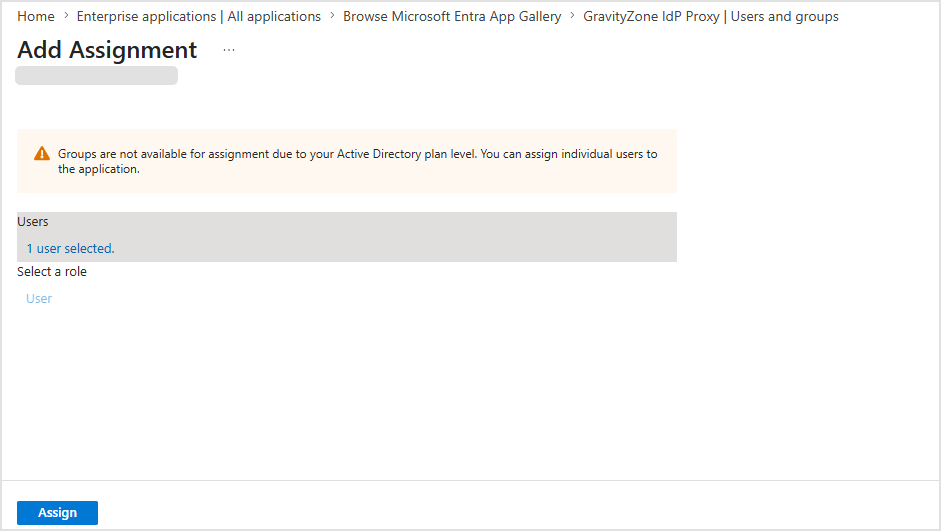
Back in the Add Assignment page, click Assign to confirm.
Configure SAML single sign-on
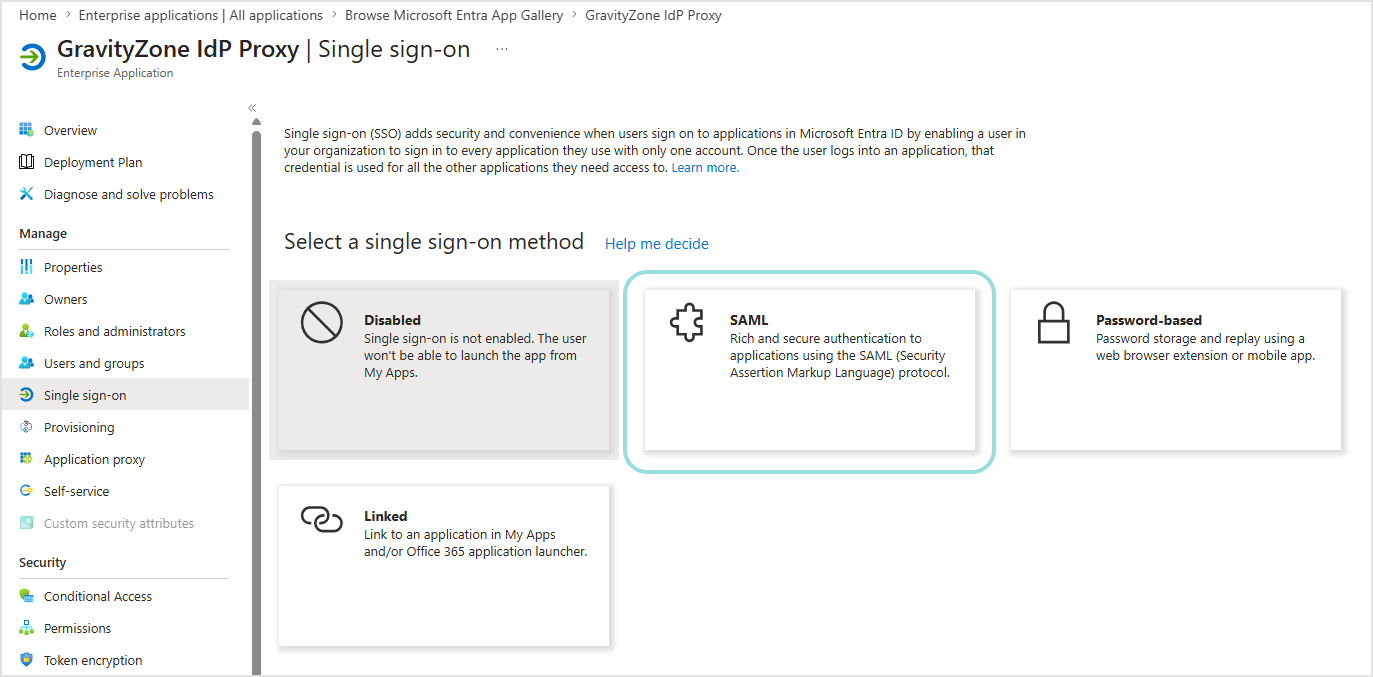
In the application's left-side navigation, go to Single sign-on.
Select SAML as the single sign-on method.
In the Set up Single Sign-On with SAML page, complete the following sections:
Basic SAML Configuration
Click the pencil icon to edit.
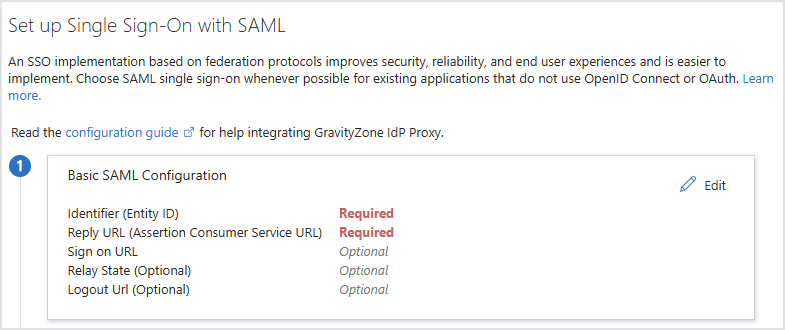
Configure the following fields using values from the GravityZone IdP Proxy metadata:
Identifier (Entity ID). Enter the Entity ID from GravityZone IdP Proxy metadata XML.
Reply URL (Assertion Consumer Service URL). Enter the Assertion Consumer Service URL from the IdP Proxy metadata XML.
Sign on URL. Enter the same Assertion Consumer Service URL.
Relay State. Leave blank.
Logout URL. Leave blank.
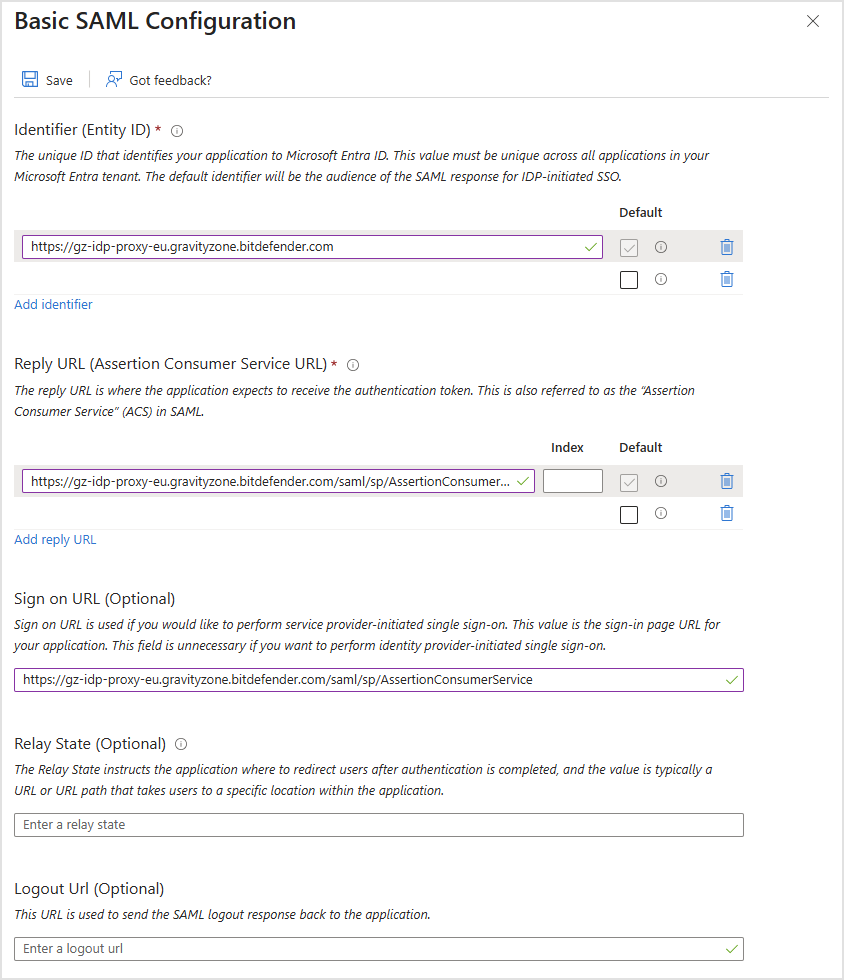
Click Save.
Return to the setup page.
Attributes & Claims
Click the pencil icon to edit.
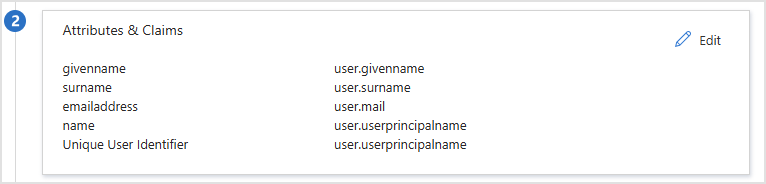
Verify the Unique User Identifier (Name ID) claim.
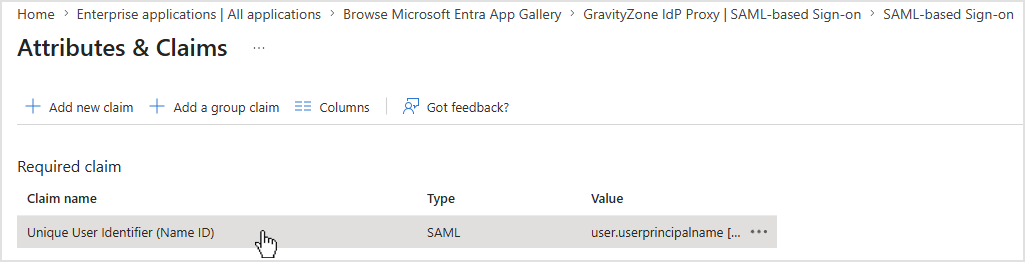
Click the entry to edit as follows:
Source attribute should be set to
user.mail.Name identifier format should be set to
Email address.
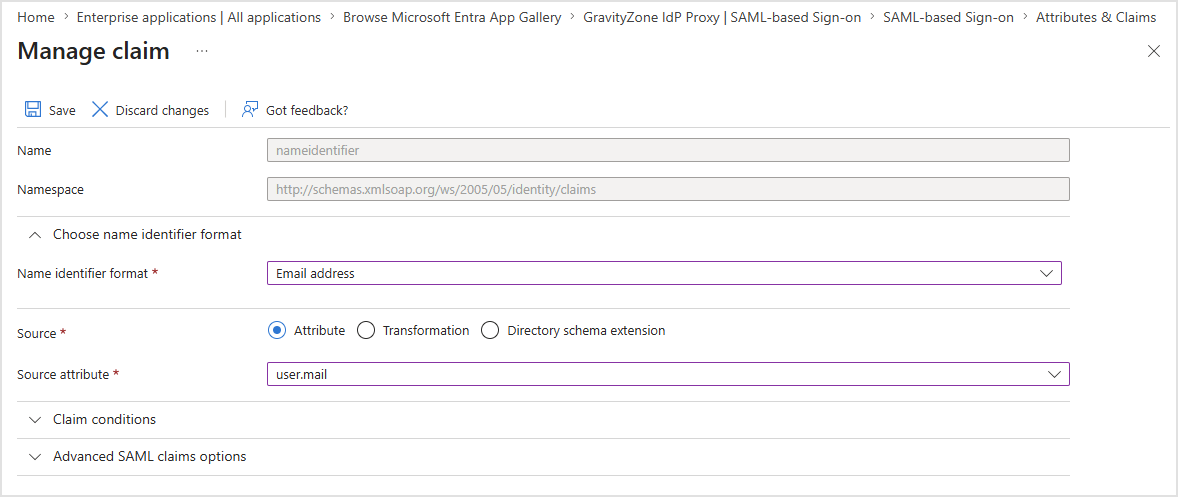
If the default configuration uses
user.userprincipalname, this is also acceptable as long as the UPN matches the email address configured in GravityZone.Click Save if you made changes.
Return to the setup page.
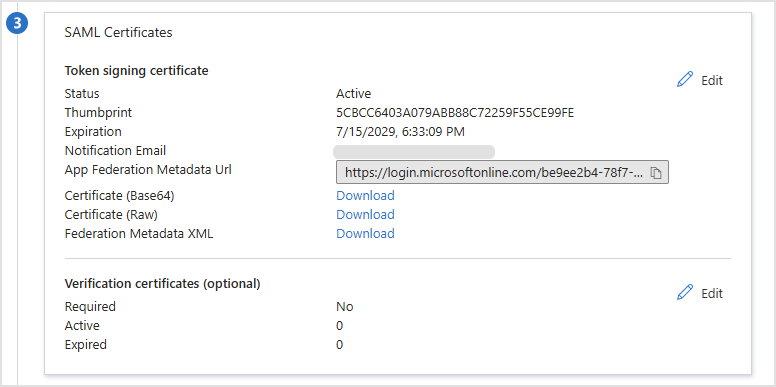
SAML Certificates
In the SAML Certificates section, verify that a signing certificate is active.
Copy the App Federation Metadata Url. This is the
identity provider metadata URLyou will need for GravityZone. Click the copy icon next to the URL.Note
Keep this URL at hand. You will paste it in GravityZone Control Center in the next step.
Enable SSO for Bitdefender services in GravityZone
After configuring your application in Microsoft Entra ID, go to GravityZone Control Center to enable SSO for Bitdefender services.
Enable SSO for your company
This is how you enable SSO for Bitdefender services for your company:
In the upper-right corner of Control Center, click the user icon and then select My Company.
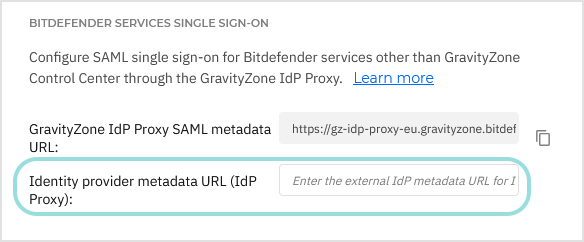
In the Authentication tab, under Bitdefender services single sign-on, enter the identity provider metadata URL in the Identity provider metadata URL (IdP Proxy) field. The other field, reserved for the GravityZone IdP Proxy SAML metadata URL, is non-editable.
Paste the App Federation Metadata Url you copied from the Microsoft Entra admin center.
If you did not save it, go to Microsoft Entra admin center > Identity > Applications > Enterprise applications > [your application] > Single sign-on. The App Federation Metadata Url is available in the SAML Certificates section.
Click Save.
Verify the authentication method for users
Users must have their authentication method set to Login using your Identity Provider in GravityZone account settings. If GravityZone Control Center SSO is already configured and users are already logging in with your Identity Provider, no additional changes are needed.
If any users still use GravityZone credentials:
Log in to GravityZone Control Center.
Go to the Accounts page from the left side menu.
In the table, click the user's name.
Under Login Security, go to Authentication method and select Login using your Identity Provider.
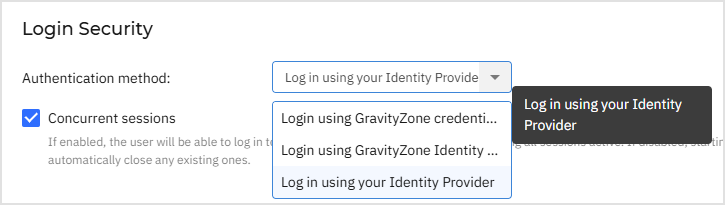
Note
This option is available after GravityZone Control Center SSO with an external identity provider has been configured at the company level.
Click Save.
Test Bitdefender services SSO
After configuring both the identity provider and GravityZone, you can test single sign-on as follows:
Log out from any Bitdefender services.
Log out from Microsoft Entra ID/Microsoft 365.
Open MDR portal in a browser.
You should be redirected to GravityZone IdP Proxy, which will redirect you to the Microsoft login page.
Authenticate with your identity provider.
You will be redirected back to MDR portal and granted access.
Note
GravityZone IdP Proxy does not support IdP-initiated login, but only service provider initiated login. Therefore, you can test the single sign-on by going directly to the Bitdefender service (for example, MDR portal), not by clicking the application in Microsoft Entra ID.
Disable Bitdefender services SSO
To disable single sign-on for Bitdefender services:
Delete the identity provider metadata URL from the Identity provider metadata URL (IdP Proxy) field in the configuration page of that company.
Click Save and confirm the action.
This does not affect GravityZone Control Center SSO, which remains configured separately.
To re-enable SSO for Bitdefender services, enter again the identity provider metadata URL in the Identity provider metadata URL (IdP Proxy) field and click Save.