Creating reports
You can create two categories of reports:
Instant reports
Instant reports are automatically displayed after you generate them.
Scheduled reports
Scheduled reports can be configured to run periodically, at a specified time and date. A list of all the scheduled reports is displayed on the Reports page.
Important
Instant reports are automatically deleted when you close the report page. Scheduled reports are saved and displayed on the Reports page.
To create a report, follow these steps:
Log in to GravityZone Control Center.
Go to the Reports page from the left side menu.
Click the
 Add button on the upper side of the table. A configuration window is displayed.
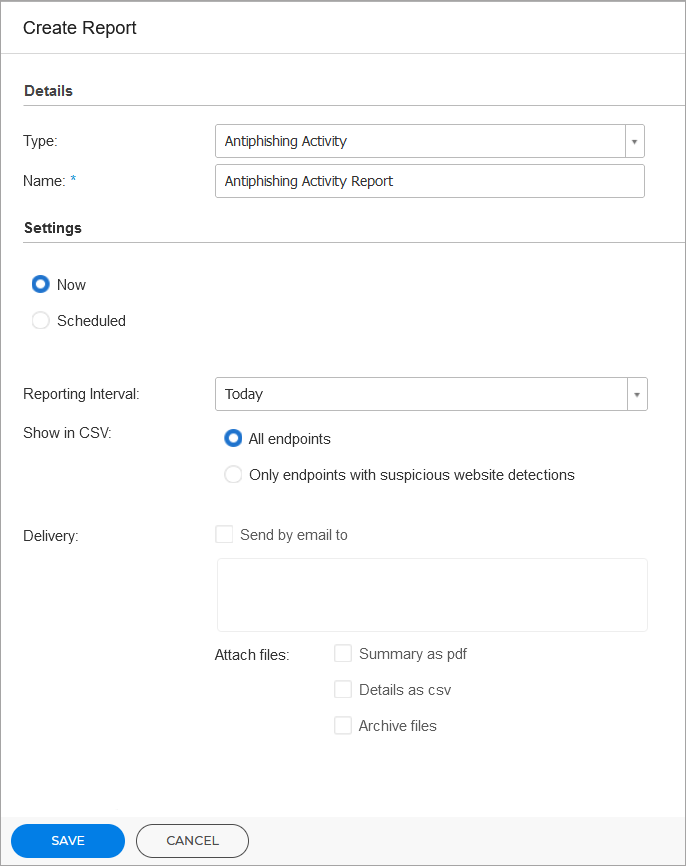
Select a report type from the menu. For more information, refer to Report types.
Enter a suggestive name for the report. When choosing a name, consider the report type and target, and possibly the report options.
Configure the report recurrence:
Select Now to create an instant report.
Select Scheduled to configure the report to be automatically generated at the time interval that you want:
Hourly, at the specified interval between hours.
Daily. In this case, you can also set the start time (hour and minutes).
Weekly, on the specified days of the week, and at the selected start time (hour and minutes).
Monthly, at each specified day of the month and at the selected start time (hour and minutes).
For most report types you must specify the time interval to which the contained data is referring. The report will only display data from the selected time period.
Several report types provide filtering options to help you easily find the information you are interested in. Use the filtering options under the Show section to obtain only the desired information.
For example, for an Update Status report, you can choose to view only the list of network objects that have not been updated, or the ones that need to be restarted to complete the update.
Delivery. To receive a scheduled report by email, select the corresponding check box. Enter the email addresses that you want in the field below. By default, the email contains an archive with both report files (PDF and CSV). Use the checkboxes in the Attach files section to customize what files and how to send them by email.
Select Target. Scroll down to configure the report target. Select one or several groups of endpoints you want to include in the report.
Depending on the selected recurrence, click Generate to create an instant report or Save to create a scheduled report.
The instant report will be displayed immediately after clicking Generate. The time required for reports to be created may vary depending on the number of managed network objects. Please wait for the requested report to be created.
The scheduled report will be displayed in the list on the Reports page. Once a report instance has been generated, you can view the report by clicking the corresponding link in the View report column on the Reports page.