Install and configure Bitdefender Endpoint Security Tools for VMware Tanzu
Configure installation package in the GravityZone
Bitdefender Endpoint Security Tools for VMware Tanzu tile downloads and installs a specific Bitdefender Endpoint Security Tools package configured in your GravityZone console.
Here are the best practices to create and configure an installation package in GravityZone for use in a VMware Tanzu deployment:
Connect and log in to Control Center using an administrator account.
Go to the Network > Installation Packages page.
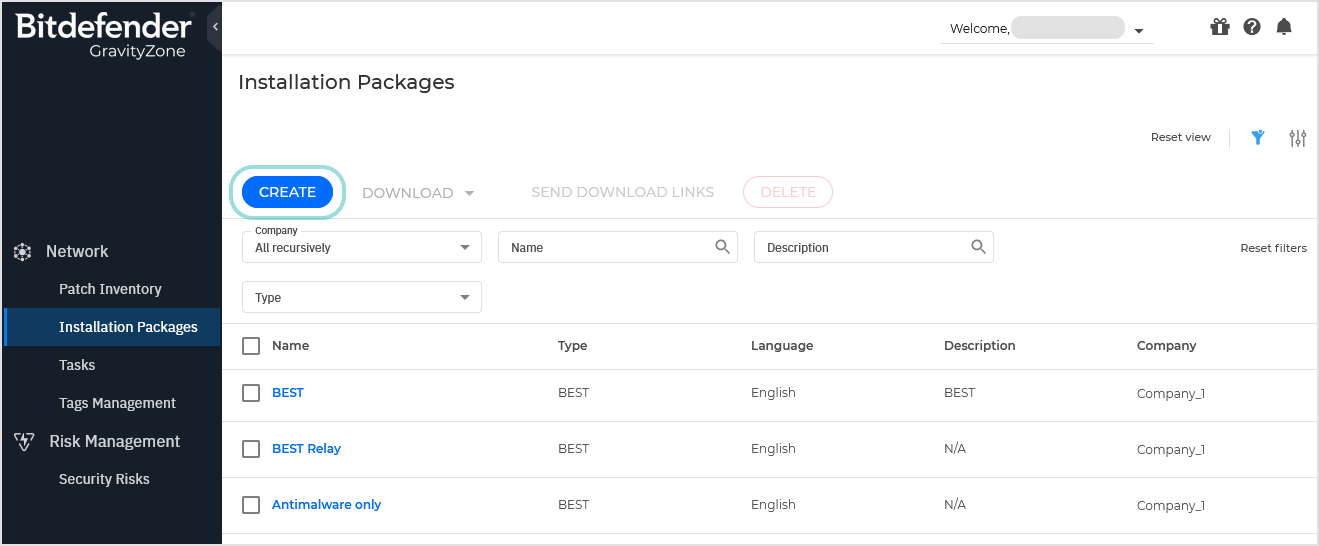
Click the Create button at the upper side of the table. A configuration window appears.
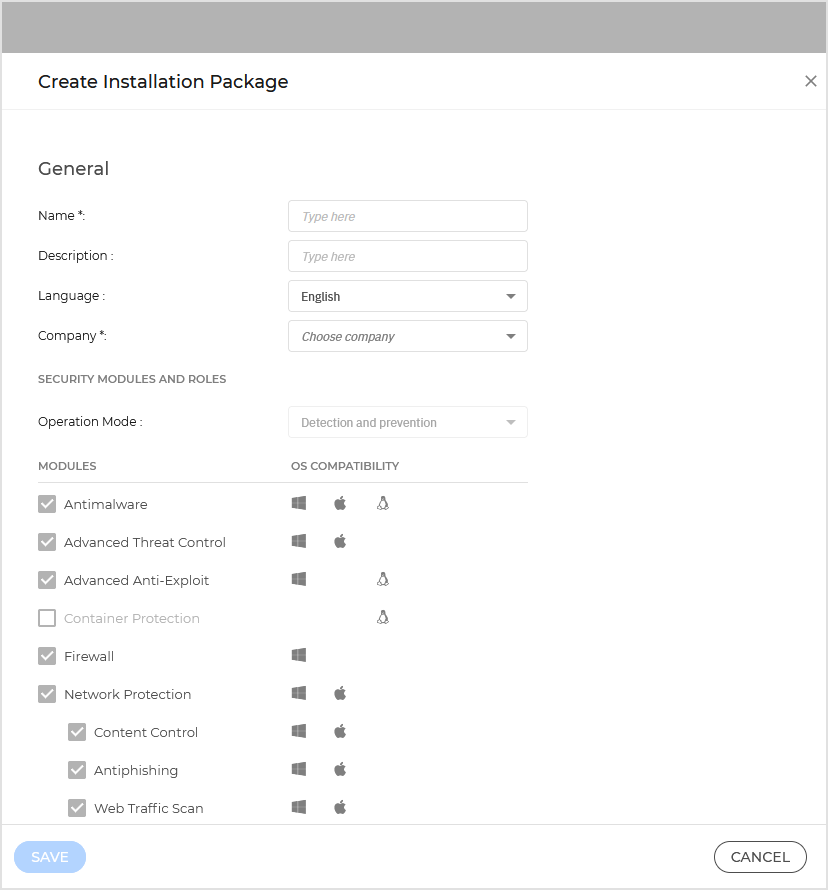
Enter a suggestive name and description for the installation package you want to create. For example, BEST for VMware Tanzu.
Select the protection modules you want to install:
For Linux deployments, only the Antimalware module is available.
For Windows server deployments, you can install additional protection modules beside Antimalware, including Advanced Threat Control, Application Control and Patch Management (if available with your GravityZone license).
Important
Make sure the Relay check box is unselected to avoid installing the agent with Relay role across all virtual machines and generating high network traffic.
Configure Scan Mode. Bitdefender Endpoint Security Tools provides three types of engines:
Local Scan – most of the scanning activity is performed locally, all signatures and engines are stored locally. Local Scan requires more local RAM and disk space resources.
Central Scan - offloads scanning to a Security Server, a dedicated virtual machine that deduplicates and centralizes most of the antimalware functionality of antimalware agents, acting as a scan server. Central Scan requires the least local RAM and disk space resources.
Hybrid Scan – uses a combination of in-the-cloud scanning and a reduced set of local signatures.
Choose the scanning technology that best suits your network environment and your endpoints' resources. Keep Automatic for predefined defaults or choose Custom to configure as needed. If you use Central Scan, make sure the virtual machines have connection to a Bitdefender Security Server to perform scanning tasks.
Note
To optimize RAM and disk space requirements on virtual machines, use either Central Scan or Hybrid Scan mode.
In the Settings section:
Disable the Scan before installation check box to speed up deployment time.
You can select Use custom folders and choose a custom folder from the GravityZone Network inventory where virtual machines will show up automatically after installation, if they do not match an existing GravityZone inventory integration.
In the Deployer section, you can choose from where to download the package for installation:
By default, this is set to Bitdefender Cloud servers or your GravityZone on-premises server.
If you have installed a relay in your IaaS to mirror installation and update files, choose Endpoint Security Relay and select it from the table or complete the required information.
Important
Port 7074 must be open for the deployment through Bitdefender Endpoint Security Tools Relay to work.
Note
At this moment, Bitdefender Endpoint Security Tools for VMware Tanzu does not support connectivity via proxy. For more information, please contact Bitdefender Business Support.
Click Save to create the installation package.
The new package is displayed on the Network > Installation Packages page.
Important
Deleting the package from the GravityZone console causes Bitdefender Endpoint Security Tools installation to fail.
Get Bitdefender package download links
To configure Bitdefender Endpoint Security Tools for VMware Tanzu tile, you need the package download URLs for Windows and Linux, depending on the operating system running on VMware Tanzu stemcells.
To get the download links from the GravityZone console:
In the Network > Installation Packages page, select the check box corresponding to the package you created at previous steps.
Click the Send download links icon in the action toolbar.
In the new window, go to the Installation links section.
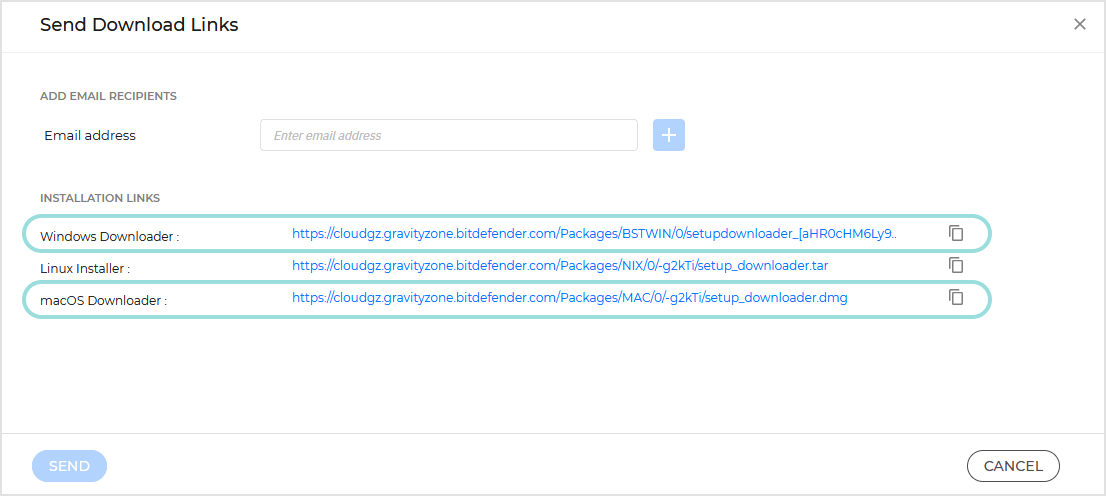
Copy the corresponding links for Windows Downloader and Linux Installer.
Upload tile
Download the Bitdefender Endpoint Security Tools for VMware Tanzu tile from Tanzu Network.
Navigate to the Ops Manager Installation Dashboard and click Import a Product.
Upload the product file.
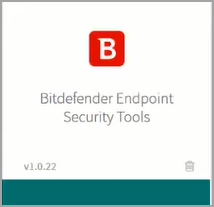
After uploading, the Bitdefender Endpoint Security Tools tile appears. Initially, the tile is orange, indicating configuration is required. Once configured, the tile appears green.
Configure tile
The Bitdefender Endpoint Security Tools for VMware Tanzu tile from Ops Manager Installation Dashboard contains two forms, displayed in the Settings tab:
One for configuring the installation of the Linux agent
Another for configuring the installation of the Windows agent
Important
Make sure to configure both Windows and Linux forms with the download URL and appropriate installation target and/or exclusion rules. Pre-configured exclusions are in place for default stemcell operating systems, in order to avoid deploying the Linux agent on a Windows VM or the Windows agent on a Linux VM. Even if you do not plan to deploy on a specific platform (Windows or Linux), you must configure the download URL and add a dummy installation target for that platform.
After you configure the tile, BOSH Director will install Bitdefender Endpoint Security Tools at the same time with other applications, when deploying the VMware Tanzu VMs.
To configure Bitdefender Linux agent installation:
Click the Linux Agent Configuration option.
Under Linux Downloader Package URL section, enter the corresponding URL copied from GravityZone.
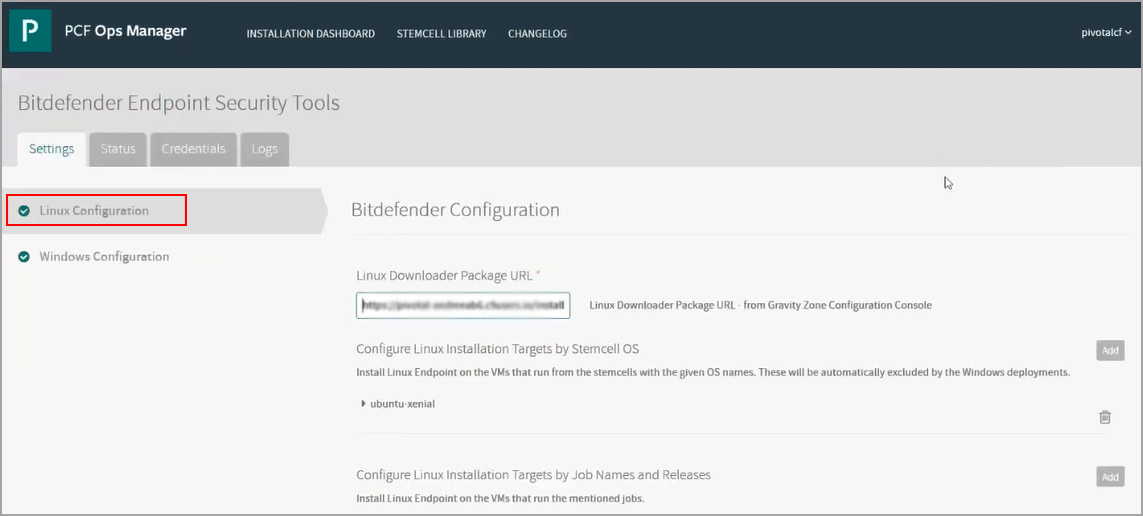
Configure the Linux installation targets by any of these criteria:
Stemcell OS – the Bitdefender Linux agent will install on the virtual machines running the specified operating systems.
The Linux Agent Configuration page has the following default inclusions:
Ubuntu Trusty
Ubuntu Xenial
CentOS 7
Important
You are required to have at least one default installation target when configuring the Bitdefender Linux agent. Deleting all default installation targets may generate deployment issues.
Release name – the Bitdefender Linux agent will install on the virtual machines running the specified job names and releases.
Deployment name - the Bitdefender Linux agent will install on the virtual machines having the specified deployment name.
Important
If you do not configure the Linux installation target, Bitdefender Endpoint Security Tools for VMware Tanzu will install the Bitdefender Linux agent on all available virtual machines including Windows.
If needed, you can configure specific Linux targets to be excluded from installation by any of these criteria:
Stemcell OS – the Bitdefender Linux agent will not install on the virtual machines running the specified operating systems.
Job names and releases – Bitdefender Linux agent will not install on the virtual machines running the specified jobs.
Deployment name – the Bitdefender Linux agent will not install on the virtual machines having the specified deployment name.
Click Save.
To configure Bitdefender Windows agent installation:
Click the Windows Agent Configuration option.
Under Windows Downloader Package URL section, enter the corresponding URL copied from GravityZone.
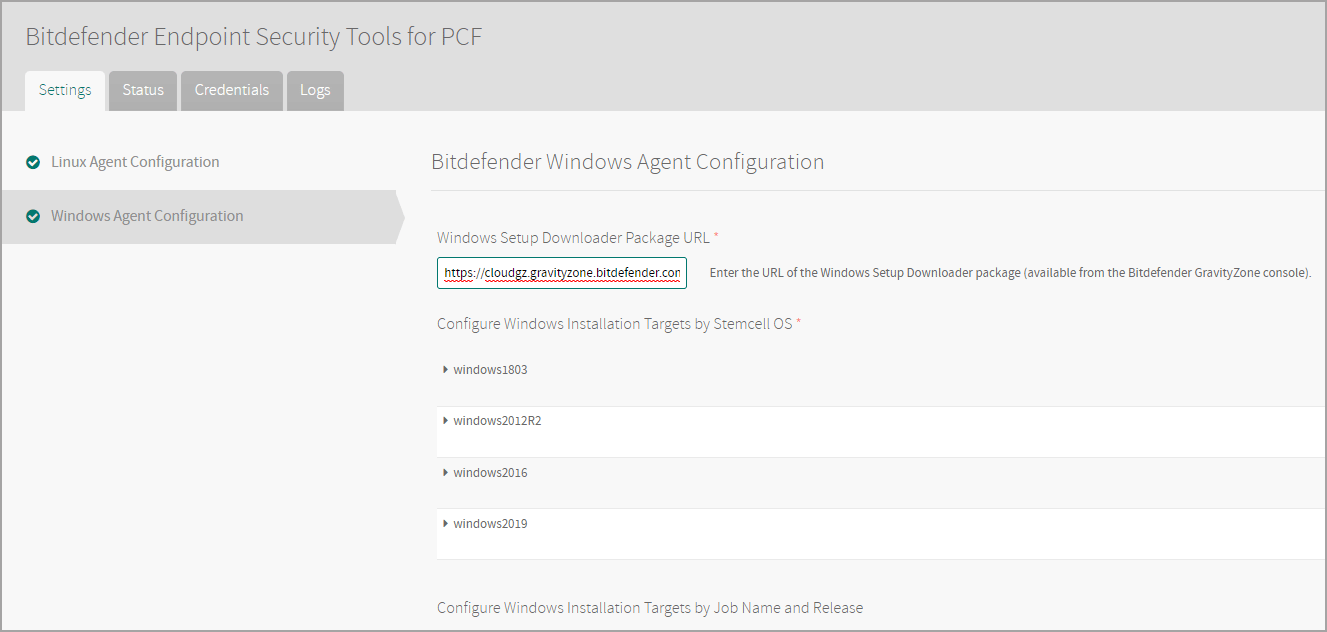
Configure Windows installation targets by any of these criteria:
Stemcell OS – the Bitdefender Windows agent will install on the virtual machines running the specified operating systems.
The Windows Agent Configuration page includes the following default inclusions:
Windows Server 1803
Windows 2012 R2
Windows 2016
Windows 2019
Important
You are required to have at least one default installation target when configuring the Bitdefender Linux agent. Deleting all default installation targets may generate deployment issues.
Release name – the Bitdefender Windows agent will install on the virtual machines running the specified job names and releases.
Deployment name - the Bitdefender Windows agent will install on the virtual machines having the specified deployment name.
Important
If you do not configure the Windows installation target, Bitdefender Endpoint Security Tools for VMware Tanzu will install the Bitdefender Windows agent on all available virtual machines including Linux.
If needed, you can configure specific Windows targets to be excluded from installation by any of these criteria:
Stemcell OS – the Bitdefender Windows agent will not install on the virtual machines running the specified operating systems.
Job name and release – the Bitdefender Windows agent will not install on the virtual machines running the specified jobs.
Deployment name – the Bitdefender Windows agent will not install on the virtual machines having the specified deployment name.
Click Save.
Deploy tile
After saving tile configuration, you can deploy the tile:
In the Ops Manager Installation Dashboard, click Review Pending Changes.
In the screen containing the product list, select the check box corresponding to Bitdefender Endpoint Security Tools.
Click Apply changes.
Important
This will only update the runtime configuration, without affecting the existing virtual machines. You must redeploy them to install the Bitdefender agents.