Managing user accounts
You can create, edit and delete user accounts individually from the Accounts page in the Control Center.
Create a user account
Before creating a user account, make sure you have the required email address at hand. This address is mandatory for creating a GravityZone user account. Users will receive their GravityZone login details at the supplied email address. Users will also use the email address to log in to GravityZone.
To add a user account in Control Center:
Log in to the GravityZone console.
Go to the Accounts page from the left side menu.
Click the Add account button in the upper left side of the page.
A configuration window will be displayed.
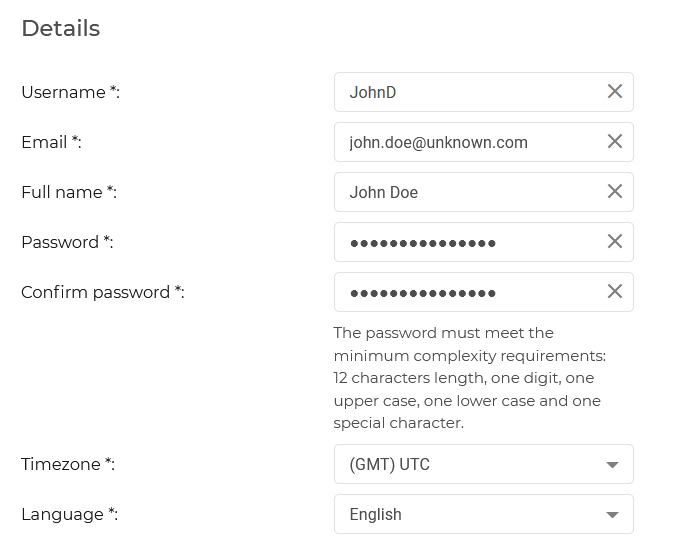
Under the Details section, fill in the following details:
Email - the user's email address used to log in to Control Center.
Note
The email address must be unique.
Reports and important security notifications are sent to this address. Email notifications are sent automatically whenever important risk conditions are detected in the network.
Full name - the full name of the account owner.
Timezone - select the timezone of the account. The console will display time information according to the selected timezone.
Language - select the console display language.
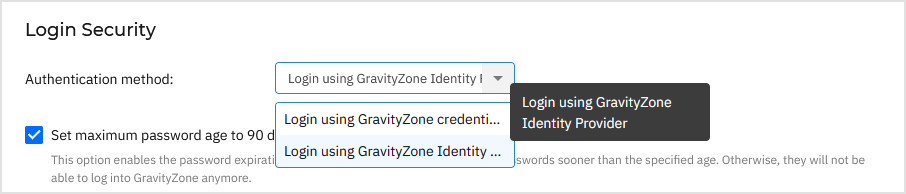
Configure the policy settings under the Login Security section:
Select the authentication method:
Login using GravityZone credentials - this method allows users to connect to GravityZone Control Center using a username and password.
To connect to other Bitdefender services, users must either use separate credentials or log in using GravityZone Identity Provider, depending on the service.
For details, refer to Login with GravityZone credentials.
Login using GravityZone Identity Provider - this method allow users to connect to GravityZone Control Center and other Bitdefender services using the same username and password.
In addition, this method allows users to configure passkeys instead of credentials for a more streamlined authentication process.
For details, refer to Login with GravityZone Identity Provider.
Note
Users cannot switch between the authentication methods on their own. They must contact their GravityZone administrator to make this change.
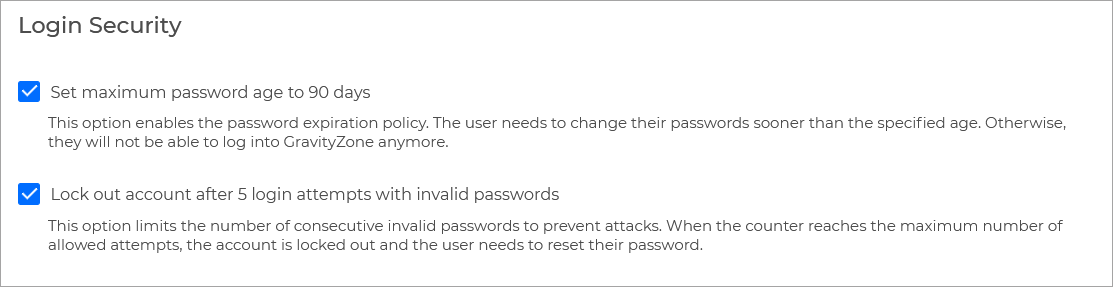
Set maximum password age to 90 days - enable or disable the password expiration policy.
When enabled, the password associated to the account expires 90 days after it is created. The user needs to change the password before this time passes, or they will be locked out of GravityZone.
Lockout accounts after 5 login attempts with invalid passwords - when enabled, locks the account after 5 login attempts are made using an incorrect password.
Concurrent Logins - When the option is disabled for an account, its user is able to log in to the GravityZone console from multiple browser sessions. If enabled, any existing session will be terminated and the user will automatically be logged out when a new session is started.
Note
If an account is locked, the user will have to reset their password. Alternatively, this action can also be taken by an administrator.
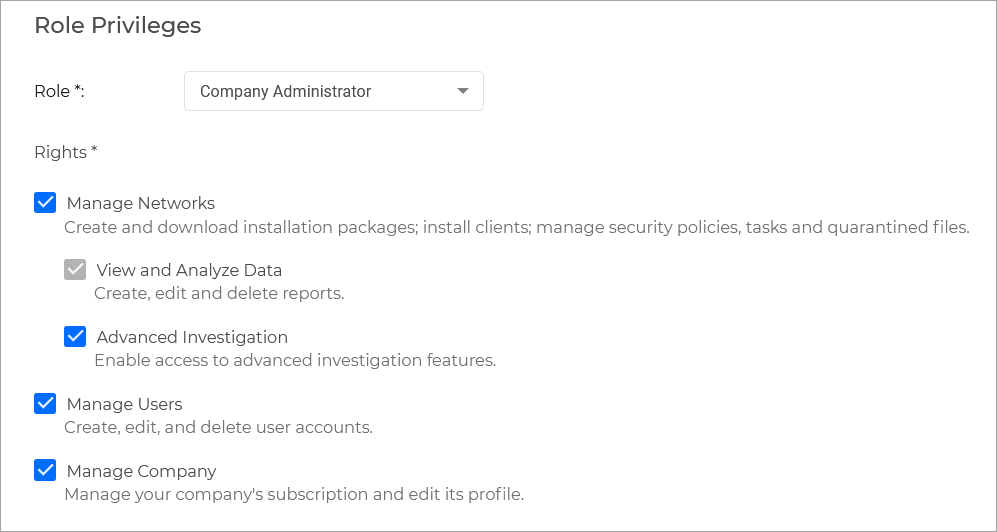
Under the Role privileges section, configure the following settings:
Role - select the role you want to assign to the user. The role determines what rights the user will have.
Note
For more information on user roles, refer to User Roles.
Rights - select what rights you want the user to have.
Each user role has a predefined configuration of rights. You can assign the user a specific combination of rights by selecting Custom under Role.
Note
For more information on user rights, refer to User rights.
Under Select Targets, use the Tree view to select the network groups the user will have access to. You can restrict user access to specific network areas. Selected entities appear in the Selected groups panel.
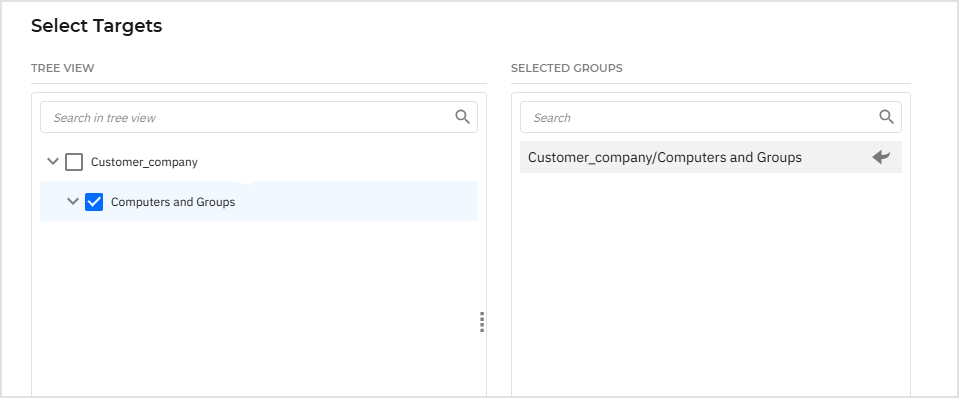
Navigation tips:
Use the search boxes to find entities in the tree or in the selected list.
Use the asterisk (*) as a wildcard to match multiple characters in an entity name.
In Selected groups, select an entity and click the arrow to locate it in the Tree view. From there, you can deselect it or select additional entities from the same location.
Click Create to add the user.
Control Center automatically sends the user an email with login details and a link they can use to create a password for their account.
The new account will appear in the user accounts list.

Editing a user account
To edit user account in Control Center :
Log in to Control Center.
Go to the Accounts page from the left side menu.
Click the Full name.

Change user account details and settings as needed.
Note
Under Login Security, you can view the status of the two-factor authentication (2FA) setting. This option is either enforced company-wide , or the users can set it themselves.
Click Save to apply the changes.
Note
All accounts with the Manage Users right can create, edit and delete other user accounts. You can only manage accounts with equal or fewer privileges as your own account.
Accounts created using AD integration can not delete or edit accounts created from GravityZone.
Deleting a user account
Log in to Control Center.
Go to the Accounts page from the left side menu.
Select the user account from the list.
Click the Delete button at the upper side of the table.
Click Delete to confirm.
Note
You cannot delete accounts that are used as contacts for the MDR service. First you must provide new MDR contacts for the affected companies, then you can try again.