Outbound Smarthost
This guide explains how to enable outbound scanning from the customer portal.
This feature is available only for Mesh Gateway and Mesh Unified customers.
Go to the Customers page.
Select Login as for the customer you want to configure.
Go to the Settings page, and then open the Outbound Smarthost tab.
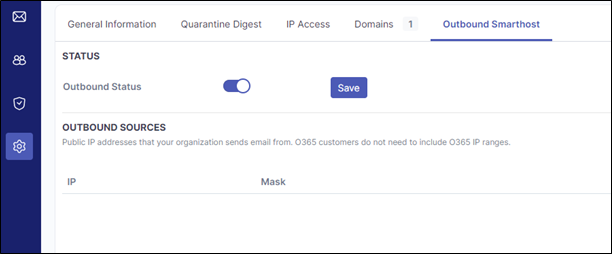
Enable Outbound Status, and then select Save.
Note
Activation may take up to 15 minutes. Wait before sending outbound email to avoid delivery issues.
For O365, configure the SPF record and outbound connector.
For Exchange or another email service, enter the public IP addresses from which the organization sends email.
The configuration varies by domain provider. Consult your provider’s documentation for additional guidance.
Mesh does not modify outbound email content, so the DKIM signature generated by your mail provider remains valid. You do not need a DKIM key from Mesh.
For Microsoft 365, see Microsoft’s DKIM configuration guide.
Update the SPF record according to your region:
Service region
SPF record
Europe
include:spf1.emailsecurity.app
United States
include:spf1.emailsecurity.app
DTS
include:spf1.dts.emailsecurity.bitdefender.com
OVH
include:spf1.ovh.emailsecurity.bitdefender.com
For O365 or Exchange, see the O365 / Exchange outbound setup guide.
For O365 or Exchange with Exclaimer, see the O365 / Exchange outbound setup guide for Exclaimer.
For Google Workspace, see the Google Workspace outbound setup guide.
Optional outbound settings
These optional settings provide additional flexibility depending on your domain configuration.
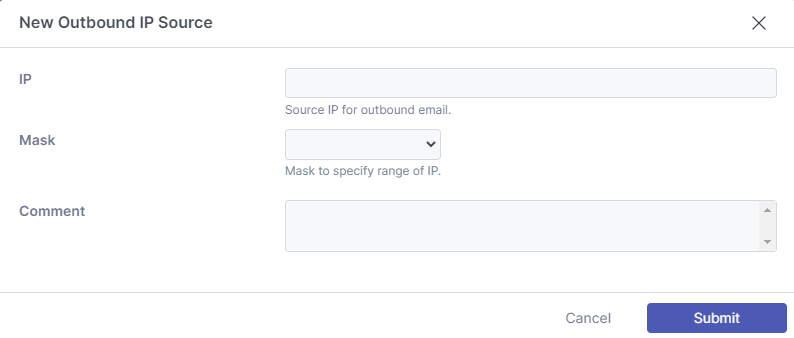
Outbound sources
Use outbound sources to specify the public IP addresses from which your organization sends email. This can be useful when third-party tools send messages on your behalf.
Note
O365 customers do not need to add O365 IP ranges because they are included automatically.
Note
When using third-party software, connect to the smart host on port 25 without authentication. See the region-specific smart host details.

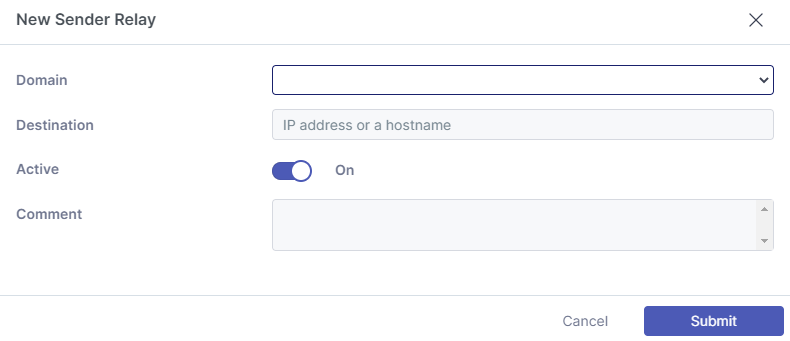
Sender relay
Use Sender Relay to forward sending domains to a third-party destination for further relay, such as a branding product or encryption service.
 |
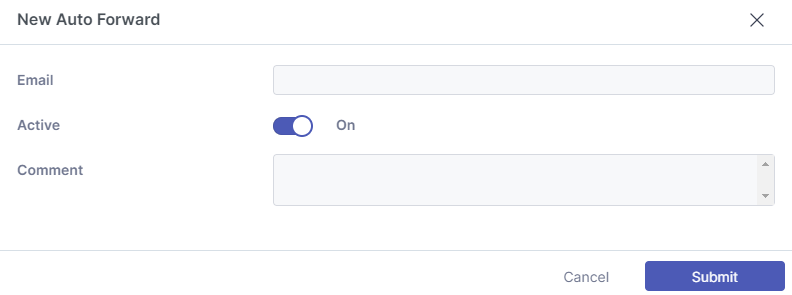
Auto Forward
An Auto Forward rule allows email sent through an automatic forwarding rule on your mail host to pass through the smart host without sender rewriting. This is required because the sending domain is typically not your own. The message can retain the original envelope address instead of using a forwarding address from your domain.
Specify the destination address to create an exception. The recipient address is used because the sender address may be random.
Note
Email originating from Microsoft’s high-risk delivery pool is not accepted by the smart host, and an NDR is generated. For more information, see Microsoft’s high-risk delivery pool documentation.
If this occurs for automatically forwarded email, create a mail flow rule that bypasses the smart host.
 |
DKIM keys
DomainKeys Identified Mail (DKIM) is an email authentication protocol that uses a digital signature to verify message integrity. This helps confirm that the message was not modified in transit.
Note
This configuration is optional. Mesh does not invalidate DKIM signatures created by other platforms or tools. For Microsoft 365, see Microsoft’s DKIM configuration guide.
On the Outbound Smarthost page, open the DKIM Keys tab.
Select the Domain to use.
Select the key size. 2048 and 4096 bits are supported.
Enter a name for the Selector. The selector identifies the key in email headers and indicates which TXT record is checked during validation.
Optionally, add a Comment.
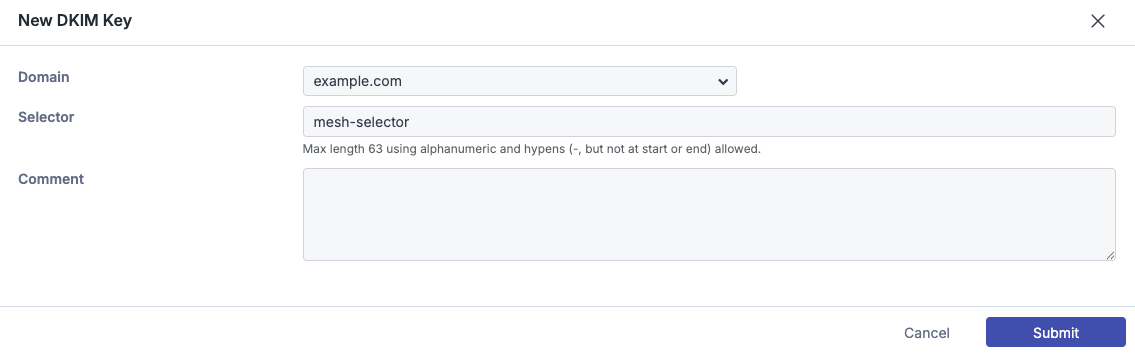
Create the TXT record for the selected domain with your DNS provider.
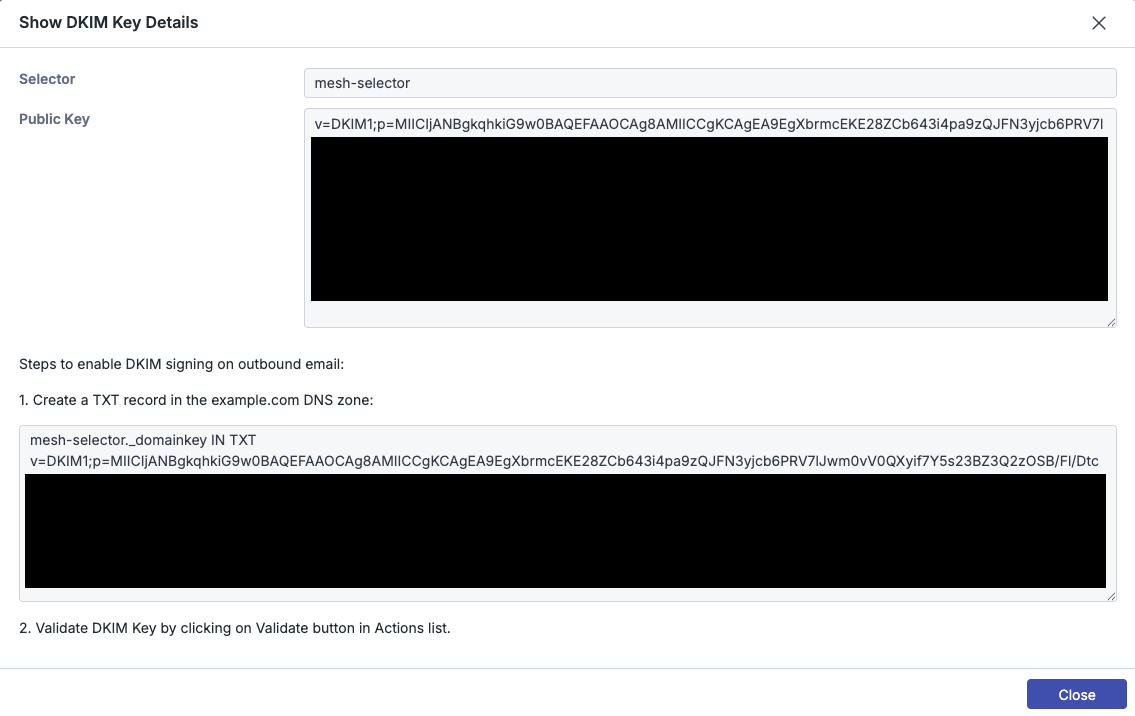
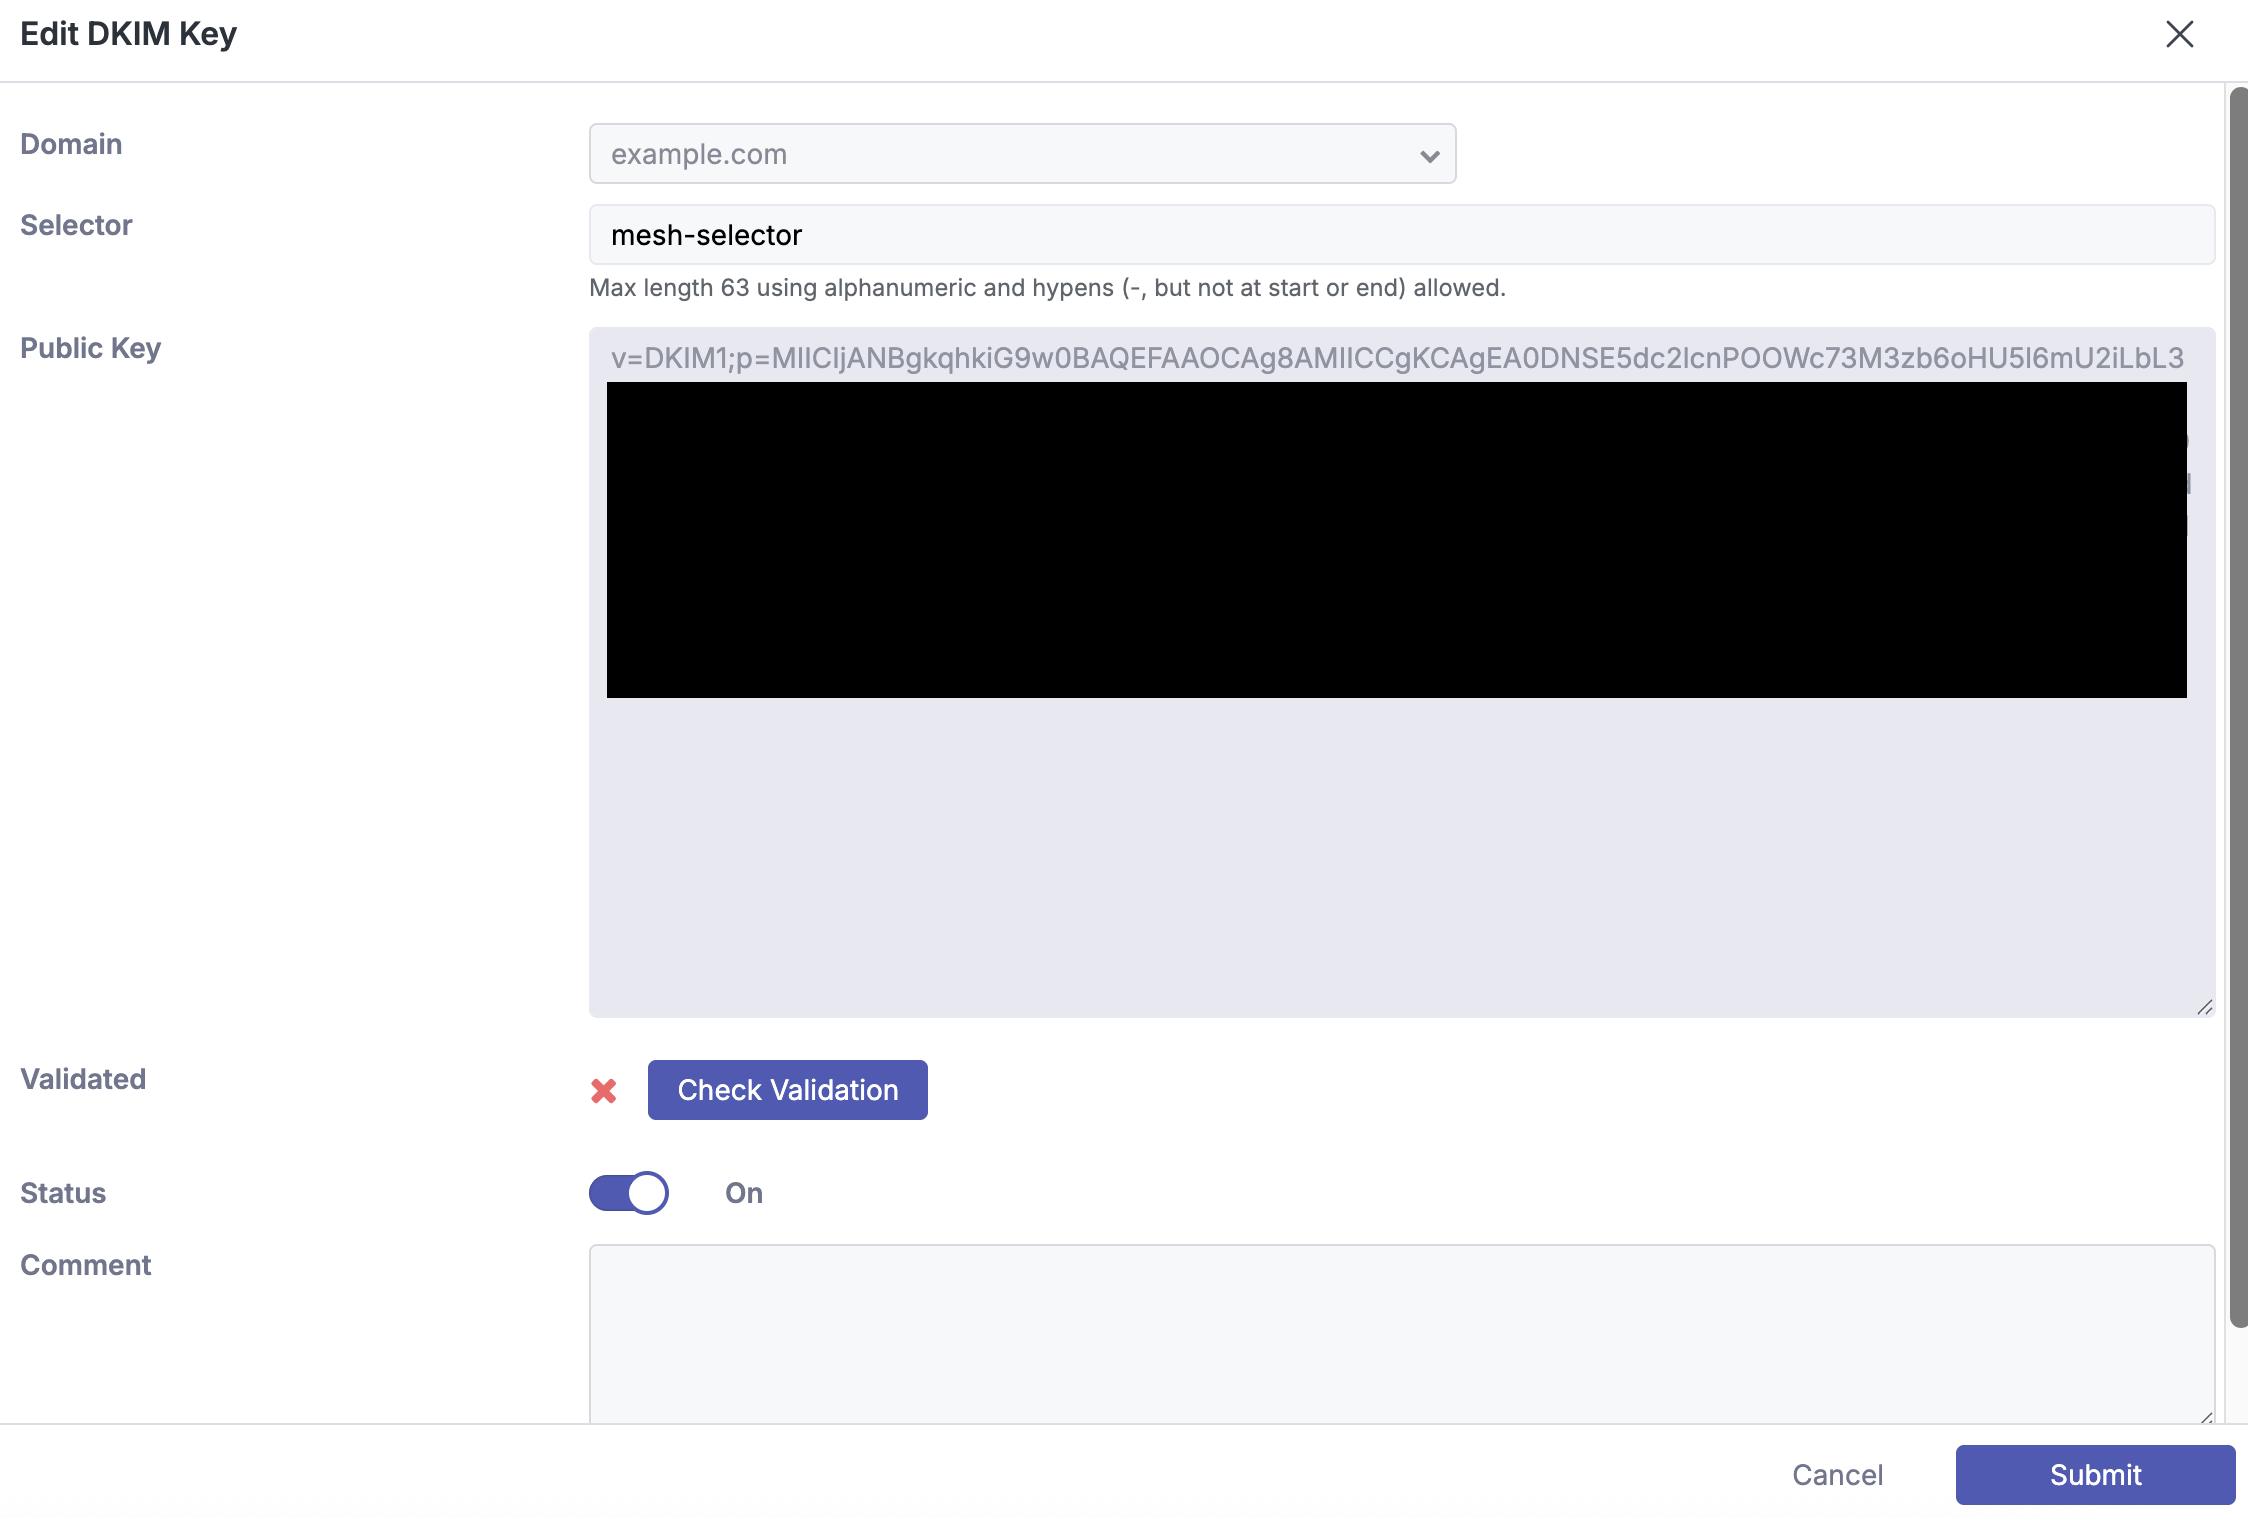
Select the pencil icon to edit the DKIM key, and then enable Check Validation. After validation succeeds, the key is ready for use.
Configure outbound filtering for Mesh in Office 365 / Exchange Admin
This guide explains how to create an outbound connector in Microsoft 365 to route outgoing email through Mesh.
We recommend reviewing Microsoft’s official documentation for configuring mail flow with connectors to ensure that the configuration is suitable for your environment.
If you use Exclaimer, follow the Exclaimer configuration guide instead.
Connector setup
Open the Connectors page
In the Exchange admin center, open the Connectors page.
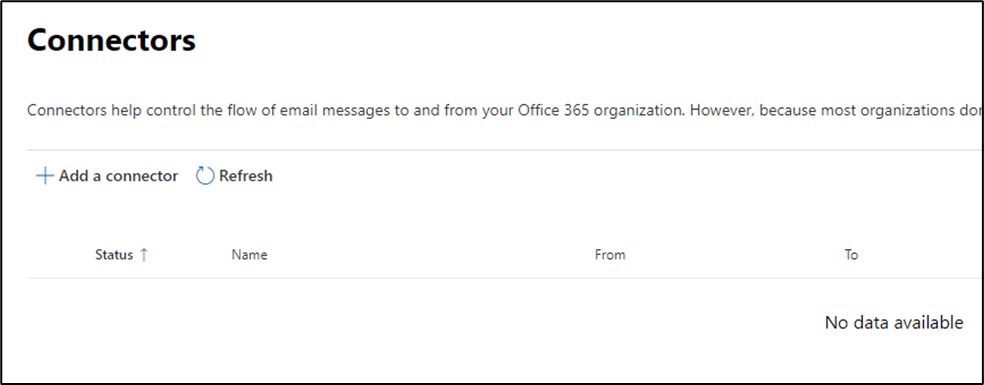
Add a connector
Select Add a connector.
Specify the mail flow
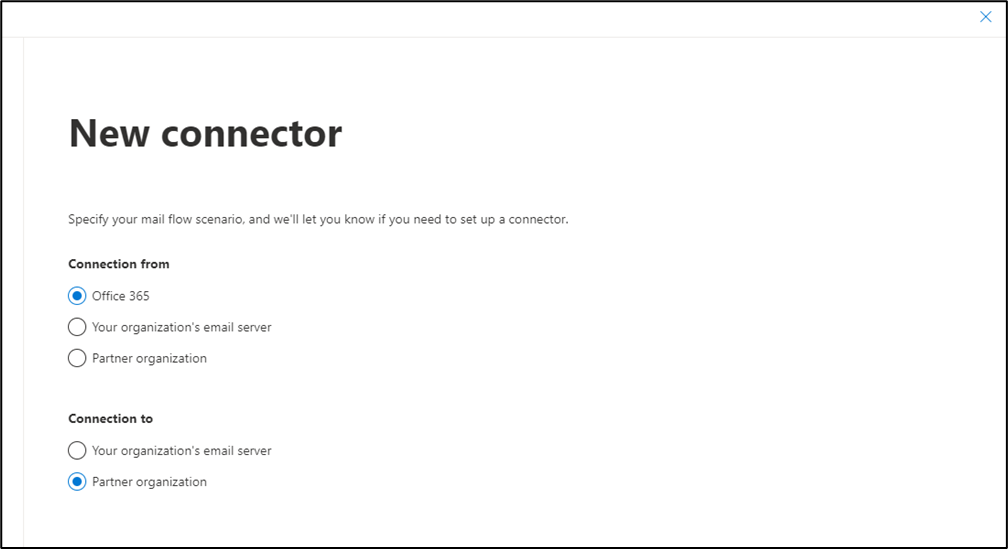
Under Connection from, select Office 365. Under Connection to, select Partner organization.
Configure the connector name
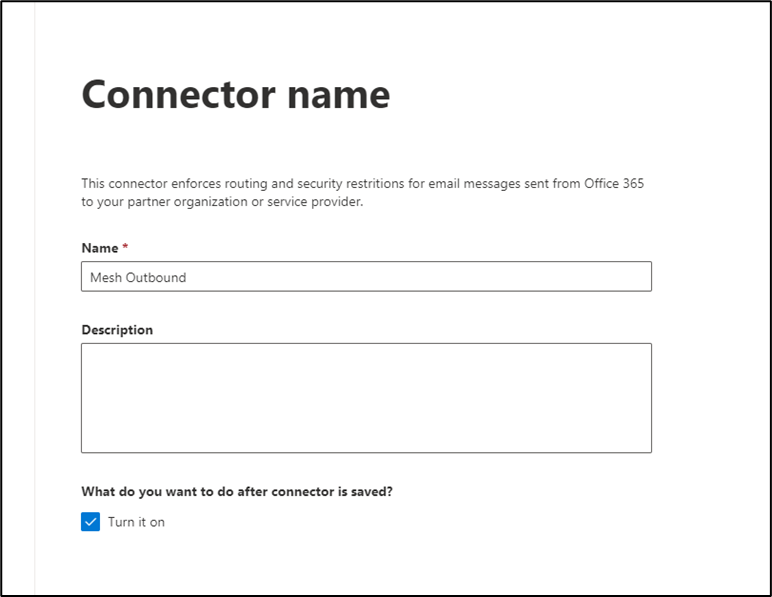
Enter a name for the connector and, optionally, a description. Select Turn it on.
Configure connector usage
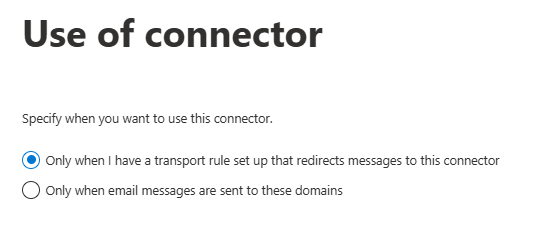
Select Only when I have a transport rule set up that redirects messages to this connector.
Configure routing
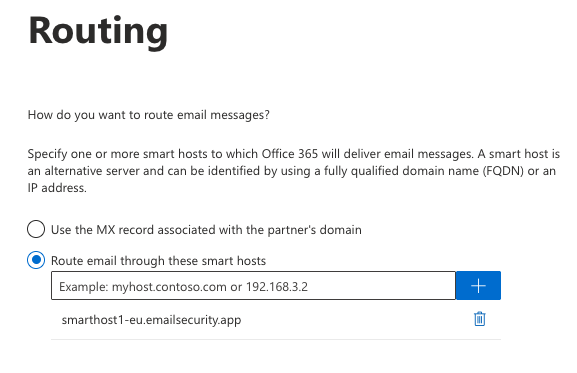
Select Route email through these smart hosts.
Enter the smart host for your region.
Configure security restrictions
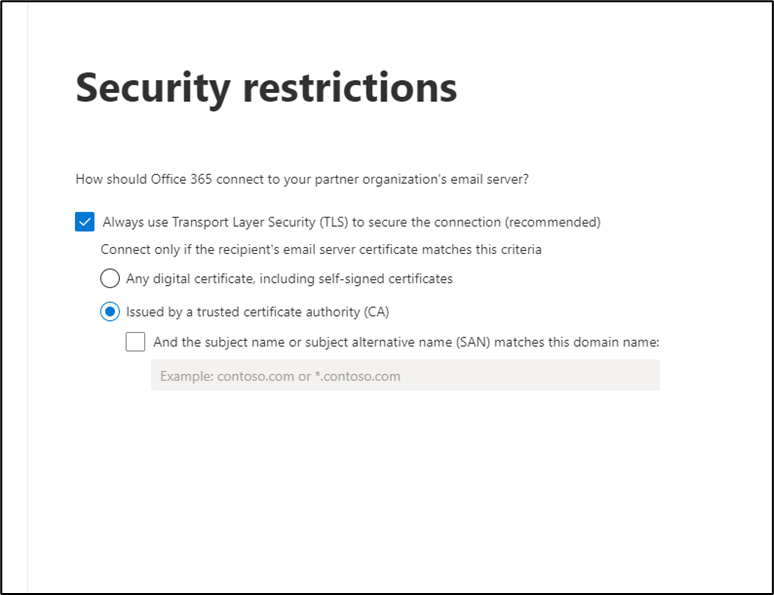
Select Always use Transport Layer Security (TLS) to secure the connection and Issued by a trusted certificate authority (CA).
Validate the connector
The next page displays the connector validation options.
For an outbound connector, use an email address that is external to the tenant being configured. If the test email address is internal, Microsoft 365 does not use the smart host.
Note
Due to changes in Microsoft’s infrastructure, the 502 5.3.3 Command not implemented error may appear when connecting to the smart host. If this occurs, skip validation and manually verify that outbound email is routed correctly.
Review and save the connector
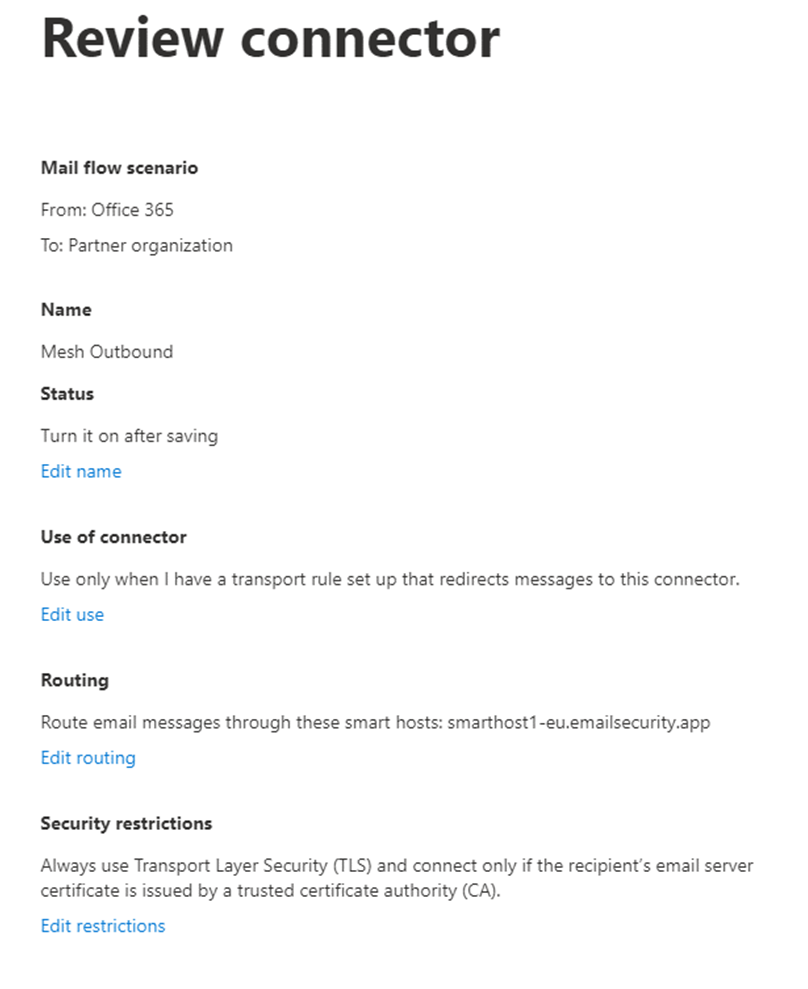
Review the details, and then select Save. The connector list is updated to reflect the change.
Transport / mail flow rule setup
Open the Rules page
In the Exchange admin center, go to Mail flow > Rules.
Create a new rule
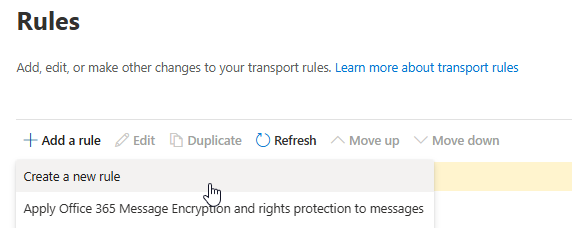
Select Add a rule > Create a new rule.
Configure the rule conditions
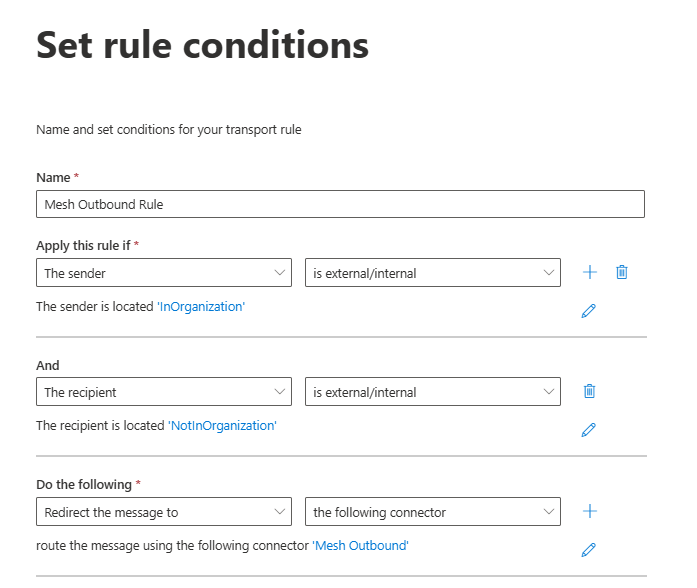
Enter a name for the rule, and then configure the following conditions:
The sender is external/internal > Inside the organization.
The recipient is external/internal > Outside the organization.
Redirect the message to > The following connector > select the Mesh outbound connector you created.
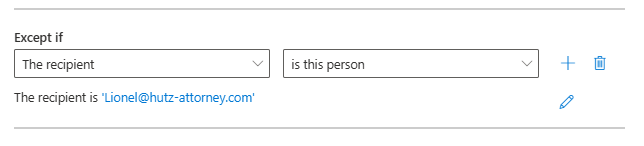
Configure exceptions
To exclude email that should not pass through the smart host, use the Except if condition.
For example, when configuring automatic forwarding, see the Outbound Smarthost guide to determine whether an exception is required.
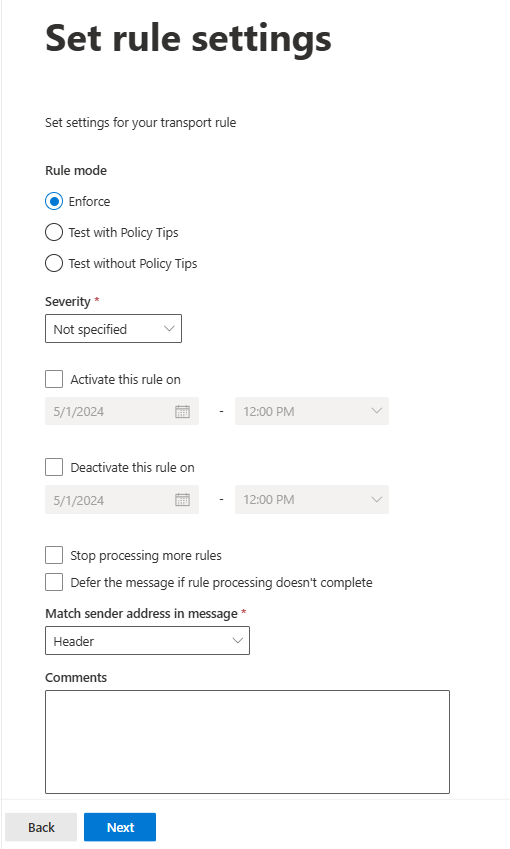
Configure the rule settings
Select Enforce.
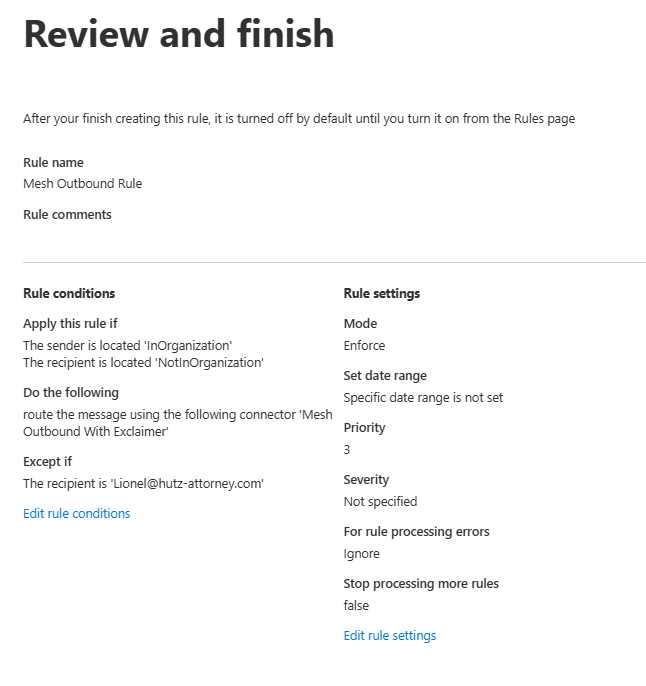
Review and finish
Review the details and verify that they are correct. The rule is created.
Configure outbound filtering for Mesh in Office 365 / Exchange Admin with Exclaimer
When using Mesh with Exclaimer Cloud, complete the following additional steps to route email through Mesh.
Connector setup
Open the Connectors page
In the Exchange admin center, open the Connectors page.
Add a connector
Select Add a connector.
Specify the mail flow
Under Connection from, select Office 365. Under Connection to, select Partner organization.
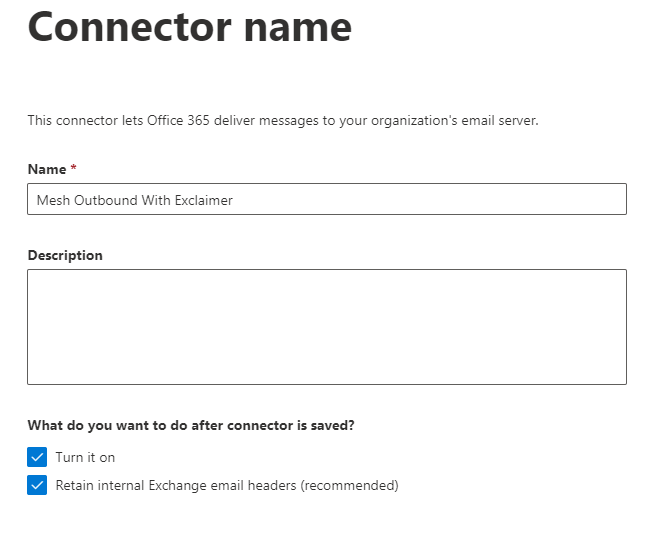
Configure the connector name
Enter a name for the connector and, optionally, a description. Select Turn it on.
Configure connector usage
Select Only when I have a transport rule set up that redirects messages to this connector.
Configure routing
Select Route email through these smart hosts.
Enter the smart host for your region.
Configure security restrictions
Select Always use Transport Layer Security (TLS) to secure the connection and Issued by a trusted certificate authority (CA).
Validate the connector
The next page displays the connector validation options.
For an outbound connector, use an email address that is external to the tenant being configured. If the test email address is internal, Microsoft 365 does not use the smart host.
Note
Due to changes in Microsoft’s infrastructure, the 502 5.3.3 Command not implemented error may appear when connecting to the smart host. If this occurs, skip validation and manually verify that outbound email is routed correctly.
Review and save the connector
Review the details, and then select Save. The connector list is updated to reflect the change.
Transport / mail flow rule setup
Open the Rules page
In the Exchange admin center, go to Mail flow > Rules.
Create a new rule
Select Add a rule > Create a new rule.
Configure the rule conditions
Enter a name for the rule, and then configure the following conditions:
The sender is external/internal > Inside the organization.
The recipient is external/internal > Outside the organization.
Redirect the message to > The following connector > select the Mesh outbound connector you created.
Configure exceptions
To exclude email that should not pass through the smart host, use the Except if condition.
For example, when configuring automatic forwarding, see the Outbound Smarthost guide to determine whether an exception is required.
Configure the rule settings
Select Enforce.
Review and finish
Review the details and verify that they are correct.
Modify the Exclaimer rule
In the mail flow rule list, edit the existing Exclaimer rule, which should have a priority of 1. Select Stop processing more rules.
Note
This setting ensures that the Exclaimer rule runs first. After the rule completes and the email returns, the Mesh outbound rule runs.
Tip
Outbound filtering with Exclaimer is now configured.
Create an outbound gateway in Google Workspace
This guide explains how to configure an outbound gateway in Google Workspace.
For more information, see Google’s documentation for routing outbound email.
Note
Google advises that changes to outbound routes may take up to 24 hours.
Add an outbound gateway route
Open the Google Admin console.
In the Admin console, go to Menu > Apps > Google Workspace > Gmail > Hosts.
Select Add route.
In the Name field, enter a name for the outbound gateway route.
In the Enter host name or IP field, enter the smart host for your region.
Configure the following options:
Important: Clear Perform MX lookup.
Select the following checkboxes:
Require mail to be transmitted via a secure (TLS) connection (Recommended).
Require CA signed certificate (Recommended).
Validate certificate hostname (Recommended).
Select Test TLS connection to verify the connection to the receiving mail server.
Select Save.
Set up the outbound gateway route in Gmail
You can configure an outbound gateway by using either the Routing setting or the Outbound gateway setting. We recommend using Routing whenever possible.
Open the Google Admin console.
In the Admin console, go to Menu > Apps > Google Workspace > Gmail > Routing.
Select the top-level organizational unit.
In the Routing section, select Configure, Edit, or Add another rule.
Enter a name or description for the routing setting.
Under Email messages to affect, select Outbound.
Under For the above types of messages, do the following, select Modify message.
Under Route, select Change route.
Select Normal routing, and then select the outbound gateway route from the list.
To require TLS for onward delivery, select Require secure transport (TLS).
Select Add setting or Save.
At the bottom of the page, select Save. The outbound gateway is configured.