Configuring Bitdefender services single sign-on with AD FS
GravityZone supports single sign-on (SSO) for Bitdefender services outside GravityZone Control Center, such as MDR portal, through the GravityZone IdP Proxy. The IdP Proxy uses SAML 2.0 as authentication standard.
This topic describes how to configure single sign-on for Bitdefender services with AD FS (2016 or later). For generic information on configuring other identity providers, refer to Configuring single sign-on for Bitdefender services using a 3rd party identity provider.
Prerequisites and requirements
You have a GravityZone administrator account.
An Active Directory instance has been configured, where users have accounts with the same email addresses as in GravityZone.
All Active Directory users who will authenticate via GravityZone IdP Proxy must have the E-mail field populated in their account properties (Active Directory Users and Computers > [user] > Properties > General tab > E-mail). Users without this attribute will not be able to sign in, as the SAML claim rules use the email address as the login identifier (
NameID).AD FS service has been fully installed and configured (AD FS 2016 or later).
You have a valid SSL certificate for AD FS and the fingerprint for that certificate.
GravityZone Control Center SSO with AD FS is already configured and working. Refer to Configuring GravityZone Control Center single sign-on with AD FS.
Users are configured with the Login using your Identity Provider authentication method in GravityZone account settings.
Note
This option is only available after GravityZone Control Center SSO has been configured at the company level.
Configure AD FS
To configure AD FS for single sign-on with Bitdefender services, you can create a separate relying party trust for the GravityZone IdP Proxy. This is in addition to the existing relying party trust used for GravityZone Control Center SSO.
You need to do the following:
Extract the GravityZone IdP Proxy SAML metadata
Log in to Bitdefender GravityZone as an administrator.
Click your user name in the upper-right side of the screen and select My Company.
Go to the Authentication tab.
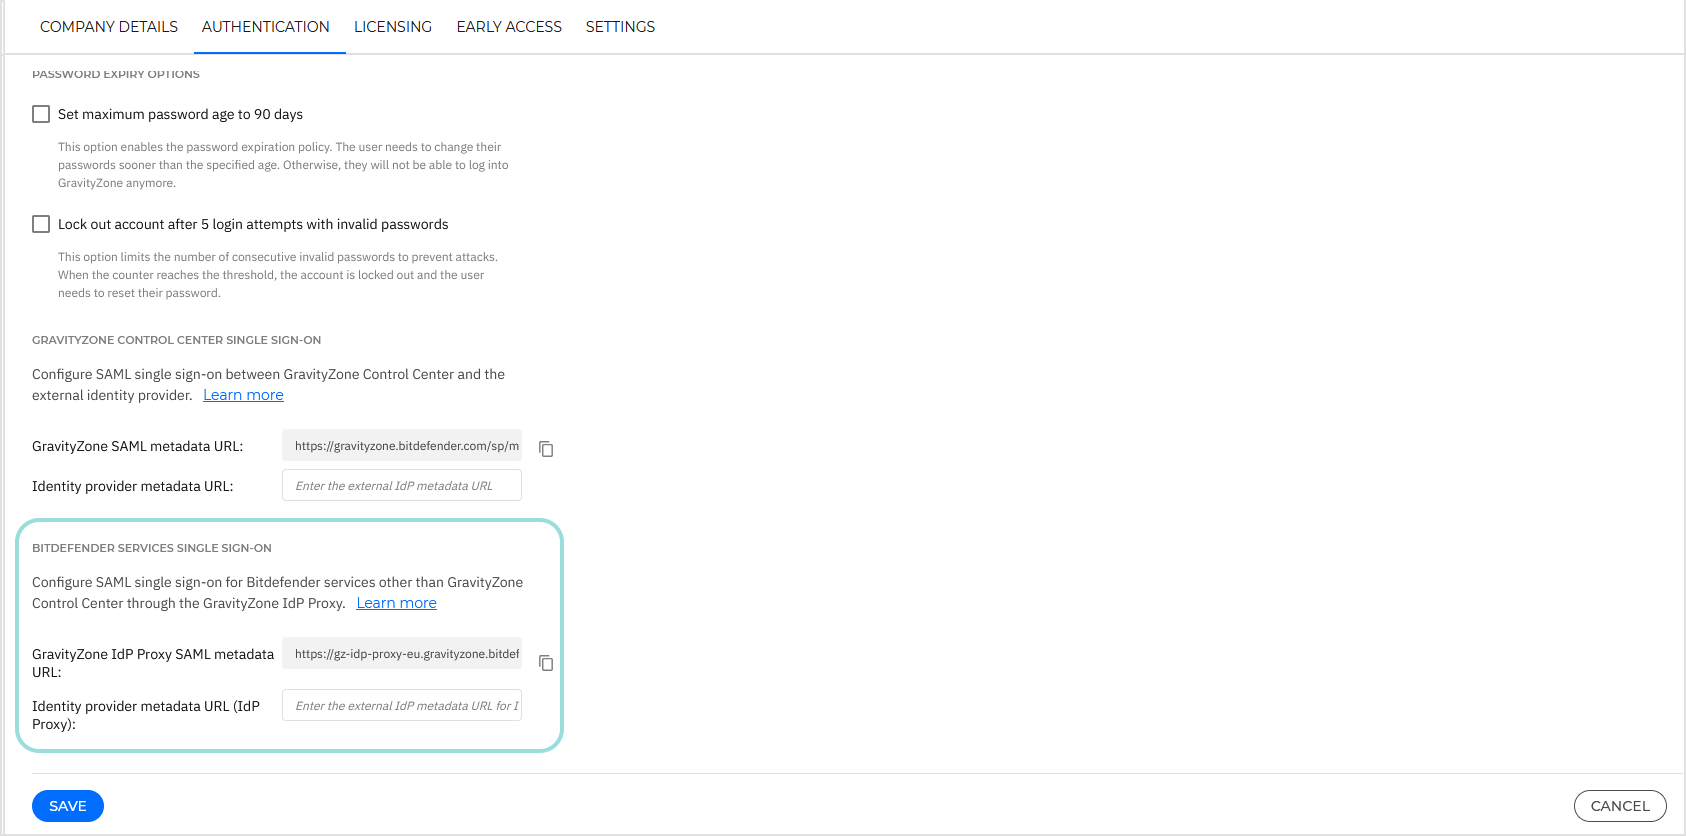
Under the Bitdefender services single sign-on section, click the button next to the GravityZone IdP Proxy SAML metadata URL field to copy the metadata URL.
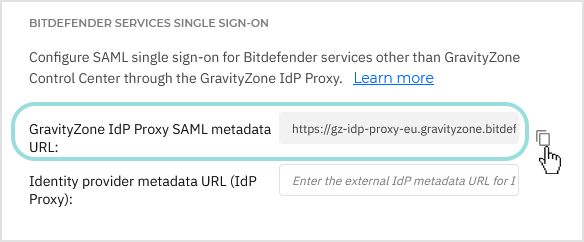
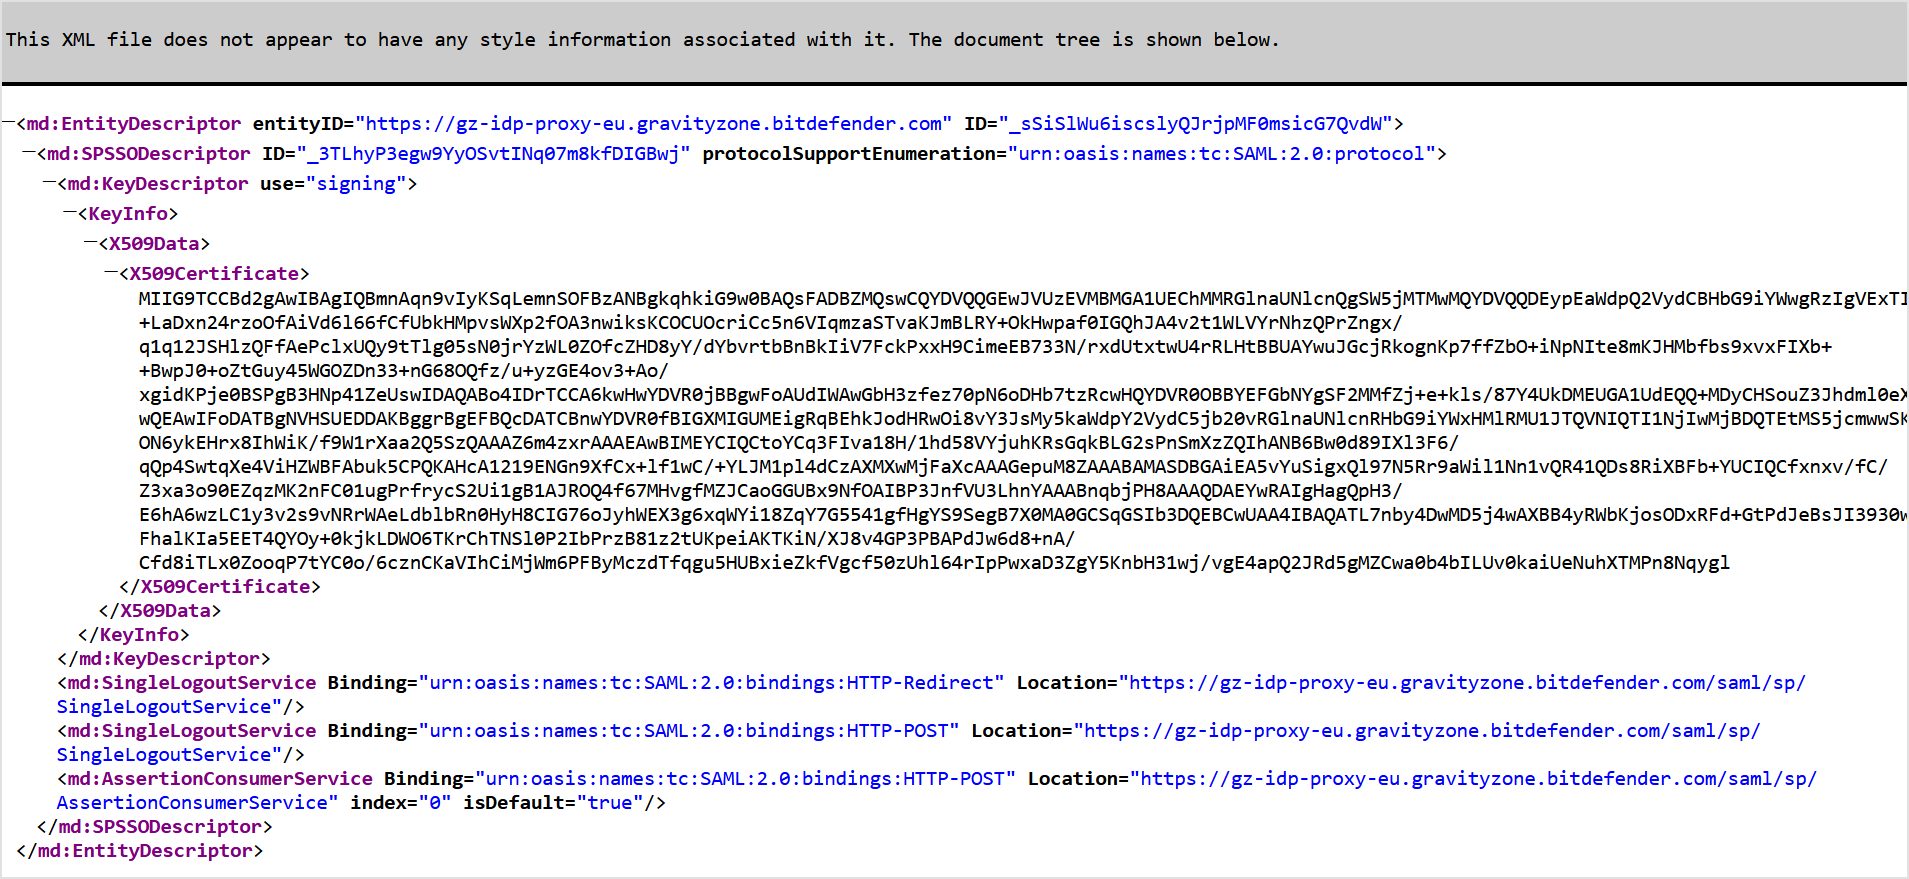
Open the metadata URL in a separate tab of your browser and save the page as a
metadata.xmlfile.
Keep the metadata.xml file open for reference during the Okta configuration. You will need the Entity ID and Assertion Consumer Service URL values from the metadata.
Add a relying party trust
The connection between GravityZone IdP Proxy and AD FS is defined using a relying party trust.
Log in to the server where AD FS is installed.
Launch the AD FS Management application.
In the left-side navigation, select AD FS > Relying Party Trusts.
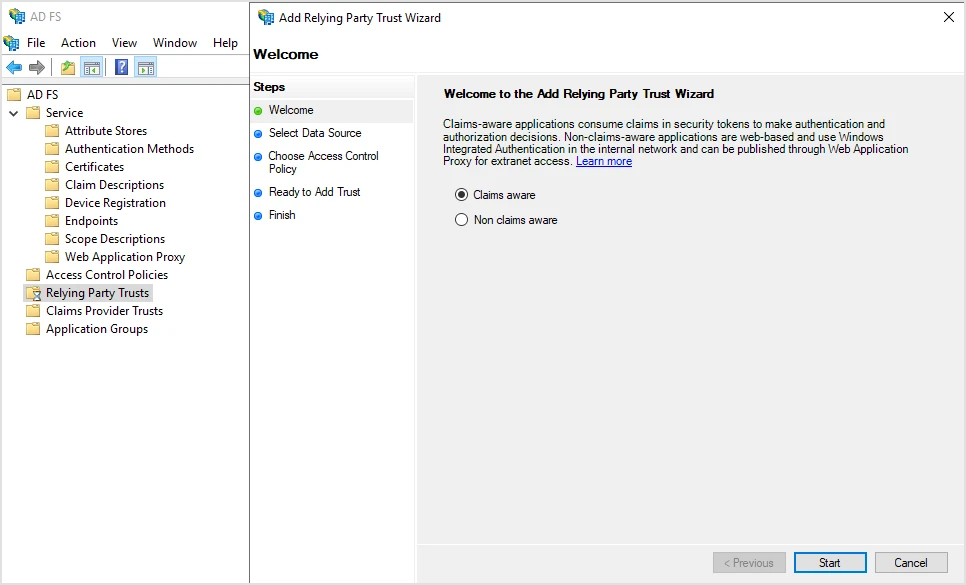
In the Actions pane on the right, click Add Relying Party Trust…
In the Add Relying Party Trust Wizard window, follow these steps:
On the Welcome page, select Claims aware and click Start.
On the Select Data Source page:
Select the option Import data about the relying party published online or on a local network.
In the Federation metadata address (host name or URL) box, enter the GravityZone IdP Proxy SAML metadata URL that you copied from GravityZone.
The SAML metadata URL may depend on the region you are in.
Example:
https://gz-idp-proxy-eu.gravityzone.bitdefender.com/saml/sp/metadata
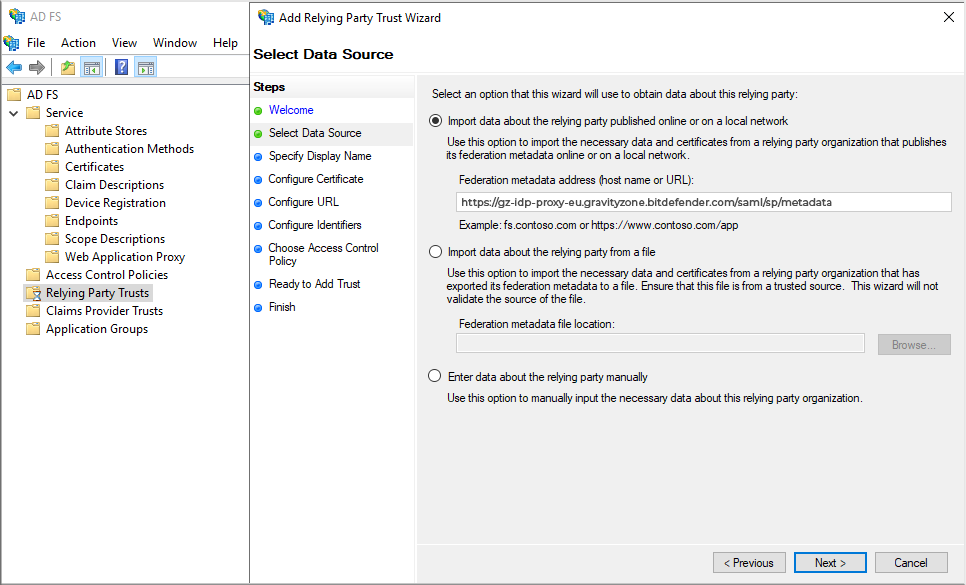
Click Next.
On the Specify Display Name page, enter a name for the service provider (for example,
GravityZone IdP Proxy) and click Next.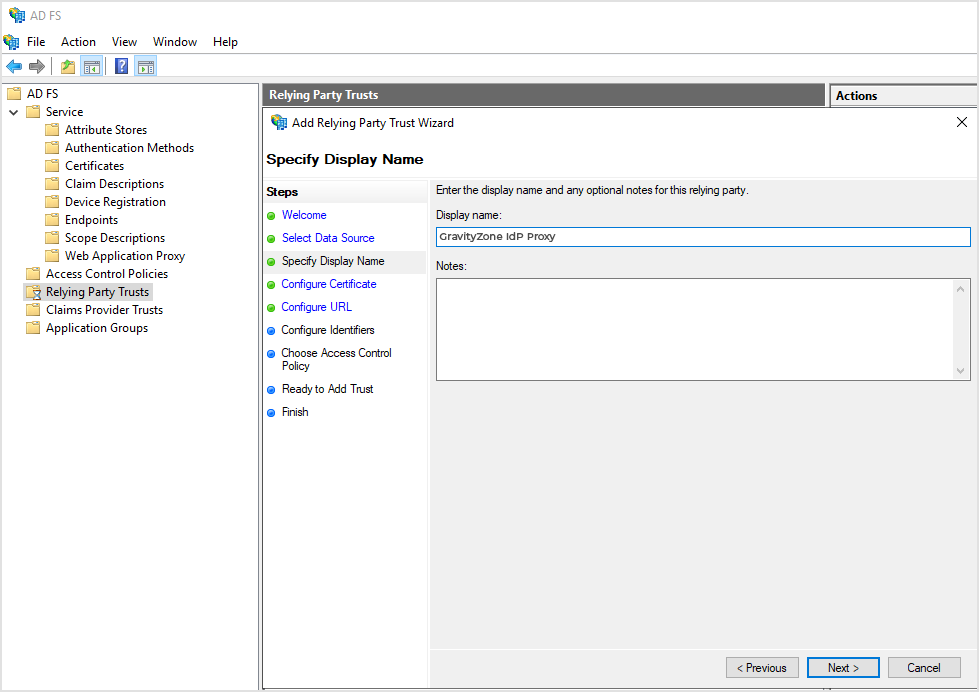
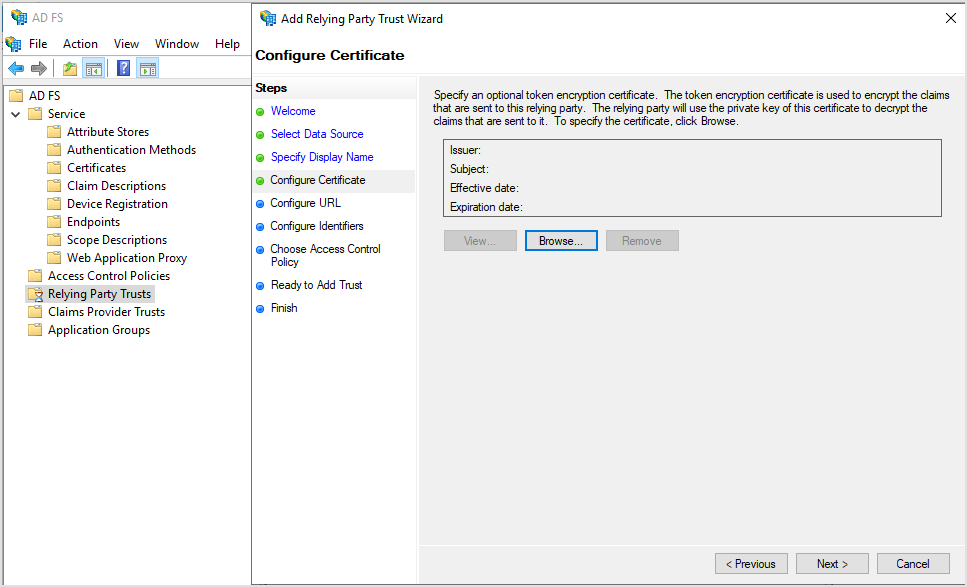
On the Configure Certificate page, click Next.
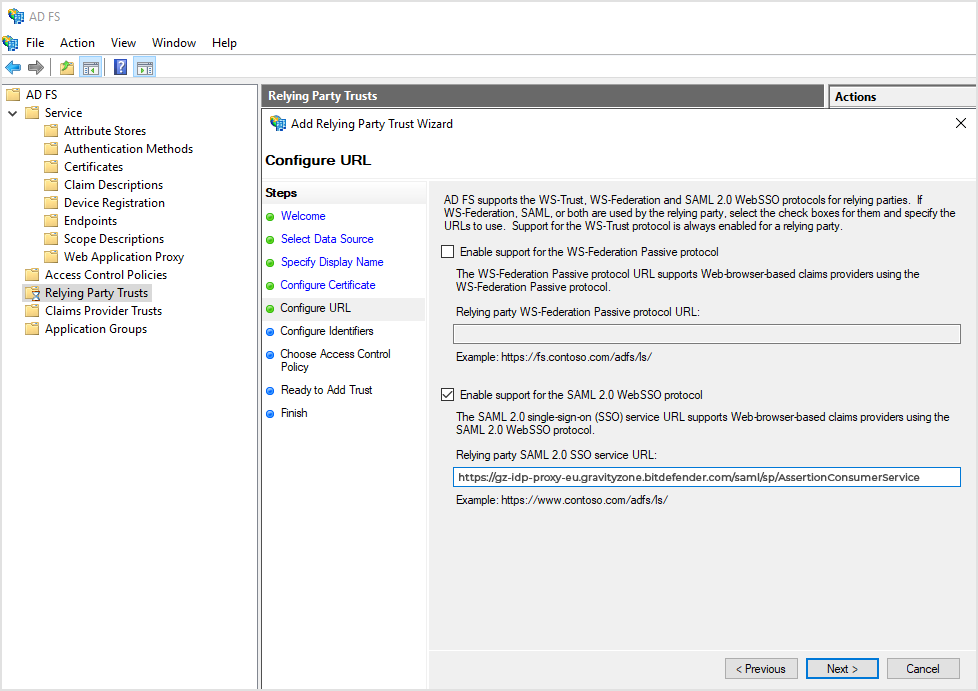
On the Configure URL page, follow these steps:
Select Enable support for the SAML 2.0 WebSSO protocol.
Under Relying party SAML 2.0 SSO service URL, enter the Assertion Consumer Service URL.
The URL may depend on the region you are in.
Example:
https://gz-idp-proxy-eu.gravityzone.bitdefender.com/saml/sp/AssertionConsumerService
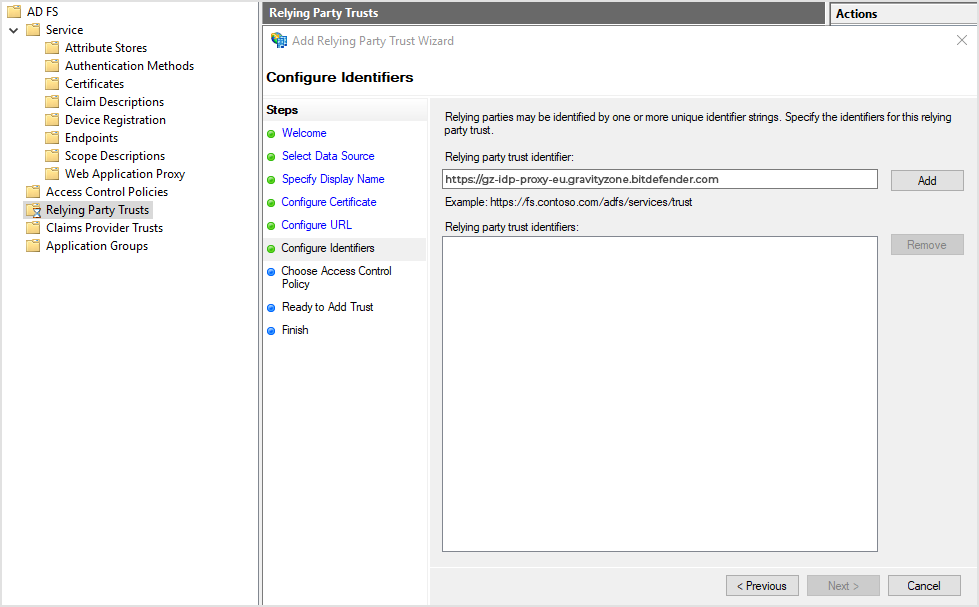
On the Configure Identifiers page:
Enter the Entity ID for relying party trust identifier.
Example:
https://gz-idp-proxy-eu.gravityzone.bitdefender.com
Click Add, then Next.
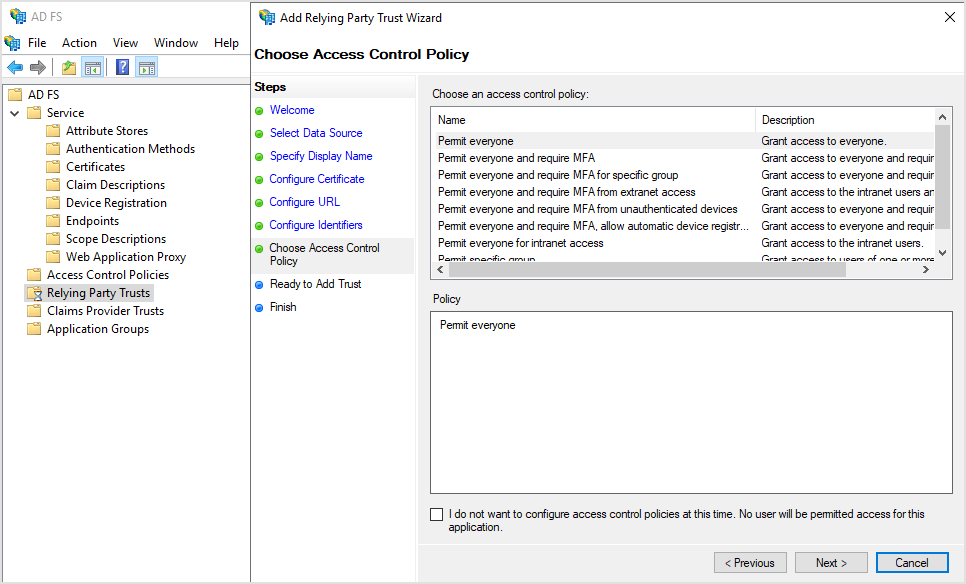
On the Choose Access Control Policy page, select Permit everyone and click Next.
Note
You do not need to configure individual access for users at this time, because you manage them from GravityZone Control Center.
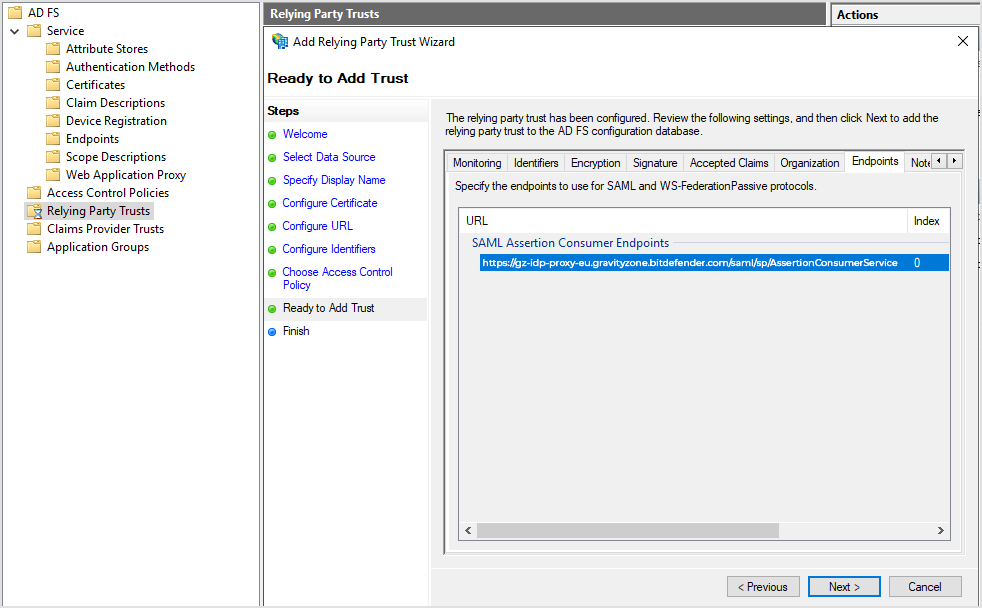
On the Ready to Add Trust page, go to the Endpoints tab and verify the Assertion Consumer Service URL has been added under SAML Assertion Consumer Endpoints and click Next.
Example:
https://gz-idp-proxy-eu.gravityzone.bitdefender.com/saml/sp/AssertionConsumerService
On the Finish page, select the option Configure claims issuance policy for this application.
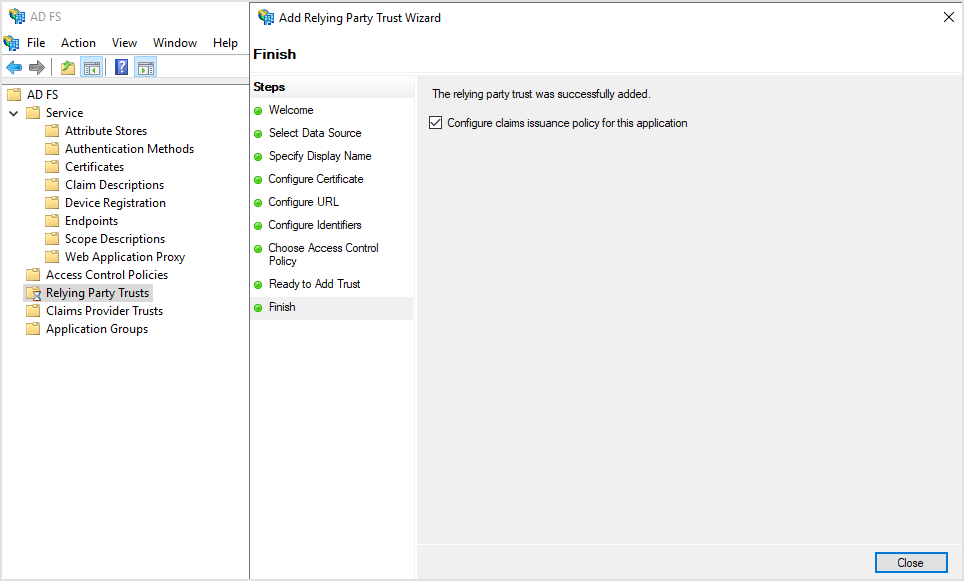
Click Close.
Create claim rules
After adding a relying party trust, you need to create claim issuance rules. The Edit Claim Issuance Policy window opens once you created the trust.
Click Add Rule to create a new rule.
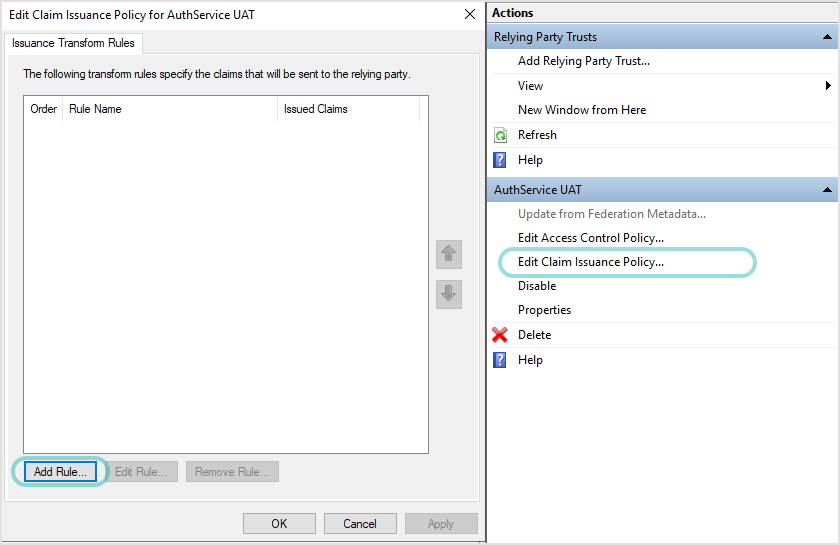
In Add Transform Claim Rule Wizard, follow these steps:
On the Choose Rule Type page, select the template Send LDAP Attributes as Claims and click Next.
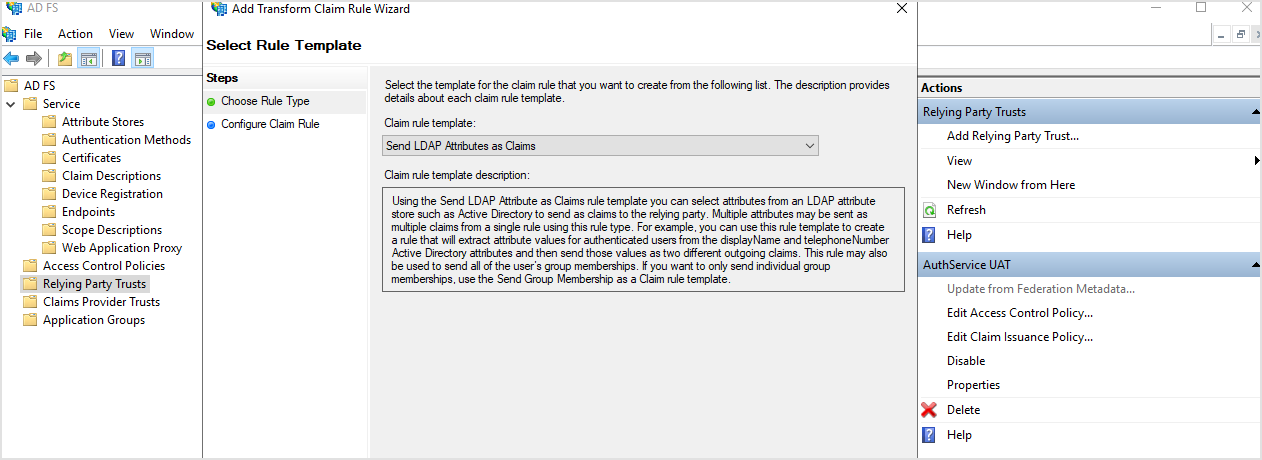
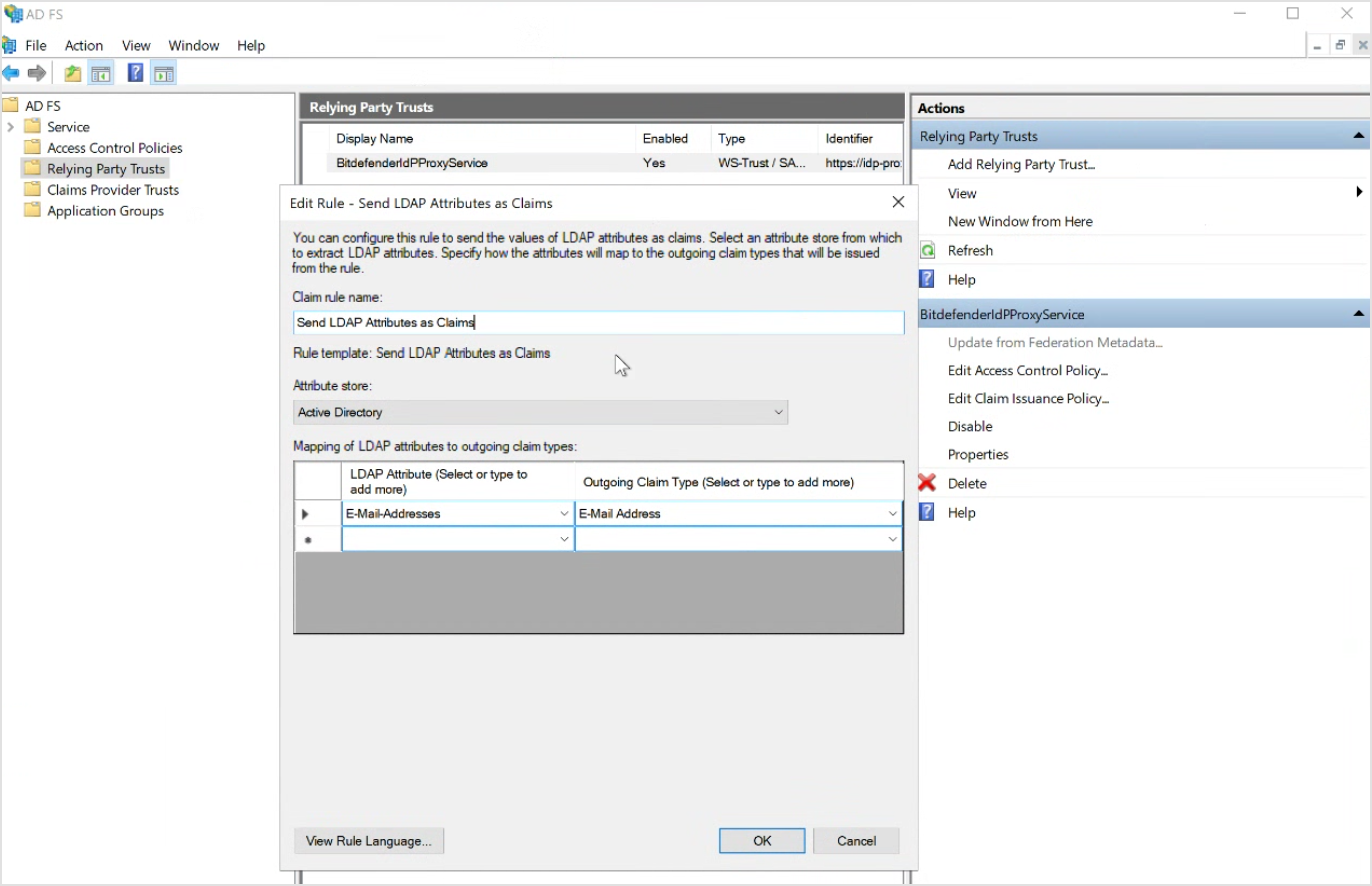
On the Configure Claim Rule page, make the following configuration:
In the Claim rule name box, enter a relevant name (for example,
Send LDAP Atributes as Claims).For Attribute store, select Active Directory.
In the table below, under LDAP Attribute (Select or type to add more), select E-Mail-Addresses.
Under Outgoing Claim Type (Select or type to add more), select E-mail Address.
Click OK.
Back in the Edit Claim Issuance Policy window, click Add Rule to create a new rule.
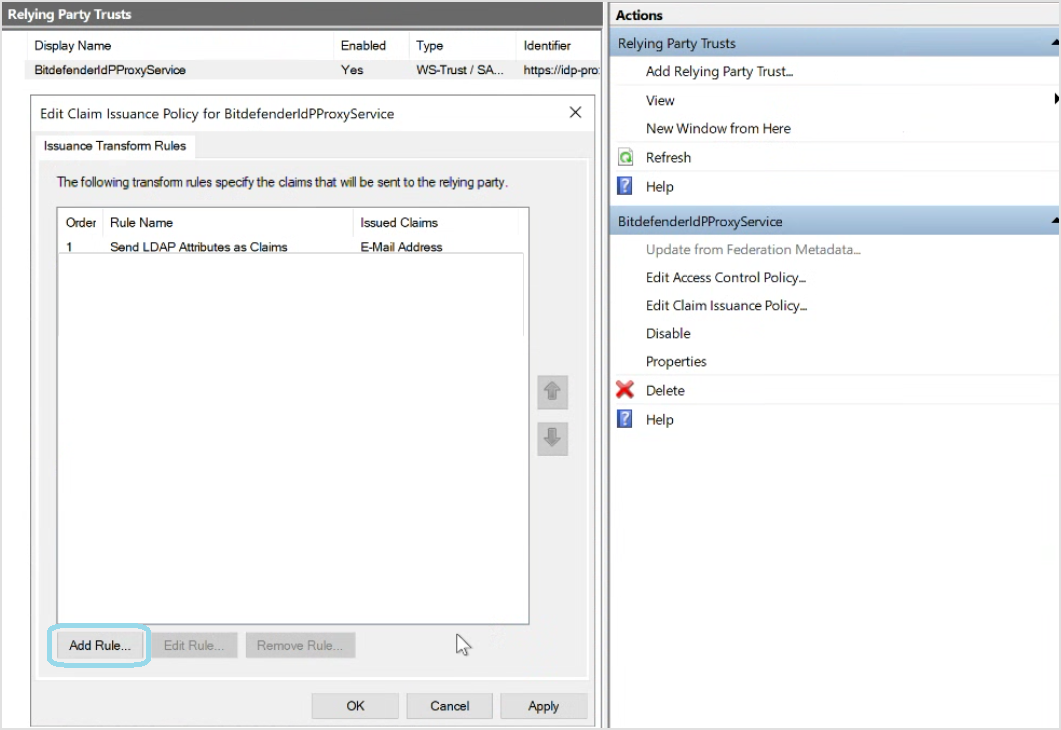
In Add Transform Claim Rule Wizard, follow these steps:
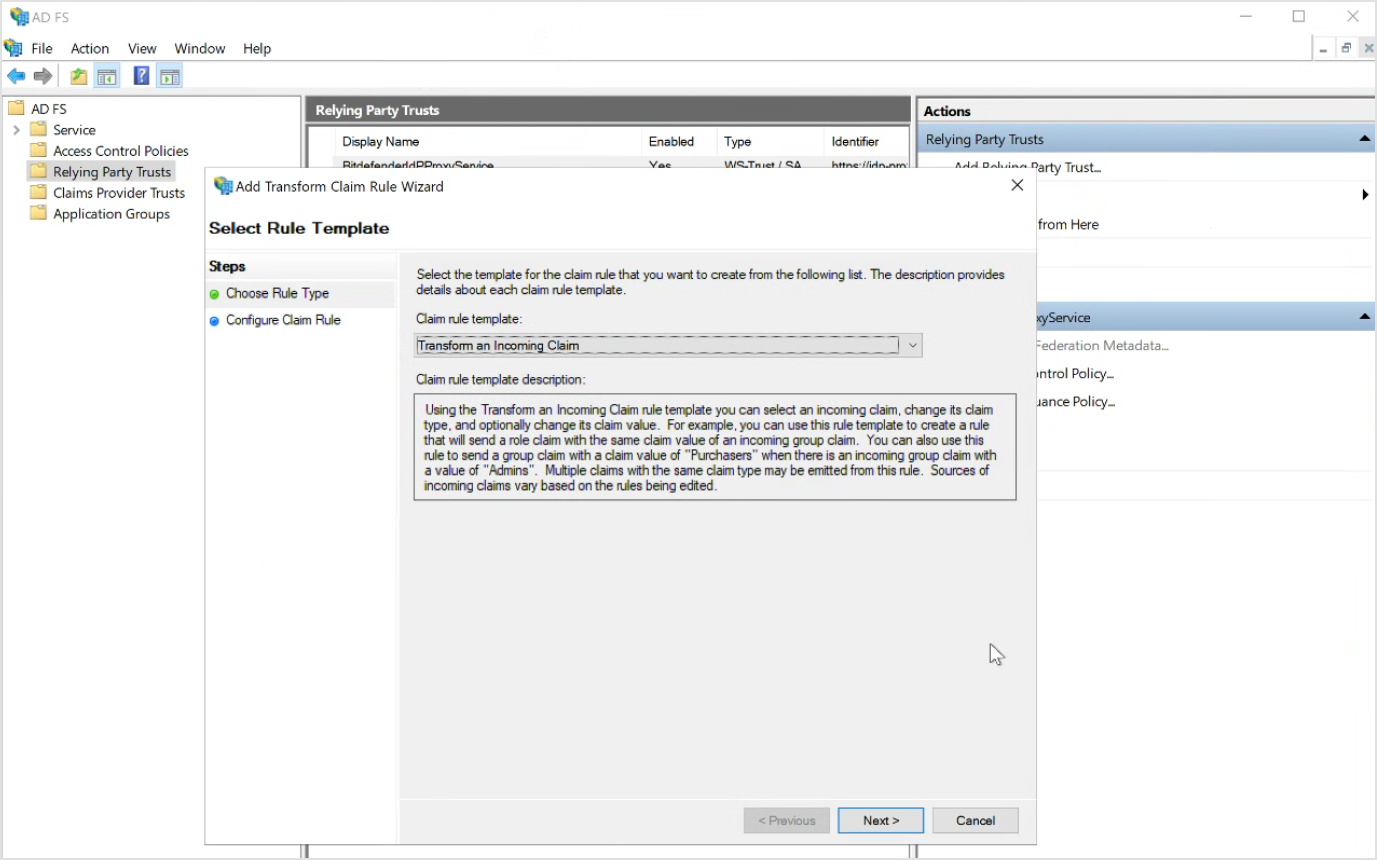
On the Choose Rule Type page, select the template Transform an Incoming Claim and click Next.
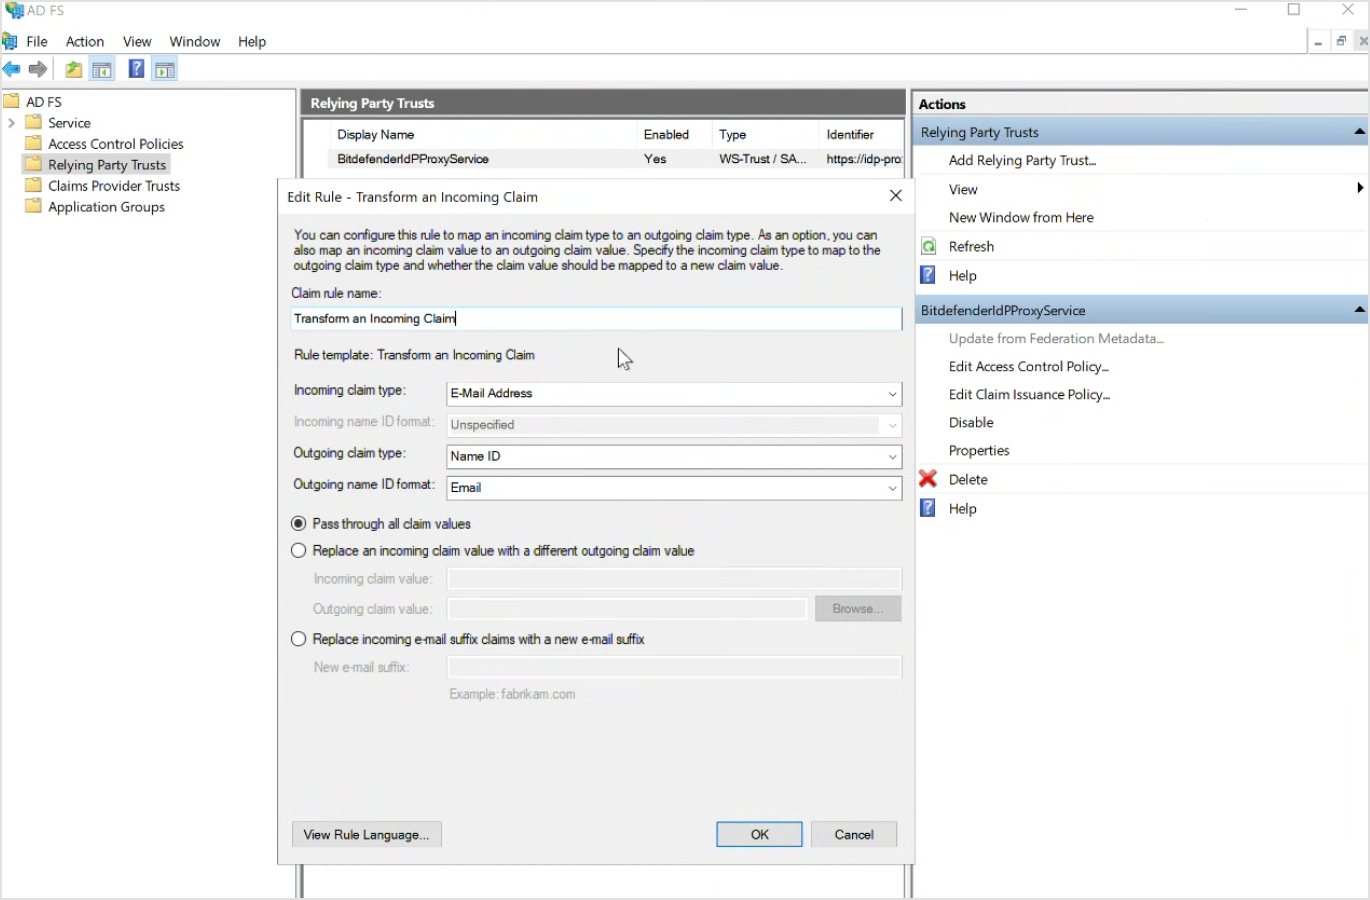
On the Configure Claim Rule page, make the following configuration:
In the Claim rule name box, enter a relevant name (for example, `Transform`).
For Incoming claim type, select E-Mail Address.
For Outgoing claim type, select Name ID.
For Outgoing name ID format, select Email.
Select Pass through all claim values.
Click OK.
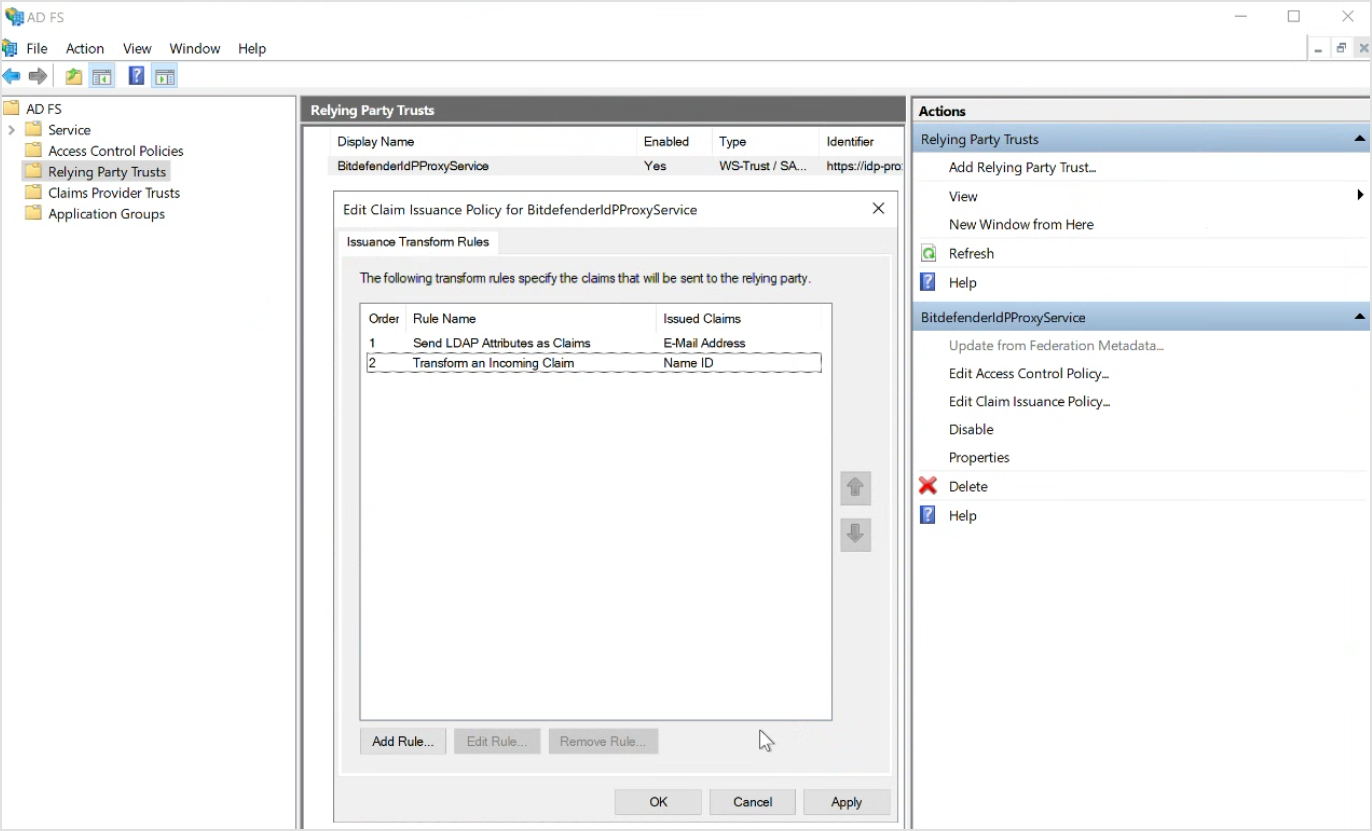
Click Apply and OK.
Note
f a user's E-mail attribute is not populated in Active Directory, the claim rule will produce no NameID and authentication will fail silently.
Upload the signature certificate
The integration of the IdP Proxy with AD FS requires a signature certificate.
To create the certificate:
Open the
metadata.xmlfile.Copy the
<X509Certificate>...</X509Certificate>value and paste it into a text editor.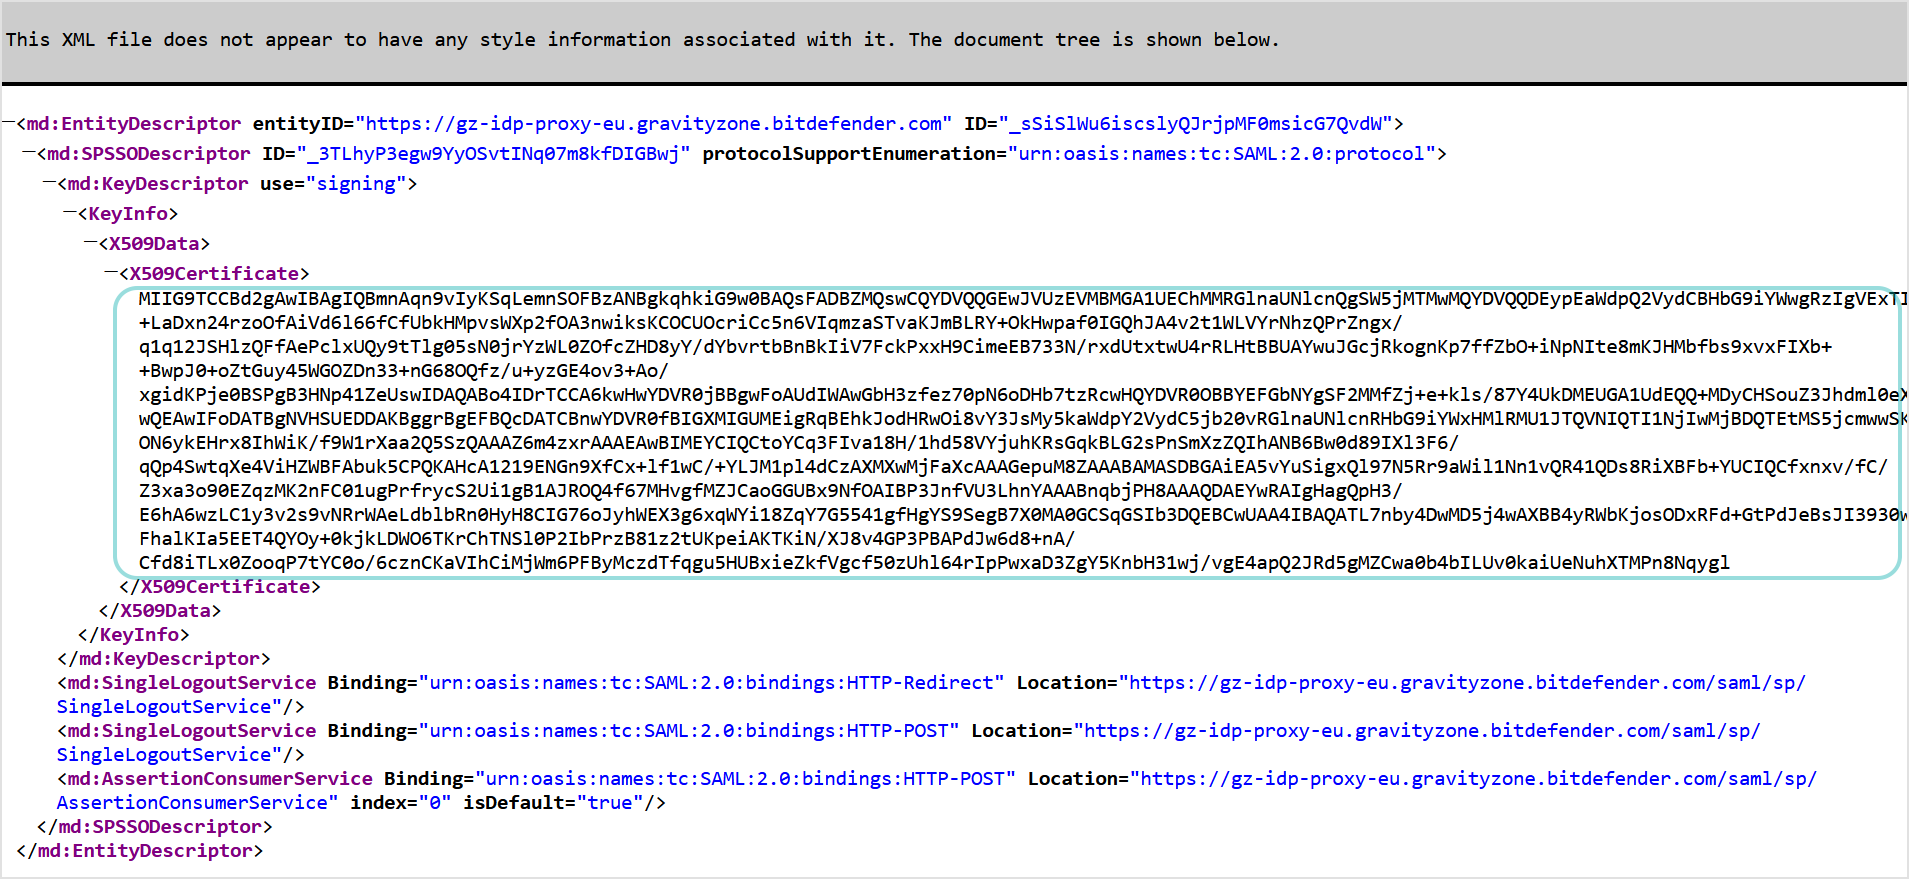
Save the file you created as
certificate.cer.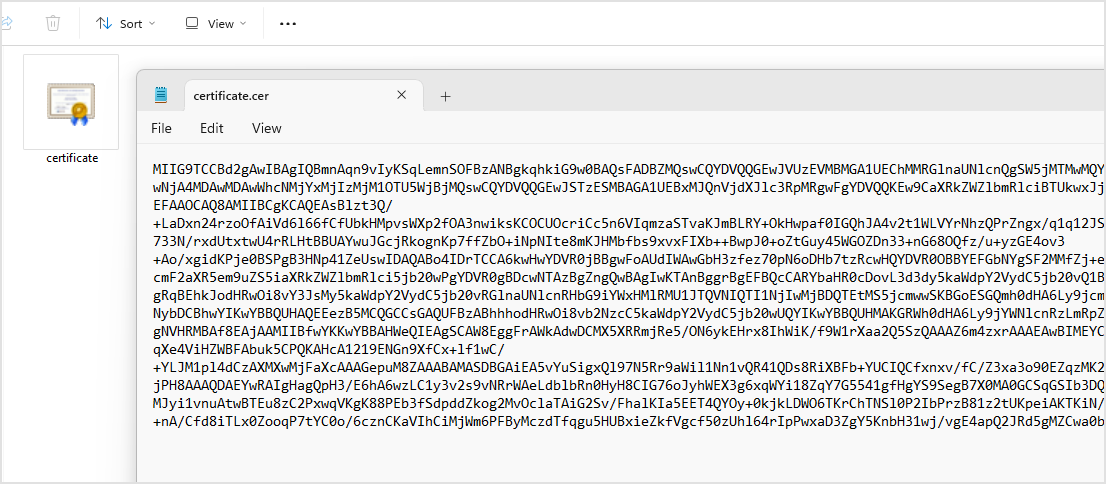
To upload the certificate:
In the left-side navigation of AD FS Management application, go to AD FS > Relying Party Trusts.
In the central panel, select the relying party trust you created for the IdP Proxy (
GravityZone IdP Proxy).Right-click and select Properties.
In the Properties window, go to the Signature tab.
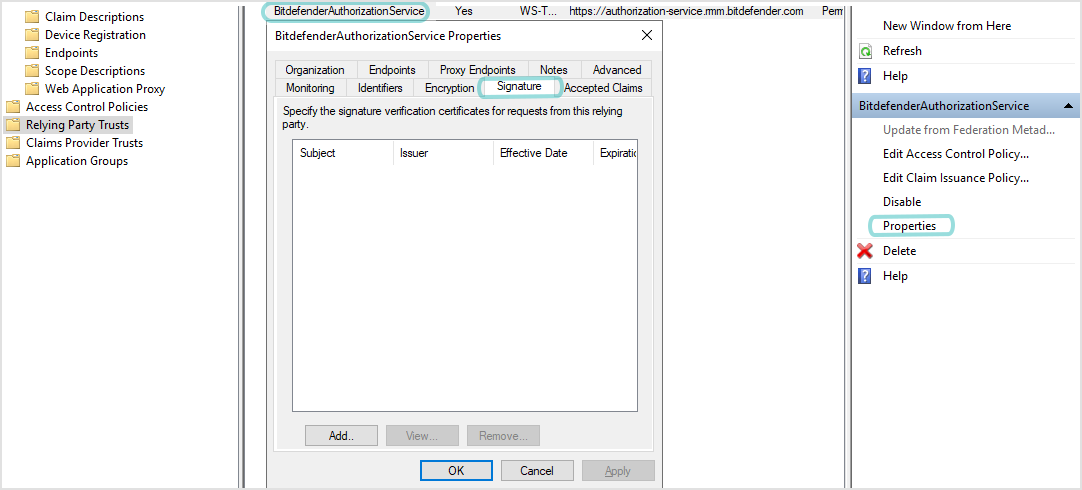
Click Add.
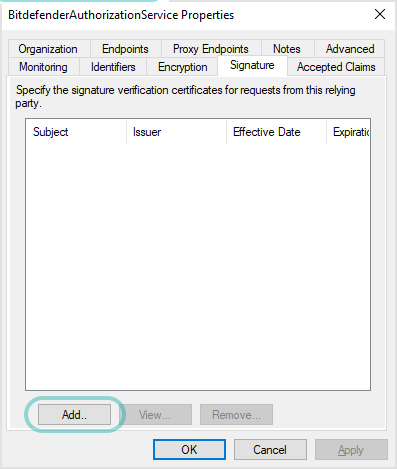
In the new window, select All Files (\*.\*) in the drop-down menu and upload the
certificate.cerfile you extracted from the GravityZone IdP Proxy metadata.Click OK.
Note
For the certificate to be valid with AD FS, make sure you removed -----BEGIN CERTIFICATE----- and -----END CERTIFICATE----- from the uploaded file content.
Enable SSO for Bitdefender services in GravityZone
After configuring the Identity Provider, go to GravityZone Control Center to enable SSO for Bitdefender services.
Enable SSO for your company
This is how you enable SSO for Bitdefender services for your company:
In the upper-right corner of Control Center, click the user icon and then select My Company.
In the Authentication tab, under GravityZone IdP Proxy single sign-on, enter the identity provider metadata URL in the Identity provider metadata URL (IdP Proxy) field. The other field, reserved for the GravityZone IdP Proxy SAML metadata URL, is non-editable.
For AD FS, the Identity Provider metadata URL has the format:
https://[:adfs_host]/FederationMetadata/2007-06/FederationMetadata.xml, where[:adfs_host]is the service FQDN.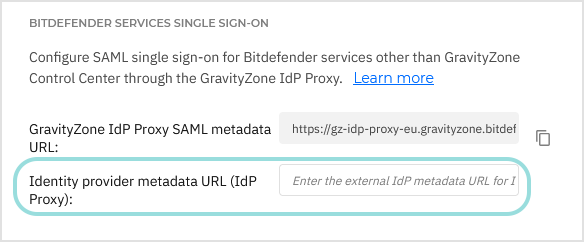
Click Save.
Verify the authentication method for users
Users must have their authentication method set to Login using your Identity Provider in GravityZone account settings. If GravityZone Control Center SSO is already configured and users are already logging in with your Identity Provider, no additional changes are needed.
If any users still use GravityZone credentials:
Log in to GravityZone Control Center.
Go to the Accounts page from the left side menu.
In the table, click the user's name.
Under Login Security, go to Authentication method and select Login using your Identity Provider.
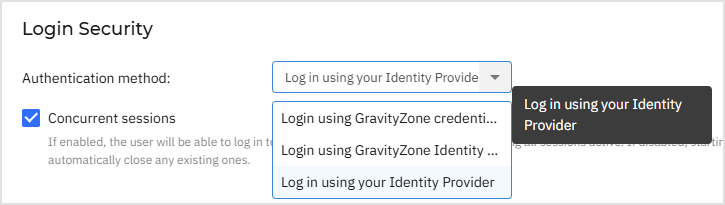
Note
This option is available after GravityZone Control Center SSO with an external identity provider has been configured at the company level.
Click Save.
Test Bitdefender services SSO
After configuring both the identity provider and GravityZone, you can test single sign-on as follows:
Open MDR portal in a browser where you are not currently authenticated.
You should be redirected to GravityZone IdP Proxy, which will redirect you to the AD FS authentication page.
Authenticate with your identity provider.
You will be redirected back to MDR portal and granted access.
GravityZone IdP Proxy does not support IdP-initiated login. You can test the single sign-on by going directly to the Bitdefender service (for example, MDR portal), not by clicking an application in AD FS.
Disable Bitdefender services SSO
To disable single sign-on for Bitdefender services for your company or for a company under your management:
Delete the identity provider metadata URL from the Identity provider metadata URL (IdP Proxy) field in the configuration page of that company.
Click Save and confirm the action.
This does not affect GravityZone Control Center SSO, which remains configured separately.
To re-enable SSO for Bitdefender services, enter again the identity provider metadata URL in the Identity provider metadata URL (IdP Proxy) field and click Save.