Office 365 / Exchange Setup
This section includes information on how to configure your Office 365 or Exchange inbound environment for use with Mesh:
Create a connector for Mesh in Microsoft 365 / Exchange (inbound)
To ensure that only email filtered by Mesh is delivered to your Microsoft 365 / Exchange tenant, create a connector for Mesh in Microsoft 365 / Exchange.
We recommend reviewing Microsoft’s official documentation for managing mail flow with a third-party cloud service to ensure that the configuration is suitable for your environment.
Note
Complete this procedure only after pointing your MX records to Mesh. Wait 24 hours to allow for DNS propagation.
Note
If you are moving from another Secure Email Gateway, you may have an existing connector that rejects email not sent from a specific IP range.
Remove the existing connector before changing your MX records to prevent clean email filtered by Mesh from being rejected.
This guide covers the following scenario:
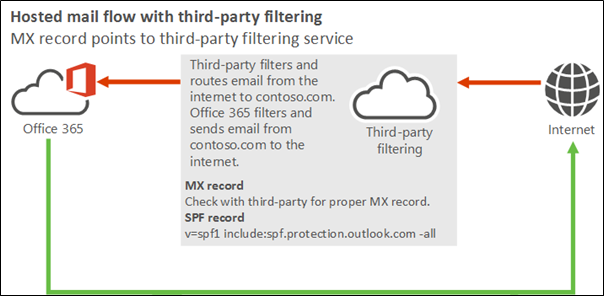 |
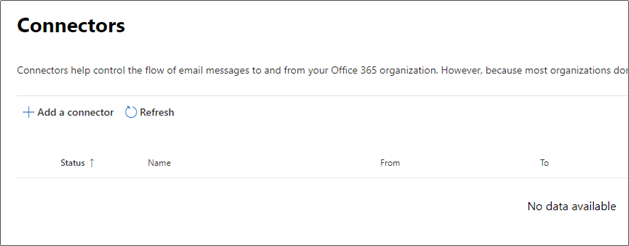
Open the Connectors page
In the Exchange admin center, go to the Connectors page.
Add a connector
Select Add a connector.
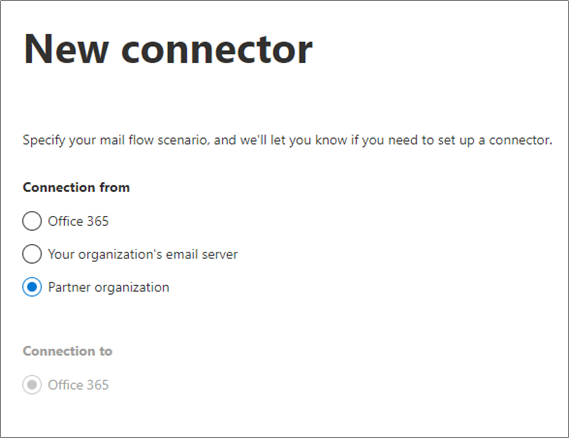
Specify the mail flow
Select Partner organization. Office 365 is selected automatically in the Connection to field.
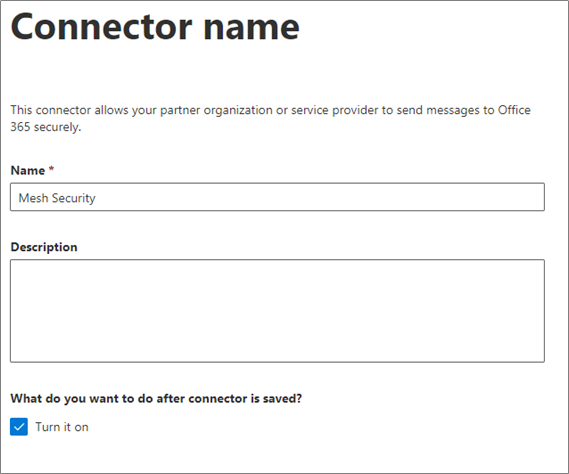
Configure the connector name
Enter a name for the connector and, optionally, a description. Select Turn it on.
Configure connector usage
Enter the
*wildcard to always use the connector when receiving inbound email.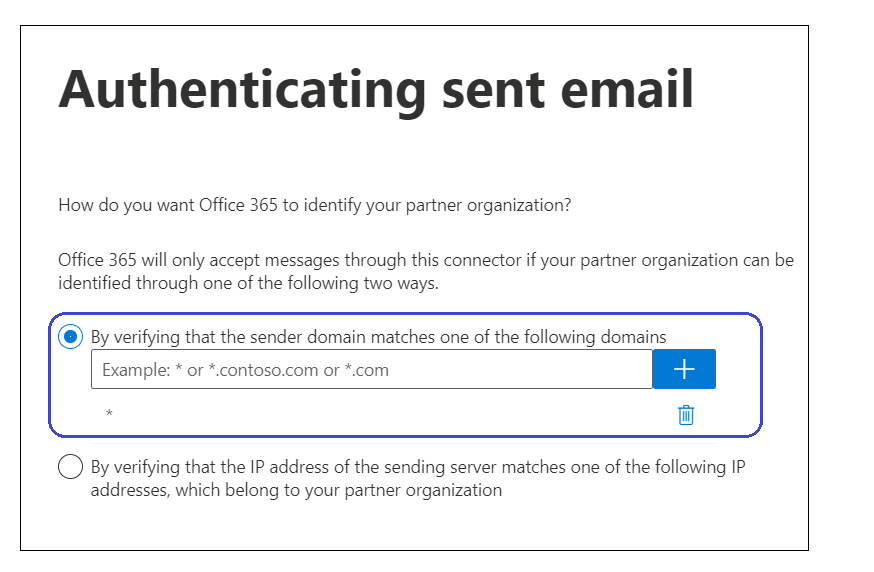
Configure security restrictions
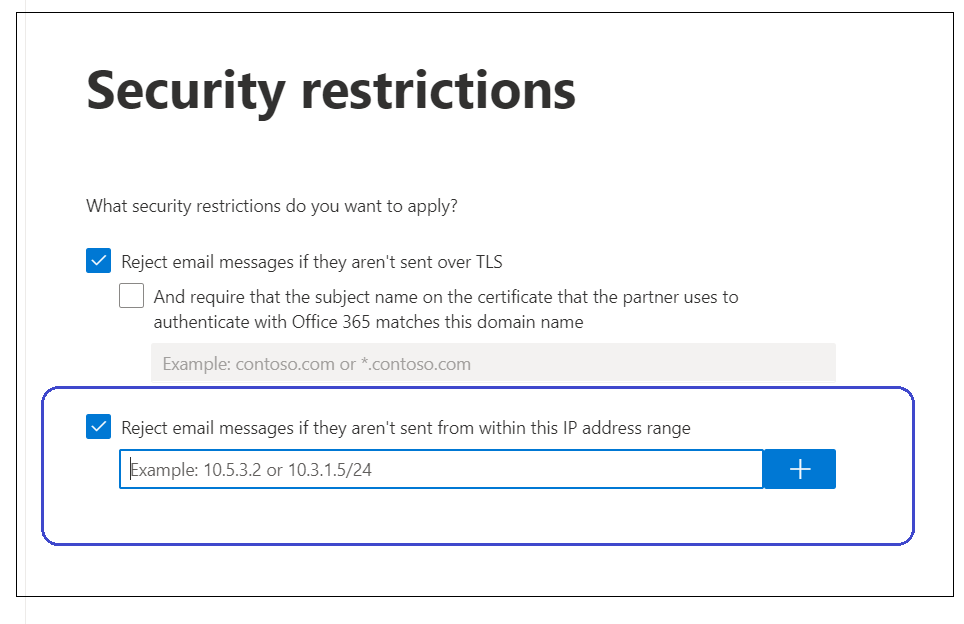
Select Reject email messages if they aren't sent over TLS and Reject email messages if they aren't sent from within this IP range.
Add the Mesh IP ranges for your region. This setting prevents email from bypassing filtering and being delivered directly to your Microsoft 365 environment.
Note
The IP address shown in the example belongs to Microsoft. Enter the Mesh IP ranges for your region.
Review and save the connector
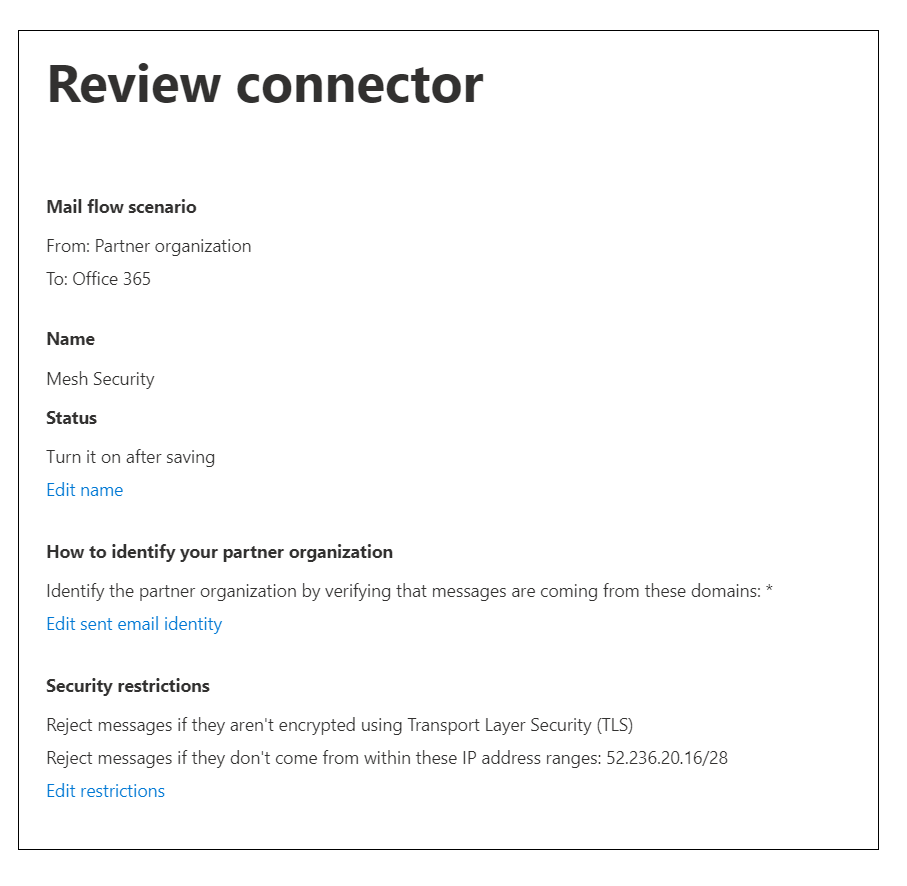
Review the details, and then select Save. The connector list is updated to reflect the change.

Tip
You’re all set.
Create a mail flow rule for Mesh in Microsoft 365 / Exchange (inbound)
To allow email filtered by Mesh to be delivered safely without additional filtering from Microsoft, create a mail flow rule in Microsoft 365 / Exchange for the Mesh IP ranges.
We recommend reviewing Microsoft’s official documentation for managing mail flow with a third-party cloud service to ensure that the configuration is suitable for your environment.
This guide covers the following scenario:
|
Open the Mail flow section
In the Exchange admin center, go to Mail flow > Rules.
Add a rule
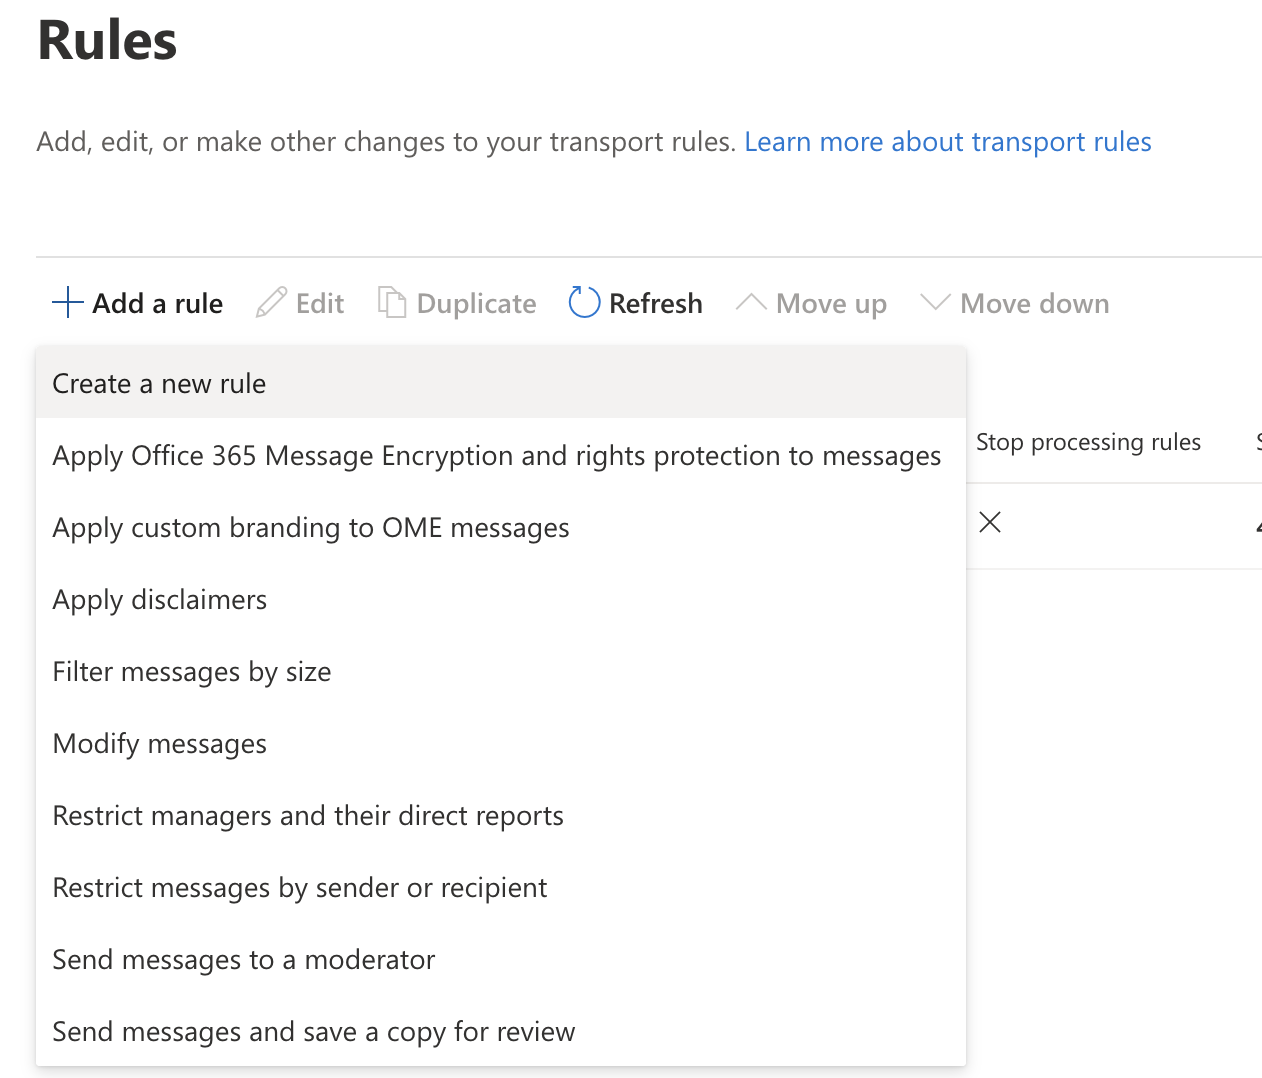
Select Add a rule > Create a new rule.
Configure the rule conditions
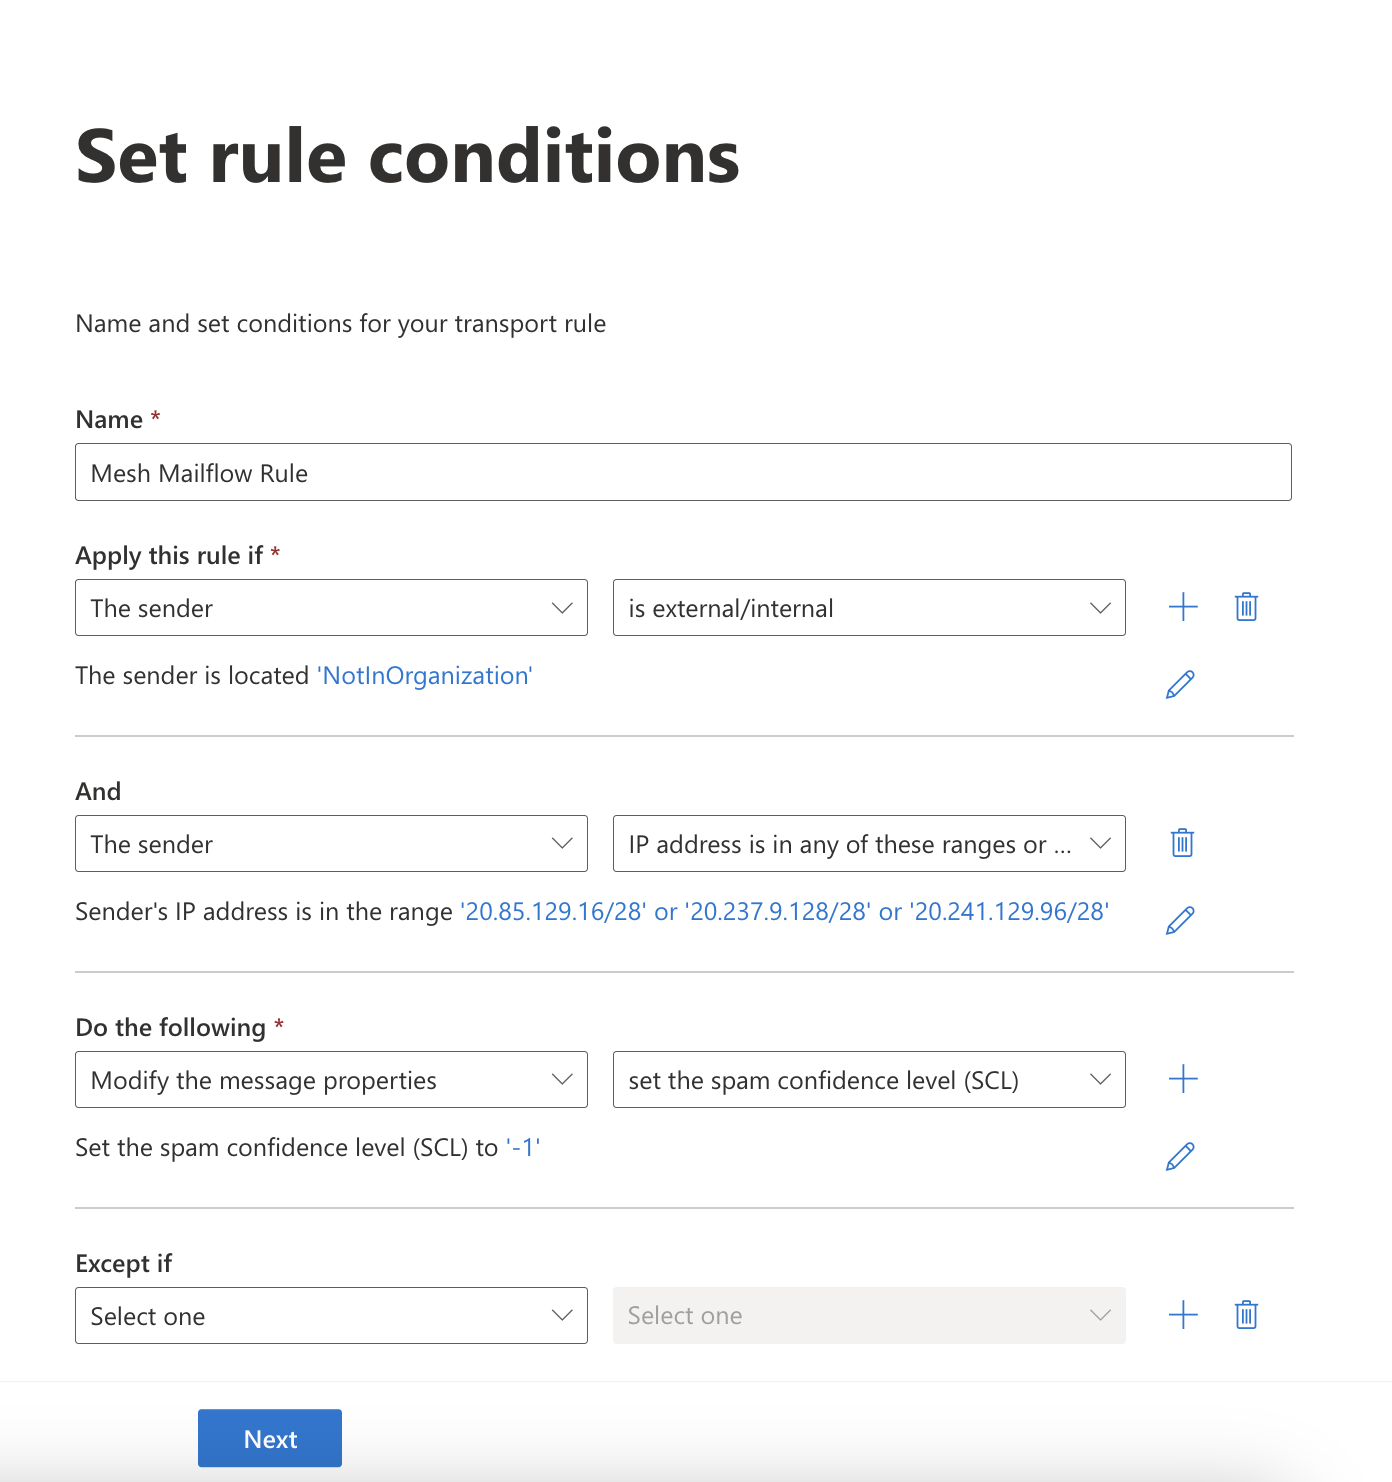
Enter a name for the rule, and then configure the following conditions:
The sender > is external/internal > Outside the organization.

AND
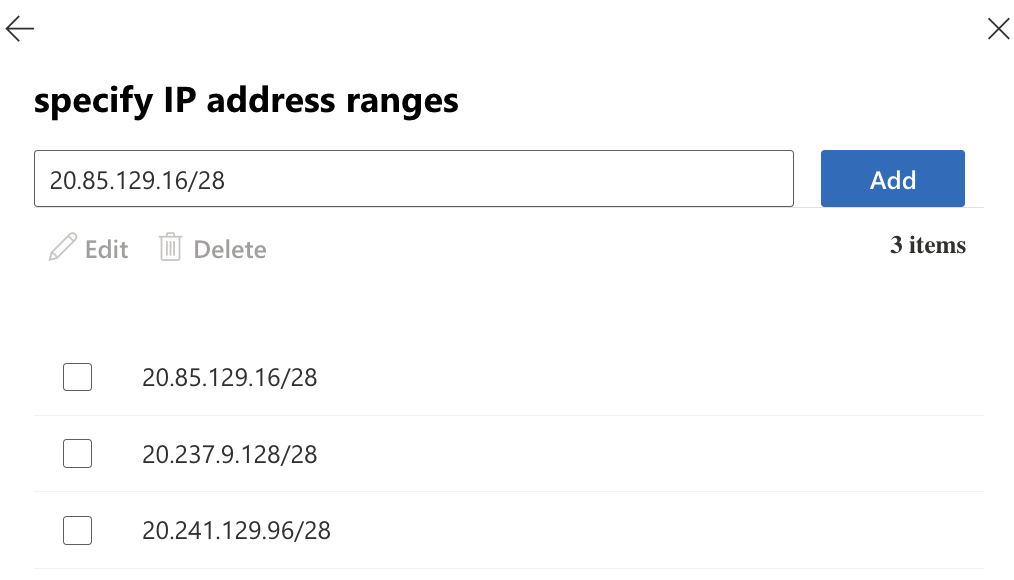
The sender > IP address is any of these ranges or exactly matches > enter the Mesh IP ranges for your region.
Note
Use the IP range applicable to your region. Using an incorrect range may result in email loss.
Configure the action
Under Do the following, select Modify the message properties > Set the spam confidence level (SCL) > Bypass spam filtering.

Review the completed rule
Verify that the completed rule conditions match the following example:
Review the rule settings
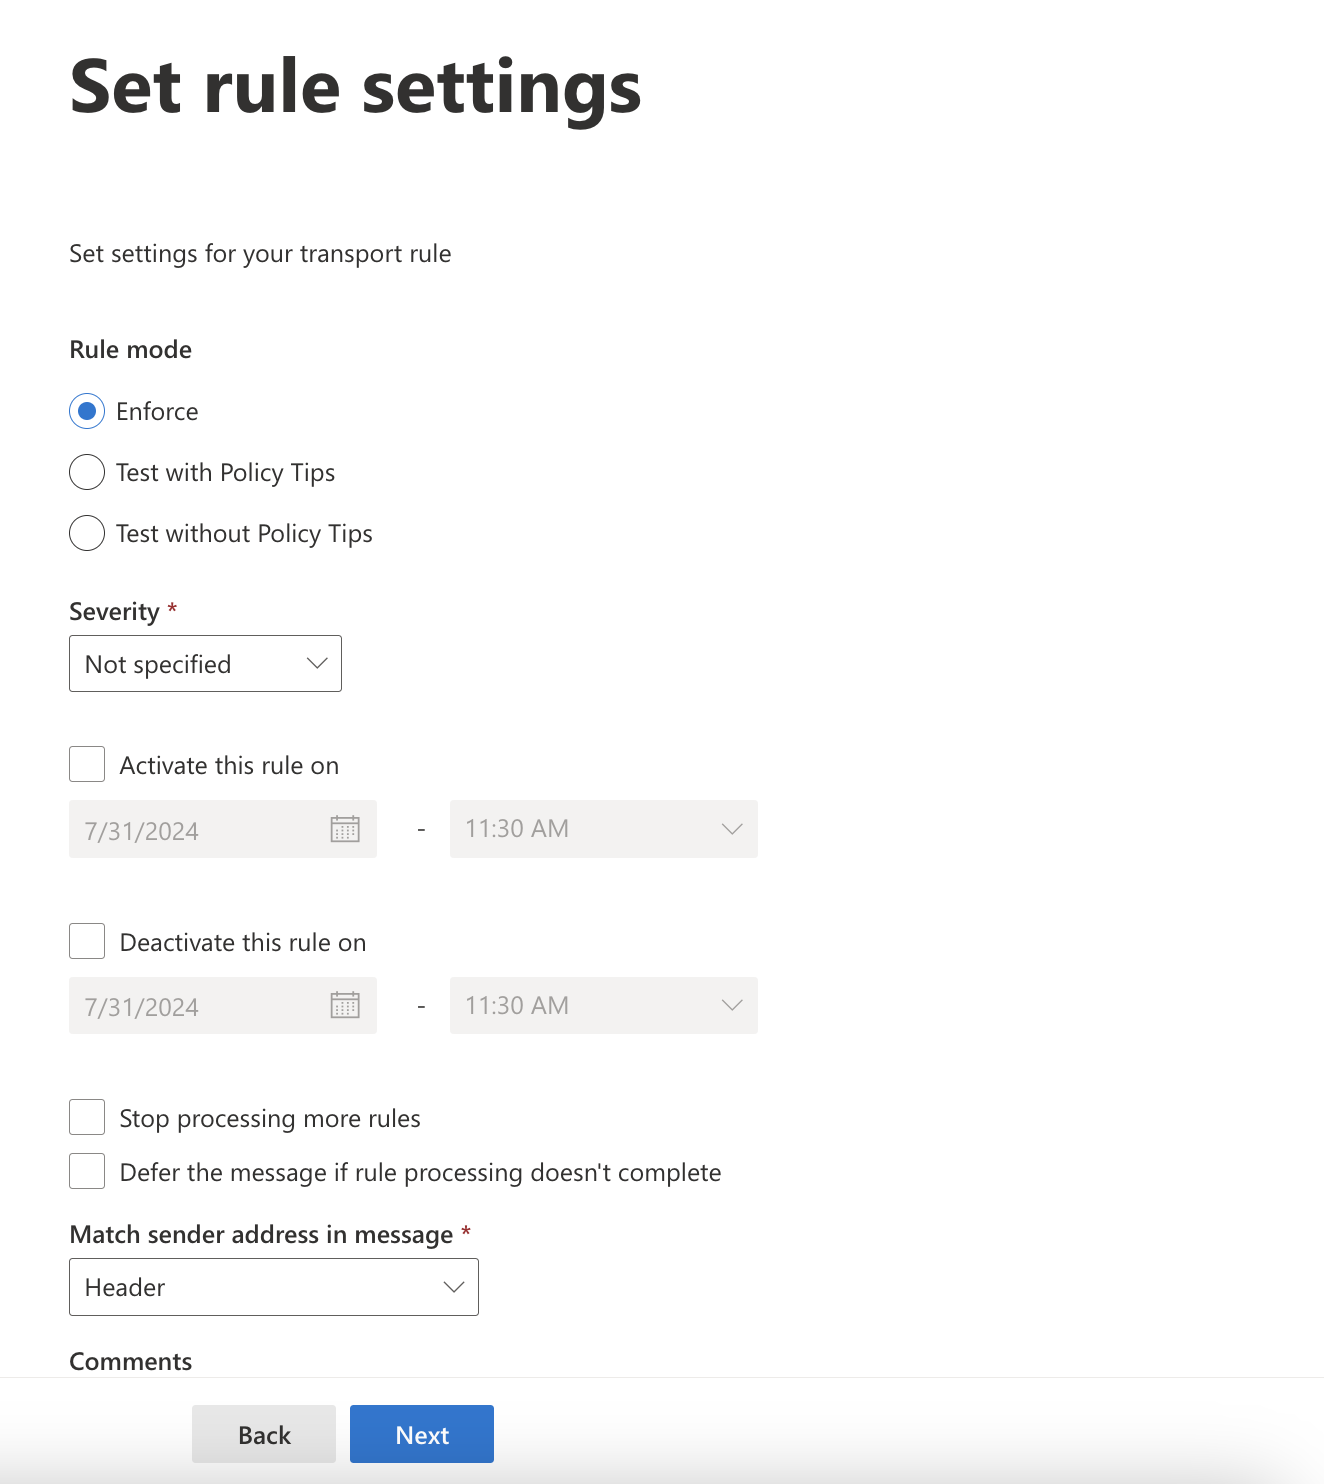
Keep the default rule settings, and then select Next.
Enable the rule
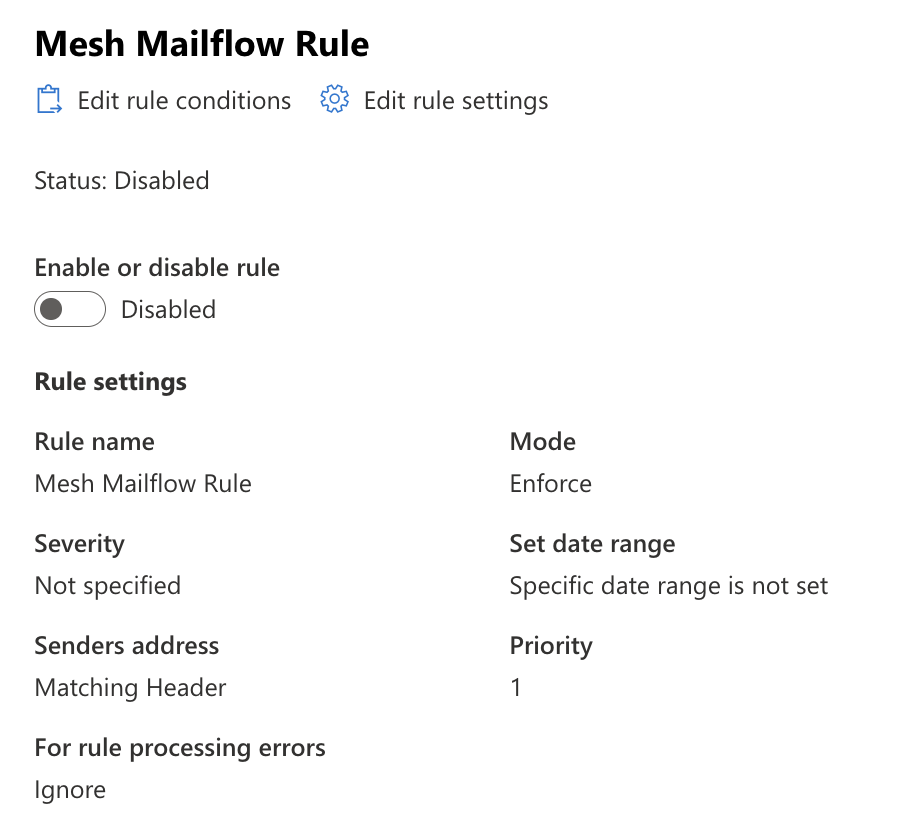
After saving the rule, verify that it appears in the rule list and is enabled.
Tip
You’re all set.