Central scanning and Security Servers
Central scanning allows you to reduce the resources needed on your virtual machines by setting up hosts where you can store scan signatures on and perform scans from. To do this, you need to install Security Servers on all your hosts, and link them to virtual machines with the BEST agent installed.
A Security Server is a dedicated virtual machine that de-duplicates and centralizes most of the antimalware functionality of antimalware clients, acting as a scan server.
Tip
The feature is designed for virtual machines, but you can also use central scanning on computers. Keep in mind that using the feature on a computer will not count towards the same seat/subscription usage.
You must install BEST on the virtual machines where you want to use this feature using a installation packages with Custom scan modes, and setting the main scan mode to Central Scan. The agent then connects to Security Server over TCP/IP, using details configured at installation or via a policy.
Components
Central Scanning is dependent on the following components:
GravityZone Control Center
Security agent (Bitdefender Endpoint Security Tools installed on virtual endpoints)
Security Server
Deploy the Security Servers and set up Central Scanning
Install the Security Servers
Before installing your Security Servers, please take into consideration the number of virtual machines you want protected using Central scanning. Based on that number, the resources available for the Security Server on the chosen hosts, as well as network connectivity between the Security Servers and the protected virtual machines, establish the number of Security Server instances you will require.
Minimum requirements
You can find the requirements for installing a Security Server here.
Installation methods
You can use one of these methods to install Security Servers:
Deploying the BEST agent with Central Scan
There are three possible scenarios for deploying Central Scan on your endpoints:
An endpoint has the BEST agent installed, but is not using Central Scan. In this case, use the Configure BEST agents with Central Scan using a Reconfigure agent task procedure.
An endpoint does not have the BEST agent installed. In this case, use the Install the BEST agent with Central Scanning using an installation package procedure.
An endpoint has the BEST agent installed, and is using Central Scan. In this case, go directly to the Test out Central Scanning section.
Log in to GravityZone Control Center.
Go to the Network page from the left side menu and select the endpoints you want to deploy the module on.
Click the Actions button at the upper side of the table and choose Reconfigure agent.
Under Modules select Match list, select the modules you want to deploy, and scroll down to the Scan mode section and select Custom.
Note
For more information on using the Reconfigure client task refer to Reconfigure agent.
Select one or more Security Servers. All endpoints where this package is used to deploy BEST are automatically assigned to these Security Server based on the priority you set them.
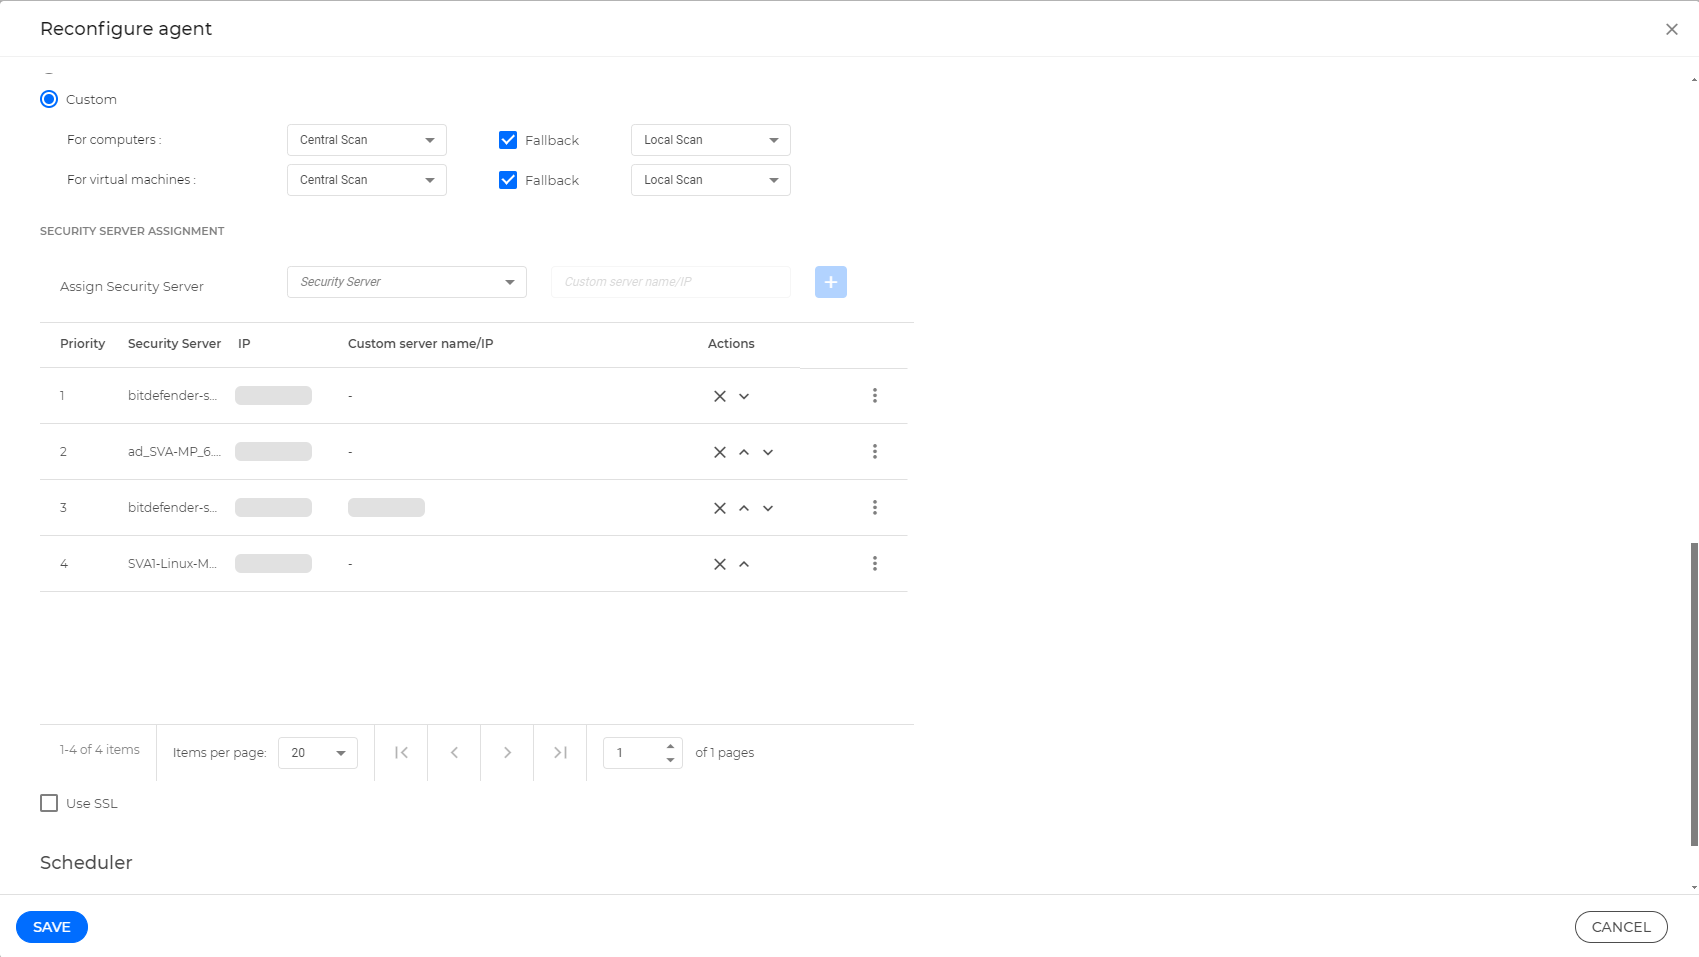
Tip
Select the Use SSL checkbox to switch from port 7081 in 7083 for a more secure connection for traffic.
Click Save.
The task will now deploy the BEST agent with Central Scanning on all selected endpoints.
Log in to GravityZone Control Center.
Go to the Installation Packages page from the left side menu.
Click the Create button in the upper-right side of the screen.
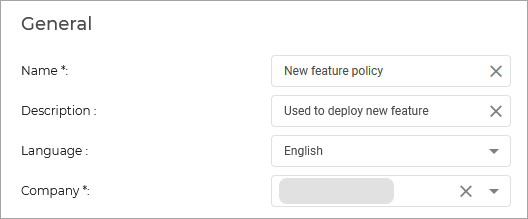
Type in the Name and Description for the new installation package.
Select the modules you want to deploy:

Scroll down to the Scan mode section and select Custom.
For both computers and virtual machines select Central scan.
We recommend you enable Fallback for both and select a desired fallback scan method.
Note
For more information refer to Local installation.
Select one or more Security Servers. All endpoints where this package is used to deploy BEST are automatically assigned to these Security Server based on the priority you set them.

Tip
Select the Use SSL checkbox to switch from port 7081 in 7083 for a more secure connection for traffic.
Click Save.
Select the newly created package from the list of packages and click Send download links.

Enter the email addresses of the recipients and click Send.
Test out Central Scanning
Check deployment and configuration
To make sure all components have been deployed and configured correctly, use one of these methods:
Log in to GravityZone Control Center.
Go to the Network page from the left side menu.
Select the endpoints where central scanning is applied.
Click the Actions button at the upper side of the table and choose Malware scan.
Select the type of scan you want to use.
Note
For more information refer to Scanning for malware for Windows and Scanning for malware for Linux.
Click Save to confirm the request.
Note
For more information, refer to Malware scan
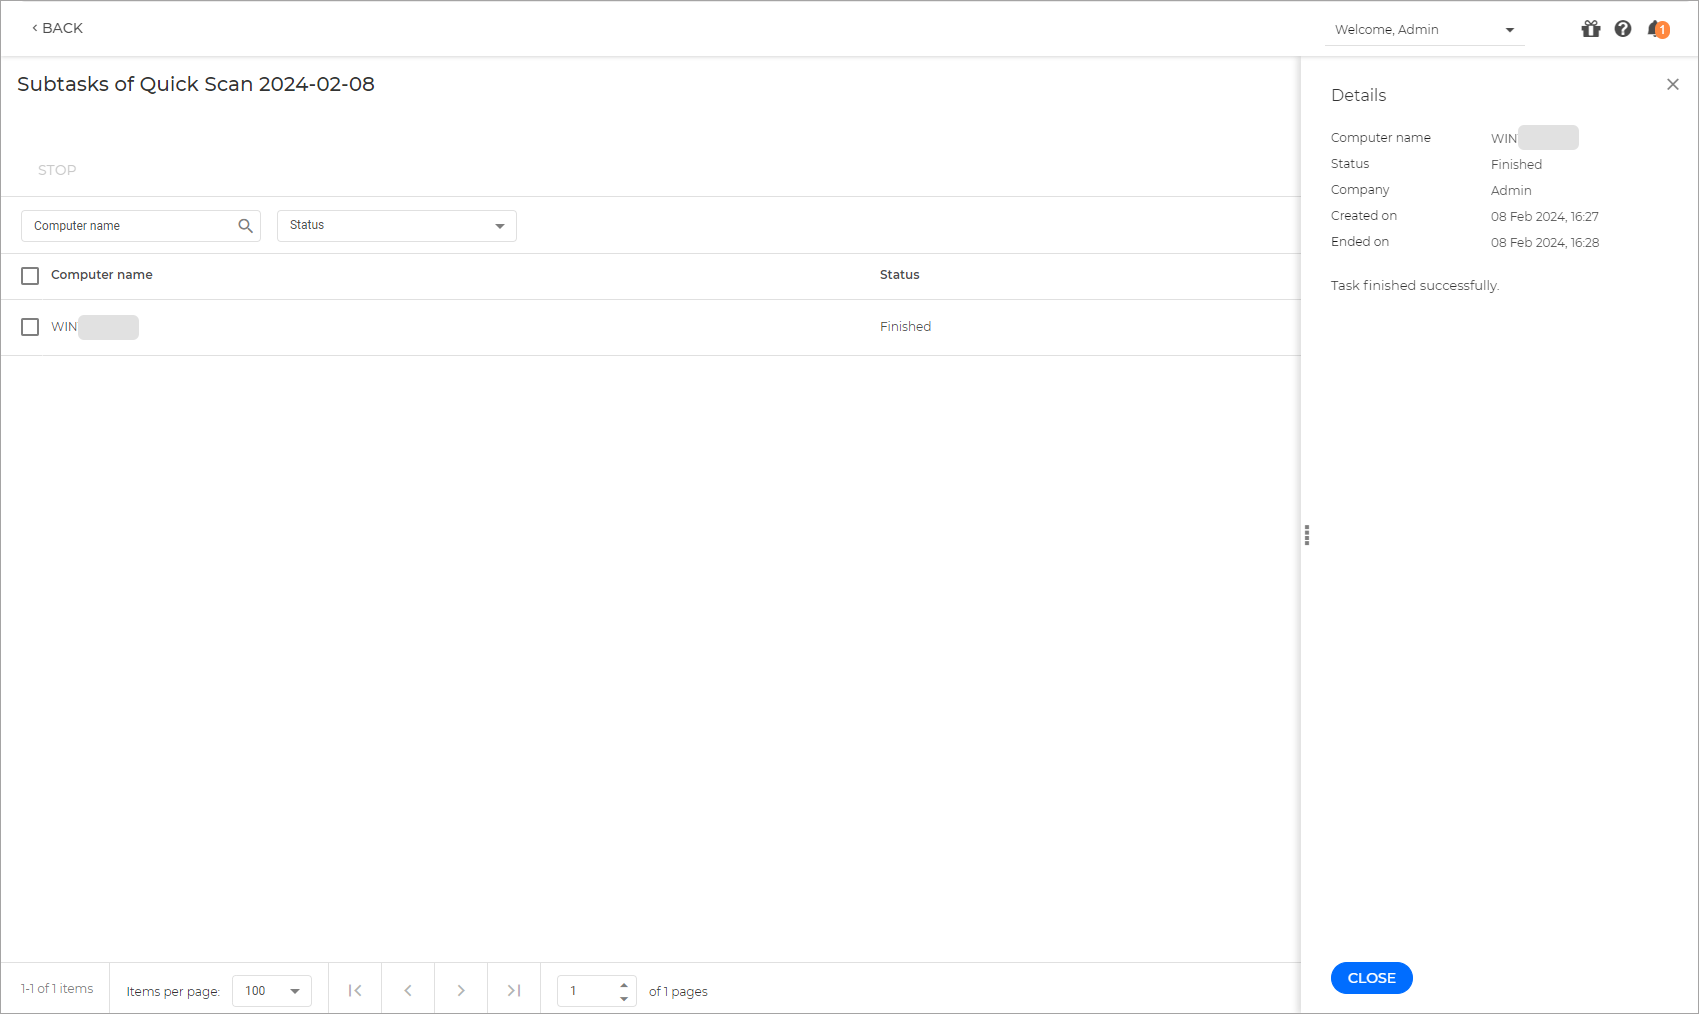
Go to the Tasks page from the left side menu.
Click on the one of the endpoints you ran the scan on to view the results.
If the task is successful and scan was performed we can confirm that the deployment and configuration was successful:
Log in to GravityZone Control Center.
Go to the Network page from the left side menu.
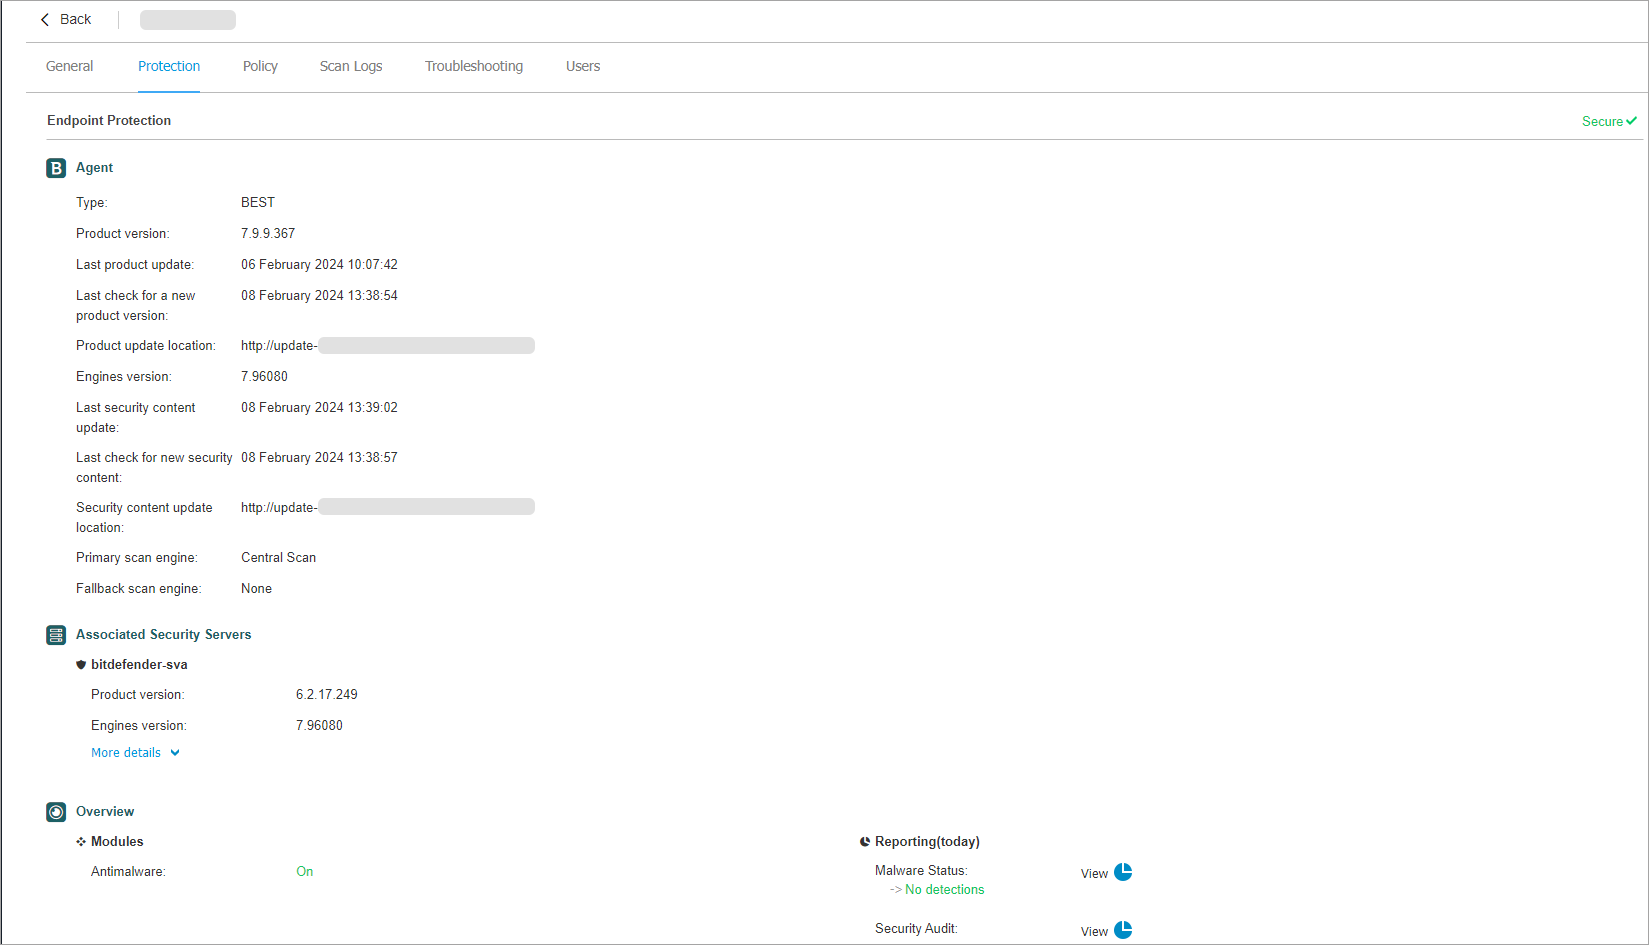
Click the name of the endpoint you want to check.
Go to the Protection tab and check the Primary scan engine field and the Associated Security Servers section:
Check Security Server allocation
Test out the Antimalware feature on endpoints with Central Scanning
Log in to GravityZone Control Center.
Go to the Policies page from the left side menu.
Select one of the policies you are using and click Clone Policy.
Click on the new policy to edit it, go to Antimalware > On-Access, and make sure On-access Scanning is disabled.
Save the policy.
Apply the policy to one of your endpoints where you want to test the feature.
Create a test folder on your endpoint.
In the test folder create a
.txtfile calledeicar.comand paste in the following line:X5O!P%@AP[4\PZX54(P^)7CC)7}$EICAR-STANDARD-ANTIVIRUS-TEST-FILE!$H+H*
Save the file.
Create a scan task:
Go to the Network page from the left side menu and select the endpoints you want to run the scan.
Click the Actions button at the upper side of the table and choose Malware scan.
Note
For more information, refer to Malware scan
Under Type select Custom Scan.
Go to the Target tab and add the path of the test folder you created earlier.
Click Save.
The Antimalware On-Access protection feature will automatically detect the EICAR file and move it to quarantine.
Important
Once done testing, re-apply the original policy to the endpoint you used for testing.
Create portlets for Antimalware data for the endpoints that use Central Scanning
Portlets provide you with security event information from your environment. You can customize the portlets and create your own, specifying the protection mechanism you would like the monitor and the time interval you would like to see in the data.
For information on how to create and manage portlets, refer to Dashboard.
Additional Antimalware data can also be found in Executive Summary.
Note
There is a portlet available for each report type provided by the console.