Using the Support Tool
Important
Please select your operating system from below.
This section helps you provide the Bitdefender Enterprise Support team with essential troubleshooting information in case Bitdefender Endpoint Security Tools (BEST for Windows) is not functioning properly in your environment.
Overview
Bitdefender Endpoint Security Tools ensures protection on local computers and communicates with Control Center to receive tasks, policy settings, updates, and to send security events.
When you contact the Bitdefender Enterprise Support team regarding issues with BEST, a representative may ask you to provide detailed technical information about the affected computers.
To help you provide this information, Bitdefender GravityZone includes a dedicated troubleshooting software, named Support Tool, that gathers system settings and logs, necessary for troubleshooting.
Generate Support Tool log
To generate the log on the affected computer, use one of the methods available, depending on the issue.
Installation issues:
For situations where BEST is not installed on the computer and the installation fails.
Other issues:
For any other issues with BEST installed on the computer.
Installation issues
To download the BEST Support Tool, click here.
Open Command Prompt (
cmd.exe) with administrative privileges.Use the
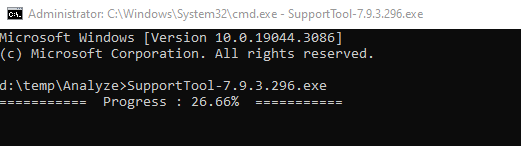
cdcommand to navigate to the folder where the BEST Support Tool has been downloaded.Run the downloaded executable file.
Choose a location to save the logs archive.
While the logs are collected, you will notice a progress bar on the screen.
When the process is complete, the output displays the name of the archive and its location.
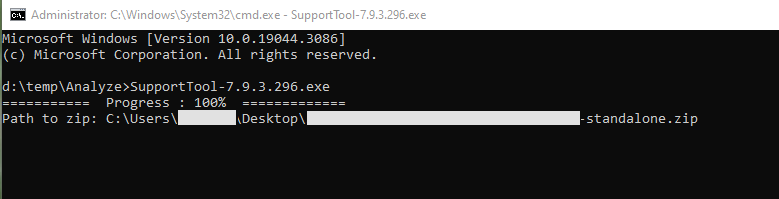
To submit the logs to the Bitdefender Enterprise Support team, access the selected location and find the archive file named [computer_name]_[current_date-time]_[product_version]-standalone.zip. Attach the archive to your support ticket for further troubleshooting.
Other issues
For different types of issues when the security agent is installed on the affected computer you can use any of the methods below.
Remote troubleshooting
With this method, you can gather logs remotely using GravityZone Control Center from one or more of the affected computers. You can also select from multiple storage options to save the logs.
Log in to GravityZone Control Center.
Go to the Network page from the left side menu and click the Computers and Groups section.
Click on the affected computer and go to the Troubleshooting tab.
Click the Gather logs button from the upper left side. A configuration window will appear.
In the Logs Storage section, choose a storage location:
Target machine: the logs archive is saved to the provided local path.
Network share: the logs archive is saved to the provided path from the shared location.
Bitdefender Cloud: the logs archive is saved to a Bitdefender Cloud storage location where the Bitdefender Enterprise Support team can access the files. This option is available only for Cloud solutions.
You can use the option Save logs also on target machine to save a copy of the logs archive on the affected machine as a backup.
Fill in with the necessary information (local path, credentials for the network share, path to the shared location, case ID) depending on the selected location.
Click the Gather logs button.
Note
If you choose Bitdefender Cloud as a storage option, consider the following:
The logs archive is saved with identical names both to Bitdefender Cloud and on the target machine. Click the troubleshooting event to view the archive’s name in the details window.
After the archive is uploaded please provide the Bitdefender Enterprise Support team with the necessary information (name of the target machine, the archive name), on the opened case. Open a new case if none exists.
If you choose another storage option to submit the logs to the Bitdefender Enterprise Support team, access the selected storage location and find the archive file named [computer_name]_[current_date-time]_[product_version]-st.zip. Attach the archive to your support ticket for further troubleshooting.
To collect advanced logs using GravityZone Control Center, consider the Debug session, available in the Troubleshooting section. You should use this method at the recommendation of the Bitdefender Enterprise Support team. For more information, refer to the Troubleshooting tab section.
Command-line
Using the command-line you can collect logs directly from the affected computer. This method is useful in situations where you do not have access to GravityZone Control Center or the computer does not communicate with the console.
Open Command Prompt with administrative privileges.
Go to the product installation folder. The default path is:
C:\Program Files\Bitdefender\Endpoint SecurityCollect and save the logs by running this command:
Product.Support.Tool.exe collect
The logs are saved by default to
C:\Windows\Temp.Optionally, if you want to save the Support Tool log in a custom location, use the option path:
Product.Support.Tool.exe collect [path="<path-to-file>"]
Example:
Product.Support.Tool.exe collect path="D:\Test"
While the command is executing, you will notice a progress bar on the screen.
When the process is complete, the output displays the name of the archive and its location.
To submit the logs to the Bitdefender Enterprise Support team, access C:\Windows\Temp or the custom location and find the archive file named [computer_name]_[current_date-time]_[product_version]-standalone.zip. Attach the archive to your support ticket for further troubleshooting.
This section helps you provide the Bitdefender Enterprise Support team with essential troubleshooting information in case Bitdefender Endpoint Security Tools (BEST) for Linux is not functioning properly in your environment.
The support tool is also included in the installation archive, allowing you to collect system and installation logs if the installation fails.
Note
Starting with version 6.1.5.527 (v6) and version 7.0.1.1754 (v7), BEST for Linux contains a support tool.
The Remote troubleshooting method is available for both versions of BEST for Linux (v6 and v7).
Generating the Linux Support Tool log
All logs will be generated in this location:
/opt/bitdefender-security-tools/var/tmp/
The generated file will have the pattern bitdefender_hostname_unixtimestamp and will be a tar (.tgz) file, for example, bitdefender_centos7nix1_1632296497.tgz.
Important
Use the support tool binary in the /opt/bitdefender-security-tools/bin/ directory.
The following actions are available:
Logs will be activated for the following processes:
bdsecd.json, on debug
epag, on trace
arrakis, ( if available) on trace
Normal logs
./bdconfigure --enablelogs
Extended logs
Note
Enabling the extended logs can be done even if the normal logs are enabled.
./bdconfigure --enablelogs=extended
Note
The log count and log file size for log rotate will be 10 files and 100MB respectively. For arrakis and epag preexisting rules will be used.
Normal logs
./bdconfigure --disablelogs
Extended logs
./bdconfigure --disablelogs=extended
Note
Already generated logs will not be deleted.
To deliver logs use this entry:
./bdconfigure --deliverall
Note
The deliverall task will ask if you wish to stop logging and if you want to delete the logs. Answering no to each of the above questions will no longer restart the product in any way, and will just copy and archive all the log files.
You can use the default modifier to deliver logs. This will automatically answer yes to all questions. To do this use this entry:
./bdconfigure --deliverall=default
The following directories/files will be copied.
"/opt/bitdefender-security-tools/var/log"
"/opt/bitdefender-security-tools/var/cache"
"/opt/bitdefender-security-tools/bdredline/bdredline.log"
"/opt/bitdefender-security-tools/bdredline/bdredline.log.1"
"/opt/bitdefender-security-tools/bdredline/fileran.jso"
"/opt/bitdefender-security-tools/var/crash"
"/opt/bitdefender-security-tools/var/epagng"
"/opt/bitdefender-security-tools/etc"
"/opt/bitdefender-security-tools/lib/bdnc_edr/bdnc.ini"
"/opt/bitdefender-security-tools/lib/bdses.config"
"/opt/bitdefender-security-tools/lib/bdses.local"
"/opt/bitdefender-security-tools/lib/bdses.cloud"
"/BDLogging" or "/root/BDLogging"
Other system information is collected and added to the support tool archive as follows:
From
File network.txtthe following information will be collected:• Output from ifconfig• /etc/network/interfaces content • Output from netstat • iptables ipv4 general information • iptables ipv4 nat information • iptables ipv4 raw information • iptables ipv6 general information • iptables ipv6 nat information • iptables ipv6 raw information
From
File system.txtthe following information will be collected:• General system info• Systemd and SysV info • System was started by • Distribution info • Distribution and kernel info • CPU Information from /proc/cpuinfo • Memory info • All system mounts from /proc/mounts • All system mounts from df tool Copies of *ls -t | grep messages | head -2 *ls -t | grep warn | head -2 *ls -t | grep syslog | head -2 *ls -t | grep dmesg | head -2 from /var/log
From
users.txtthe following information will be collected:• Sudoers file • Users list • Current user
From
File product.txtthe following information will be collected:• Check Dazuko modules present • SELinux Config file • Bdsecd connections with lsof • Bdsecd connections with netstat • Epagng connections with lsof • Epagng connections with netstat • List of system crash dumps • List Antimalware Signature versions • List all /opt/bitdefender-security-tools files
From
File journal.txtthe following information will be collected:Journalctl information
From
File processes.txtthe following information will be collected:Processes and system resource usage
From
dmesg, the following information will be collected:system's dmseg logs
From
syslog, the following information will be collected:system's syslog file
From
process-tree.txt, the following information will be collected:Processes and system resource usage
Remote troubleshooting
With this method, you can gather logs remotely using GravityZone Control Center from one or more of the affected computers. You can also select from multiple storage options to save the logs.
Log in to GravityZone Control Center.
Go to the Network page from the left side menu and click the Computers and Groups section.
Click on the affected computer and go to the Troubleshooting tab.
Click the Gather logs button from the upper left side. A configuration window will appear.
In the Logs Storage section, choose a storage location:
Target machine: the logs archive is saved to the provided local path.
Network share: the logs archive is saved to the provided path from the shared location.
Bitdefender Cloud: the logs archive is saved to a Bitdefender Cloud storage location where the Bitdefender Enterprise Support team can access the files. This option is available only for Cloud solutions.
You can use the option Save logs also on target machine to save a copy of the logs archive on the affected machine as a backup.
Fill in with the necessary information (local path, credentials for the network share, path to the shared location, case ID) depending on the selected location.
Click the Gather logs button.
Note
If you choose Bitdefender Cloud as a storage option, consider the following:
The logs archive is saved with identical names both to Bitdefender Cloud and on the target machine. Click the troubleshooting event to view the archive’s name in the details window.
After the archive is uploaded please provide the Bitdefender Enterprise Support team with the necessary information (name of the target machine, the archive name), on the opened case. Open a new case if none exists.
If you choose another storage option to submit the logs to the Bitdefender Enterprise Support team, access the selected storage location and find the archive file named ST_[computername]_[currentdate]. Attach the archive to your support ticket for further troubleshooting.
To collect advanced logs using GravityZone Control Center, consider the Debug session, available in the Troubleshooting section. You should use this method at the recommendation of the Bitdefender Enterprise Support team. For more information, refer to the Troubleshooting tab section.
Getting help with the Support Tool
If you need help with the Support Tool, run:
sudo /opt/BitDefender/bin/bdconfigure --help
This section helps you provide the Bitdefender Enterprise Support team with essential troubleshooting information in case Endpoint Security for Mac is not functioning properly in your environment.
When submitting a request, you need to provide the following:
A detailed description of the issue you are encountering.
A screenshot (if applicable) of the exact error message that appears.
A Support Tool log that contains system information.
Below are presented the methods that will help you generate the Support Tool log.
Note
You can use the GatherBD method to collect the logs starting with product version 4.0.0.179022.
Collect logs with GatherBD
To collect logs from the affected endpoint, follow these steps:
Open a Terminal window.
Type the following commands to enable logging:
cd /Library/Bitdefender/AVP/product/bin/
sudo ./GatherBD start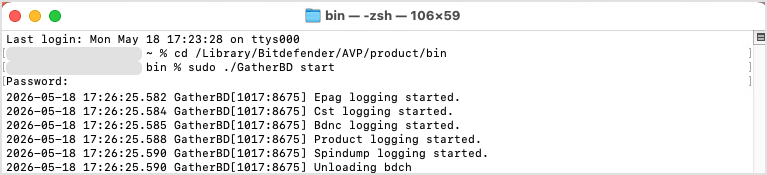
Save all work and run the following command to restart the system:
sudo reboot

Reproduce the issue.
Gather logs into an archive:
sudo ./GatherBD archive all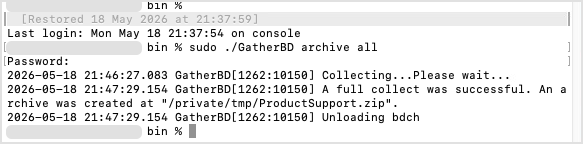
Attach the archive to your support ticket.
You can find the archive file named
ProductSupport.zipin Finder > Go > Go to Folder... > private > tmp.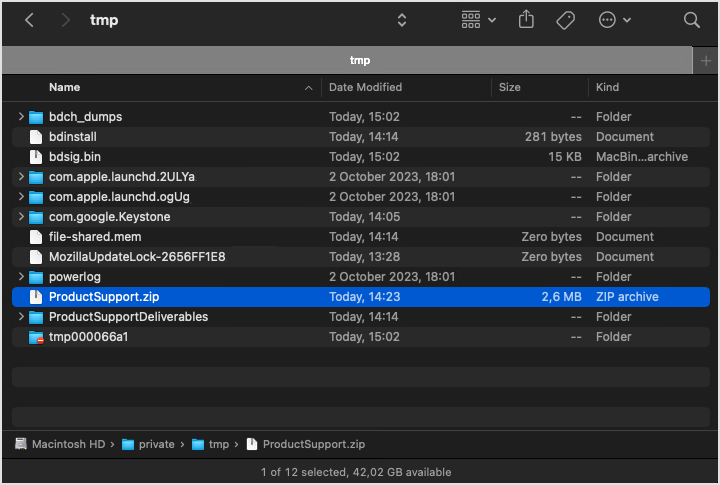
Stop logging:
sudo ./GatherBD stop
Save all work and run again the following command to restart the system:
sudo reboot

Note
Do not reboot the system before saving the archive elsewhere or sending the ticket. Rebooting the system deletes the contents of the
/tmpfolder.
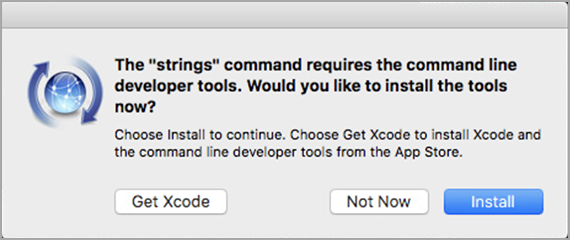
If prompted to install Xcode command line developer tools, click Install. When installation is complete, perform once again the above steps.
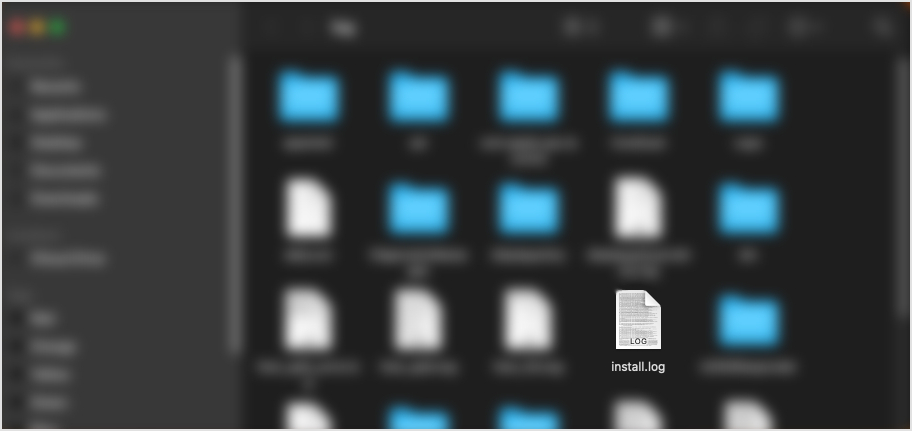
If the security agent fails to install, you cannot gather a set of logs. In this case, only the install.log file is generated.
To access install.log, follow these steps:
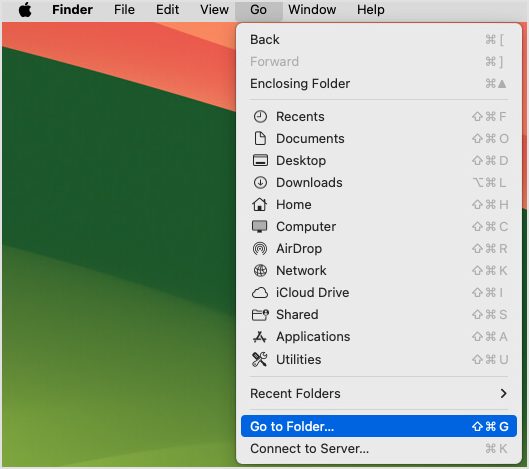
Open Finder.
Open the Go menu and select Go to Folder....
Enter the path to
install.log. The file is available in this location:/var/log/install.log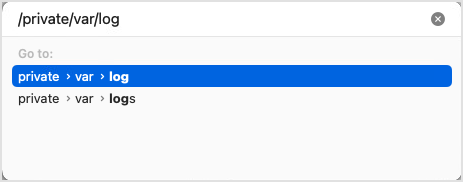
Use this file to create an archive and attach it to your support ticket.
Remote troubleshooting
With this method, you can gather logs remotely using GravityZone Control Center from one or more of the affected computers. You can also select from multiple storage options to save the logs.
Log in to GravityZone Control Center.
Go to the Network page from the left side menu and click the Computers and Groups section.
Click on the affected computer and go to the Troubleshooting tab.
Click the Gather logs button from the upper left side. A configuration window will appear.
In the Logs Storage section, choose a storage location:
Target machine: the logs archive is saved to the provided local path.
Network share: the logs archive is saved to the provided path from the shared location.
Bitdefender Cloud: the logs archive is saved to a Bitdefender Cloud storage location where the Bitdefender Enterprise Support team can access the files. This option is available only for Cloud solutions.
You can use the option Save logs also on target machine to save a copy of the logs archive on the affected machine as a backup.
Fill in with the necessary information (local path, credentials for the network share, path to the shared location, case ID) depending on the selected location.
Click the Gather logs button.
Note
If you choose Bitdefender Cloud as a storage option, consider the following:
The logs archive is saved with identical names both to Bitdefender Cloud and on the target machine. Click the troubleshooting event to view the archive’s name in the details window.
After the archive is uploaded please provide the Bitdefender Enterprise Support team with the necessary information (name of the target machine, the archive name), on the opened case. Open a new case if none exists.
If you choose another storage option to submit the logs to the Bitdefender Enterprise Support team, access the selected storage location and find the archive file named ST_[computername]_[currentdate]. Attach the archive to your support ticket for further troubleshooting.
To collect advanced logs using GravityZone Control Center, consider the Debug session, available in the Troubleshooting section. You should use this method at the recommendation of the Bitdefender Enterprise Support team. For more information, refer to the Troubleshooting tab section.
How to submit a request
Open a ticket to the Bitdefender Enterprise Support team, enter the requested information, attach the log file and the screenshot, and click SUBMIT. If you already have an open ticket with the issue, reply to the confirmation email received from Bitdefender and attach the files to it.