Organizing endpoints into Groups
Organizing endpoints into groups
You can manage endpoint groups in the left-side pane of the Network page, under Computers and Groups folder.
Under the Network group belonging to your company, you can create, delete, rename and move computer groups within a custom-defined tree structure.
Note
A group can contain both endpoints and other groups.
When selecting a group in the left-side pane, you can view all endpoints except for those placed into its sub-groups. To view all endpoints included in the group and in its sub-groups, click the Filters menu located at the upper side of the table and select All items recursively in the Depth section.
Creating groups
Before you start creating groups, think of the reasons why you need them and come up with a grouping scheme.
For example, you can group endpoints based on one or a mix of the following criteria:
Organization structure (Sales, Marketing, Quality Assurance, Software Development, Management etc.).
Security needs (Desktops, Laptops, Servers, etc.).
Location (Headquarter, Local Offices, Remote Workers, Home Offices etc.).
To organize your network into groups:
Select the Computers and Groups folder in the left-side pane.
Click the name of your company to expand the network tree.
Select the Computers and Groups folder in the left-side pane.
Click the
 Options button to access the contextual menu.
Click Create new group in the contextual menu.
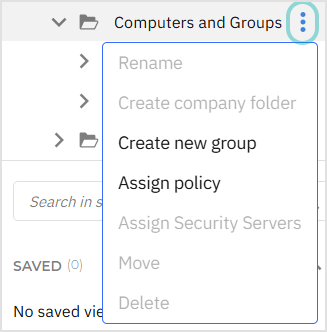
Enter a suggestive name for the group and click the
 icon to confirm.
Renaming groups
To rename a group:
Select the group in the left-side pane.
Click the contextual menu button
 in left-side pane.
Enter the new name in the corresponding field and click the green icon.
Moving groups and endpoints
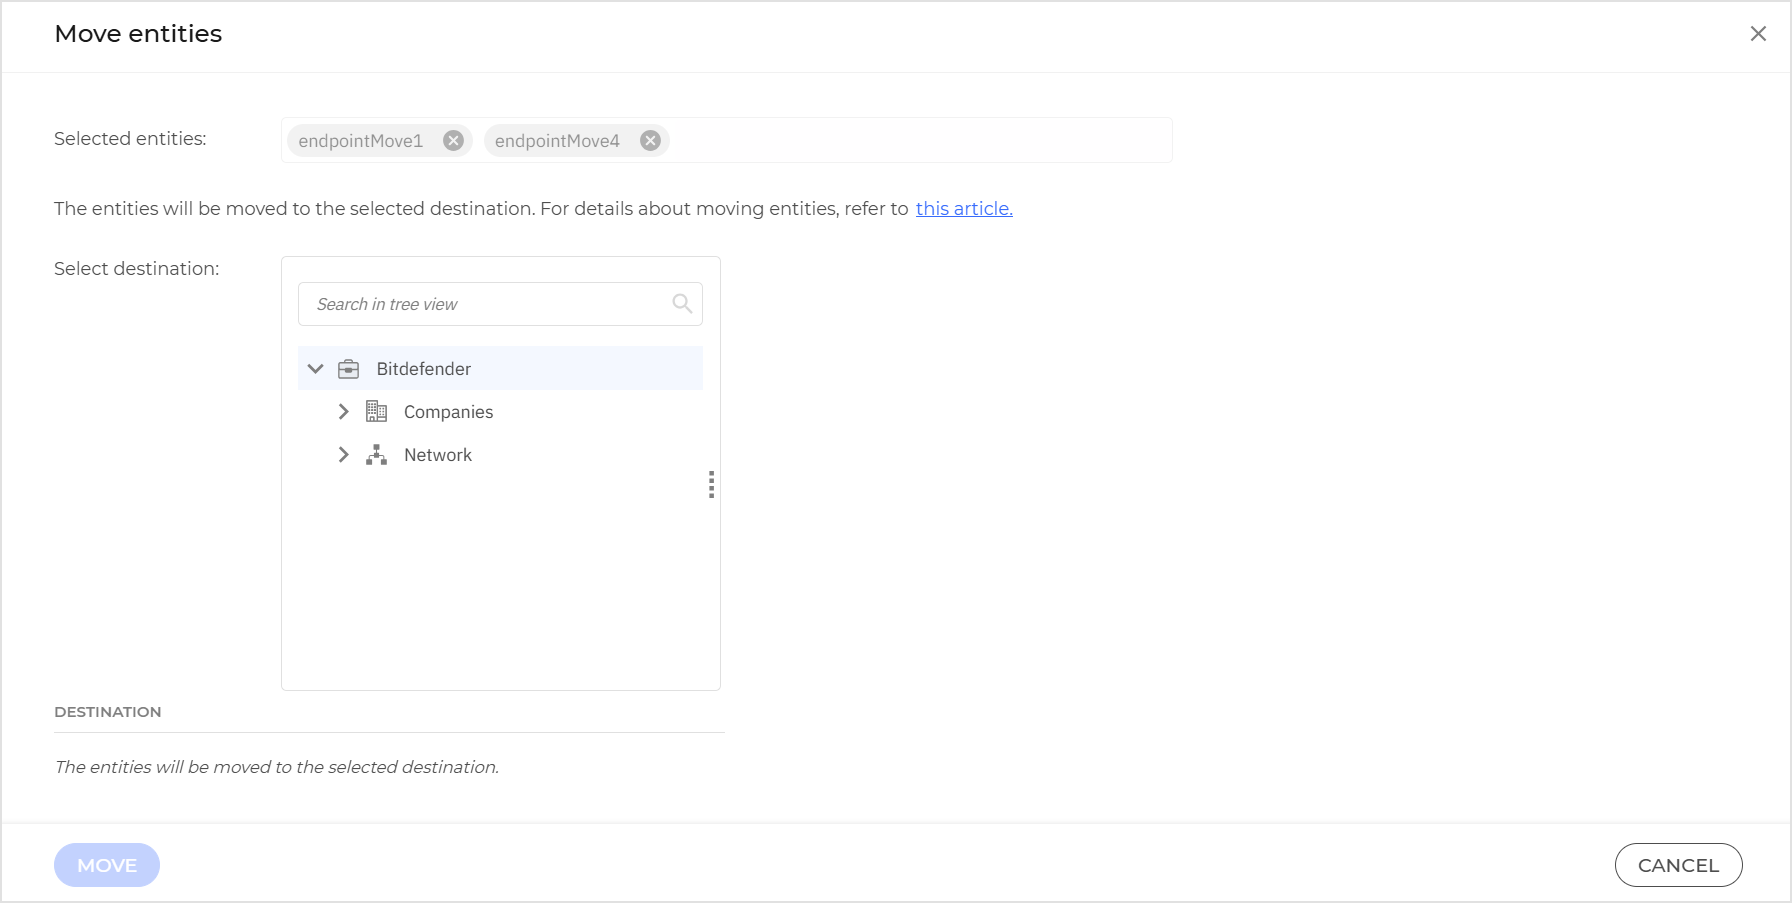
You can move entities to Computers and Groups anywhere inside the group hierarchy.
To move entities in the Network table, follow these steps:
Locate the entities you want to move in the Network table.
Select the corresponding checkboxes.
Open the Actions menu at the top of the table and select Move.
On the configuration page, select the destination for the entities.
The path to the new location will be displayed under Destination.
If the destination is invalid, an error message will inform you about the issue.
Click Move to initiate the process.
Note
The entity that is moved will inherit the policy settings of the new parent group, unless a different policy has been directly assigned to it.
For more information about policy inheritance, refer to Security management.
Deleting groups
To delete entities refer to the following article.
Deleting a group is a final action. Empty folders will be permanently deleted. Populated folders will be permanently deleted, and their contents will be moved to the Deleted folder.
Organizing containers into groups
You can manage container groups in the left-side pane of the Network page.
All containers are detected by Network Discovery and placed in the Network page where you can organize them into groups as you want.
A major benefit is that you can use group policies to meet different security requirements.
Under Custom Container Groups you can create, delete, rename and move container groups within a custom-defined tree structure.
Note
A group can contain only containers.
When selecting a group in the left-side pane, you can view all containers except for those placed into its sub-groups.
To view all containers included in the group and in its sub-groups, click the Filters menu located at the upper side of the table and select All items recursively in the Depth section.
Creating groups
Before you start creating groups, think of the reasons why you need them and come up with a grouping scheme.
For example, you can group endpoints based on one or a mix of the following criteria:
Organization structure (Sales, Marketing, Quality Assurance, Software Development, Management etc.).
Security needs (Desktops, Laptops, Servers, etc.).
Location (Headquarter, Local Offices, Remote Workers, Home Offices etc.).
To organize your containers into groups:
Select the Containers folder in the left-side pane.
Click the inline menu next to Custom Container Groups and select Create new group in the contextual menu.
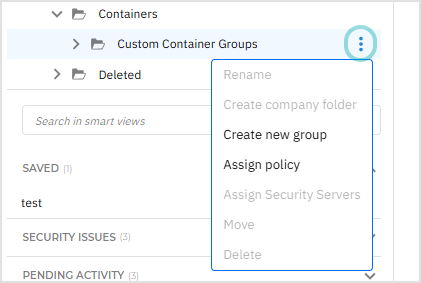
Enter a suggestive name for the group and click the green icon.
Renaming container groups
To rename a container group:
Select the container in the left-side pane.
Click the contextual menu button
in left-side pane.Enter the new name in the corresponding field and click the green icon.
Moving groups and endpoints
You can move entities to Computers and Groups anywhere inside the group hierarchy.
To move entities in the Network table, follow these steps:
Locate the entities you want to move in the Network table.
Select the corresponding checkboxes.
Open the Actions menu at the top of the table and select Move.
On the configuration page, select the destination for the entities.
The path to the new location will be displayed under Destination.
If the destination is invalid, an error message will inform you about the issue.
Click Move to initiate the process.
Note
The entity that is moved will inherit the policy settings of the new parent group, unless a different policy has been directly assigned to it.
For more information about policy inheritance, refer to Security management.
Deleting groups
Deleting a group is a final action. As a result, the security agent installed on the targeted endpoint will be removed.
To delete a group:
In the network table, find the group you want to delete.
Select the corresponding checkboxes.
Click the Delete button at the upper side of the table.
In the dialog window, click OK to confirm the action.
Unmanaged endpoints are moved directly to the Deleted folder.
Managed endpoints are moved to the Deleted folder and the security agent is uninstalled. Check the status of the task created by this action on the Tasks page.
When the task is finished, the corresponding license seats are released. If the endpoints have been added as a result of an integration (Active Directory, vCenter Server, XenServer etc.), they become unmanaged and will remain in their original location (they are not moved to the Deleted folder). If the endpoints come back online, they will be licensed again.
Security Server instances will be moved to the Deleted folder.
Endpoints already in the Deleted folder will be permanently removed.