Managing sensors
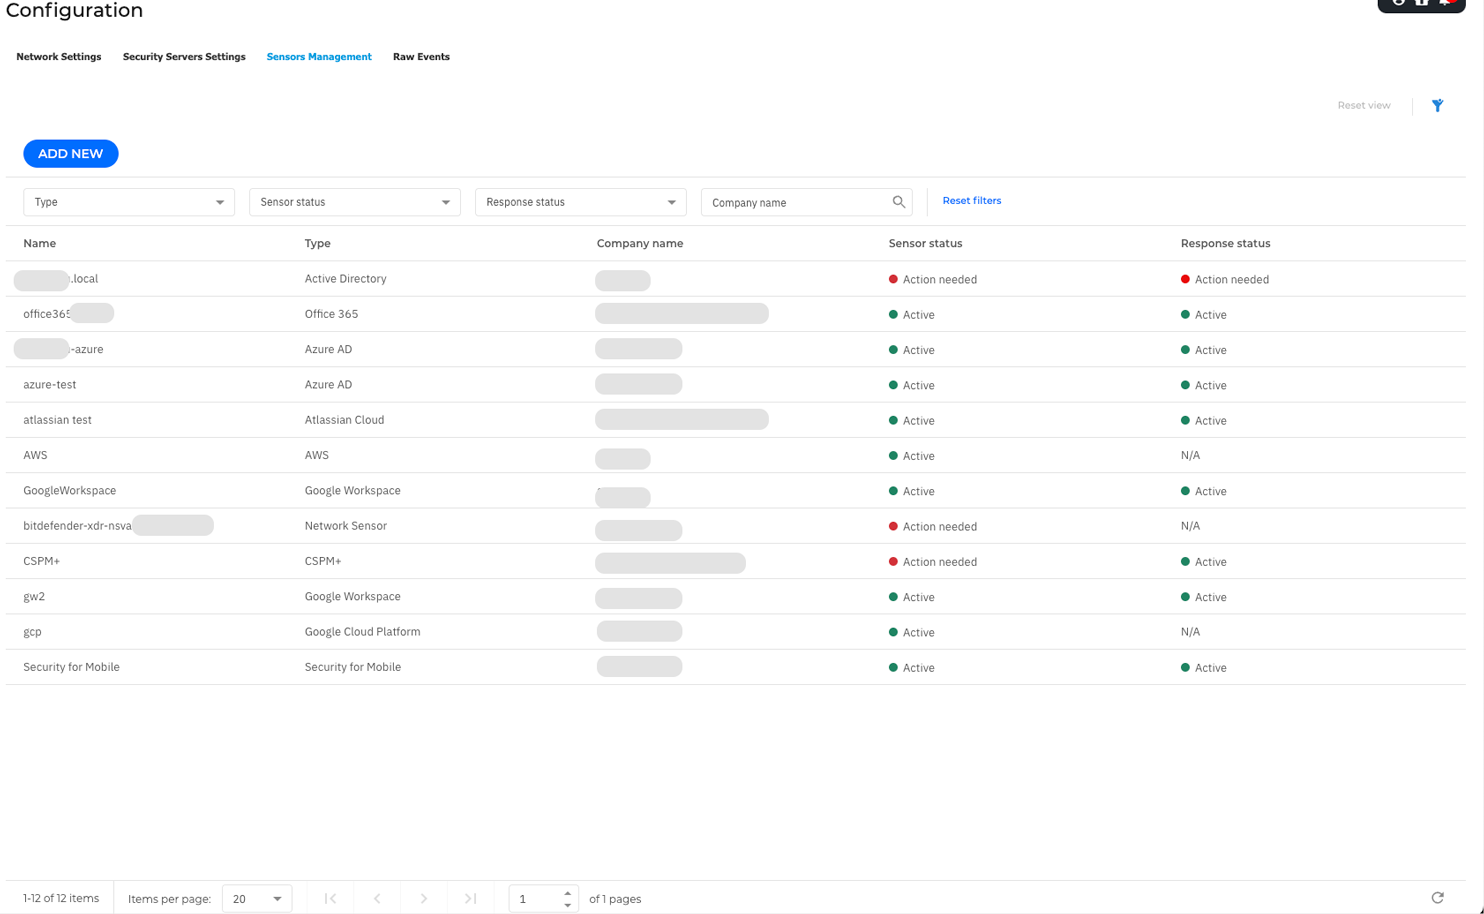
The Configuration > Sensors Management page from the left-side menu of GravityZone Control Center displays all XDR integrations that you added, along with some important details: the integration name, its type, its status, and the response status.

The Sensor status can have the following values:
Active - The sensor is correctly configured and processes data.
Disabled - The sensor does not process data because it was disabled by a user.
Action needed - One or more permissions are missing, therefore, the sensor cannot process data or take certain response actions.
Offline - Most probably, one or more permissions are missing.
The Response status shows whether you can respond to incidents detected through each integration. It can have the following values:
N/A - This type of sensor does not allow taking response actions, or no response actions are available.
Active - You can actively take response actions.
Disabled - The integration is disabled, so you cannot take response actions for any of the 3rd party accounts.
Action needed - One or more permissions are missing. You cannot take response actions for one or more of the 3rd party accounts. View the integration details panel for more information about the error.
The response status is updated after integration save and disable actions, as well as after performing a related response action.
Viewing sensor details
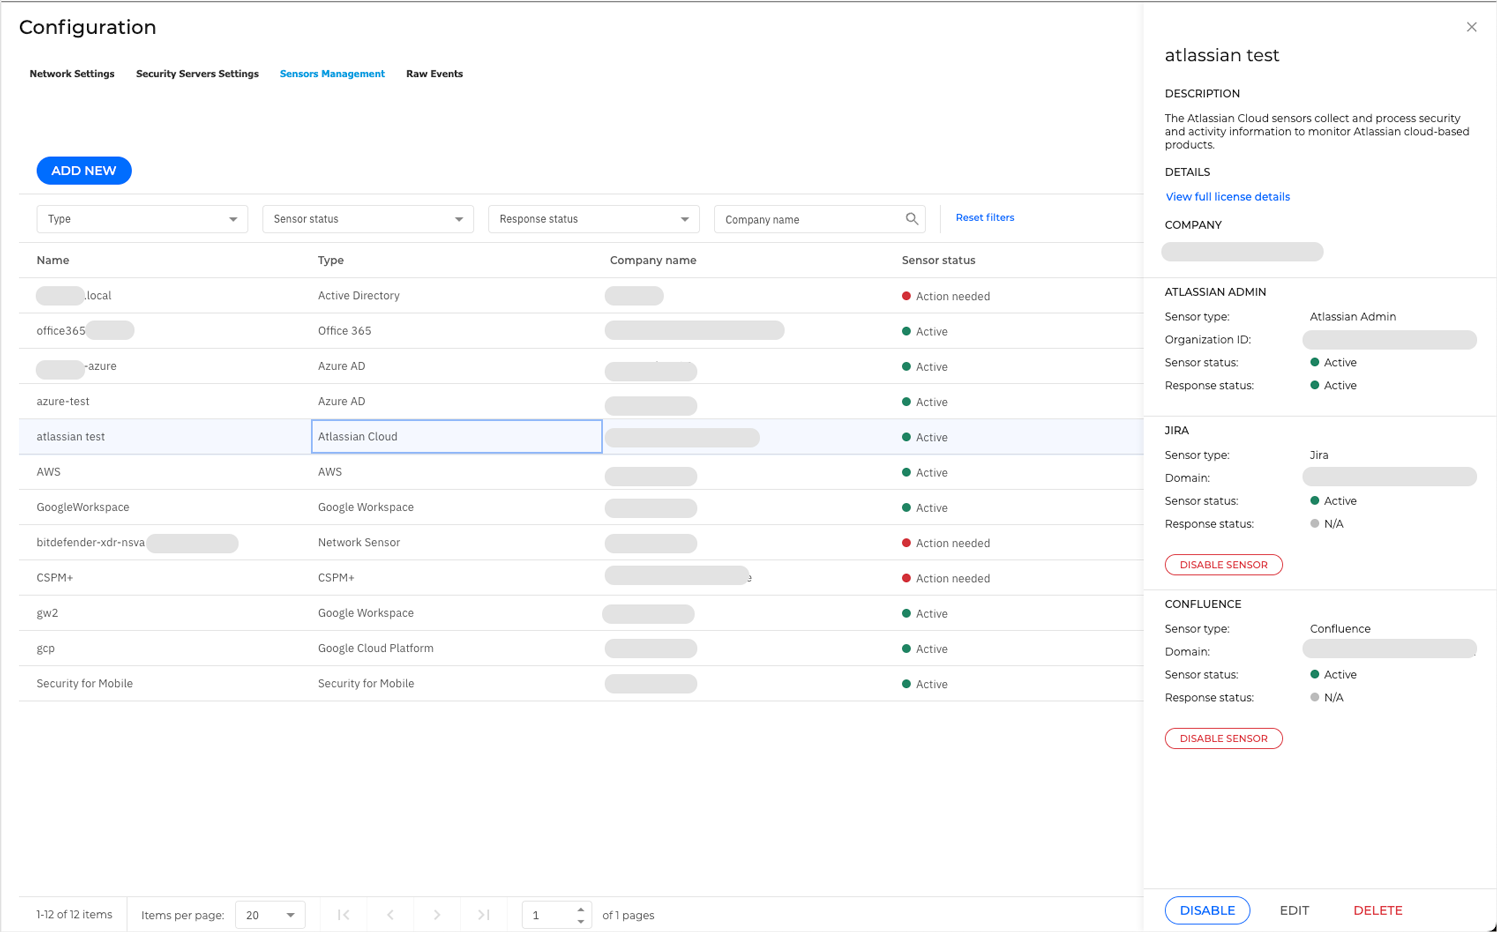
After completing the configuration steps, the sensors are displayed in the Configuration > Sensors Management grid.
Select any sensor from the list to view its details.

Important
If you notice any mismatch between the sensors grid and the details panel, close the panel, refresh the page using the bottom-right icon, and then reopen the panel.
Deleting a sensor integration
Deleting a sensor integration removes it from the Sensors Management list and stops the sensor from processing data.
Important
Deleting the CSPM+ and Security for Mobile integrations is only possible if their corresponding licenses are no longer valid.
To delete a Network sensor integration, make sure the Network Sensor Virtual Appliance (NSVA) is offline before following the steps below.
To delete a sensor integration, follow these steps:
Select the integration from the Sensors Management grid.
The details panel is displayed.
Select Delete and confirm the action.
Important
Deleting the sensor will not deactivate your paid Pub/Sub subscription in the Google Cloud console, or any of the following paid services: AWS CloudTrail, AWS Config, Amazon SQS, and Amazon SNS.
Disabling a sensor integration
If you disable a sensor integration, the sensor will no longer process data.
To disable a sensor integration, follow these steps:
Select the integration from the Sensors Management grid.
The details panel is displayed.
Select Disable and confirm the action.
Important
Disabling the sensor will not deactivate your paid Pub/Sub subscription in the Google Cloud console, or any of the following paid services: AWS CloudTrail, AWS Config, Amazon SQS, and Amazon SNS.
Editing a sensor integration
To edit a sensor integration, follow these steps:
Select the integration from the Sensors Management grid.
The details panel will be displayed.
Click Edit.
The Edit sensor page with the most recent sensor configuration will be displayed.
Update any options as needed.
Click Test connectivity.
Click Apply.
You will see the updated sensor in the Sensors Management grid.
Important
You can edit only sensors of the following types: Office 365, AWS, Active Directory, Azure AD, Microsoft Intune, Azure Cloud, Google Workspace, Google Cloud Platform, and Atlassian Cloud.