Deploying GravityZone MTD and Security for Chrome on Chromebook using Google Admin Console
Overview
This article describes how to deploy GravityZone MTD and Security for Chrome (Chrome extension) on ChromeOS devices using Google Admin Console. The deployment ensures full protection at both device and browser levels.
The process includes:
Deploying the GravityZone MTD Android application
Deploying the Security for Chrome extension
Verifying proper installation and activation
Prerequisites
Item | Specifics |
|---|---|
Google Admin Console Access | Access to a Google Workspace account requires a valid username and password. Regular Gmail accounts are not compatible for signing in to the admin.google.com website. |
GravityZone MTD for Android | Use the latest release in the Google Play Store. |
Chromebook | The Chromebook must have compatibility with Android apps and the Google Play Store. This link provides a list of Chromebook devices that are compatible with Android apps. |
Mobile Security console | Access to the Mobile Security console. |
Mobile Security console administrator credentials | You must have administrator credentials with login access. |
Device application deployment set up
To configure the app, certain steps need to be performed on the Google Admin Console, while others must be completed on the Mobile Security console. Upon completion of the configuration setup, the following events take place:
The app is known to the Google Admin Console along with the activation information defined.
The device app automatically installs on Chromebook devices once the administrator integrates it with the Google Admin Console.
Users within the Google workspace have the app automatically installed. The device user clicks on the app, and then it auto-activates.
The Mobile Security console handles threat management.
Optionally, the app can be set up for auto-launch including auto-activation with a VPN, and the device user does not have to open the app.
Note
The Google Admin Console allows for only one activation link URL per organisational unit. A domain, such as example.com, can contain multiple organisational units, including quality assurance, a demo organisation, and a beta organisation. Each organisational unit can assign a single activation URL to all devices within it. The activation link in the console should be configured by an administrator to accommodate the anticipated number of destination devices.
Deploy GravityZone MTD app
Prerequisites
The Chromebook must be enterprise enrolled.
The device must be assigned to the correct OU.
Google Play Store must be enabled.
The Play Store must be opened at least once.
Important
If Play Store is not initialized, the application may not install even if policies are correctly configured.
Add the application
Log in to Google Admin Console at admin.google.com.
Navigate to Devices > Chrome > Apps & extensions > Users & browsers.
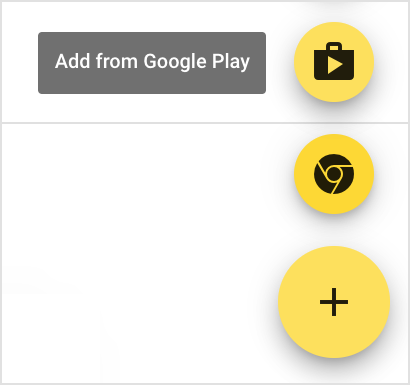
Click Add > Add Android app from Google Play.
Search for Bitdefender GravityZone MTD and select it.
Set Installation policy to Force install + pin.
Click Save.
Configure automatic activation
Enter the following JSON in Managed Configuration:
{
  "activation_link": "https://gzX-device-api.ms.gravityzone.bitdefender.com/activation?stoken=YOUR_TOKEN"
}
For activation link:
Navigate to GravityZone > Devices > Local Device Groups > Copy Link
Additional optional parameters can be used if needed:
display_eula– set tofalseto hide the End User License Agreement screen.tracking_id_1/tracking_id_2– custom identifiers for device tracking.
Note
These parameters are not required for standard deployment.
Obtain the activation link
Log in to GravityZone.
In the GravityZone main menu, go to the Mobile security page.
Open the Mobile Security console.
Navigate to the Devices page and the Local Device Group tab.
Create a local device group if needed, and then expand the created or existing local device group.
Click the Copy Link button to copy the activation URL value that you need to complete activation.
Complete activation on device
Open Bitdefender Mobile Security on the Chromebook.
Click Continue.
Accept the following permissions if prompted:
Run in background
Manage all files access
VPN permission (if prompted)
Note
These permissions cannot be enforced automatically due to Android security restrictions.
Set up the app for auto-launch with VPN
If you can have the device app running a VPN, then you can make a few additional settings and the app can automatically launch and begin detecting threats.
Log in to Google Admin Console at admin.google.com.
Click on Devices.
Click and expand Chrome.
Click and expand Settings.
Click Users & browsers.
On the User & browser Settings tab, scroll and find the Network section.
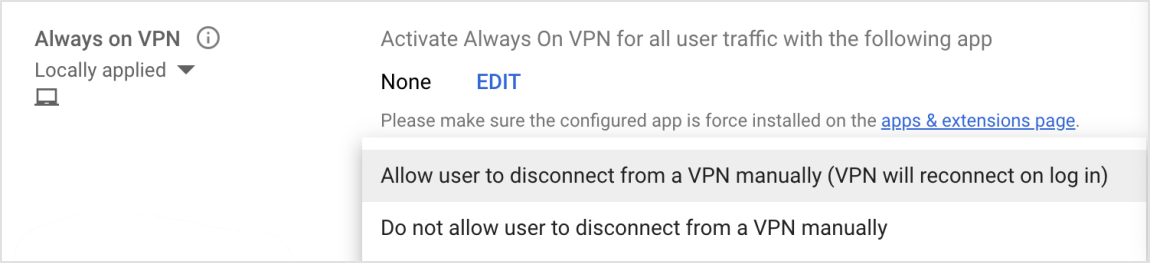
Within the Network section, find the Always on VPN section.
Click Edit, and from the drop-down list, select the always-on VPN app, and click OK.
Choose the option to either allow or not allow the user to disconnect the VPN manually on the Chromebook and save your settings.
Note
If you want to use the Always on VPN setting for phishing detection and for web content filtering, enable these features in the Mobile Security console Policy page for the selected Local Device Group and verify:
The app is automatically installed on Chromebook.
The app is automatically launched and activated on Chromebook. The VPN is also automatically connected.
Verify that phishing links are blocked by the local VPN on the Chromebook.
Deploy Security for Chrome extension
What Security for Chrome does
The extension monitors installed browser extensions and web activity to detect:
Malicious extensions
High-risk extensions
Non-compliant extensions
Sideloaded extensions
Add the extension
Navigate to Devices > Chrome > Apps & extensions > Users & browsers.
Click Add > Add Chrome app or extension by ID.
Enter Extension ID:
jihodgjhdnfdifminkpcjkfbibddhkpj
Click Save.
Set Installation policy to Force install + pin.
Configure extension activation
Enter the following JSON in Policy for extensions:
{
  "acceptorUrl": {
    "Value": "https://gzX-acceptor.ms.gravityzone.bitdefender.com/srx/json"
  },
  "activationUrl": {
    "Value": "https://gzX-device-api.ms.gravityzone.bitdefender.com/activation?stoken=YOUR_TOKEN&redirect_uri=zips"
  }
}
For acceptor URL:
Navigate to GravityZone > Manage > General > Default Channel.
For activation URL:
Navigate to GravityZone > Devices > Local Device Groups > Copy Link.
Verification
On device
Open
chrome://extensions.Confirm the Bitdefender extension is installed.
Click extension icon and verify it opens.
In GravityZone
Navigate to Extensions, where it shows the monitored extensions.
Navigate to Devices, where the Chromebook appears as two entries:
Android (MTD) (OS: Android, Android icon) - represents the GravityZone MTD application.
ChromeOS device (Google Chrome) (OS: Chrome, Chrome icon) - represents the ChromeOS device associated with the Security for Chrome extension.
The distinction between the two entries is based on the OS column and Model, even if the Group column shows Android for both.
The Security for Chrome extension is not listed as a separate item in the Extensions view.
However, it creates a separate ChromeOS device entry in the Devices view (OS: Chrome, Model: Google Chrome), representing the browser protection component.
