Advanced custom rules
Overview
Advanced custom rules are queries you can use to scan endpoints for patterns of malicious behavior. Advanced detection rules will generate custom alerts and, optionally, security incidents based on the results of these scans.
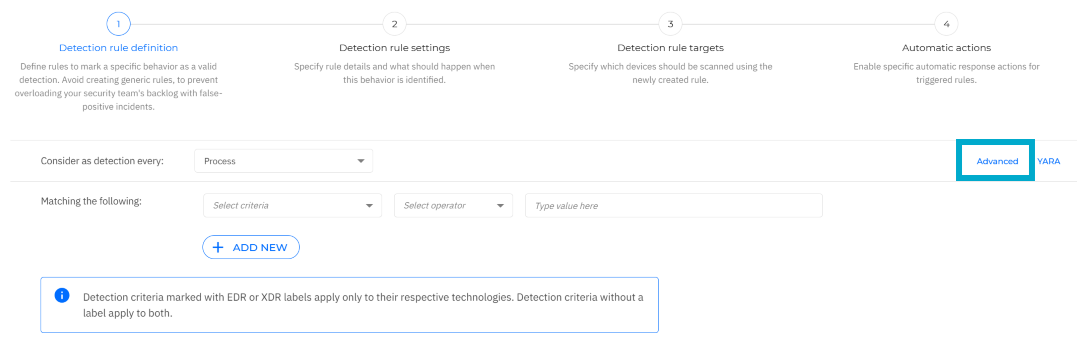
Find this new feature by going to the Incidents > Custom detection rules page. When adding a new rule, click the Advanced button to switch to the Advanced rule definition.
Important
This feature is available for macOS, Windows, and Linux endpoints with x64 architecture that have BEST configured with the Local Scan mode.
Prerequisites
To use this feature, you must meet the following requirements:
You have an active EDR license.
Important
Licenses offering deployment only in EDR (Report only) mode do not support this feature.
The installed BEST version on your endpoint satisfies the OS-specific requirement:
Windows: BEST version
7.9.5.324or newerLinux: BEST version
7.0.3.2271or newermacOS: BEST version
7.16.42.200016or newer
Creating Advanced detection rules
To create an Advanced rule, follow these steps:
Log in to GravityZone Control Center.
Go to the Incidents > Custom detection rules page from the left side menu.
Click Add rule.
You will be redirected to the Add rule page.
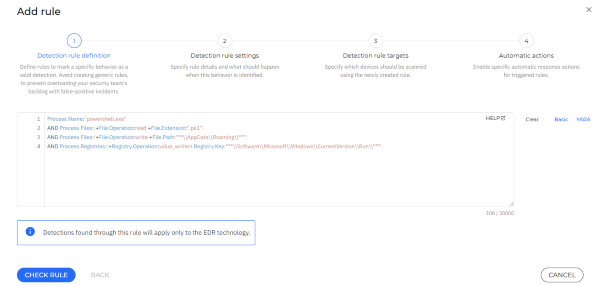
At the Detection rule definition step, click the Advanced button to switch to Advanced rule definition.
Configure the settings for Step 1: Detection rule definition:
Type your rule query.
Advanced custom detection rules use a query syntax similar to Lucene to define detection logic. This section covers the operators and matching patterns you can use when building queries.
Important
Only ASCII characters are supported.
You can enter up to 30,000 characters per Advanced rule.
Categories - Advanced custom rules enable you to define a complex detection logic across a number of categories. Here you can specify the type of entity you want the rule to apply to.
Criteria - Specify the component, entity, setting, or value you want to check against the value entered under the Value field.
Note
The available options vary depending on the specified Category.
Operators - The following type pf operators are are available:
Logical operators - They combine multiple conditions within a query. The following options are available:
Comparison operators - They define the relationship between a
fieldand avalue.These work only on numeric fields (source_portanddestination_port)Glob patterns (GlobRE) - Used by fields such as
process.name,process.path,file.name,file.path,registry.key.Wildcard patterns - Used by fields such as
process.command_line,process.user,certificate_signer,network.domain.Array operator - When querying nested entity arrays (such as
Process.Files,Process.Connections), use the + operator to mark a field as mandatory within the array match.Process.Files:(+File.Operation:create File.Extension:'.exe' File.Extension:'.dll')
This matches processes that created a file with the
.exeor.dllextension, where thecreateoperation is required.
Click Check rule.
Note
This query matches
powershell.exeinstances that:Open a PowerShell script (
.ps1file).Write a file under the user's
AppData\Roamingdirectory.Modify a registry value under
HKCU\Software\Microsoft\Windows\CurrentVersion\Run, a common persistence mechanism used by malware.
This pattern is often observed in malware droppers, loaders, and persistence-establishment techniques.
If there are any errors in the rule syntax, you will receive error messages or warnings. Hover over the highlighted lines to get more detailed information on what needs to be fixed.
Correct any highlighted syntax errors, then click Check rule again.
Once the rule is successfully validated, click Next.
Configure the settings under Step 2: Detection rule settings:
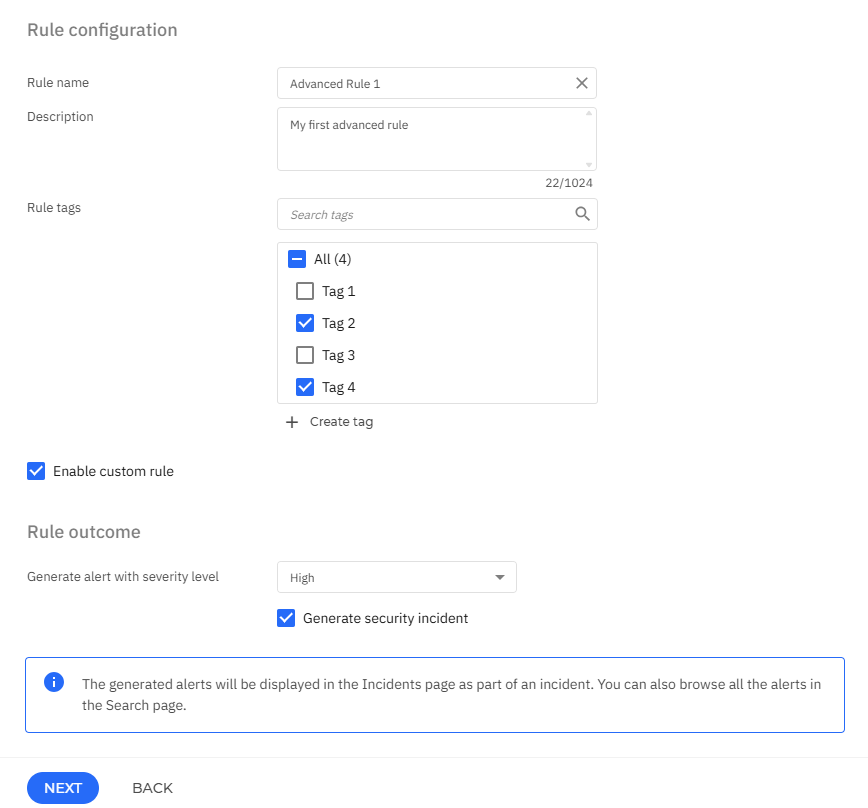
Configure the settings under the Rule configuration section:
Type in a descriptive name for the rule under Rule name.
Under Description type in a short description of what the rule does.
Select the Rule tags you want to apply to the rule.
Rule tags can help you identify, group, and sort for rules as needed. If you do not have a tag that suits your rule, you can click the Create tag button, and add one.
Select the Enable custom rule checkbox to activate the rule immediately after creation.
Enabling this option generates alerts whenever the conditions listed in the rule are met for any specific endpoint.
Configure the settings under the Rule outcome section:
Under Generate alert with severity level select the severity level you want to assign to all the alerts created as a result of triggering this rule.
Select the Generate security incident box to automatically generate an incident when this rule is triggered.
Note
This setting is required for enabling automatic actions.
Click Next.
Configure the settings under step 3, Detection rule targets:
Under the Rule targets section, select one of the options available for the Apply rule on targets from setting:
Select your company - The rule applies to all the endpoints managed by your companies.
Endpoint tags - Select from the list of endpoint tags available for your company. The rule will apply only to the endpoints that have the selected tags applied. These tags are created and managed in Network > Tags Management.
When you select the Endpoint tags option, you can choose the tags from the list in the left-side menu, and your current selection of tags will appear in the right-side menu.

Important
Endpoint tags are supported only for rules.
Click Next.
Configure the settings under Step 4: Automatic actions:
Select the Enable automatic actions box to activate automatic actions. These will apply to the targeted entity every time the rule is triggered.
Select the actions you want to enable for this rule by selecting them from the list below:
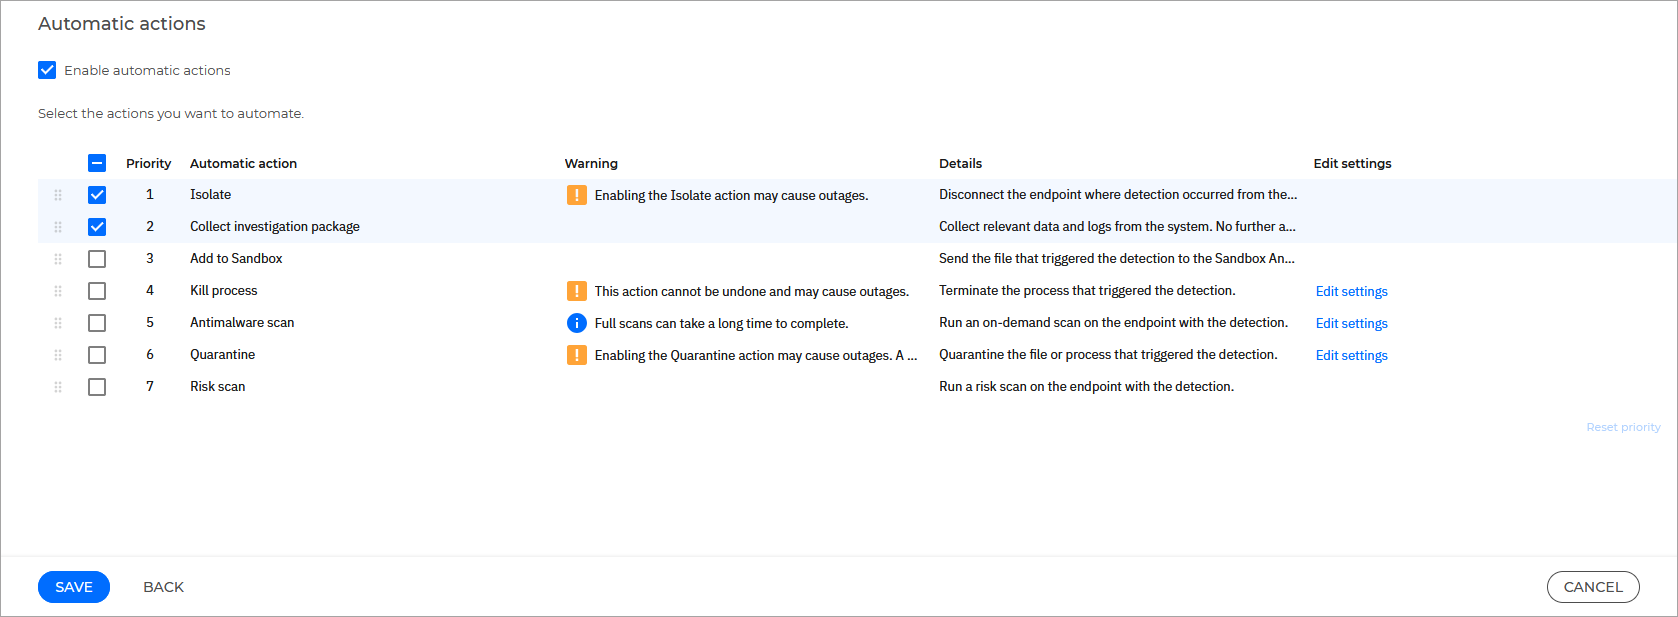
The following automatic actions are available:
Isolate
Collect investigation package
Add to Sandbox
Antimalware scan
Quarantine
Risk scan
Kill process
Important
Depending on your platform, your company's license, and what modules are installed on your endpoints, specific actions might not be available.
You can further customize certain actions by clicking the Edit settings button.
Click Save.
The new rule is now available in the Custom detection rules grid.
Important
Automatic actions are supported only for EDR detection rules.
Change the status of rules
To enable or disable a rule, follow these steps:
Select the checkbox next to the rule you want to modify.
Note
You can select multiple rules.
Click the Change status button on top of the grid.
Click on the action you want to take.

Alternatively, you can click the corresponding menu item on the right side of the grid and select the action you want to take.
Delete a rule
To delete a rule, follow these steps:
Select the checkbox next to the rule you want to modify.
Note
You can select multiple rules.
Click the Delete button on top of the grid.
Click Delete again to confirm the request.
You can select multiple rules.
Edit a rule
To edit a rule, click on the rule name under the Rule name column. Alternatively you can click the Edit rule button from the Rule details side panel.
Viewing advanced rules details
To view the details of a specific rule, locate the rule in the grid, and click anywhere on its row to display the Rule details side panel.
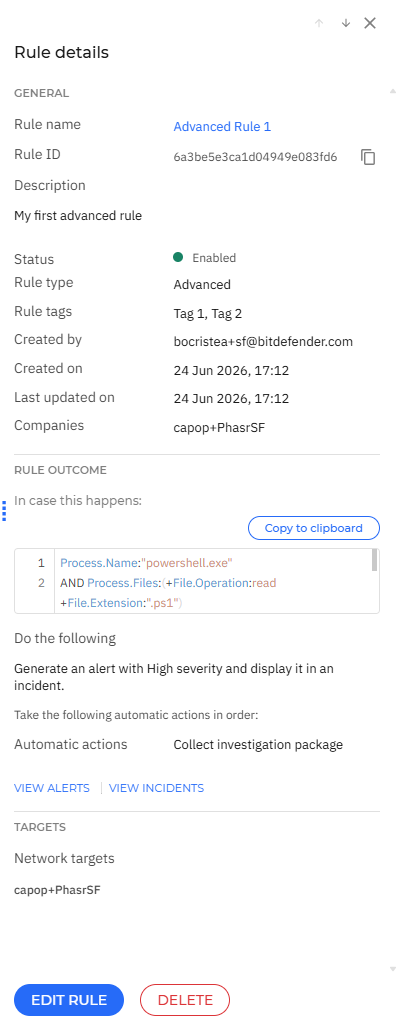
The panel contains information regarding the creation of the rule, the settings applied to it, along with these options
The View alerts option redirects you to the Search page, where a prefilled query runs automatically to retrieve all the alerts triggered by the rule.
The View incidents option redirects you to the Search page, where a prefilled query runs automatically to retrieve all the incidents triggered by the rule.
The Edit rule button brings up the rule definition window, where you can change the rule settings.
The Delete button permanently removes the rule.