Reports
For more information on the Reports screen click here.
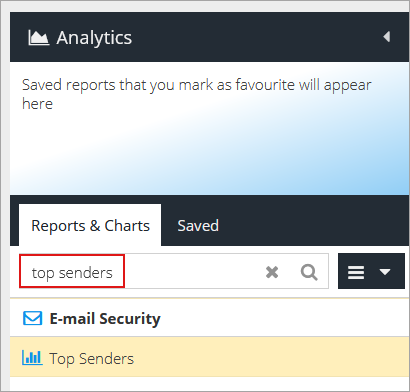
To access Reports actions go to the Analytics page and select one of the report types.
Running reports
To run a report follow the steps below:
Select a report from the list or use the search box to find a specific report and click it:
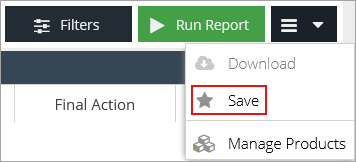
Click the Run Report button at the right side of the screen:

Saving reports
Once a report has been generated by completing the search criteria, it can be saved so that it can be easily run again in the future or attached to a Schedule.
Note
It is best practice to run the report and ensure you have the expected results before saving it
To save a report, follow the steps below:
Click the drop-down menu in the upper right side of the screen.
Select Save.
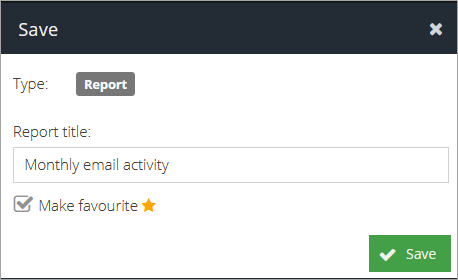
Enter a descriptive name for the report.
Note
Select the Make favourite checkbox if you want the report added to the Favourites panel.
Click Save.
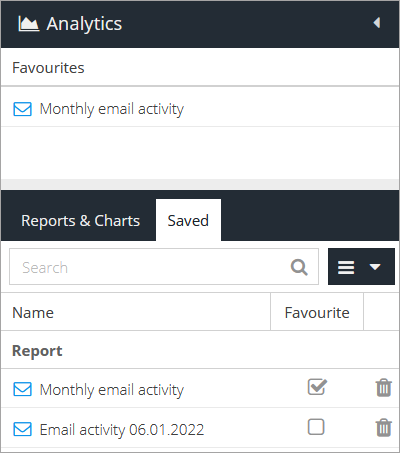
The report is now saved and available in the Save panel.
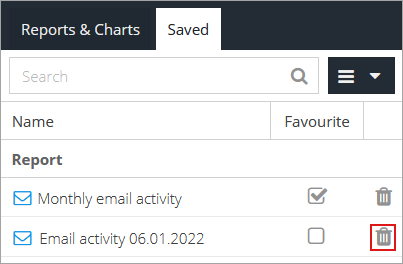
Deleting reports
To delete a report simply click the  button in the left side of the Saved panel that corresponds to the report you wish to remove:
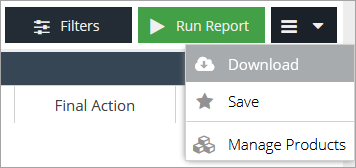
Download Reports
To download a report, follow the steps below:
Click the drop-down menu in the upper right side of the screen.
Select Download.
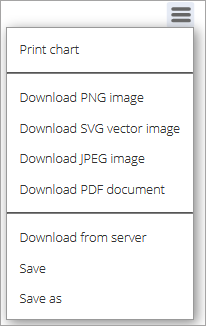
Note
Other report types, such as charts provide multiple options for downloading:
For more information refer to Analytics
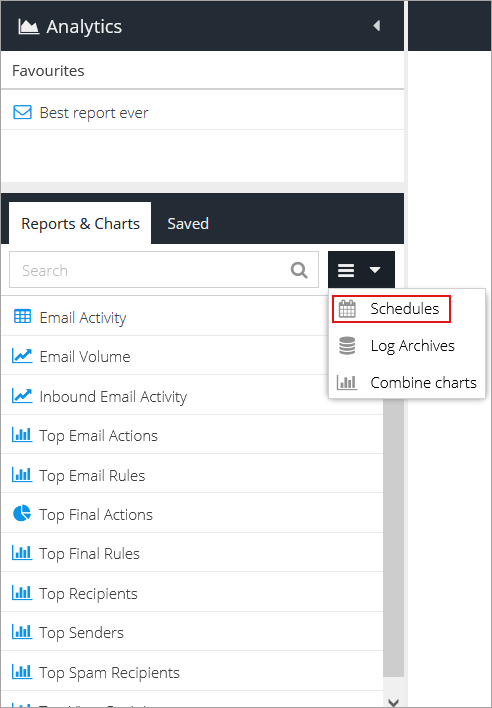
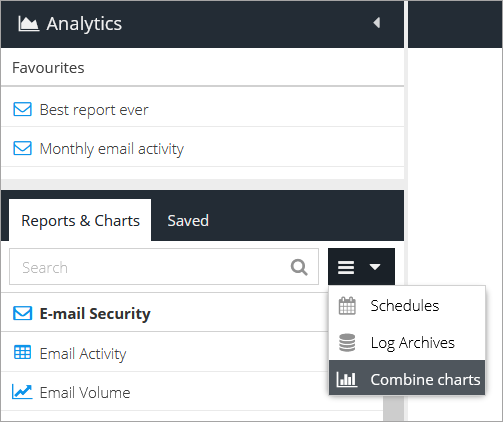
Scheduling reports
To schedule a report, follow the steps below:
Click the drop-down menu in the upper right side of the Reports & Charts pane.
Select Schedules.
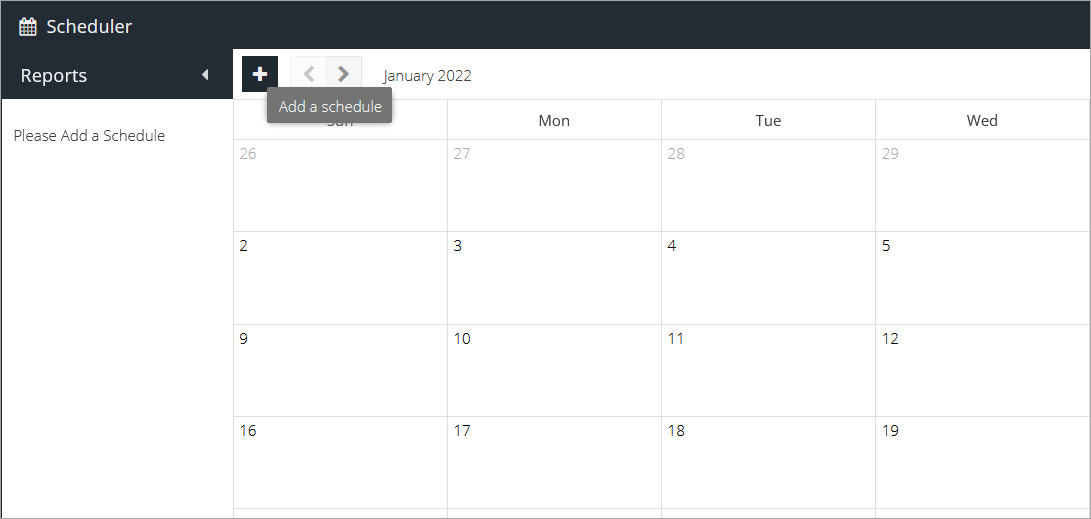
Click on the Add a schedule button or on one of the days in the calendar. The latter will automatically set the first day of the report to the one you selected from the calendar.
Fill in the required information:
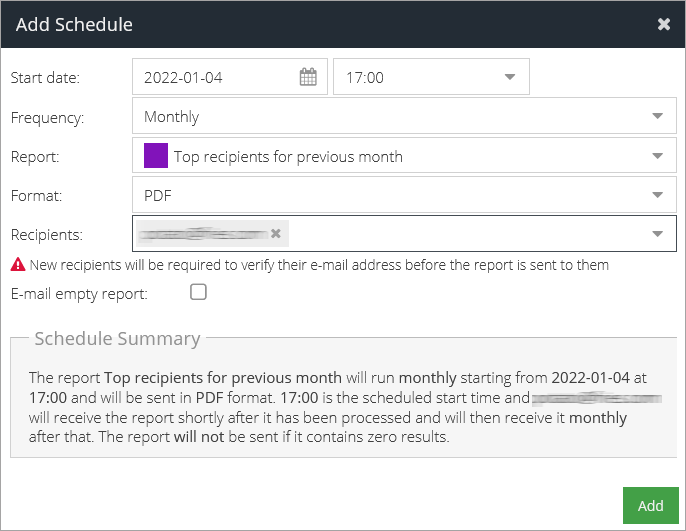
Start date - the first time you want the report to run.
Frequency - how often the report should run.
Report - select which report you want to run from your saved reports list.
Format - select the output format of the report: comma separated values (.csv) or excel (.xlsx).
Recipients - add which email addresses you want the report sent to. They will receive an email containing a download link.
Email empty report - if selected, emails will be sent to the recipients even if the reports returned no results.
Click the Add button.
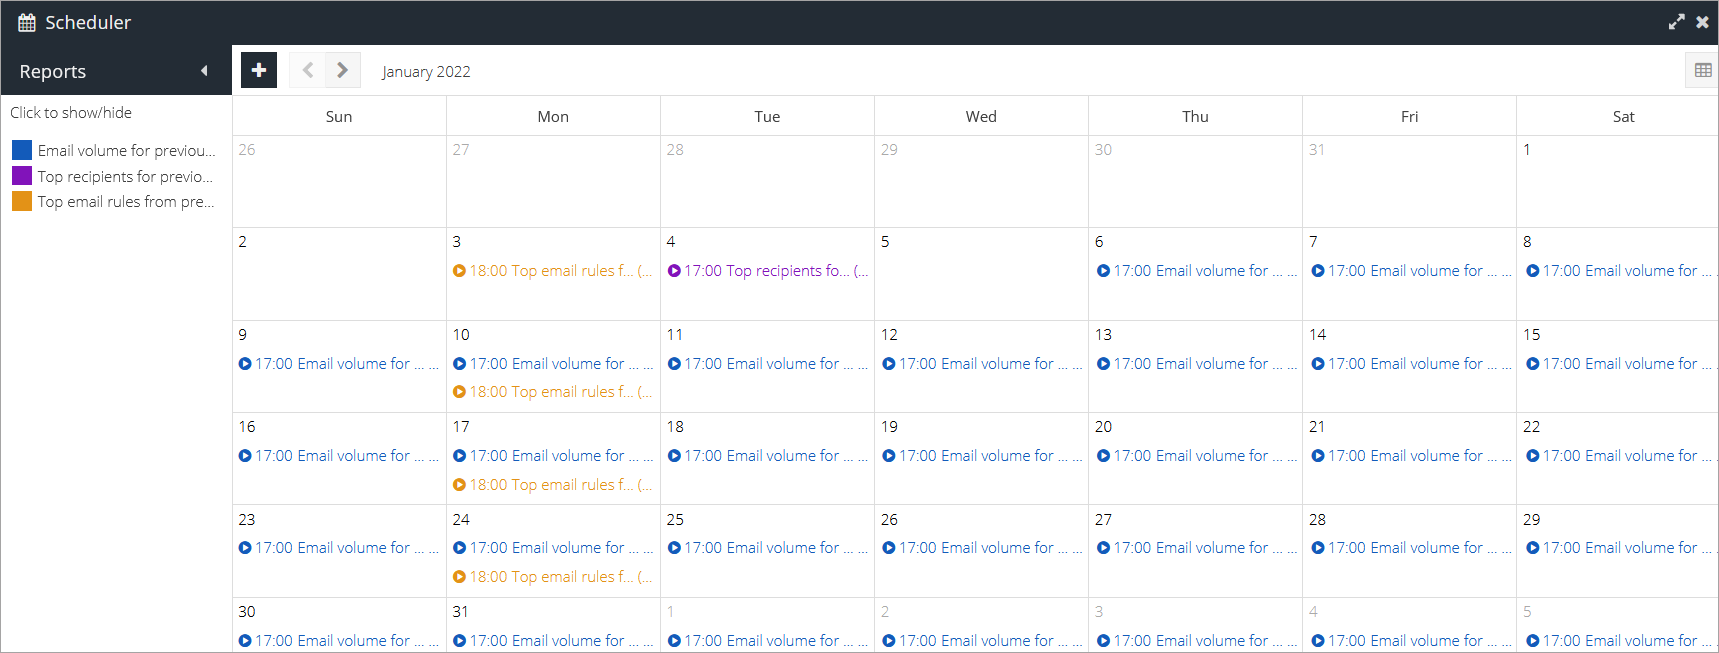
The scheduled report will now appear on your calendar.
Editing a scheduled report
To edit a scheduled report follow the steps below:
Click the drop-down menu in the upper right side of the Reports & Charts pane.
Select Schedules.
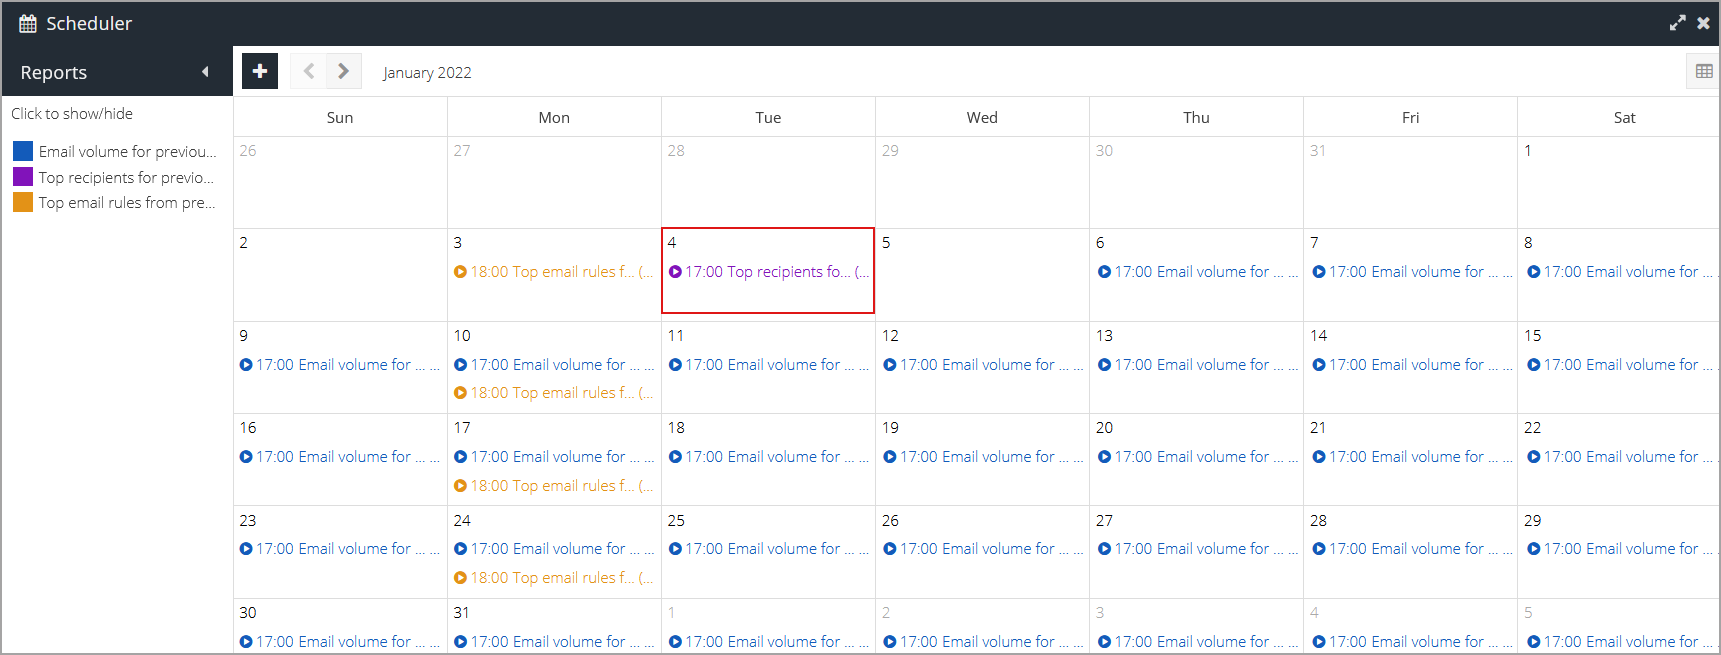
Look for the scheduled report in the calendar and select it.
Make the desired modifications.
Click Update.
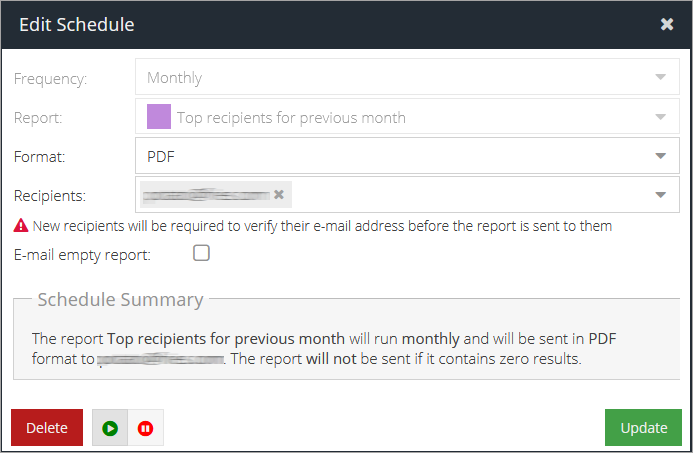
Note
You can use the
 pause and
  unpause buttons to turn scheduled reports on or off.
 You can use the Delete button to permanently cancel the schedule. The report itself will not be deleted.
Managing scheduled reports
To manage scheduled reports, follow the steps below:
Click the drop-down menu in the upper right side of the Reports & Charts pane.
Select Schedules.
A calendar will be displayed of all scheduled reports:
You can also switch to the list view by clicking the  button in the upper right side of the screen.

Note
You can use the pause and unpause buttons to turn scheduled reports on or off.
You can use the button to permanently cancel the schedule. The report itself will not be deleted.
Combining charts
You can combine one or more charts following the steps below:
Click the drop-down menu in the upper right side of the Reports & Charts pane.
Select Combine charts.
Enter a descriptive title for the new report.
Select the reports you wish to combine.
Click Combine.

A new report will be created that contains data from all of the selected reports.