Generate a complete memory dump on Windows 10
This section describes how to generate a complete memory dump on Windows 10.
When a system protected with GravityZone stops unexpectedly, a complete memory dump may be useful for the Bitdefender Enterprise Support Team to identify the cause of the crash.
The following steps describe how to generate a dump file using Task Manager:
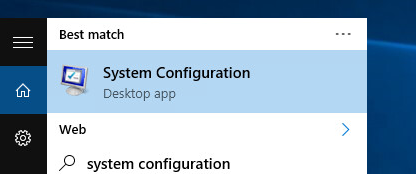
Search for System Configuration and select it.
Select Boot > Advanced options....
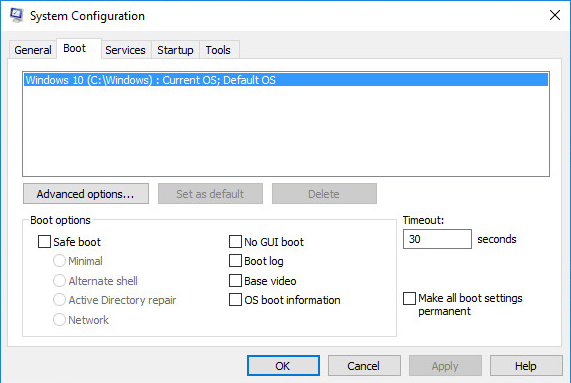
In the BOOT Advanced Options window, make sure the Maximum memory check box is selected and click OK.
Click OK to close the System Configuration window.
Click Exit without restart in the dialog window that may appear. You can restart the system later.
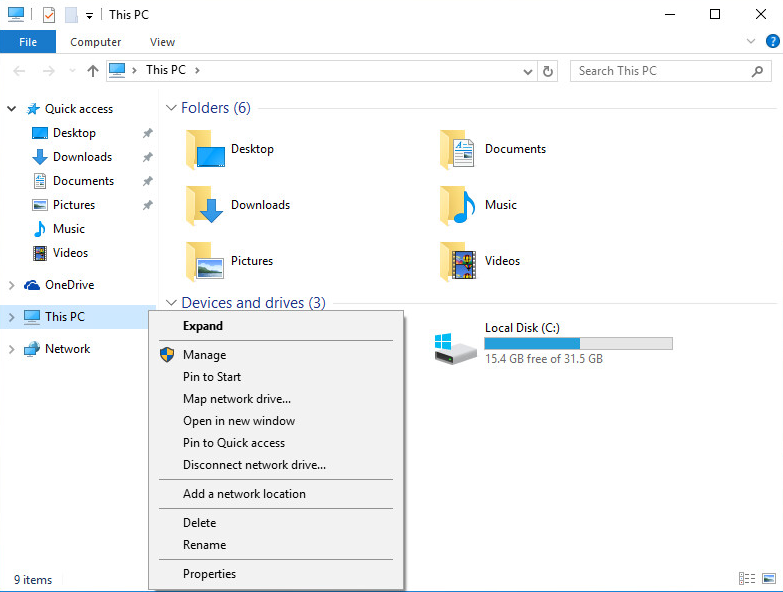
Right click on This PC and go to Properties > Advanced system settings.
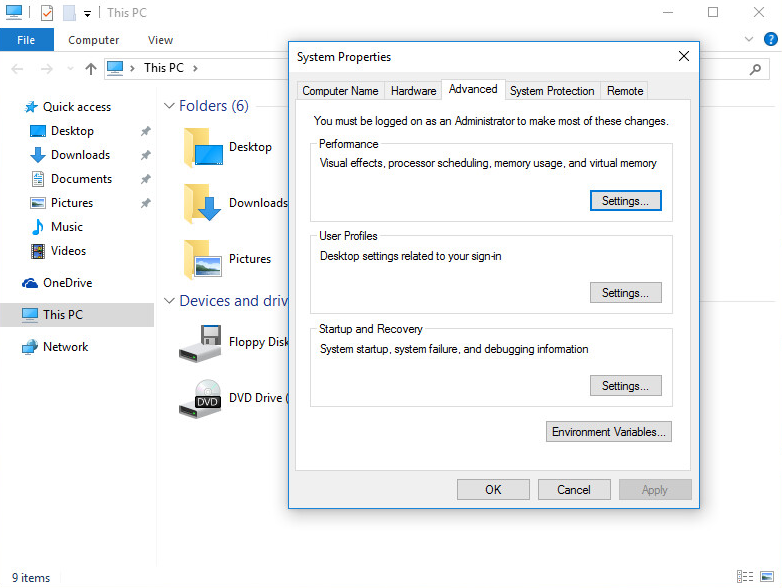
In the System properties window, click Advanced.
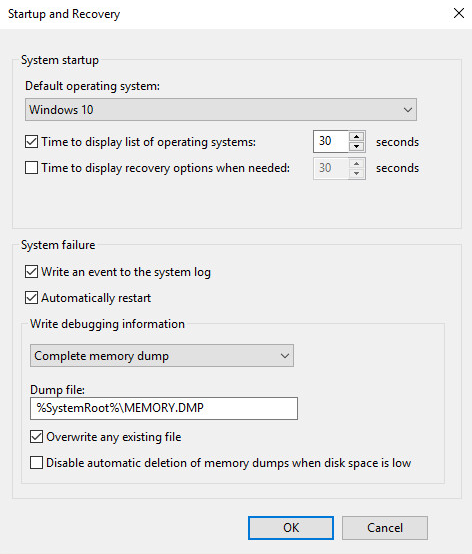
Go to Startup and Recovery > Settings.
Under the System failure > Write debugging information section, select Complete memory dump from the dropdown menu and modify the dump file path as needed.
Click OK and Restart the system.
Reproduce the issue and check for the memory dump in the selected folder.