Onboarding
This article helps you get started with using your new GravityZone product.
To take your first steps in using your GravityZone product, follow the sections below:
First steps
Before you can start using the Bitdefender GravityZone solution, follow these steps:
Check the GravityZone virtual appliance requirements section and then Prerequisites.
Install the GravityZone virtual appliance.
Follow the steps presented in this article to set up GravityZone Control Center, create your account and validate your license keys.
For additional information about the installation process and specific cases, refer to the Installation section.
Note
You will receive the license key via email after you complete your purchase. For more information on licensing, refer to License management
Every time you log in the GravityZone Control Center, you must enter your username and password. To enhance security, you can also enable two-factor authentication for your account, or for any GravityZone accounts that you manage. Two-factor authentication requires entering a six-digit code after your credentials.
The initial setup
Configure endpoint protection and deploy the security agent
This section provides you with the steps required to deploy security agents on your endpoints and customize the level of protection provided for each one by setting up custom installation packages.
Bitdefender Endpoint Security Tools (BEST) is the security agent that monitors and protects the endpoint, and reports the information to GravityZone.
Depending on your needs and current network setup, BEST may be deployed in multiple ways.
Follow the steps below to create and deploy a package as efficiently as possible. Refer to the Installation page for in-depth customization options.
Important
Before you start the installation check the prerequisites outlined in Prepare for the installation.
To install BEST, follow these steps:
Log in to your GravityZone console.
Go to the Installation Packages page from the left side menu, under Network.
Click the Create button at the top of the table.
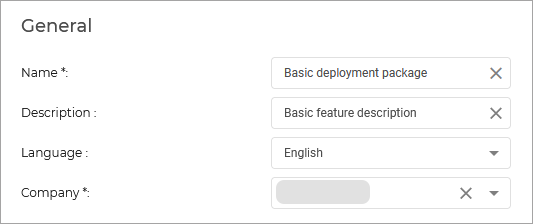
Fill in the information under the General tab:
Scroll down to the Modules section, and select the modules you want to deploy on your endpoints.
Note
You can identify the features you have access to using this feature matrix.
Optional: you can further customize the installation package. Learn more
Scroll down and click the Save button.
Select the newly created package from the list of packages and click Send download links.

Enter the email addresses of the users that will be deploying the security agents on your endpoints, and click Send.
On your endpoints, open the link to download the installation package.
Important
Do not rename the installation file. It may cause errors.
Run the file.
Configure your policies
The above procedure makes use of the default GravityZone policy, which is automatically applied to an endpoint when the BEST agent is deployed.
Some features need to be activated in the policy that is applied to an endpoint. If they are not, the feature will not be active on the endpoint. To enable a feature, you will need to copy and edit the default policy and apply it to the endpoints where you want the feature deployed.
The following features are enabled by default:
Advanced Anti-Exploit
Advanced Threat Control
Bitdefender EDR
Firewall
HyperDetect
Network Attack Defense
The following features are not enabled by default:
Content Control
Device Control
Full Disk Encryption
Integrity Monitoring
Security for Storage
Additionally, the following features require further configuration:
Patch Management
Security for Exchange
You can find what options need to be configured in a policy for each feature in the Feature specific deployment guides.
Running scans
Important
We recommend you first run a full scan after the installation process.
To run a full scan, follow these steps:
In the left side of the console, click Network.
Select the endpoints you want to scan.
Click
 Tasks and then Scan.
In the Type category, select Full Scan.
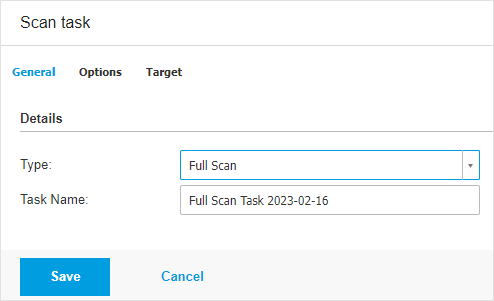
Save your changes.
Security monitoring
Once you have finished configuring protection for all your endpoints, you can monitor and keep track of security events and incidents by using the following resources:
Important
The data and endpoints under the sections described below is only available if the security agent has been deployed on your endpoints.
Check endpoint statuses
The Network page provides several features for exploring and managing all endpoints available in your network. It also enables you to run tasks remotely and to generate reports.
You can find a list of your managed endpoints in the network page, organised into folders, companies or networks. Information is displayed for each endpoint including an icon that indicates the status of the endpoint. Refer to Network object types and statuses for a list with all available icon types and statuses.
For detailed status information regarding your endpoints, refer to the Checking the endpoints status section.
Check Reports
Control Center allows you to create and view centralized reports that can be used for multiple purposes, such as:
Monitoring and ensuring compliance with the organization's security policies.
Checking and assessing network security status.
Identifying network security issues, threats and vulnerabilities.
Monitoring security incidents and malware activity.
Providing upper management with easy-to-interpret data on network security.
Several different report types are available so that you can easily get the information you need. The information is presented as easy-to-read interactive charts and tables, allowing you to quickly check the network security status and identify security issues.
For more information on creating, scheduling, and viewing reports, refer to Reports.
Create portlets
Portlets provide you with security event information from your environment. You can customize the portlets and create your own, specifying the protection mechanism you would like the monitor and the time interval you would like to see in the data.
To create a portlet follow the steps below:
Log in to GravityZone Control Center.
Go to the Dashboard page from the left side menu.
Click the Add portlet button on the upper right side of the page.
Select the portlet you wish to create.
Note
You can customize the Dashboard page by dragging and dropping a portlet to the position that best suits your needs.
There is a portlet available for each report type provided by the console.
Check Notifications
Notifications keep you up to date with the security status of your environment.
Click the  Notification icon on the right side of the Control Center to display the Notification area.
To configure notifications, click the  Configure button and select the type of notifications you want to receive. For help with configuration settings, refer to Configuring notification settings.
Troubleshooting and support
If you encounter any difficulties while using GravityZone, refer to the dedicated troubleshooting chapters below:
If you haven't found your answer, you can always check our FAQ page or contact the Bitdefender Enterprise Support.