VMware vCenter
Integrate with vCenter Server
You can integrate GravityZone with one or multiple vCenter Server systems.
vCenter Server systems in Linked Mode must be added separately to the Control Center.
To set up integration with a vCenter Server follow these steps:
Go to the Configuration page from the left side menu in Control Center and navigate to Virtualization Providers > Management Platforms.
Click the
 Add button at the upper side of the table and choose vCenter Server from the menu. A configuration window will appear.
Specify the vCenter Server details:
Name of the vCenter Server system in the Control Center
Hostname or IP address of the vCenter Server system
vCenter Server port (the default is
443)
Specify the credentials to be used to authenticate with the vCenter Server.
You can choose to use the credentials provided for integration with Active Directory or a different set of credentials.
The user whose credentials you provide must have root or administrator permissions in the vCenter Server.
Choose the VMware platform installed in your environment and configure the settings accordingly:
None. Select this option for NSX-T or if there is no VMware specific platform installed and click Save. Accepting the self signed security certificate is required for the integration.
To configure NSX-T Manager integration and apply endpoint protection to your VMs through the GravityZone Guest Introspection policy, refer to Manage endpoint protection in VMware NSX-T.
NSX-V. Specify the details of the NSX Manager integrated with the vCenter Server:
Hostname or IP address of the NSX Manager
NSX Manager port (the default is
443)Username and password used to authenticate on the NSX Manager.
These credentials will be saved on the protected entity, not in the Credentials Manager.
Select the Tag if a virus is found check box to use the default NSX security tags when malware is found on the virtual machine.
A machine may be tagged with three different security tags, depending on the risk level of the threat:
ANTI_VIRUS.VirusFound.threat=low, applying on the machine when Bitdefender finds low risk malware, which it can delete.ANTI_VIRUS.VirusFound.threat=medium, applying on the machine if Bitdefender cannot delete the infected files, but instead it disinfects them.ANTI_VIRUS.VirusFound.threat=high, applying on the machine if Bitdefender can neither delete, nor disinfect the infected files, but blocks access to them.
When threats of different risk levels are detected on the same machine, all associated tags will be applied. For example, a machine on which high and low risk malware were found will have both security tags.
Note
You can find the security tags in VMware vSphere, under the Networking > Security > NSX Managers > NSX Manager > Manage > Security Tags tab.
Even though you can create as many tags as you want, only the three mentioned tags work with Bitdefender.
Restrict policy assignment from the network view. Use this option to control the network administrators permission to change the virtual machines policies via the Computers and Virtual Machines view in the Network page. When this option is selected, administrators can change the virtual machines policies only from the Virtual Machines view of the network inventory.
Click Save. You will be asked to accept the security certificates for vCenter Server and NSX Manager. These certificates ensure a secure communication between GravityZone and VMware components, resolving the risk of man-in-the-middle attacks
You can verify if the correct certificates were installed by checking the browser's site information for each VMware component against the certificate information displayed in Control Center.
Select the check boxes to accept using the certificates.
Click Save. You will be able to view the vCenter Server in the active integrations list.
If you use the NSX-V platform:
Go to the Update > Components tab.
Download and then publish the Security Server (VMware with NSX) package. For more information on how to update GravityZone components, refer to Update GravityZone.
Go to the Configuration > Virtualization Providers tab.
In the Action column, click the
 Register button corresponding to the vCenter integrated with NSX to register the Bitdefender service with VMware NSX Manager.
Warning
When the security certificate has expired and the vCenter tries to synchronize, a pop-up will prompt you to update it. Enter the configuration window of the vCenter Server integration, click Save, accept the new certificates and then click Save again.
After registration, Bitdefender adds to VMware vSphere console:
Bitdefender service
Bitdefender service manager
Three new default service profiles for permissive, normal and aggressive scanning modes.
Note
You can also view these service profiles in the Policies page of Control Center. Click the Columns button at the upper-right side of the right pane to view additional information.
Afterwards, you can view that the vCenter Server is synchronizing. Wait for a couple of minutes until synchronization finishes.
Protect VDIs when using VMware Horizon View and GravityZone SVE
This section explains how to protect the Virtual Desktop infrastructure (VDI) in a VMware environment with the use of VMware Horizon View and GravityZone Security for Virtualized Environments.
Overview
VMware Horizon View delivers desktop services from your datacenter to enable end-user freedom and IT management and control.
Desktop and application virtualization offers IT a more streamlined, secure way to manage users and provide agile, on-demand desktop services.
Bitdefender GravityZone Security for Virtualized Environments (SVE), is an encompassing security solution for virtualized datacenters, protecting virtualized servers and desktops on Windows and Linux systems.
GravityZone SVE offers protection through Security Server and BEST. The Security Server is a dedicated virtual machine that de-duplicates and centralizes most of the antimalware functionality of antimalware clients, acting as a scan server. BEST is the component that must installed on the virtual machines you want to protect.
Prerequisites
The prerequisites for GravityZone SVE are:
ESXi host
vCenter Server
Control Center with the GravityZone SVE service
Security Server (VMware version) deployed on at least on ESXi Host
BEST installed on golden image
How to protect the VDIs
To protect the VDIs, you must install BEST on every virtual machine.
BEST offloads anti-malware processing to the Security Server via TCP/IP. Network load will be at a minimum level due to the BEST local cache and the centralized cache on the Security Server. BEST employs a local cache that is prepopulated based on its environment variables. Therefore it will be able to offload the scanning of only what is required, while excluding objects that are safe.
To protect the VDIs, follow these steps:
Integrate Control Center with vCenter:
Open the GravityZone Control Center.
Go to the Configuration page from the left side menu.
Select the Virtualization tab.
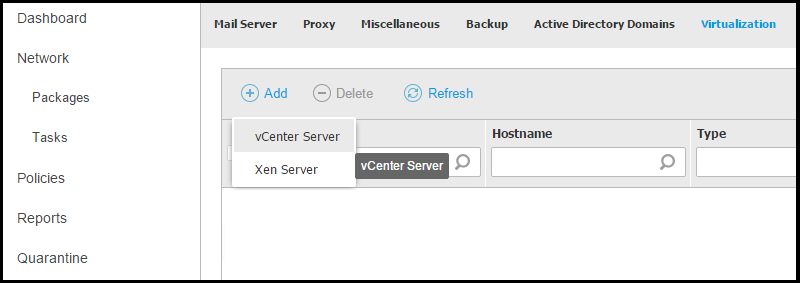
Click the Add button from the upper left side of the table and select vCenter Server from the menu.
Install the Security Server on an ESXi hosts.
Go to the Network page from the left side menu and select Virtual Machines service.
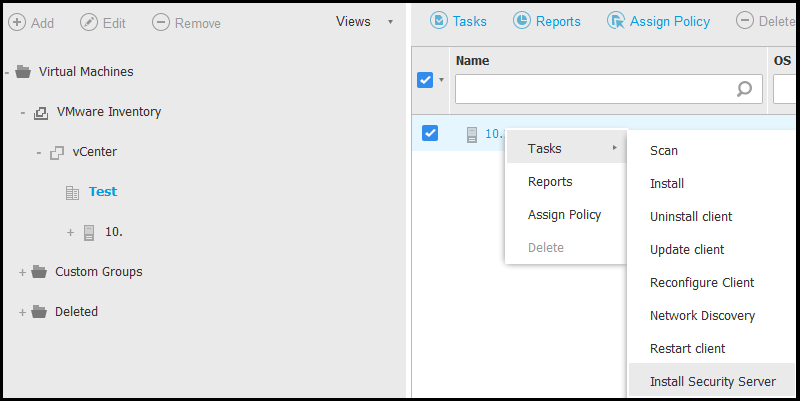
Select the host(s) on which you deploy the Security Server.
Right-click to access the contextual menu and select the Tasks > Install Security Server option. The Security Server Installation window is displayed.
In the General tab, select one of the following options:
Use common settings for all Security Servers. Using this option while deploying multiple Security Server instances requires the target hosts to share the same storage and have identical hardware specs. In addition, all Security Servers will be part of the same management network segment and they will be automatically configured by DHCP.
Note
If DHCP is used, make sure all IPs assigned to Security Servers are reserved.
Configure each Security Server differently. This option allows you to have different values for each setting of the Security Servers.
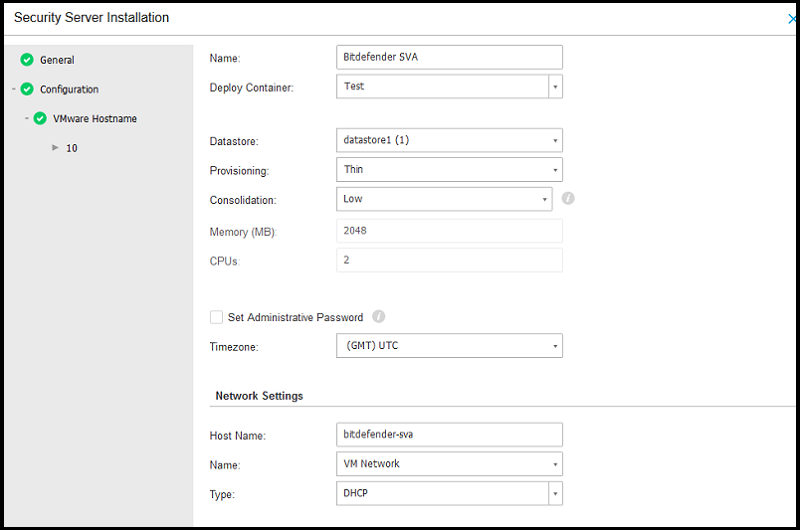
Click Next to configure the Security Server instance(s):
Name – The name of the Security Server which is displayed in the VMware Inventory.
Deploy Container – the vCenter server parent container for the new Security Server.
Provisioning – the VMDK provisioning type.
Consolidation – the hardware resources assignation. If the Custom level is selected, the administrator can specify the amount of CPU and Memory.
Set Administrative Password – at the time of the deployment the administrator can change the Security Server root password. If this option is not selected, the root account will have the default password and the only way this can be changed later is by accessing the VM's console.
Timezone – the time zone setting. The clock is automatically synchronized by the ntpd service.
Network Settings – the VMs management network settings.
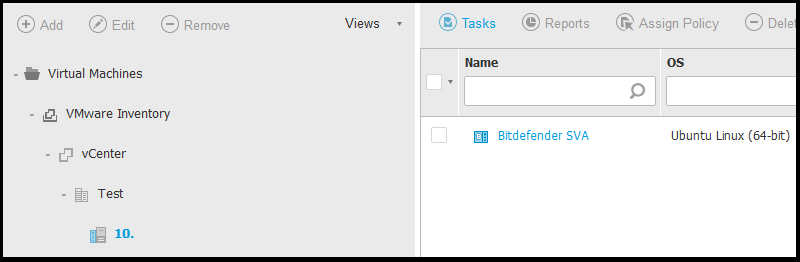
After all the configurations are done, if you have different settings for your Security Servers, click Next to proceed with the next instance, otherwise click Save. The deployment task starts.
Note
You can view the deployment task progress in the Network > Tasks page. Check the task status, by clicking the link in the Status column. After the deployment task reaches the status In progress 100%, the new Security Server is powered on and the boot process starts. Allow up to 3 minutes for the boot operation to complete. The deployment task will display the Finished status after the management agent on the Security Server synchronizes with GravityZone for the first time, announcing the administrator the the new Security Server is operational.
Create a virtual machine (with Windows 7, for example) with all the programs needed by users.
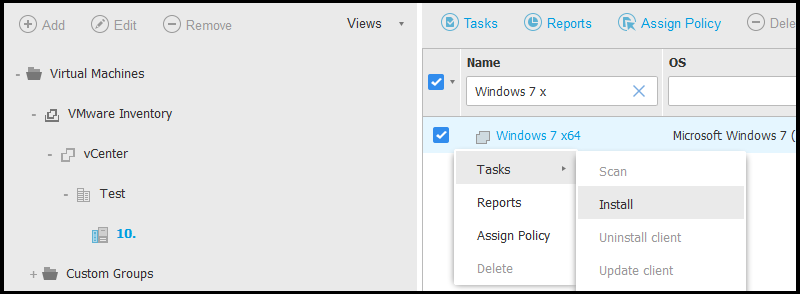
Deploy BEST on this new virtual machine:
Select the VM on which you deploy BEST.
Right-click to access the contextual menu and select the Tasks > Install option. The BEST Installation window is displayed.
Under the Credentials Manager section, specify the administrative credentials required for remote authentication on the virtual machine.
Note
If using VMware Horizon View Persona Management, it is recommended to configure Active Directory Group Policy to exclude the following Bitdefender processes (without the full path):
bdredline.exeepag.exeepconsole.exeepintegrationservice.exeepprotectedservice.exeepsecurityservice.exeepupdateservice.exeepupdateserver.exe
For details, download the official VMware Horizon documentation.
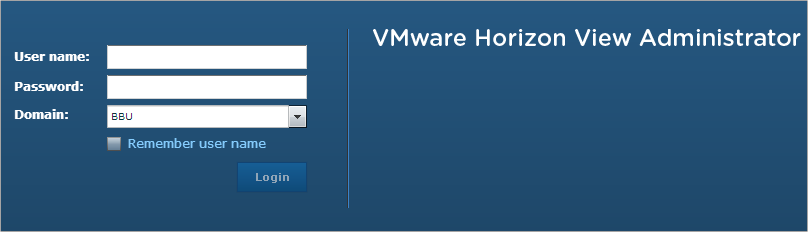
Configure the VMware Horizon View: connect to VMware Horizon View Administrator and create the pools for the VDIs.
Once VMware Horizon View is configured and a user is trying to connect from a VMware View Client to a VDI, new Virtual Desktops are created.
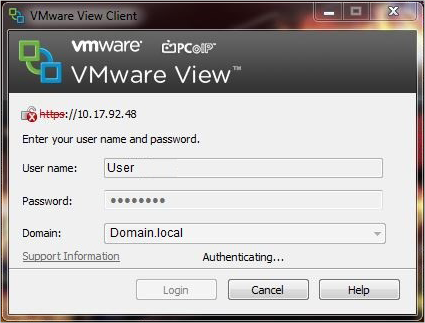
All the VDIs from VMware Horizon View will be protected.
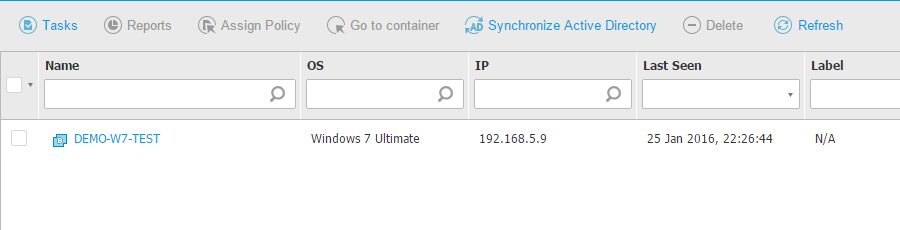
To be sure that the VDIs are protected, you can:
Try an EICAR test. Copy the 68 bytes string, in a
.txtfile and save it. If the VDI is protected, when you will reopen the.txtfile, it will be empty. In addition, the Dashboard portlets and the reports related to Antimalware will show malware presence on the VDI.On the Security Server you can check if your VDI is connected to it. The connection should be established on port
7081:netstat | grep ESTABLISHEDtcp6 0 0 gz2svamp.tstlabs:7081 vdi-01.tstlabs.bi:65299 ESTABLISHED