Profiles
In this section you can create, modify and delete usage profiles for mobile devices.
Usage profiles help you push Wi-Fi and VPN settings and enforce web access control on managed mobile devices.
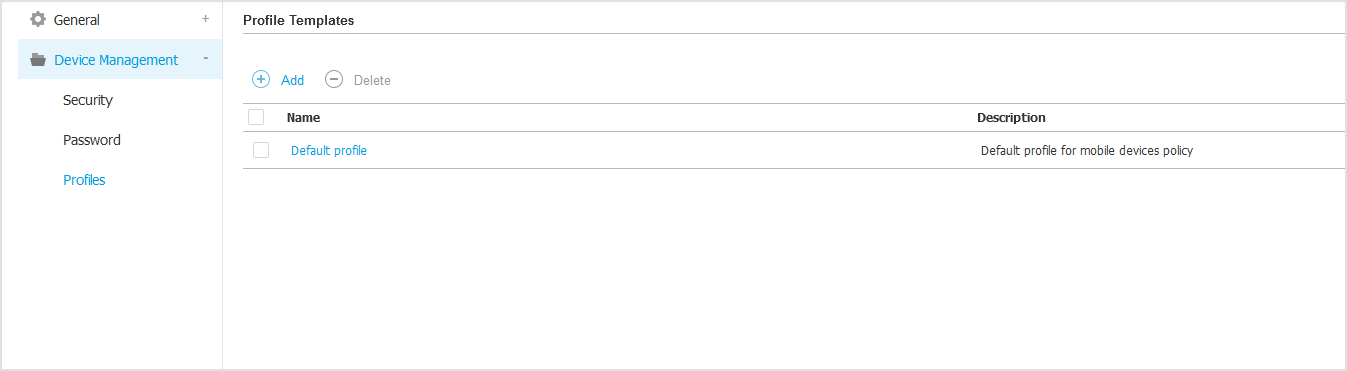
You can configure one or several profiles, but only one can be active at a time on a device.
If you configure only one profile, that profile is automatically applied to all devices the policy is assigned to.
If you configure several profiles, the first in the list is automatically applied to all devices the policy is assigned to.
Mobile device users can view the assigned profiles and the settings configured for each profile in the GravityZone Mobile Client application. Users cannot modify existing settings in a profile, but they can switch between profiles if several are available.
Note
Profile switching requires Internet connectivity.
To create a new profile:
Click the
 Add button at the right side of the table. The profile configuration page is displayed.
Configure the profile settings as needed. For detailed information, refer to:
???
Networks
Click Save. The new profile is added to the list.
To delete one or several profiles, select their corresponding check boxes and click the  Delete button at the right side of the table.
To modify a profile, click its name, change settings as needed and click Save.
Details
The Details page contains general information regarding the profile:
Name.
Enter the desired profile name. Profiles should have suggestive names so that you or other administrator can quickly identify them.
Description.
Enter a detailed profile description. This option may help administrators easily identify a profile from several others.
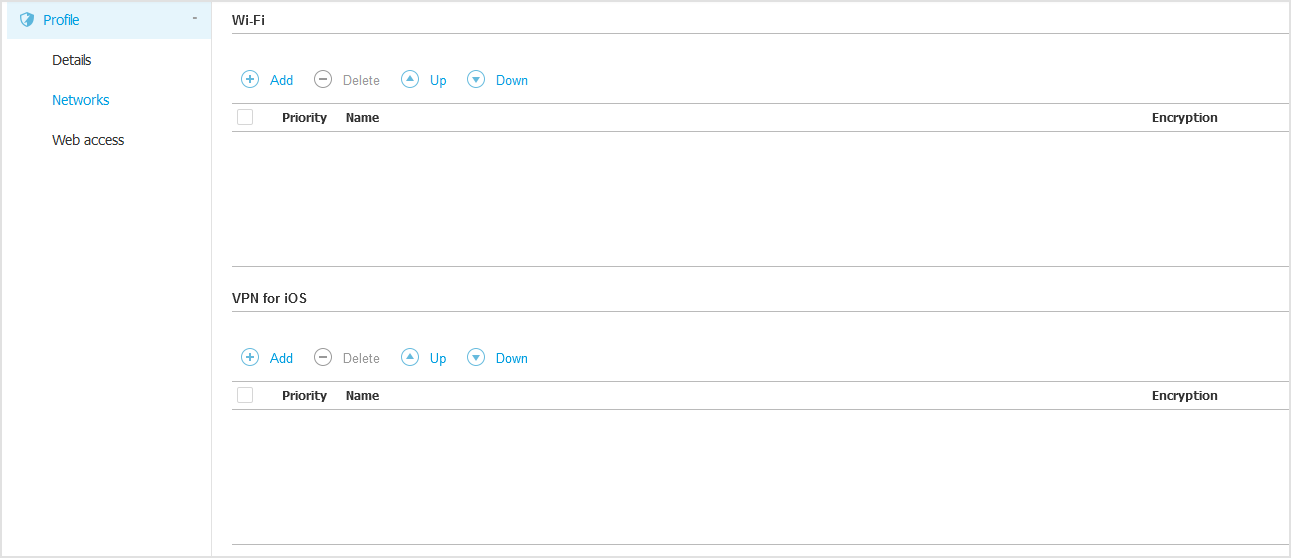
Networks
In this section you can specify the settings of one or several Wi-Fi and VPN networks. The VPN settings are available only for iOS devices.
Important
Before defining the Wi-Fi and VPN connections, make sure you have all the necessary information at hand (passwords, proxy settings etc.).
The mobile devices assigned with the corresponding profile will automatically connect to the defined network, when it is in range. You can set the priority when several networks are created, taking into account that only one network can be used at a time. When the first network is not available, the mobile device will connect to the second one, and so on.
To set the networks priority:
Select the check box of the desired network.
Use the priority buttons at the right side of the table:
Click the
 Up button to promote the selected network.
Click the
 Down button to demote it.
Wi-Fi
You can add as many Wi-Fi networks as you need.
To add a Wi-Fi network:
In the Wi-Fi section, click the
Add button at the right side of the table.A configuration window is displayed.
Under the General tab, you can configure the details of the Wi-Fi connection:
Name (SSID).
Enter the name of the new Wi-Fi network.
Security.
Select the option corresponding to the Wi-Fi network security level:
None.
Choose this option when the Wi-Fi connection is public (no credentials required).
WEP.
Choose this option to set a Wireless Encryption Protocol (WEP) connection. Enter the required password for this type of connection in the corresponding field displayed below.
WPA/WPA2 Personal.
Choose this option if the Wi-Fi network is secured using Wi-Fi Protected Access (WPA). Enter the required password for this type of connection in the corresponding field displayed below.
Under the TCP/IP you can configure the TCP/IP settings for the Wi-Fi connection.
Each Wi-Fi connection can use IPv4 or IPv6 or both.
Configure IPv4.
If you want to use the IPv4 method, select the IP assignment method from the corresponding menu:
DHCP: if the IP address is assigned automatically by a DHCP server.
If needed, provide the DHCP Client ID in the subsequent field.
Disabled: select this option if you do not want to use the IPv4 protocol.
Configure IPv6.
If you want to use the IPv6 method, select the IP assignment method from the corresponding menu:
DHCP: if the IP address is assigned automatically by a DHCP server.
Disabled: select this option if you do not want to use the IPv6 protocol.
DNS Servers.
Enter the address of at least one DNS server for the network.
Under the Proxy tab, configure the proxy settings for the Wi-Fi connection. Select the desired proxy configuration method from the Type menu:
Off.
Choose this option if the Wi-Fi network has no proxy settings.
Manual.
Choose this option to manually specify the proxy settings. Enter the hostname of the proxy server and the port on which it listens for connections. If the proxy server requires authentication, select the Authentication check box and provide the user name and the password in the subsequent fields.
Automatic.
Choose this option to retrieve the proxy settings from a Proxy Auto-Configuration (PAC) file published in the local network. Enter the PAC file address in the URL field.
Click Save.
The new Wi-Fi connection is added to the list.
VPN for iOS
You can add as many VPNs as you need.
To add a VPN:
In the VPN for iOS section, click the
Add button at the right side of the table. A configuration window is displayed.Define the VPN settings in the VPN Connection window:
Click Save. The new VPN connection will be added to the list.
General:
Name
Enter the name of the VPN connection.
Encryption
The available authentication protocol for this connection type is IPSec, which requires user authentication by password and machine authentication by shared secret.
Server
Enter the VPN server address.
User
Enter the VPN user name.
Password
Enter the VPN password.
Group Name
Enter the group name.
Secret
Enter the pre-shared key.
Proxy:
In this section you can configure the proxy settings for the VPN connection. Select the desired proxy configuration method from the Type menu:
Off
Choose this option if the VPN connection has no proxy settings.
Manual
This option allows you to manually specify the proxy settings:
Server: enter the proxy host name.
Port: enter the proxy port number.
If the proxy server requires authentication, select the Authentication check box and provide the user name and the password in the subsequent fields.
Automatic
Select this option to retrieve the proxy settings from a Proxy Auto-Configuration (PAC) file published in the local network. Enter the PAC file address in the URL field.
To delete one or several networks, select their corresponding check boxes and click the Delete button at the right side of the table. To modify a network, click its name, change settings as needed and click Save.
Web access
In this section you can configure the web access control for Android and iOS devices.
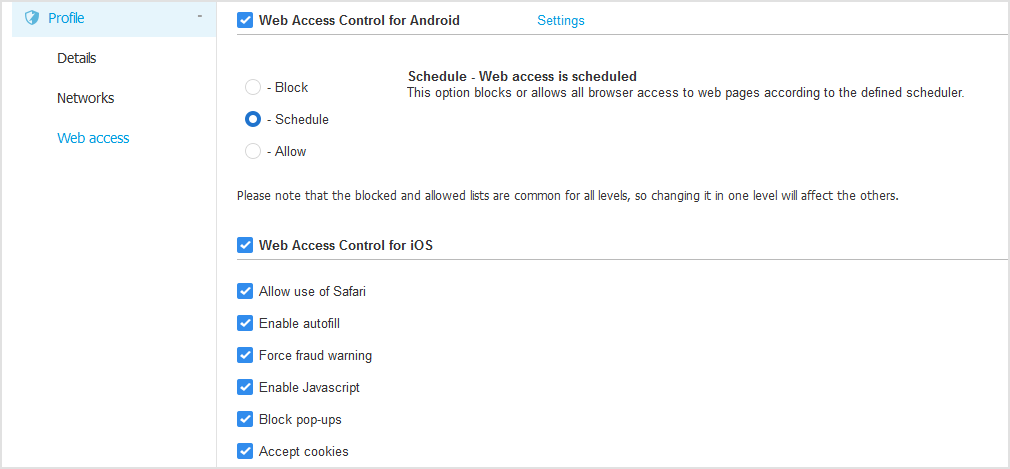
Web Access Control for Android
Enable this option to filter web access for Chrome and the built-in Android browser. You can set time restrictions on web access and also explicitly allow or block access to specific web pages.
The web pages blocked by Web Access Control are not displayed in the browser. Instead, a default web page is displayed informing the user that the requested web page has been blocked by Web Access Control.
You have three configuration options:
Select Allow to always grant web access.
Select Block to always deny web access.
Select Schedule to enable time restrictions on web access upon a detailed schedule.
Either if you choose to allow or block the web access, you can define exclusions to these actions for entire web categories or only for specific web addresses.
Click Settings to configure your web access schedule and exclusions.
To restrict Internet access to certain times of day on a weekly basis:
Select from the grid the time intervals during which you want Internet access to be blocked.
You can click individual cells, or you can click and drag to cover longer periods. Click again in the cell to reverse the selection.
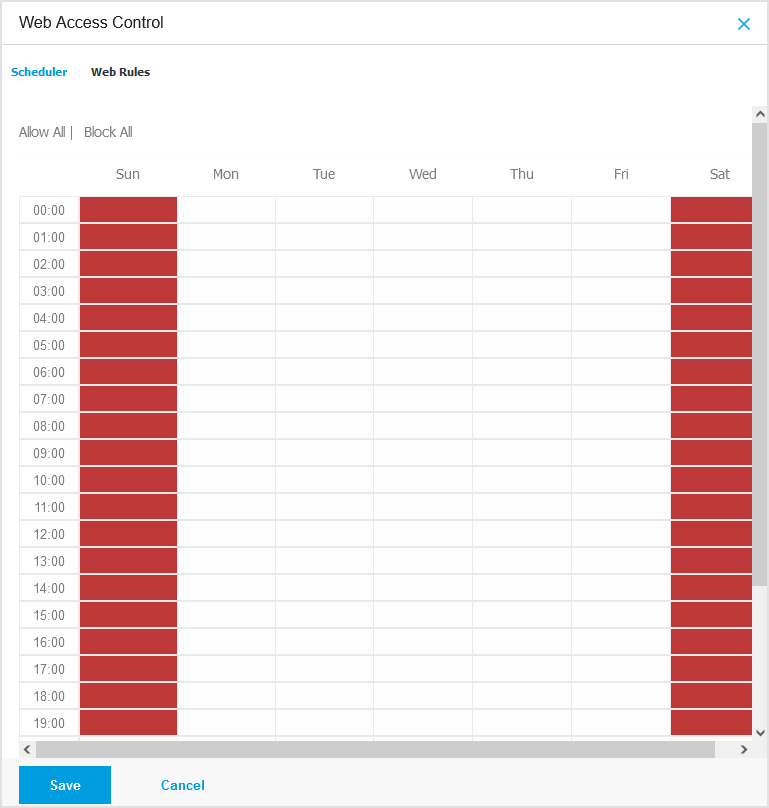
To start a new selection, click Allow All or Block all, depending on the type of restriction you wish to implement.
Click Save.
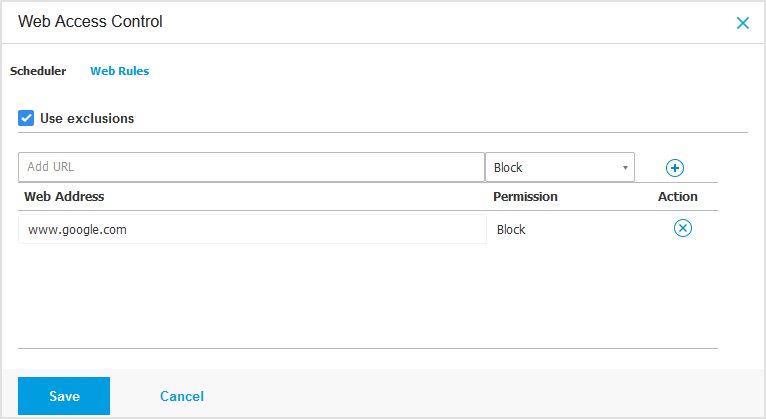
You can also define web rules to explicitly block or allow certain web addresses, overriding the existing Web Access Control settings. Users will be able, for example, to access a specific webpage also when the web browsing is blocked by Web Access Control.
To create a web rule:
Select Use exclusions to enable web exclusions.
Note
This feature is available only for accounts with management rights.
Enter the address you want to allow or block in the Web Address field.
Select Allow or Block from the Permission menu.
Click the
 Add button at the right side of the table to add the address to the exclusions list.
Click Save.
To edit a web rule:
Click the web address you want to edit.
Modify the existing URL.
Click Save.
To remove a web rule:
Move the cursor over the web address you want to remove.
Click the
 Delete button.
Click Save.
Use wildcards to define web address patterns:
Asterisk (*) substitutes for zero or more characters.
Question mark (?) substitutes for exactly one character. You can use several question marks to define any combination of a specific number of characters. For example, ??? substitutes for any combination of exactly three characters.
In the following table, you can find several sample syntaxes for specifying web addresses.
Syntax | Applicability |
|---|---|
| Any website or web page starting with The rule will not apply to the subdomains of the specified website, such as |
| Any website ending in |
| Any website or web page whose address contains the specified string. |
| Any website having the |
| Any web address starting with |
Important
Web Access Control for Android works only up to Android 5, and only with Chrome and the built-in Android browser.
Web Access Control for iOS
Enable this option to centrally manage the settings of the built-in iOS browser (Safari).
Mobile device users will no longer be able to change the corresponding settings on their device.
Allow use of Safari.
This option helps you control the use of Safari browser on mobile devices.
Disabling the option removes the Safari shortcut from the iOS interface, thus preventing users from accessing the Internet via Safari.
Enable auto-fill.
Disable this option if you want to prevent the browser from storing form entries, which may include sensitive information.
Force fraud warning.
Select this option to ensure that users are warned when accessing fraudulent web pages.
Enable Javascript.
Disable this option if you want Safari to ignore javascript on websites.
Block pop-ups.
Select this option to prevent pop-up windows from opening automatically.
Accept cookies.
Safari allows cookies by default.
Disable this option if you want to prevent websites from storing browsing information.
Important
Web Access Control for iOS is not supported starting with iOS 13.