Sorting, filtering and searching for endpoints
Sorting, filtering, and searching entities
Depending on the number of entities in your Network section, the right side pane table can span through several pages (only 20 entries are displayed per page by default). To move through the pages, use the navigation buttons at the bottom of the table. To change the number of entries displayed on a page, select an option from the menu next to the navigation buttons.
If there are too many entries, you can use the search boxes under the column headers or the Filters menu at the upper side of the page to display only the entities you are interested in.
For example, you can search for a specific computer or choose to view only the managed computers.
Sorting computers
To sort data by a specific column, click the column headers.
For example, if you want to order computers by name, click the Name heading.
If you click the heading again, the computers will be displayed in reverse order.

You can sort items by name, OS version, IP, date and time of the last communication with GravityZone , and label.
Filtering computers
To filter your network entities, use the Filters menu from the upper-side of the network panes area.
Select the group that you want in the left-side pane.
Click the Filters menu at the upper-side of the network panes area.
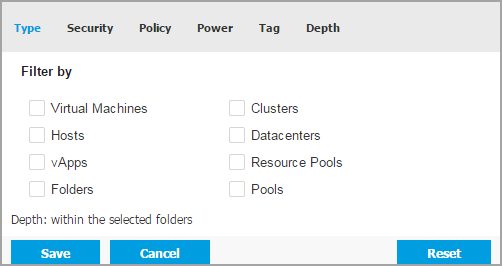
Use the filter criteria as follows:
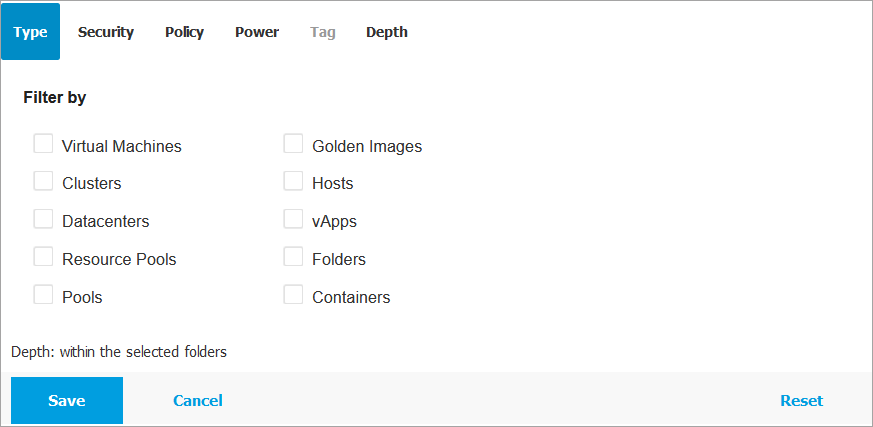
Type. Select the type of entities you want to display (computers, virtual machines, folders).
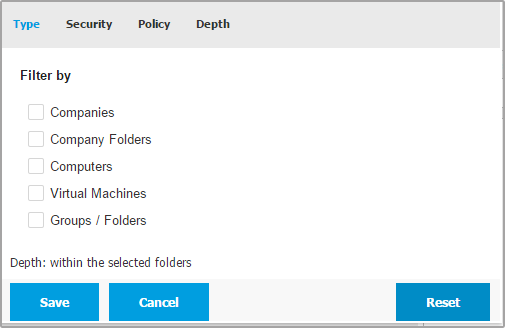
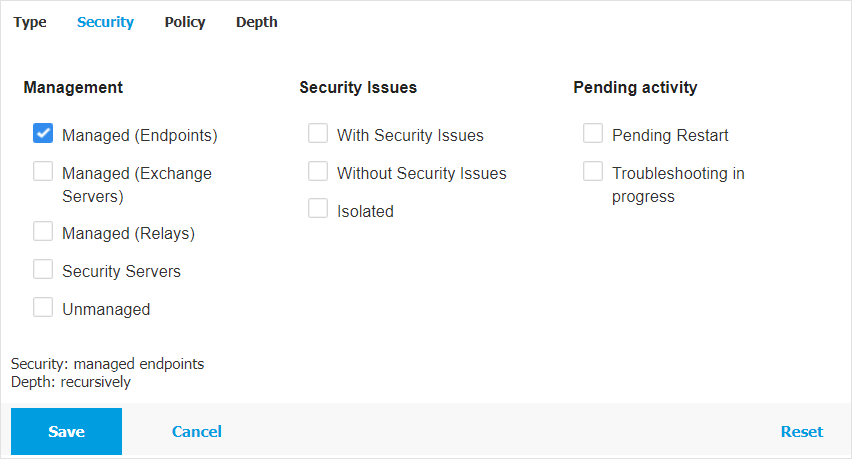
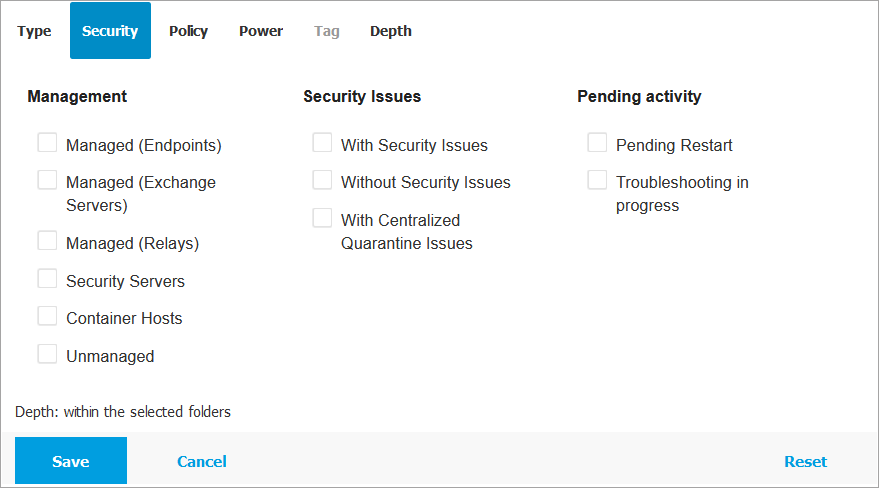
Security.
Choose to display computers by protection management, security status or pending activity. Options displayed may differ depending on active licenses.
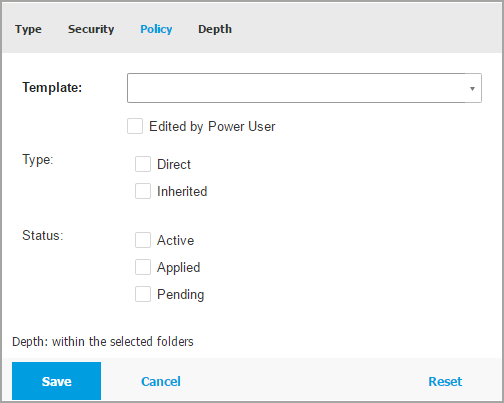
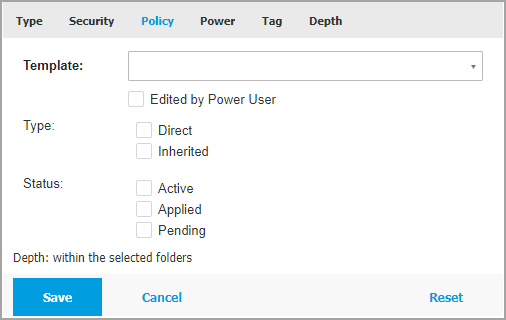
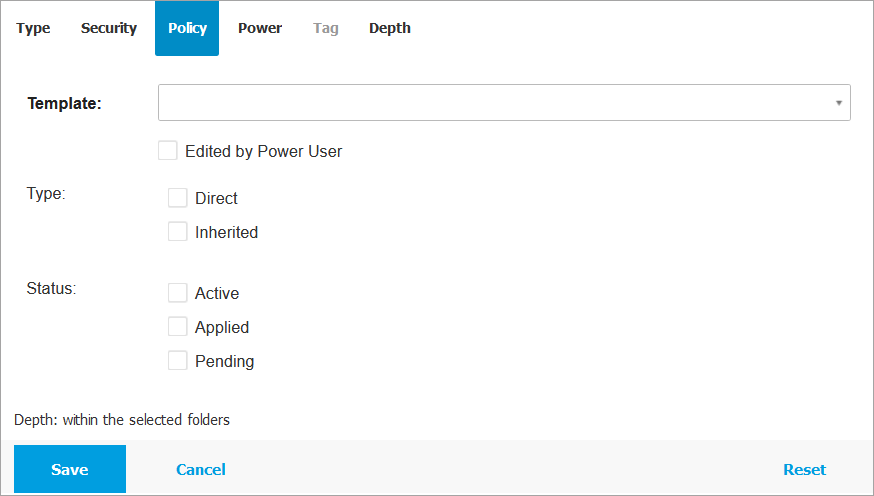
Policy.
Select the policy template you want to filter the computers by, the policy assignment type (Direct or Inherited), as well as the policy assignment status (Active, Applied or Pending).
You can also choose to display only entities with policies edited in the Power User mode.
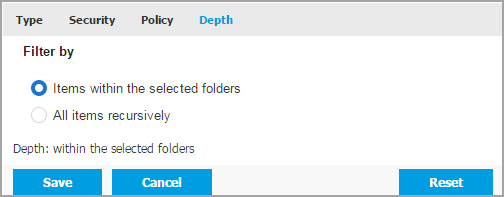
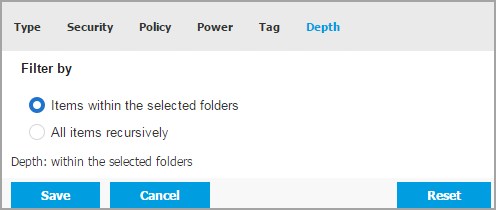
Depth.
When managing a tree-structured network, computers placed in sub-groups are not displayed when selecting the root group.
Select All items recursively to view all the computers included in the current group and all its sub-groups.
When choosing to view all items recursively, Control Center displays them in a plain list. To find the location of an item, select the item you are interested in, and then click the
 Go to container button at the upper side of the table. You will be redirected to the parent container of the selected item.
Note
You can view all selected filter criteria in the lower part of the Filters window.
If you want to clear all filters, click the Reset button.
Click Save to filter the computers by the selected criteria. The filter remains active in the Network page until you log out or reset the filter.
Searching for computers
This is how you search for network entities:
Select the desired group in the left-side pane.
Enter the search term in the corresponding box under the column headers from the right-side pane. For example, enter the IP of the computer you are looking for in the IP field. Only the matching computer will appear in the table.
Clear the search box to display the full list of computers.

Sorting, filtering, and searching for virtual machines
Depending on the number of virtual machines, the virtual machines table can span several pages (only 20 entries are displayed per page by default).To move through the pages, use the navigation buttons at the bottom of the table. To change the number of entries displayed on a page, select an option from the menu next to the navigation buttons.
If there are too many entries, you can use the search boxes under the column headers or the Filters menu at the upper side of the page to display only the entities you are interested in. For example, you can search for a specific virtual machine or choose to view only the managed virtual machines.
Sorting virtual machines
To sort data by a specific column, click column headers.
For example, if you want to order virtual machines by name, click the Name heading.
If you click the heading again, the virtual machines will be displayed in reverse order.

Filtering virtual machines
Select the group that you want in the left-side pane.
Click the Filters menu at the upper-side of the network panes area.
Use the filter criteria as follows:
Type.
Select the type of virtual entities to be displayed.
Security.
Policy.
Select the policy template you want to filter the virtual machines by, the policy assignment type (Direct or Inherited), as well as the policy assignment status (Active, Applied or Pending).
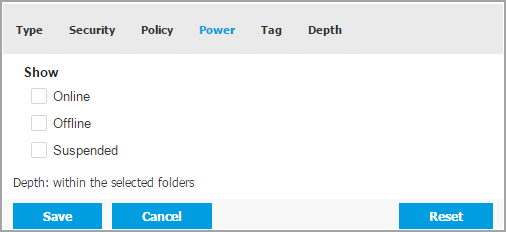
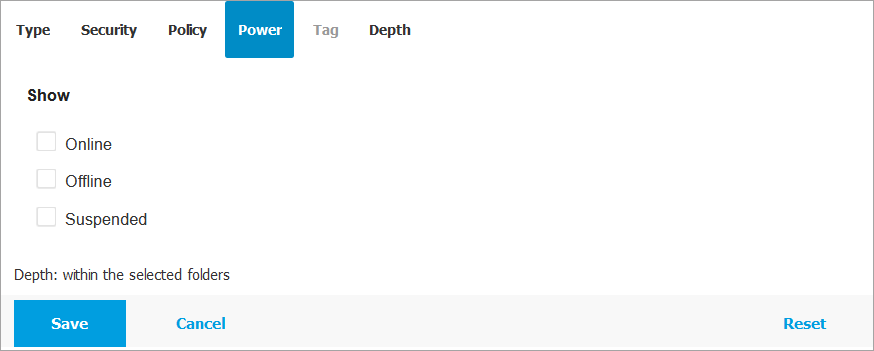
Power.
You can choose to show between online, offline and suspended virtual machines.
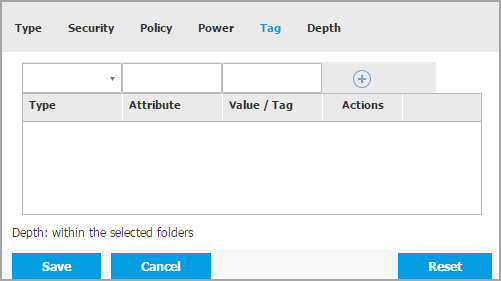
Tags.
You can choose to filter the virtual machines by tags and attributes you have defined in your virtualization environment.
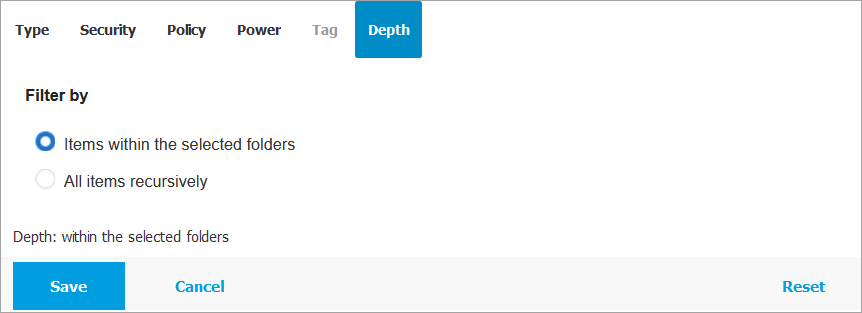
Depth.
When managing a tree-structure virtual machines network, virtual machines placed in sub-groups are not displayed by default.
Select All items recursively to view all virtual machines included in the current group and in its sub-groups.
Note
Click Reset to clear the filter and display all virtual machines.
Click Save to filter the virtual machines by the selected criteria.
Searching for virtual machines
Select the desired virtual machine in the left-side pane.
Enter the search term in the corresponding box under the column headers (Name, OS or IP) from the right-side pane. For example, enter the IP of the virtual machine you are looking for in the IP field. Only the matching virtual machine will appear in the table.
Clear the search box to display the full list of virtual machines.
Sorting, filtering, and searching for containers
Depending on the number of endpoints, the container host table can span several pages (only 20 entries are displayed per page by default). To move through the pages, use the navigation buttons at the bottom of the table. To change the number of entries displayed on a page, select an option from the menu next to the navigation buttons.
If there are too many entries, you can use the Filters menu to display only the entities you are interested in. For example, you can search for a specific container or choose to view only the managed virtual machines.
Sorting containers
To sort data by a specific column, click the  column's header. This will reorganize the rows based on the values in that column.
For example, if you want to order containers by name, click the Name heading.
If you click the heading again, the containers will be displayed in reverse order.

Filtering virtual machines
Select the group that you want in the left-side pane.
Click the Filters menu at the upper-side of the network panes area.
Use the filter criteria as follows:
Type - Select the type of virtual entities to be displayed:
Security - Select the type of endpoints you want to be displayed based on security status::
Policy - Select the policy template you want to filter the virtual machines by, as well as the policy assignment status:
Power - Filter endpoints by power status:
Tag. You can choose to filter the virtual machines by tags and attributes you have defined in your virtualization environment.
Depth. When managing a tree-structure virtual machines network, virtual machines placed in sub-groups are not displayed by default. Select All items recursively to view all virtual machines included in the current group and in its sub-groups.
Note
Click Reset to clear the filter and display all containers.
Click Save to filter the virtual machines by the selected criteria.
Searching for containers
Select the desired container in the left-side pane.
Enter the search term in the corresponding box under the column headers (Name, OS or IP) from the right-side pane. For example, enter the IP of the container you are looking for in the IP field. Only the matching container will appear in the table.
Note
Clear the search box to display the full list of virtual machines.
Sorting, filtering, and searching for mobile devices
The Mobile Devices inventory table can span several pages, depending on the number of users or devices (only 10 entries are displayed per page by default).
To move through the pages, use the navigation buttons at the bottom of the table.
To change the number of entries displayed on a page, select an option from the menu next to the navigation buttons.
If there are too many entries, you can use the filter options to display only the entities you are interested in.
For example, you can search for a specific mobile device or choose to view only the managed devices.
Sorting the mobile devices inventory
To sort data by a specific column, click the column headers.
For example, if you want to order devices by name, click the Name heading.
If you click the heading again, the devices will be displayed in reverse order.
Filtering the mobile devices inventory
Select the group that you want in the left-side pane.
Click the Filters menu at the upper-side of the network panes area.
Use the filter criteria as follows:
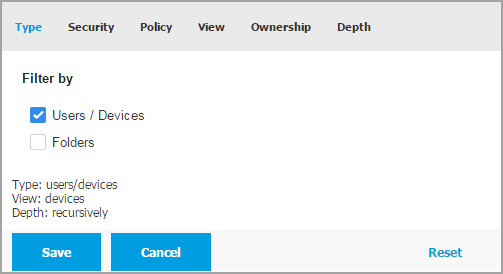
Type.
Select the type of entities you want to display (Users/Devices and Folders).
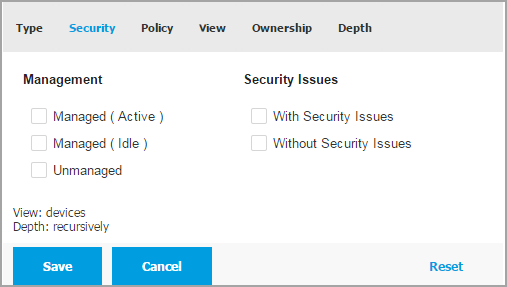
Security.
Choose to display computers by management and security status.
Policy.
Select the policy template you want to filter the mobile devices by, the policy assignment type (Direct or Inherited), as well as the policy assignment status (Active, Applied or Pending).
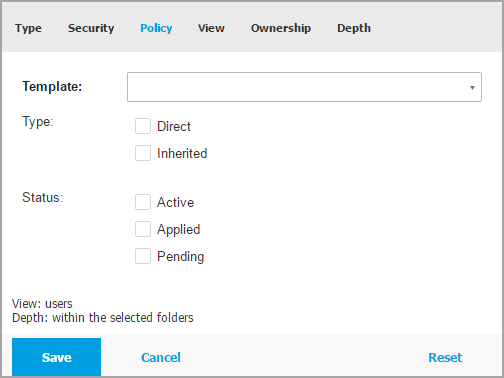
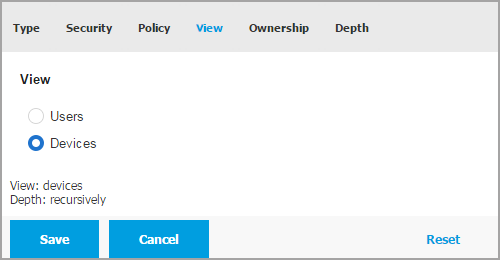
View.
Select Users to display only users in the selected group.
Select Devices to display only devices in the selected group.
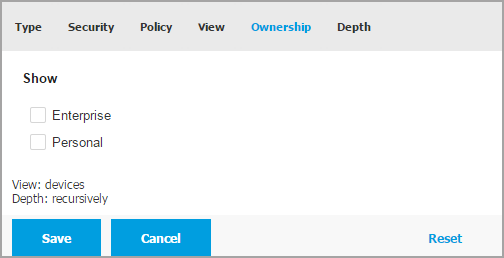
Ownership.
You can filter mobile devices by ownership, choosing to show Enterprise devices or Personal devices. The ownership attribute is defined in the mobile devices details.
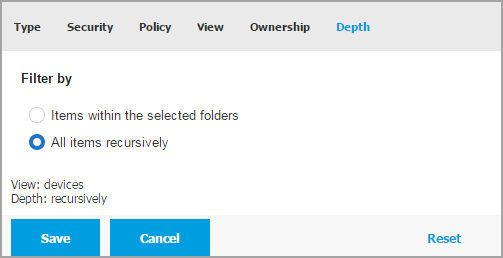
Depth.
When managing a tree-structured network, mobile devices or users placed in sub-groups are not displayed when selecting the root group.
Select All items recursively to view all entities included in the current group and in its sub-groups.
Click Save to filter the mobile devices inventory by the selected criteria.
The filter remains active in the Network page until you log out or reset the filter.
Searching for mobile devices
The right-side pane table provides specific information of users and mobile devices.
You can use the categories available on each column to filter the table contents.
Select the desired group in the left-side pane.
Switch to the view that you want (Users or Mobile Devices) using the Filters menu at the upper-side of the network panes area.
Search for the entities that you want using the search fields under each column header from the right-side pane:
Enter the search term that you want in the corresponding search field.
For example, switch to the Devices view and enter the name of the user you are looking for in the User field.
Only the matching mobile devices will appear in the table.
Select the attribute that you want to search by in the corresponding drop-down list boxes.
For example, switch to the Devices view, click the OS list box and select Android to view only Android mobile devices.
Note
To clear the search term and show all entities, place the mouse cursor over the corresponding box and click the
 icon.
icon.