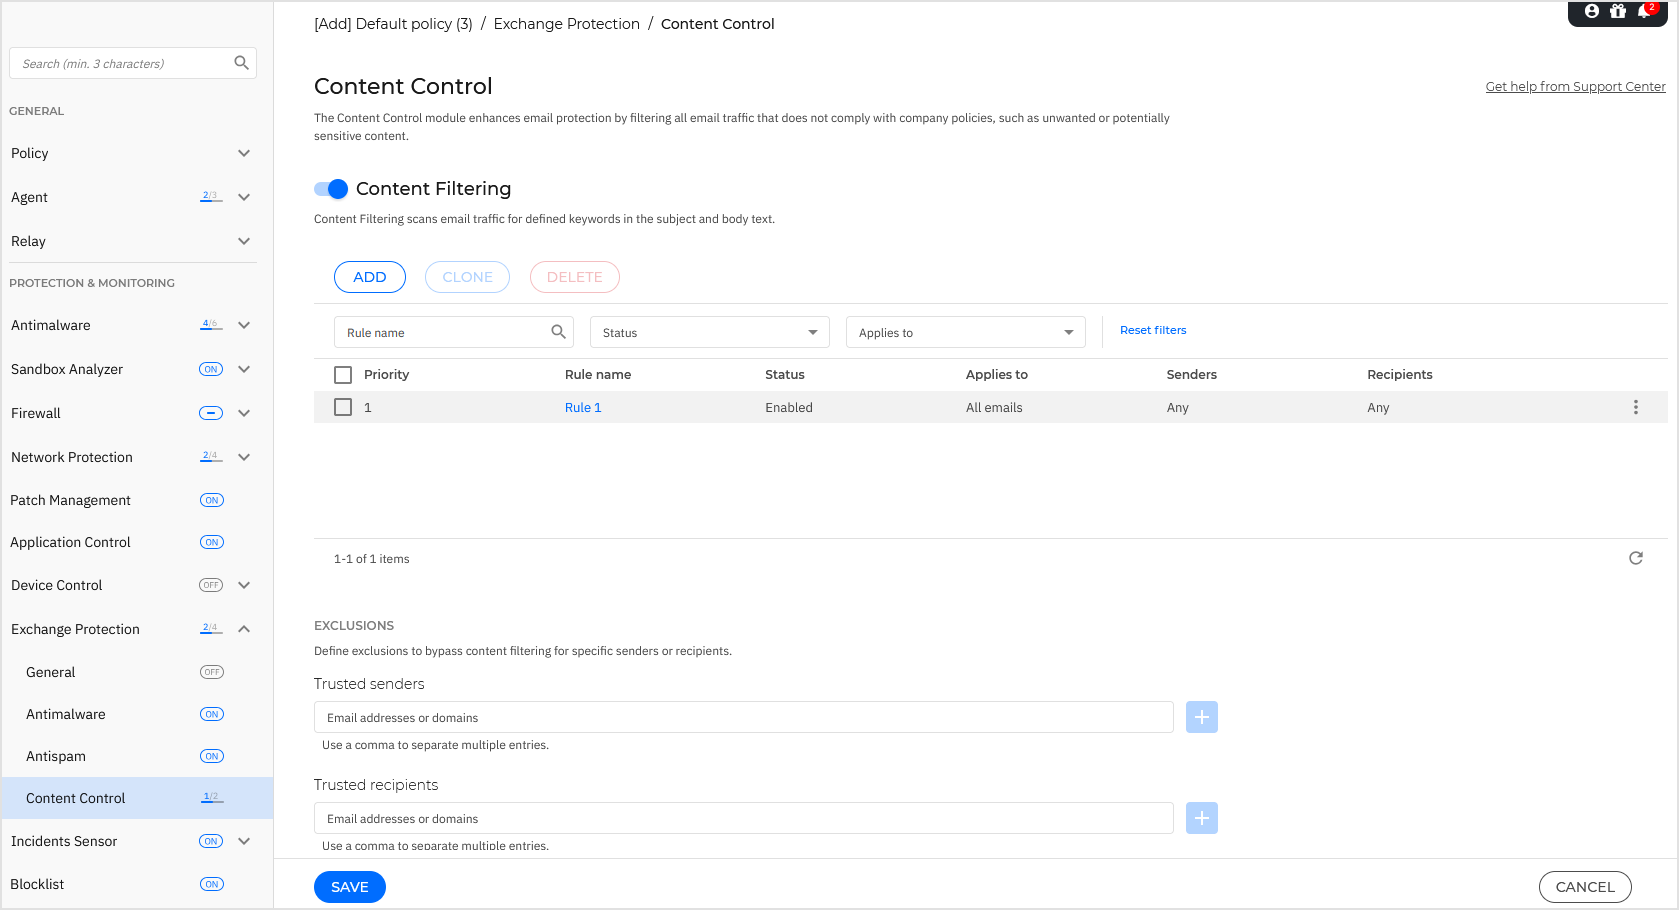
Content Control
Use Content Control in the Exchange Protection section of the policy to enhance email protection by filtering all email traffic that is non-compliant with your company policies (unwanted or potentially sensitive content).
For an overall control of the email content, this module comprises two email filtering options:
Note
Content Filtering and Attachment Filtering are available for:
Exchange Server 2016/2013 with the Edge Transport or Mailbox role
Exchange Server 2010/2007 with the Edge Transport or Hub Transport role
Managing filtering rules
Content Control filters rely on rules. You can define various rules for different users and user groups. Each email that reaches the mail server is checked against the filtering rules, by order of priority, until it matches a rule. The email is then processed according to the options specified by that rule.
The content filtering rules precede the attachment filtering rules.
Content and attachment filtering rules are listed in the corresponding tables ordered by priority, with the first rule having the highest priority. For each rule, the following information is provided:
Priority
Name
Traffic direction
Senders and recipients groups
Creating rules
You have two alternatives for creating filtering rules:
Start from the default settings, by following these steps:
Click the Add button at the upper side of the table to open the configuration window.
Configure the rule settings. For details about specific content and attachment filtering options, refer to:
Click Add. The rule is added to the list.
Use a clone of a custom rule as a template, by following these steps:
Select the desired rule from the table.
Click the Clone button at the upper side of the table to open the settings.
Alternately, open the
 More menu and select Clone.
Adjust the rule options to your needs.
Click Add. The rule is added to the list.
Editing rules
To edit an existing rule:
Click the rule name to open the settings.
Enter the new values for the options you want to modify.
Click Save. The changes take effect after the policy is saved.
Setting rule priority
To change the priority of a rule:
Go to the rule to be moved, click the
More menu and select Edit priority.Use the arrows to change the priority.
Click the
 OK icon to confirm the changes.
To set a rule to be first in the list, click the corresponding More button and select Move to top.
Removing rules
You can delete one or several custom rules. All you need to do is:
Select the rules to be deleted.
Click the Delete button at the upper side of the table. Once a rule is deleted, you cannot recover it.
To delete a single rule, click the corresponding More menu and select Delete.
Content Filtering
Content Filtering helps you filter email traffic based on the character strings you have previously defined. These strings are compared with the email subject or with the text content of the email body. By using Content Filtering, you can achieve the following goals:
Prevent unwanted email content from entering the Exchange Server mailboxes.
Block outgoing emails containing confidential data.
Archive emails that meet specific conditions to a different email account or on the disk. For example, you can save the emails sent to your company's support email address to a folder on the local disk.
Enabling content filtering
Click the toggle to enable Content Filtering.
For creating and managing content filtering rules, refer to Content Control.
Rule options
The following options are available:
General. In this section you must set a name for the rule, otherwise you cannot save it. Select the Active check box if you want the rule to be effective after the policy is saved.
Rule scope. You can restrict the rule to apply only to a subset of emails, by setting the following cumulative scope options:
Apply to (direction). Select the email traffic direction to which the rule applies.
Senders. You can decide whether the rule applies for any sender or only for specific senders. To narrow the senders range, click the Specific button and select the desired groups from the table on the left. View the selected groups in the table on the right.
Recipients. You can decide whether the rule applies for any recipient or only for specific recipients. To narrow the recipients range, click the Specific button and select the desired groups from the table on the left. You can view the selected groups in the table on the right.
Note
The addresses in the Cc and Bcc fields also count as recipients.
Important
The rules based on user groups apply only to Hub Transport and Mailbox roles.
Settings. Configure the expressions to be searched for in emails as described herein:
Choose the part of the email to be checked:
The email subject, by selecting the Filter by subject check box. All emails whose subject contains any of the expressions entered in the corresponding table are being filtered.
The body content, by selecting the Filter by body content check box. All emails that contain in their body any of the defined expressions are being filtered.
Both the subject and the body content, by selecting both check boxes. All emails whose subject matches any rule from the first table AND their body contains any expression from the second table, are being filtered. For example:
The first table contains the expressions:
newsletterandweekly. The second table contains the expressions:shopping,priceandoffer.An email with the subject "Monthly newsletter from your favorite watch vendor" and the body containing the phrase "We have the pleasure to present you our latest offer containing sensational watches at irresistible prices." will make a match on the rule and will be filtered. If the subject is "News from your watch vendor", the email is not filtered.
Build the lists of conditions, using the fields from the table headers. For each condition, follow these steps:
Select the expression type used in searches. You can choose to enter the exact text expression or to build text patterns with the use of regular expressions.
Note
The syntax of regular expressions is validated against the ECMAScript grammar.
Enter the search string in the Expression field.
For example:
The expression
5[1-5]\d{2}([\s\-]?\d{4}){3}matches the bank cards with numbers that start with fifty-one through fifty-five, have sixteen digits in groups of four, and the groups may be separated by space or hyphen. Therefore, any email containing the card number in one of the formats:5257-4938-3957-3948,5257 4938 3957 3948or5257493839573948, will be filtered.This expression detects emails with the words
lottery,cashandprize, found in this exact order:(lottery)((.|\n|\r)*)( cash)((.|\n|\r)*)( prize)
To detect emails that contain each of the three words regardless of their order, add three regular expressions with different word order.
This expression detects emails that include three or more occurrences of the word
prize:(prize)((.|\n|\r)*)( prize)((.|\n|\r)*)( prize)
If you want to differentiate the capital letters from the small letters in text comparisons, select the Match case check box. For example, with the check box selected,
Newsletteris not the same withnewsletter.If you do not want the expression to be a part of other words, select the Whole word check box. For example, with the check box selected, the expression
Anne's salarydoes not make a match withMariAnne's salary.Click the Add button from the Action column header to add the condition to the list.
Actions. There are several actions which you can take on emails. Each action has, at its turn, several possible options or secondary actions. Find them described herein:
Main actions:
Deliver email. The detected email reaches the recipients mailboxes.
Quarantine. The email is encrypted and saved in the quarantine folder from the Exchange Server, without being delivered to recipients. You can manage the quarantined emails in the Quarantine page.
Redirect to. The email is not delivered to the original recipients, but to a mailbox you specify in the corresponding field.
Reject / Delete email. On servers with Edge Transport role, the detected email is rejected with a 550 SMTP error code. In all other cases, the email is deleted without any warning. It is advisable to avoid using this action.
Secondary actions:
Tag the email subject as - You can add a label to the detected email subject to help users filter emails in the email client.
Add a header to the email messages - You can add a header name and a value to the headers of the detected email, by entering the desired values in the corresponding fields.
Save mail to disk - A copy of the detected email is saved as a file to the specified folder on the Exchange Server. If the folder does not exist, it will be created. You must provide the absolute path of the folder in the corresponding field.
Note
This option supports only emails in MIME format.
Archive to account - A copy of the detected email is delivered to the specified email address. This action adds the specified email address to the email Bcc list.
Notify recipients - Send a notification to the intended recipients when an action is taken on an email. Emails are only sent to addressee that belong to a domain accepted by the company email server.
Notify the sender - Send a notification to the sender when an action is taken on an email. Emails are only sent to addressee that belong to a domain accepted by the company email server.
Notify users - Send notifications to the specified mailboxes when when an action is taken on an email.
By default, when an email matches the conditions of a rule, it is no longer checked against any other rules. If you want to continue processing rules, clear the check box Stop processing more rules.
Exclusions
If you want the email traffic for specific senders or recipients to be delivered regardless of any content filtering rule, you can define filtering exclusions.
To create an exclusion:
Under Trusted senders and Trusted recipients, enter the email addresses you want to exclude from filtering.
Use the following wildcards to define an entire email domain or a pattern for email addresses:
Asterisk (*), replacing zero, one or more characters.
Question mark (?), replacing any single character.
For example, if you enter
*.gov, all emails coming from the.govdomain will be accepted.For emails with multiple recipients, you can select Exclude email from filtering only if all recipients are trusted to apply the exclusion only if all email recipients are present in the trusted recipients list.
Attachment Filtering
The Attachment Filtering module provides filtering features for mail attachments. It can detect attachments with certain name patterns or of a certain type. By using Attachment Filtering, you can:
Block potentially dangerous attachments, such as
.vbsor.exefiles, or the emails containing them.Block attachments having offensive names or the emails containing them.
Enabling attachment filtering
Click the toggle to enable Attachment Filtering.
For creating and managing attachment filtering rules, refer to Content Control.
Rule options
The following options are available:
General. In this section you must set a name for the rule, otherwise you cannot save it. Select the Active check box if you want the rule to be effective after the policy is saved.
Rule scope. You can restrict the rule to apply only to a subset of emails, by setting the following cumulative scope options:
Apply to (direction). Select the email traffic direction to which the rule applies.
Senders. You can decide whether the rule applies for any sender or only for specific senders. To narrow the senders range, click the Specific button and select the desired groups from the table on the left. View the selected groups in the table on the right.
Recipients. You can decide whether the rule applies for any recipient or only for specific recipients. To narrow the recipients range, click the Specific button and select the desired groups from the table on the left. You can view the selected groups in the table on the right.
Note
The addresses in the Cc and Bcc fields also count as recipients.
Important
The rules based on user groups apply only to Hub Transport and Mailbox roles.
Settings. Specify the files that are allowed or denied in email attachments.
You can filter email attachments by file type or by file name.
To filter attachments by file type, follow these steps:
Select the Detect by content type checkbox.
Select the detection option that is more suitable for your needs:
Only the following categories, when you have a limited list of forbidden file type categories.
All except the following categories, when you have a limited list of allowed file type categories.
Select the file type categories of your interest from the available list. For details on the extensions of each category, refer to Attachment Filtering File Types.
If you are interested in some specific file types only, select the Custom extensions check box and enter the list of extensions in the corresponding field.
Select the Enable true type detection check box to check file headers and correctly identify the attachment file type when scanning for restricted extensions. This means an extension cannot be simply renamed to bypass attachment filtering policies.
Note
True type detection can be resource intensive.
To filter attachments by their name, select the Detect by filename check box and enter the filenames you want to filter, in the corresponding field. When editing the list, you can also use the following wildcards to define patterns:
Asterisk (*), replacing zero, one or more characters.
Question mark (?), replacing any single character.
For example, if you enter
database.*, all files nameddatabase, regardless of their extension, will be detected.Note
If you enable both content type and filename detections (without true type detection), the file must simultaneously meet the conditions for both detection types. For example, you have selected the Multimedia category and entered the filename
test.pdf. In this case any email passes the rule because the PDF file is not a multimedia file.Select the Scan inside archives check box to prevent blocked files from being hidden in apparently inoffensive archives and thus by-passing the filtering rule.
The scan is recursive inside archives and by default it goes until the fourth archive depth level. You can optimize the scan as described herein:
Select the Archive maximum depth (levels) checkbox.
Choose a different value from the corresponding menu. For best performance choose the lowest value, for maximum protection choose the highest value.
Note
If you have selected to scan archives, Scan inside archives is disabled and all archives are scanned.
Actions. There are several actions which you can take on detected attachments or on the emails containing them. Each action has, at its turn, several possible options or secondary actions. Find them described herein:
Main actions:
Replace file with text. Deletes the detected files and inserts a text file that notifies the user of the actions taken.
The replacement text is found under Settings, after the Attachment Filtering table and you can edit it as you desire.
Delete file. Deletes the detected files without any warning. It is advisable to avoid using this action.
Reject/Delete email. On servers with Edge Transport role, the detected email is rejected with a 550 SMTP error code. In all other cases, the email is deleted without any warning. It is advisable to avoid using this action.
Quarantine email. The email is encrypted and saved in the quarantine folder from the Exchange Server, without being delivered to recipients. You can manage the quarantined emails in the Quarantine page.
Redirect email to. The email is not delivered to the original recipients, but to an email address you specify in the corresponding field.
Deliver email. Lets the email pass through.
Secondary actions:
Tag the email subject as. You can add a label to the detected email subject to help users filter emails in the email client.
Add an email header. You can add a header name and a value to the headers of the detected email, by entering the desired values in the corresponding fields.
Save email to disk. A copy of the detected email is saved as a file to the specified folder on the Exchange Server. If the folder does not exist, it will be created. You must provide the absolute path of the folder in the corresponding field.
Note
This option supports only emails in MIME format.
Archive to account. A copy of the detected email is delivered to the specified email address. This action adds the specified email address to the email Bcc list.
Send copy to. A copy of the email and all its attachments will be send as a .eml file to the specified email address. This option is only available for the following main actions:
Replace file with text
Delete file
Reject/Delete email
By default, when an email matches the rule scope, it is processed exclusively in accordance with the rule, without being checked against any other remaining rule. If you want to continue checking against the other rules, clear the check box If the rule conditions are matched, stop processing more rules.
Exclusions
If you want the email traffic for specific senders or recipients to be delivered regardless of any attachment filtering rule, you can define filtering exclusions.
To create an exclusion:
Under Trusted senders and Trusted recipients, enter the email addresses you want to exclude from filtering.
Use the following wildcards to define an entire email domain or a pattern for email addresses:
Asterisk (*), replacing zero, one or more characters.
Question mark (?), replacing any single character.
For example, if you enter
*.gov, all emails coming from the.govdomain will be accepted.For emails with multiple recipients, you can select Exclude email from filtering only if all recipients are trusted to apply the exclusion only if all email recipients are present in the trusted recipients list.