IBM QRadar
Note
The article provides information about the GravityZone On-premises integration with IBM QRadar. For the GravityZone Cloud integration, refer to IBM QRadar.
Overview
This integration provides you with the possibility to better monitor GravityZone events using IBM QRadar. Bitdefender DSM for QRadar is a device support module that provides the categorization of events according to QRadar high and low-level threat categories, allowing a QRadar administrator to perform complex searches, cross-correlations across multiple event types and sources and perform threat-hunting activities that include in-depth information reported by GravityZone technology layers.
Prerequisites
IBM QRadar On-premises version 7.3.3 (Patch 6).
Bitdefender GravityZone On-premises minimum version 6.23.x with Syslog protocol enabled using either TCP or UDP.
Enable event sending
To allow GravityZone to send events to the QRadar instance using the Syslog protocol:
Connect to the GravityZone Control Center.
Go to the Configuration page and click Miscellaneous.
Select the Enable Syslog check box.
Enter the IP address of the QRadar instance, the preferred protocol and the port Syslog listens to.
Select the format Common Event Format (CEF) to send the data to the Syslog server.
Click the Add button from the Action column.

To select the events you want to receive on the QRadar instance:
Connect to the GravityZone Control Center.
Click the Notification button at the right side of the menu bar and then click the Settings icon.
Under Enable Notification section, choose the type of notifications you want to receive from GravityZone and select the Log to server checkbox.
For more information, refer to Notification Types.
Deploy the application in QRadar
To install the Bitdefender DSM for QRadar in IBM QRadar:
Log in to IBM QRadar.
Click the Admin tab.
Under the System Configuration section, click Extensions Management. A new window will open.
Click the Add button on the right side and then Browse for the installation kit.
Select Install immediately, and then click Add.
Click Install.
You can find the application in the Extensions Management window after the installation is complete.

Configure log sources
The following configuration steps may be different for QRadar versions up to 7.5.0 Update Package 3. For more information, refer to the official IBM documentation.
To receive the security events in the QRadar instance, follow these steps:
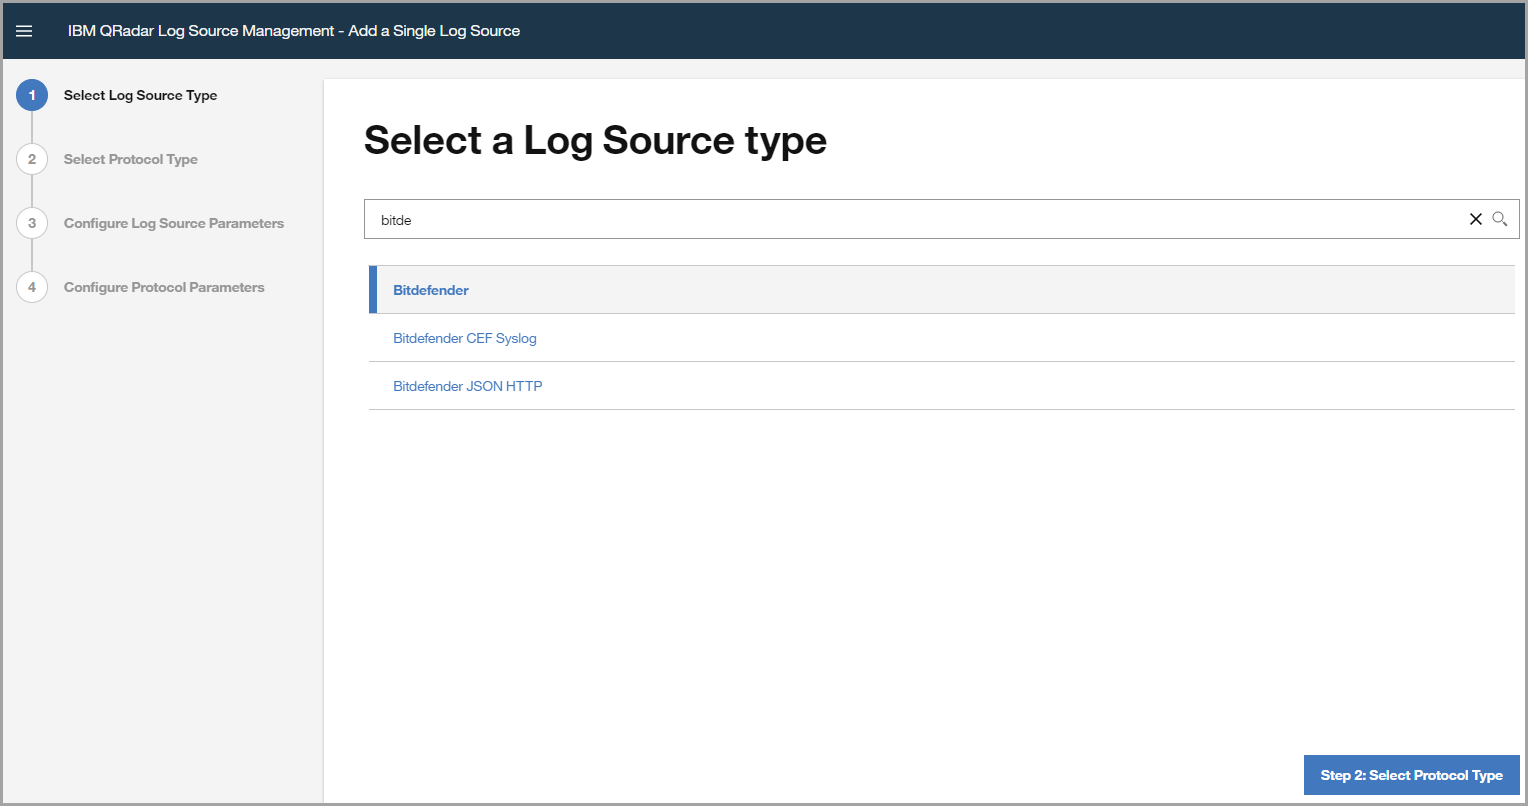
Go to Admin and click the QRadar Log Source Management application icon.
Select Log Sources.
Create a new log source using the +New Log Source button.
Select between Single Log Source or Multiple Log Sources.
Search and select Bitdefender CEF Syslog log source type. Click the Step 2: Select Protocol Type button to proceed.
Search and select Syslog protocol type. Click the Step 3: Configure Log Source Parameters button to proceed.
Configure the log source parameters as desired. Click the Step 3: Configure Protocol Parameters button to proceed.
Configure the protocol parameters. The log source identifier is GravityZone appliance hostname. The default hostname is
gzva.Click Finish.
Saved searches
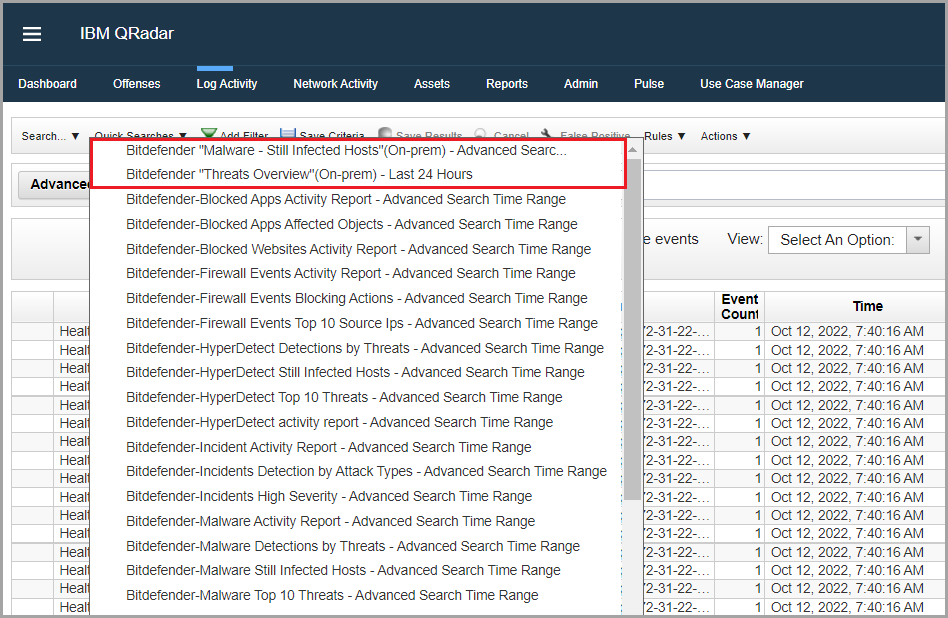
To help you in identifying the security events Bitdefender DSM for QRadar stores two saved searches:
Bitdefender “Malware - Still Infected Hosts”(On-prem) centralizes events from Antimalware and HyperDetect modules. You can view the events in which the item scanned by the corresponding technology is ignored, restored, or still present. The events provide you with details like the IP address, username, computer name, malware type, malware name, and action state.
Bitdefender “Threats Overview”(On-prem) centralizes events from the following modules: Antimalware, Antiphishing, Advanced Threat Control, Security for Exchange, HyperDetect, Sandbox Analyzer, Advanced Anti-Exploit, Content Control, Security for Storage and Ransomware Mitigation. The events provide you with details such as IP address, username, computer name and action state.
To use these searches follow the steps below:
Click the Log Activity tab.
Click Quick Searches from the upper left side of the page. You should see a list with all the saved searches, custom and predefined.
If the two searches are unlisted, follow these steps:
Click the Search button from the upper left side of the page and select New Search.
Type the name of the search in the text box or select it from the Available Saved Searches.
Click the Load button.
Once loaded, select the Include in my Quick Searches checkbox.
Click the Search button from the lower right side of the page. Once completed you can view the search in the Quick Searches list.
Select the search of interest to list out all the matching events.
View events and explore data
The integration provides you with the possibility to view events in real-time and investigate them properly using customizable queries.
To investigate an event:
Access the Log Activity tab.
Click Quick Searches.
Select Bitdefender “Malware - Still infected hosts”(On-prem) or Bitdefender “Threats Overview”(On-prem).
Customize or use the corresponding default query.
Default query for Bitdefender “Malware - Still infected hosts”(On-prem)
SELECT DVC as "IP Address", "Target User Name", "Target Computer Name", "Malware Type", "Malware Name", "Action State" FROM events WHERE LOGSOURCETYPENAME(devicetype) = 'Bitdefender CEF Syslog' and QIDNAME(qid) IN('AntiMalware','HyperDetect Activity') and "Malware Type" IN ('file', 'http', 'cookie', 'pop3', 'smtp', 'process', 'boot', 'registry', 'stream') and "Action State" IN('still present', 'ignored', 'restored')Default query for Bitdefender “Threats Overview”(On-prem):
SELECT DVC as "IP Address", "Target User Name", "Target Computer Name", "Action State" FROM events WHERE LOGSOURCETYPENAME(devicetype) = 'Bitdefender CEF Syslog' and QIDNAME(qid) IN('Antiphishing','AntiMalware','Behavioral scanning','Exchange Malware Detected', 'HyperDetect Activity', 'HVI', 'Sandbox Analyzer Detection', 'Exploit Mitigation', 'Web Control', 'Storage Antimalware', 'Ransomware Detection') and ("Event Type" NOT IN (NULL,'N/A','None') OR "Malware Type" NOT IN (NULL,'N/A','None') OR "Exploit Type" NOT IN (NULL,'N/A','None') OR "Threat Name" NOT IN (NULL,'N/A','None') OR "Attack Type" NOT IN (NULL,'N/A','None') OR "Application Control Block Type" NOT IN (NULL,'N/A','None'))Click Search.
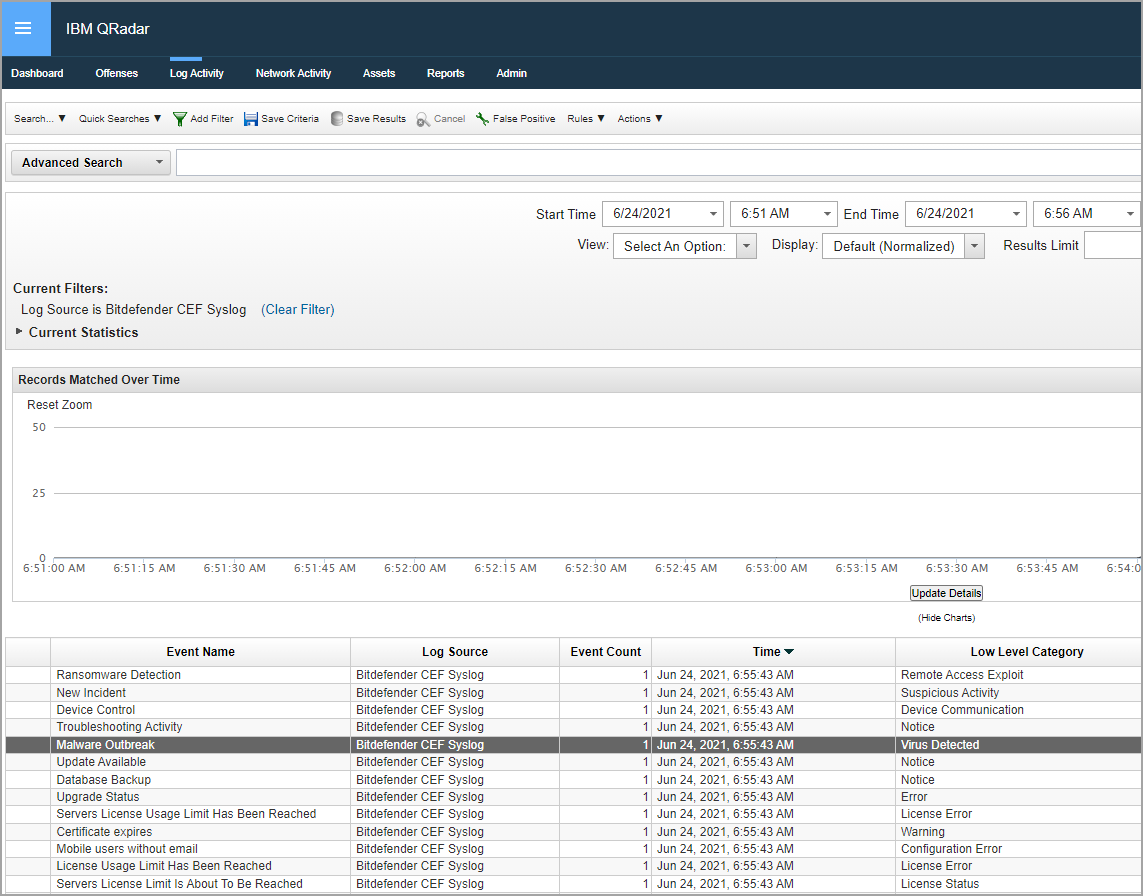
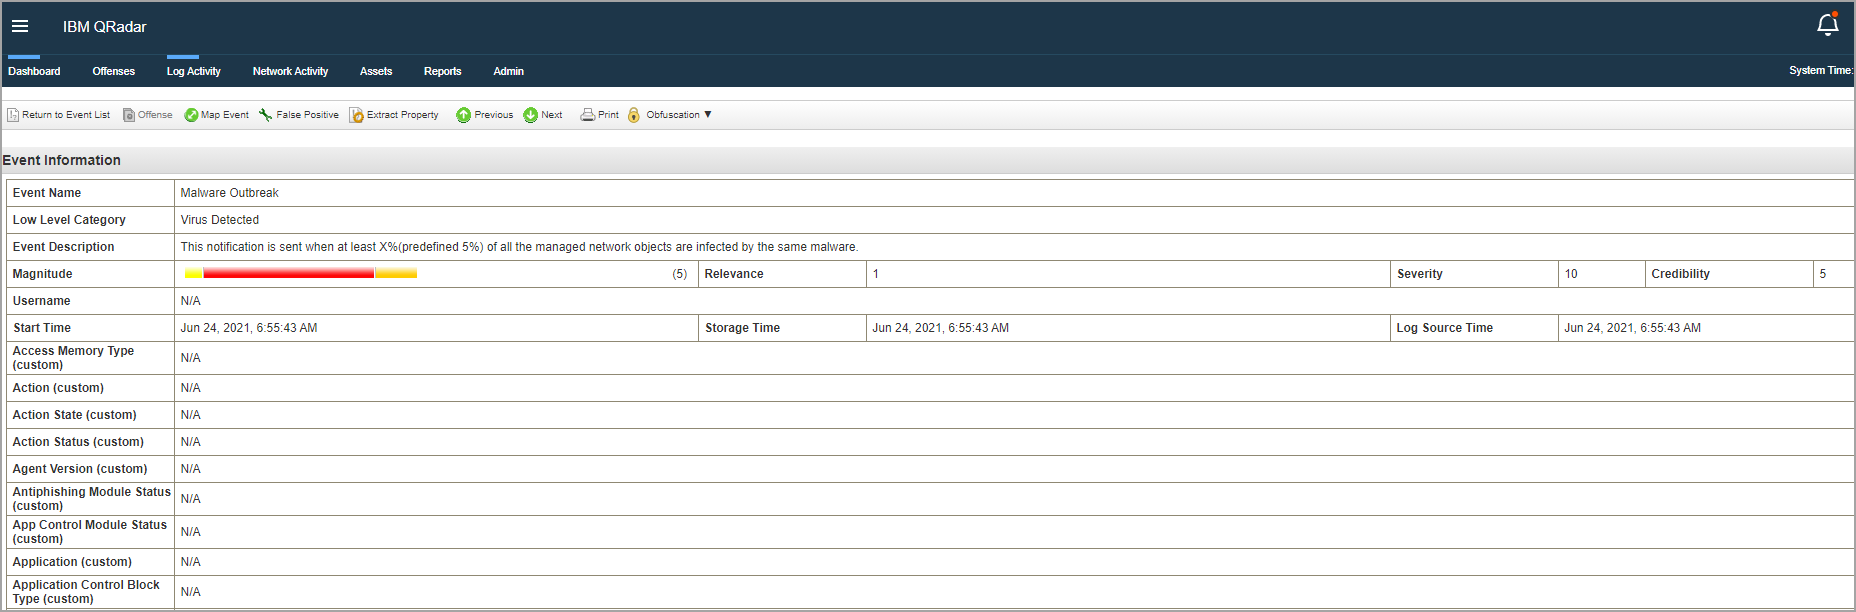
Double click the event of your interest. You can view the details in the Event Information widow.
In the same window, you can also view the event in CEF format.

To find more information about the GravityZone events, refer to Syslog Event Types.