Install Security Server through Control Center
Security Server is a dedicated virtual machine that deduplicates and centralizes most of the antimalware functionality of antimalware clients, acting as a scan server.
Security Server deployment is specific to the environment it is installed in. The installation procedures are described herein:
Install Security Server for VMware NSX
In VMware NSX environments, you must deploy the Bitdefender service in each cluster to be protected. The purpose-built appliance will automatically deploy on all hosts in the cluster. All virtual machines on a host are automatically connected via Guest Introspection to the Security Server instance installed on that host.
Security Server deployment is to be performed exclusively from the vSphere Web Client.
To install the Bitdefender service:
Log in to vSphere Web Client.
Go to Network & Security > Installation and click the Service Deployments tab.
Click the New service deployment button (the plus sign icon). The configuration window opens.
Select Guest Introspection and click Next.
Select the datacenter and the clusters on which to deploy the service, then click Next.
Select storage and management network, click Next and then Finish.
Repeat the steps from 3 to 6, this time choosing Bitdefender service.
Before you proceed with installation, make sure that you have network connection between the selected network and GravityZone Control Center.
Once the Bitdefender service is installed, it will automatically deploy the Security Server on all ESXi hosts in the selected clusters.
Warning
For the services to work properly, it is very important you install them in this order, first Guest Introspection and then Bitdefender, and not both at the same time.
Note
For more information on adding partner services to NSX, refer to VMware NSX Documentation Center.
If you choose Specified on host for storage and network management, check that Agent VM is set on hosts for both Guest Introspection and Bitdefender services.
Security Server has specific requirements that depend on the number of virtual machines it has to protect. To adjust the default hardware configuration of the Security Server:
Log in to VMware vSphere Web Client.
Go to Hosts and Clusters.
Select the cluster where Security Server is deployed and then select Related Objects > Virtual Machines tab.
Power off the Bitdefender appliance.
Right-click the appliance name and then choose Edit Settings... in the contextual menu.
In the Virtual Hardware tab, adjust the CPU and RAM values to fit your needs and then click OK to save the changes.
Power the appliance back on.
For more information on how to integrate VMware NSX, refer to:
Install Security Server Multi-Platform
Connecting to the virtualization platform
To access the virtualized infrastructure integrated with Control Center, you must provide your user credentials for each virtualization server system available. Control Center uses your credentials to connect to the virtualized infrastructure, displaying only resources you have access to (as defined in vCenter Server).
To specify the credentials to connect to the virtualization server systems:
Click the
 user icon in the upper-right corner of the console and select Credentials Manager.
Go to the Virtual Environment tab.
Specify the necessary authentication credentials.
Select a server from the corresponding menu.
Note
If the menu is unavailable, either no integration has been configured yet or all necessary credentials have already been configured.
Enter your username and password and a suggestive description.
Click the
 Add button.
The new set of credentials is displayed in the table.
Note
If you have not specified your authentication credentials, you will be required to enter them when you try to browse the inventory of any vCenter Server system.
Once you have entered your credentials, they are saved to your Credentials Manager so that you do not need to enter them the next time.
Installing Security Server on hosts
You must install Security Server on hosts as follows:
In Nutanix Prism Element environments, you must install Security Server on each host, via remote installation task.
In all other environments, you must install Security Server on one or more hosts so as to accommodate the number of virtual machines to be protected. You must consider the number of protected virtual machines, resources available for Security Server on hosts, as well as network connectivity between Security Server and protected virtual machines. The security agent installed on virtual machines connects to Security Server over TCP/IP, using details configured at installation or via a policy.
If Control Center is integrated with vCenter Server, XenServer and Nutanix Prism Element, you can automatically deploy Security Server on hosts from Control Center. You can also download Security Server packages for standalone installation from Control Center.
Local installation
In all virtualized environments that are not integrated with Control Center, you must install Security Server on hosts manually, using an installation package. The Security Server package is available for download from Control Center in several different formats, compatible with the main virtualization platforms.
To download Security Server installation packages:
Go to the Network > Installation Packages page from the left side menu in GravityZone Control Center.
Select the Default Security Server Package.
Click the
 Download button at the upper side of the table and choose the package type from the menu.
Save the selected package to the desired location.
Once you have the installation package, deploy it to the host using your preferred virtual machine deployment tool.
After deployment, set up the Security Server as follows:
Deploy the Security Server in vCenter.
Open the Security Server console.
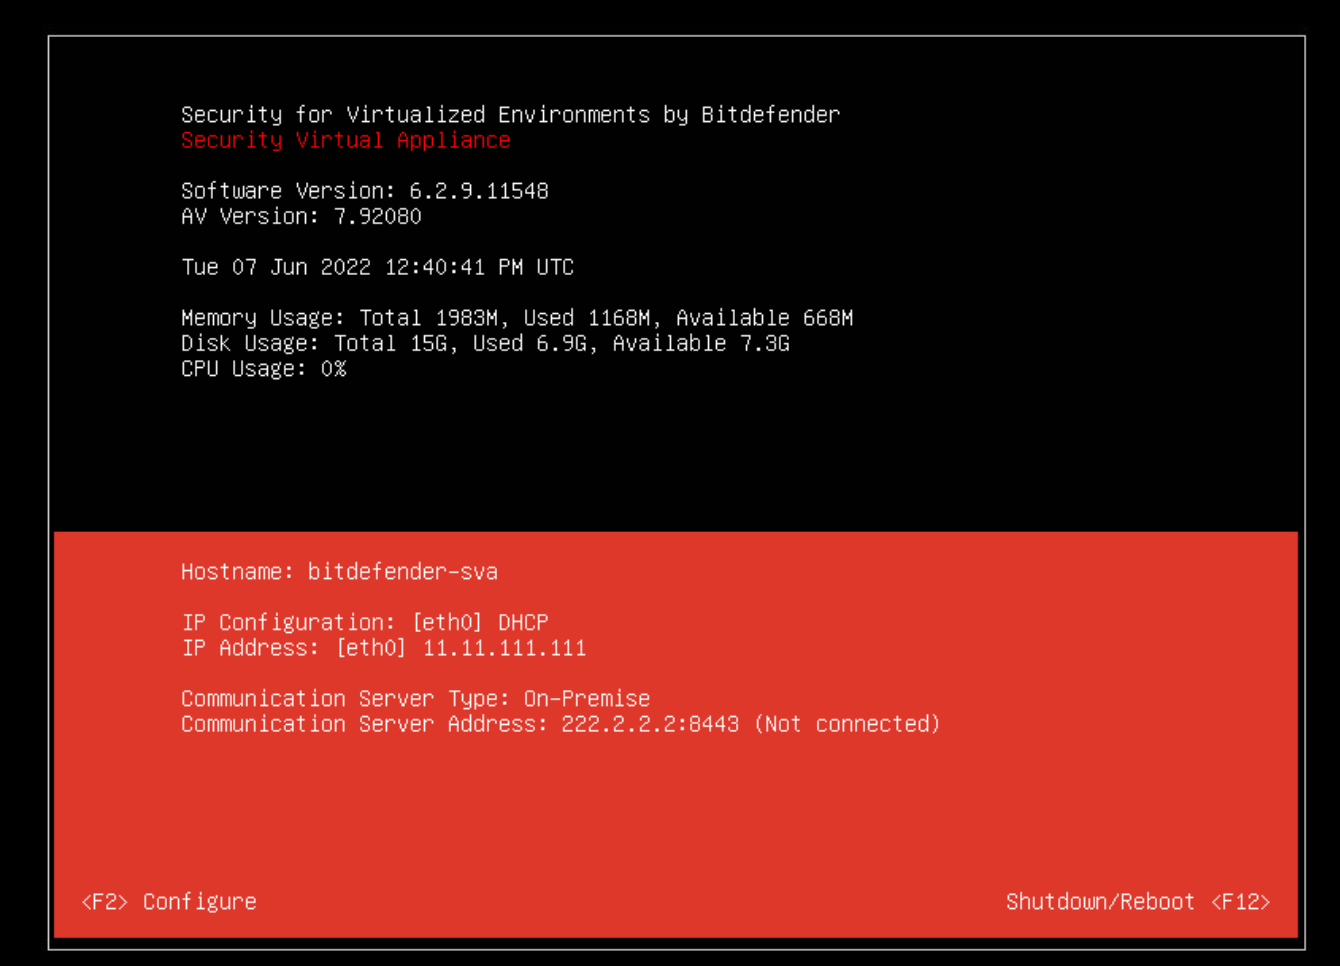
Press F2 to open the configuration screen.
Enter your password. The default password is:
sve.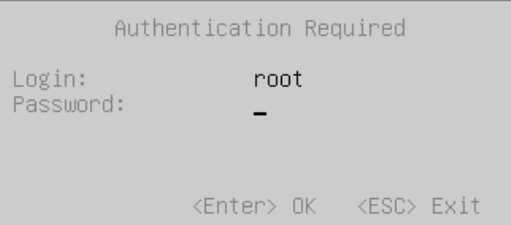
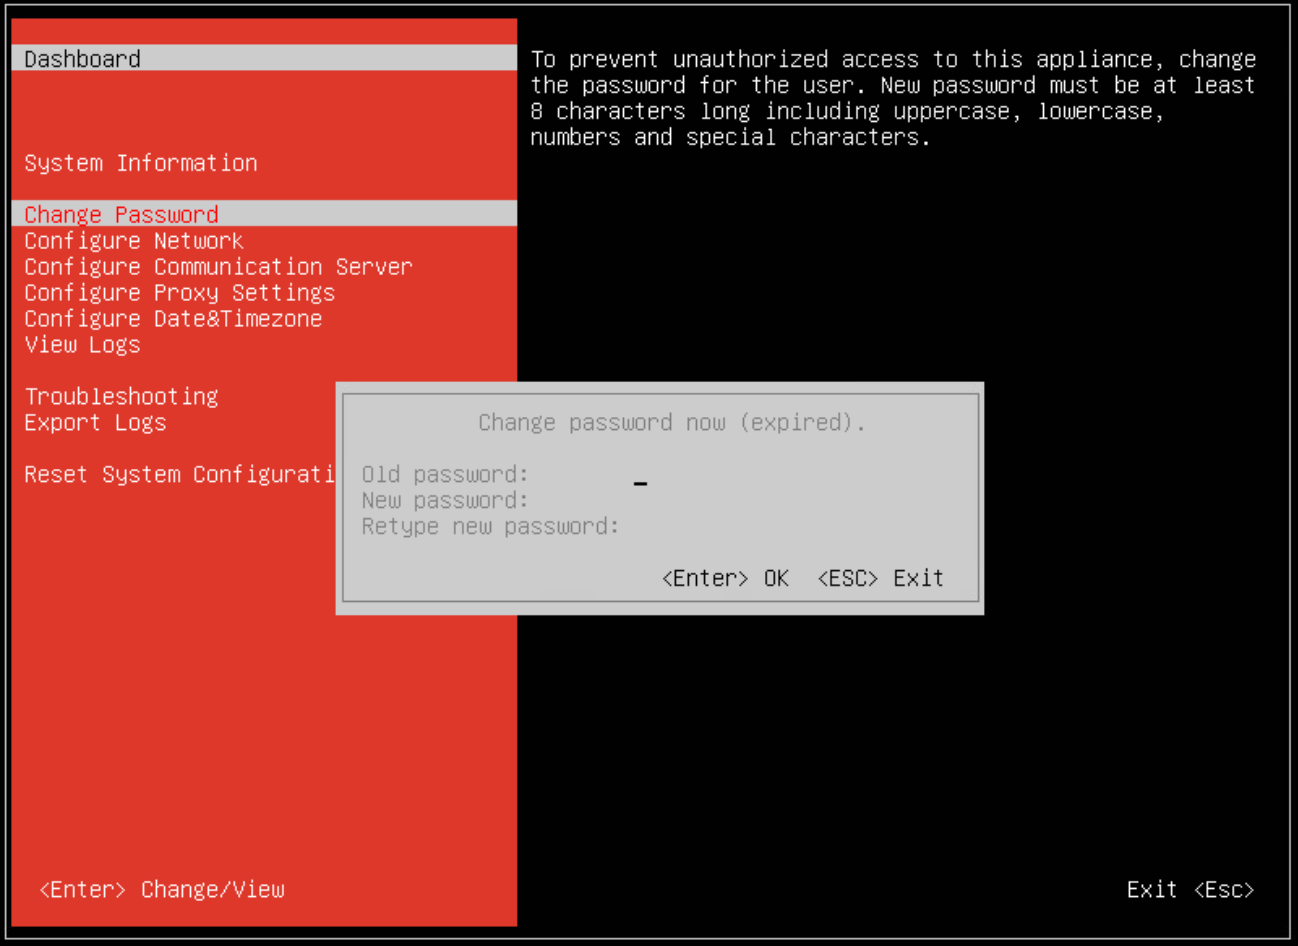
Change the password.
The default password does not meet the new security password requirements, so you have to change it. It must contain at least 8 characters, one digit, at least one upper case character, at least one lower case character, one special character and must be changed every 3 months.
Note
For more information about resetting the
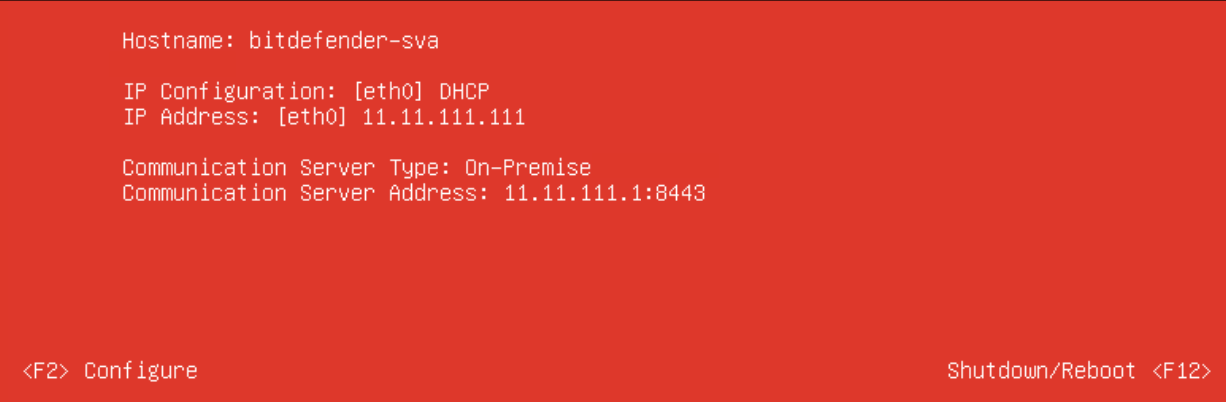
bdadminpassword, refer to Reset the Security Server password.Select Configure Communication Server. By default, the address is the localhost.
Select On-Premises.
Note
If you use a relay address, you must add the Address using the following URL format:
http://<relay-address>:7074Press Tab to modify the Communication Server server address.
Select Enter to start the configuration.
Check the main screen to view your Security Server information.
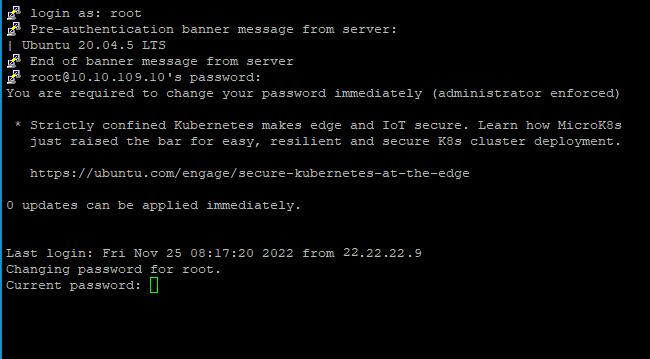
Access the appliance console from your virtualization management tool (for example, vSphere Client). Alternatively, you can connect to the appliance via SSH.
Log in using the default credentials.
User name:
bdadminPassword:
sve
Change the password.
The default password does not meet the new security password requirements, so you have to change it. It must contain at least 8 characters, one digit, at least one upper case character, at least one lower case character, one special character and must be changed every 3 months.
Note
For more information about resetting the
bdadminpassword, refer to Reset the Security Server password.Run the
sva-setupcommand. You will access the appliance configuration interface.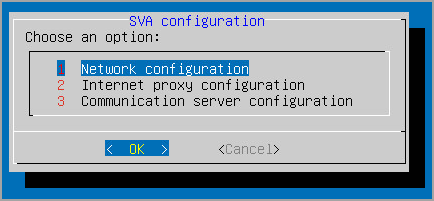
To navigate through menus and options, use the
Taband arrow keys. To select a specific option, pressEnter.Configure the network settings.
The Security Server uses the TCP/IP protocol to communicate with the other GravityZone components. You can configure the appliance to automatically obtain network settings from the DHCP server or you can manually configure network settings, as described herein:
From the main menu, select Network configuration.
Select the network interface.
Select the IP configuration mode:
DHCP, if you want the Security Server to automatically obtain network settings from the DHCP server.
Static, if a DHCP server is absent or an IP reservation for the appliance has been made on the DHCP server. In this case, you must manually configure the network settings.
Enter the hostname, IP address, network mask, gateway and DNS servers in the corresponding fields.
Select OK to save the changes.
Note
If you are connected to the appliance via a SSH client, changing the network settings will immediately terminate your session.
Configure the proxy settings.
If a proxy server is used within the network, you must provide its details so that the Security Server can communicate with GravityZone Control Center.
Note
Only proxies with basic authentication are supported.
From the main menu, select Internet proxy configuration.
Enter the hostname, username, password and the domain in the corresponding fields.
Select OK to save the changes.
Configure the Communication Server. For more information, refer to Communication Server configuration.
Remote installation
Control Center allows you to remotely install Security Server on visible hosts by using installation tasks.
To install Security Server remotely on one or several hosts:
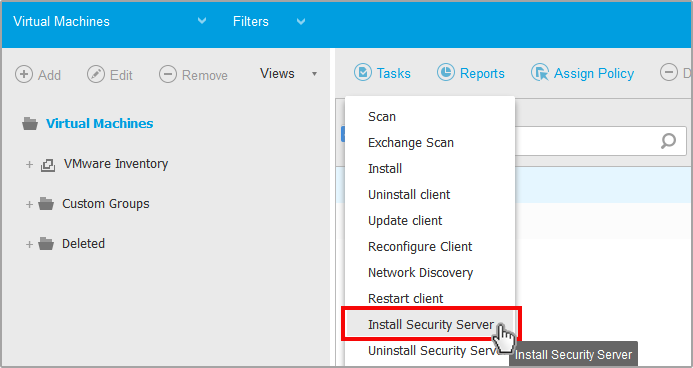
Go to the Network page from the left side menu in GravityZone Control Center.
Choose Virtual Machines from the views selector.
Browse the VMware, Citrix or Nutanix inventory and select the check boxes corresponding to the desired hosts or containers (Nutanix Prism, vCenter Server, XenServer or datacenter). For a fast selection, you can directly select the root container (Nutanix Inventory, VMware Inventory or Citrix Inventory). You will be able to select hosts individually from the installation wizard.
Note
You cannot select hosts from different folders.
Click the
 Tasks button at the upper side of the table and choose Install Security Server from the menu.
The Security Server Installation window is displayed.
Select the hosts on which you want to install the Security Server instances.
Choose the configuration settings you want to use.
Important
Using common settings while deploying multiple Security Server instances simultaneously requires the hosts to share the same storage, have their IP addresses assigned by a DHCP server and be part of the same network.
When choosing to configure each Security Server differently, you will be able to define the settings that you want for each host at the next step of the wizard. The steps described hereinafter apply for the case when Configure each Security Server option is used.
Click Next.
Enter a suggestive name for the Security Server.
For VMware environments, select the container in which you want to include the Security Server from the Deploy Container menu.
Select the destination storage.
Choose the disk provisioning type. It is recommended to deploy the appliance using thick disk provisioning.
Important
If you use thin disk provisioning and the disk space in the datastore runs out, the Security Server will freeze and, consequently, the host will remain unprotected.
Configure the memory and CPU resource allocation based on the VM consolidation ratio on the host. Choose Low, Medium or High to load the recommended resource allocation settings or Manual to configure resource allocation manually.
You have to set an administrative password for the Security Server console. Setting an administrative password overrides the default root password (
sve).The administrative password must contain at least 8 characters, one digit, at least one upper case character, at least one lower case character, one special character and must be changed every 3 months.
Set the timezone of the appliance.
Select the network configuration type for the Bitdefender network. The IP address of the Security Server must not change in time, as it is used by Linux agents for communication.
If you choose DHCP, make sure to configure the DHCP server to reserve an IP address for the appliance.
If you choose static, you must enter the IP address, subnet mask, gateway and DNS information.
You can view and manage the task in the Network > Tasks page.
Important
Installing Security Server on Nutanix through remote task may fail when the Prism Element cluster is registered to Prism Central or because of another reason. In these situations, it is recommended to perform a manual deployment of Security Server. For more details, refer to Install Security Server manually.