Security for Storage
This topic provides guiding steps on how to install Security for Storage in your GravityZone environment. Before installation, refer to requirements.
Important
The Security for Storage solution has been validated by the Nutanix Ready team on AOS 7.5 and Nutanix Files 5.2.1.
Depending on whether the GravityZone environment is configured or not, the Security for Storage installation varies for existing and new users.
Installation steps
For existing GravityZone users
If you already use GravityZone, this is how you install Security for Storage:
Add the Security for Storage add-on license key in Control Center. For details on licensing steps, refer to License management.
Install at least two Bitdefender Security Servers and configure them as ICAP servers on supported NAS devices or file-sharing systems.
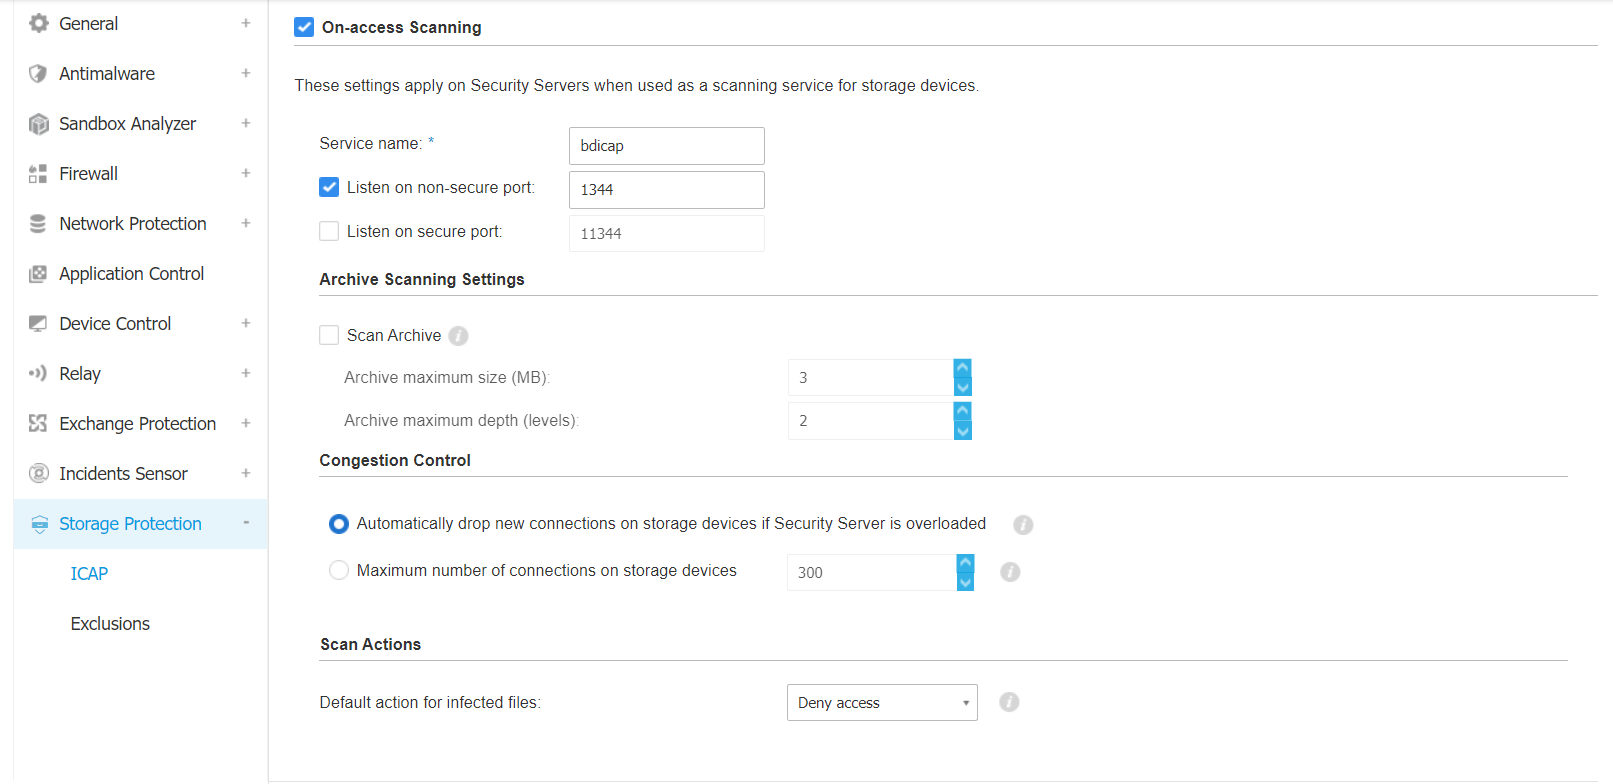
Enable and configure the Storage Protection module in the GravityZone policy settings.
For new GravityZone users
If you are new to Bitdefender, your first must set up a GravityZone environment, then install Security for Storage, as follows:
Configure the GravityZone environment. For details, refer to this section.
Add the Security for Storage add-on license key in Control Center. For details on licensing steps, refer to License management.
Install at least two Bitdefender Security Servers and configure them as ICAP servers on the NAS devices or the file-sharing systems of choice.
Enable and configure the Storage Protection module in the GravityZone policy settings.
Considerations on installing Bitdefender Security Server
GravityZone Security for Storage uses Bitdefender Security Server Multi-Platform as an ICAP server that analyzes data and sends verdicts to the protected ICAP platform, which take actions accordingly.
Although you can only use one Security Server for ICAP scanning, it is recommended to install and configure at least two Bitdefender Security Servers. This is necessary in case of overloading, when the first Security Server redirects the surplus of data to the second one.
As best practices, you must install Security Servers as close as possible to the NAS server. In case of cloud NAS deployment (for example, in an Amazon Web Services environment), you must install Security Servers there.
For installing Bitdefender Security Server in various environments (including Nutanix AHV), refer to Install Security Server manually.
Note
As best practices, install dedicated Security Servers for storage protection, separate from the Security Servers used for other purposes, such as antimalware scanning.
Configuring 3rd party solutions for Security for Storage
For details about configuring and managing ICAP servers on a certain NAS device or file-sharing system, refer to the documentation for that specific platform (such as Nutanix® Files (formerly, Acropolis File Services or AFS) and Citrix® ShareFile).
For details on how to configure Citrix ® ADC VPX to use it with Security for Storage, refer to this topic.
For details on how to configure F5 BIG-IP VE ASM to use it with Security for Storage, refer to this topic.
What to do after installing Security for Storage
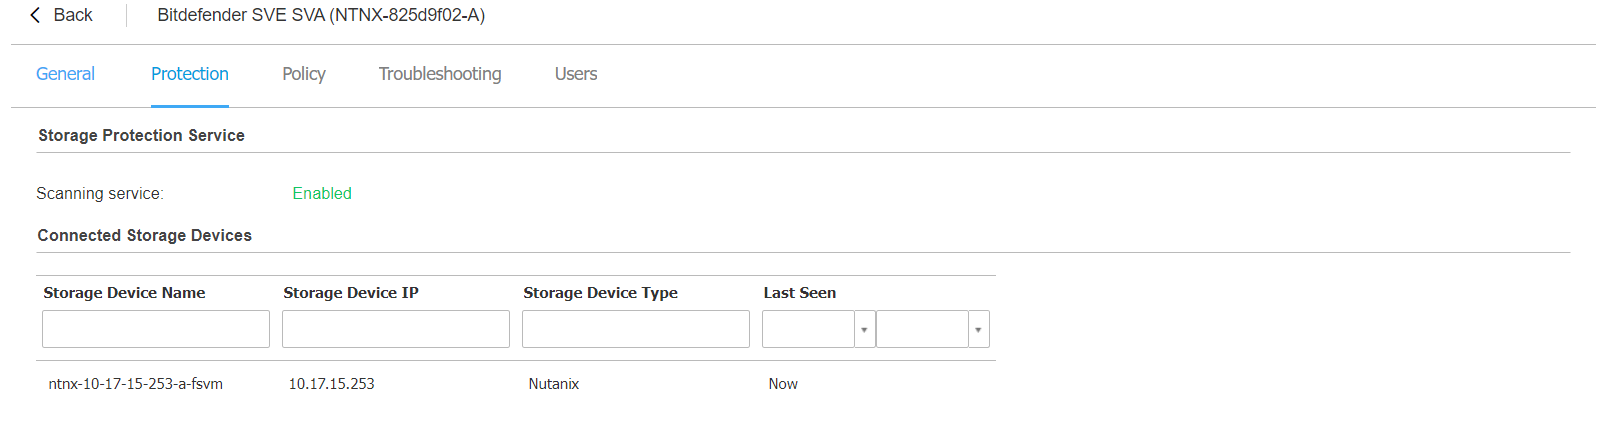
Check the status of the integration
To check the integration, you must go to Network > Cloud Workloads > VMware Inventory > vCenter and select your server.
The Security Server should be online, and it should have a policy with Storage Protection enabled and applied.
Connect the Security Server to the Storage Device (depending on your ICAP client vendor), and check the Scanning service status and Connected Storage Devices.
Check if the ICAP client is protected by the Security Server
To check if the ICAP client is protected by the Security Server, you must:
Download a test file from eicar on the protected storage.
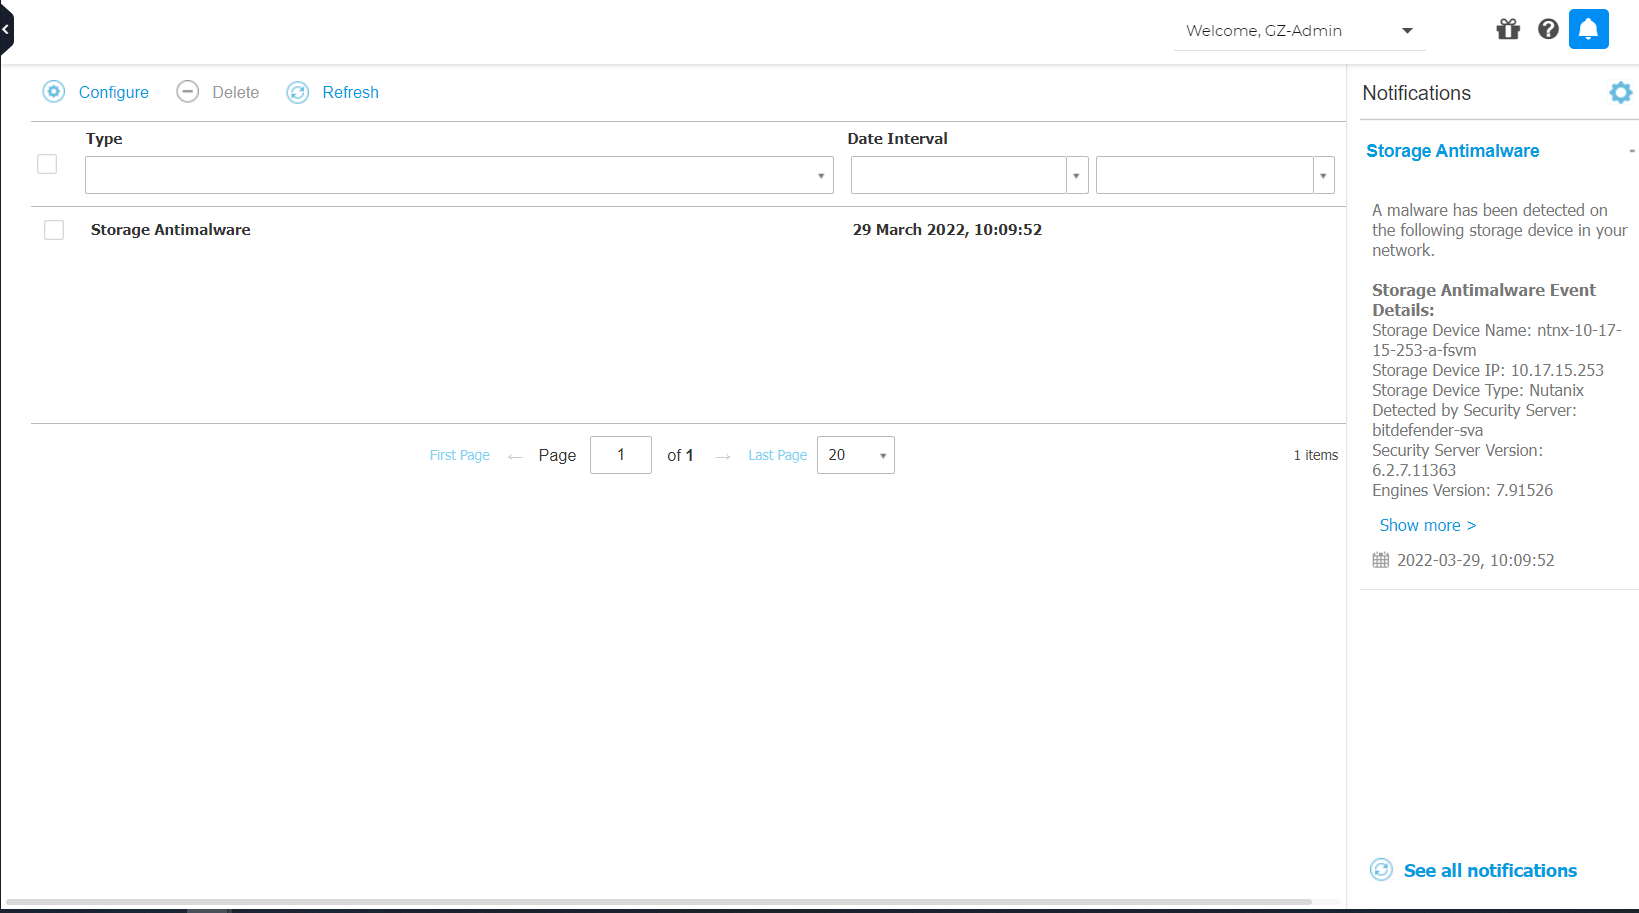
Check the Notifications tab for the detected file.
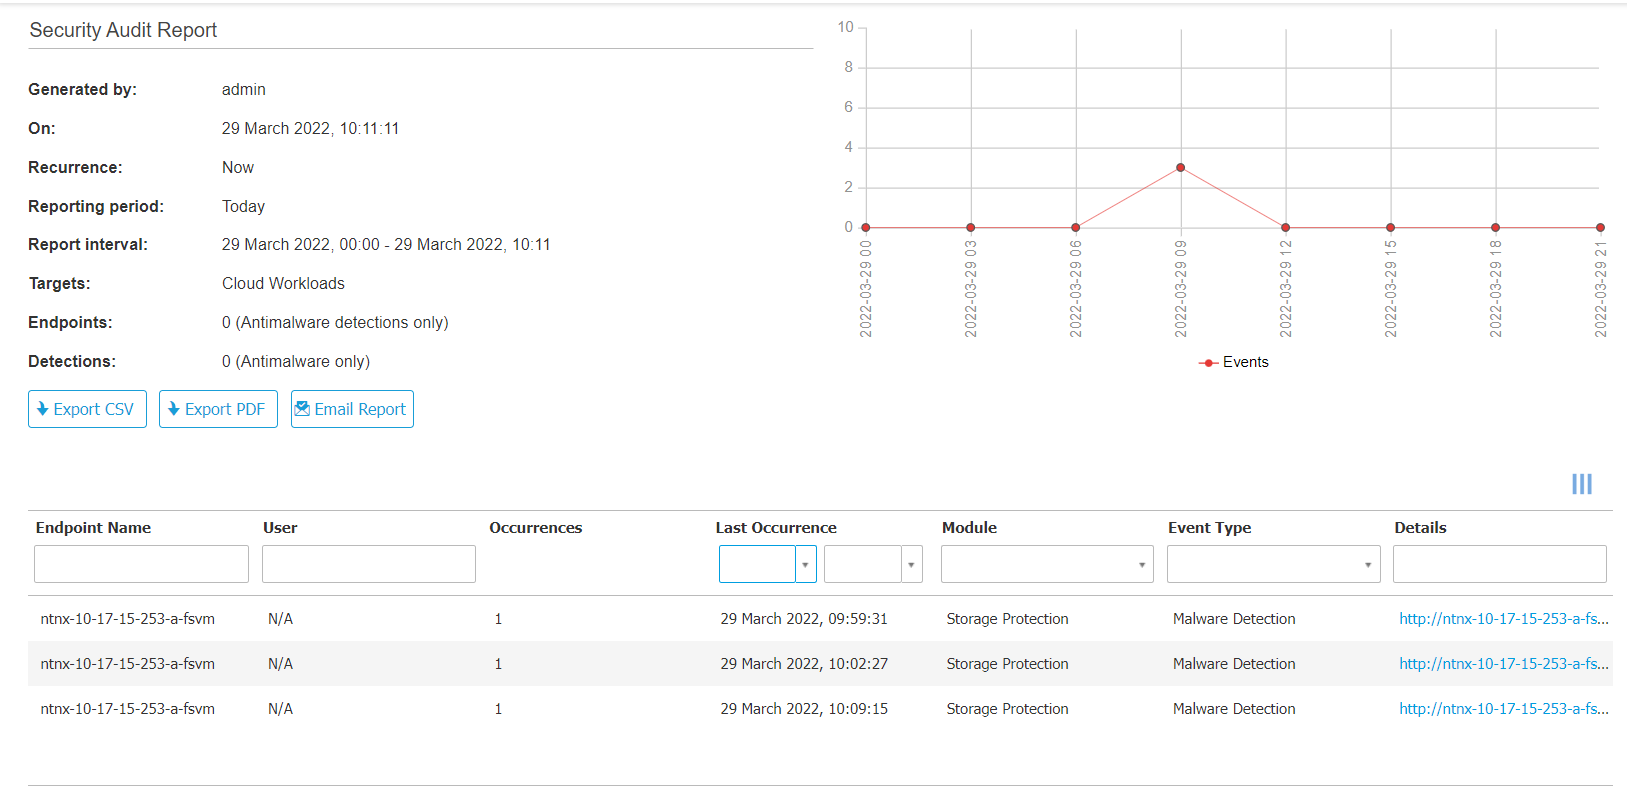
Generate a Security Audit Report and check if the malware is reported.
Monitor the ICAP activity
Once you have installed the Security Server and configured them to use a policy with ICAP scanning enabled, you can monitor their activity in several places in GravityZone Control Center:
In the Network section, locate the Security Server used as ICAP servers and click their names to view more information in the Protection tab of the endpoint details screen.
In the Reports section, generate a Security Audit or a Security Servers Status report.
In the Notifications area, look for the Storage Antimalware notification.