Microsoft Azure
Integrate Microsoft Azure
You can integrate GravityZone with Microsoft Azure and protect your virtual machines hosted in the Microsoft cloud.
Prerequisites:
Azure application with Reader permission
Active Directory ID
Application ID
Application Secret
For details about obtaining the required credentials and setting up the Azure application, refer to Configure Microsoft Azure application for GravityZone integration.
You can create several Microsoft Azure integrations. For each integration, you must have a valid Active Directory ID.
To set up integration with Microsoft Azure:
Go to the Configuration page in Control Center and click the Virtualization Providers tab.
Click the
 Add button at the upper side of the table and choose Azure Integration from the menu. A configuration window will appear.
Specify the Azure integration details:
The integration name. When adding several Azure integrations, you can identify them by name.
Active Directory ID. Each instance of Azure Active Directory has a unique identifier available in the Microsoft Azure account details.
Application ID. Each Azure application has a unique identifier available in the application details.
Application Secret. The application secret is the value displayed when saving a key in the Azure application settings.
Select the option Restrict policy assignment from the network view to change the policy only from the Virtual Machines view. If deselected, you can change the policy from the Computers and Virtual Machines view.
Click Save. If the provided credentials are valid, the integration will be created and added to the grid.
Wait a few moments while GravityZone synchronizes with the Microsoft Azure inventory.
Configure Microsoft Azure application for GravityZone integration
This section aims to explain how to configure an Azure application to integrate GravityZone with Microsoft Azure.
Through GravityZone (on-premises solution) integration with Microsoft Azure, you are able to import into Control Center the existing inventory of virtual machines hosted in the Microsoft cloud.
The integration requires registering in Azure a web application that provides GravityZone the ability to access data from Azure virtual machines. The Azure application also provides the necessary credentials to configure the integration in Control Center:
Active Directory ID
Application ID
Application Secret
For details on how to use these credentials after you have created the application, refer to the Configuring Bitdefender Cloud single sign-on with Azure AD section.
Requirements
To create an application, first make sure that you have the necessary Azure AD and subscription permissions.
You need Azure AD permissions to access Azure Active Directory and to register the application.
To check the Azure AD permissions:
Log in to Microsoft Azure Portal.
Select Azure Active Directory.
In the Overview section, observe your role. For example, if you are an administrator, you can manage all aspects of app registrations. Refer to Microsoft Azure documentation for available roles and role permissions.
In the left pane, select User settings.
View the App registrations setting. If the value is Yes, then any user in the Azure directory can register an application. If the value is No, then only users with an administrator role can register an application. Only an administrator can change the value for App registrations.
In your Azure subscription, you need to have Microsoft.Authorization/*/Write access to assign a role to the application. This action requires the Owner role or User Access Administrator role.
To check the subscription permissions:
Search for and select Subscriptions, or click Subscriptions on the Home page.
Select the subscription that you want to associate with the application. If you do not see the subscription, select global subscriptions filter.
Select My permissions and select Click here to view complete access details for this subscription.
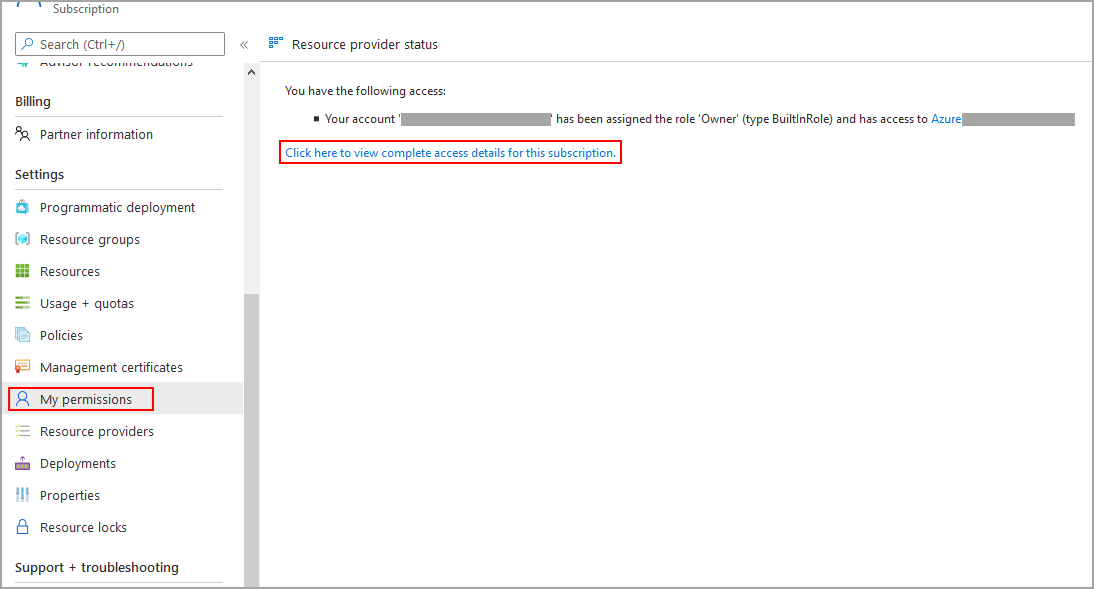
Click Role assignments and view your roles. If the case, use the filtering boxes to find your account. If you do not have the required permissions to assign a role to the application, contact your administrator.
Configuring an Azure application
To register an Azure application:
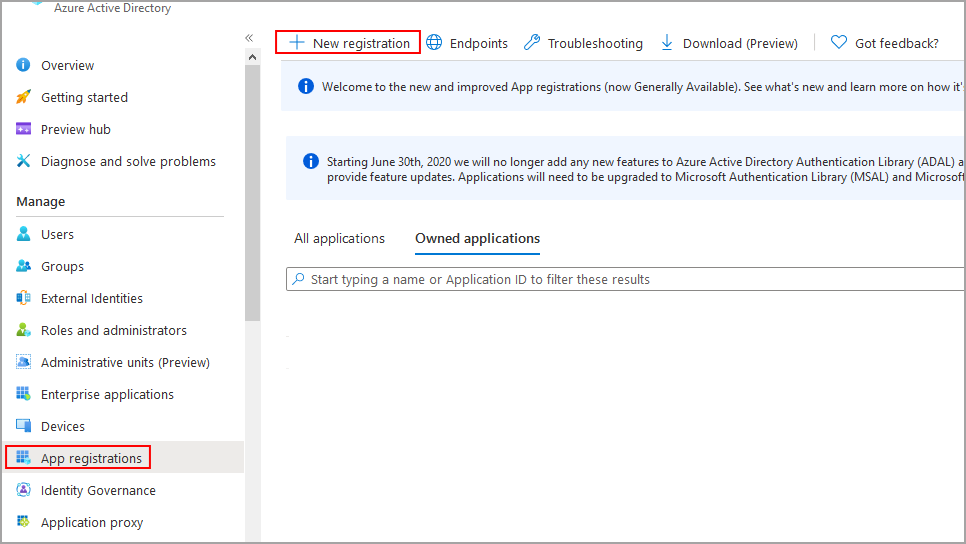
Log in to Microsoft Azure Portal.
Select Azure Active Directory.
Select App registrations.
Select New registration.
Enter a name for the application.
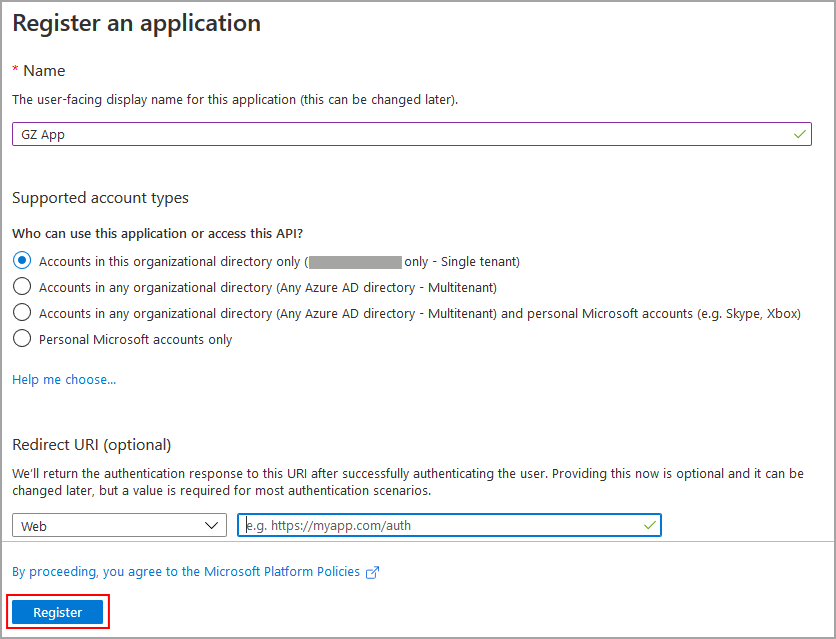
Under Redirect URl (optional), select Web and enter the URL of the GravityZone instance that you integrate with Azure.
Click Register.
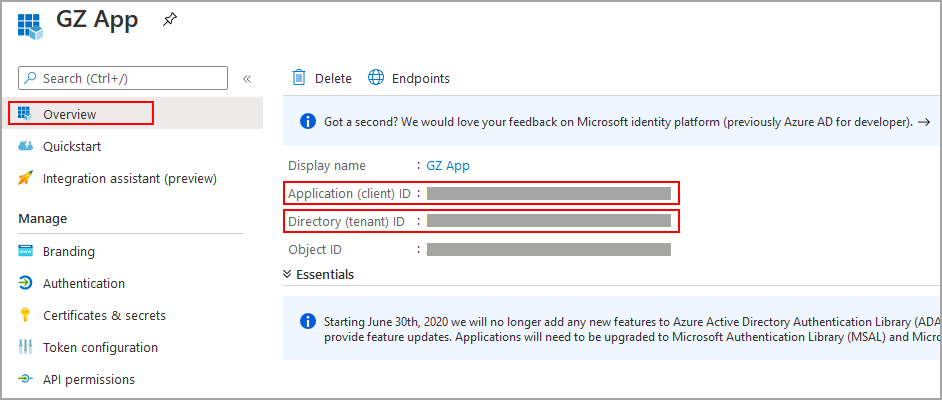
Once created, the application displays in the Overview section two of the three values required for GravityZone integration:
Application (client) ID
Directory (tenant) ID
You must assign a Reader role to the application to access resources in your subscription.
Search for and select Subscriptions, or click Subscriptions on the Home page.
Select the subscription that you want to associate with the application.
Select Access control (IAM).
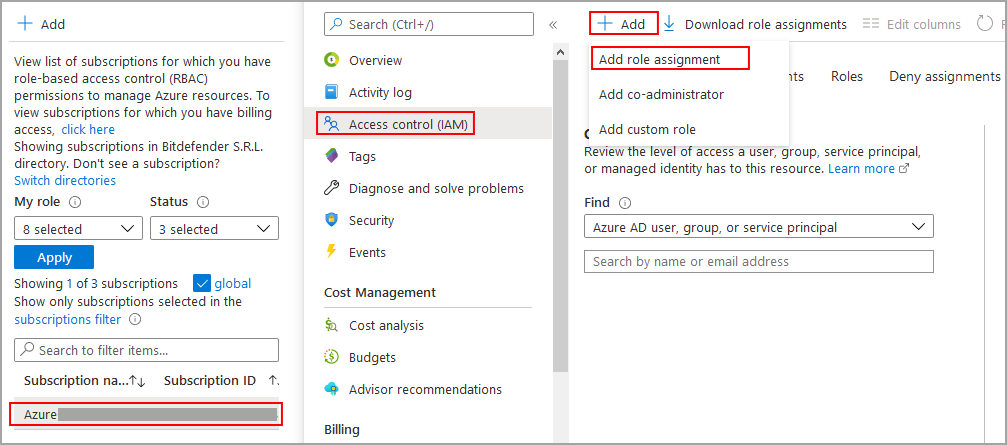
Click Add and select Add role assignment.
Under Role, select Reader.
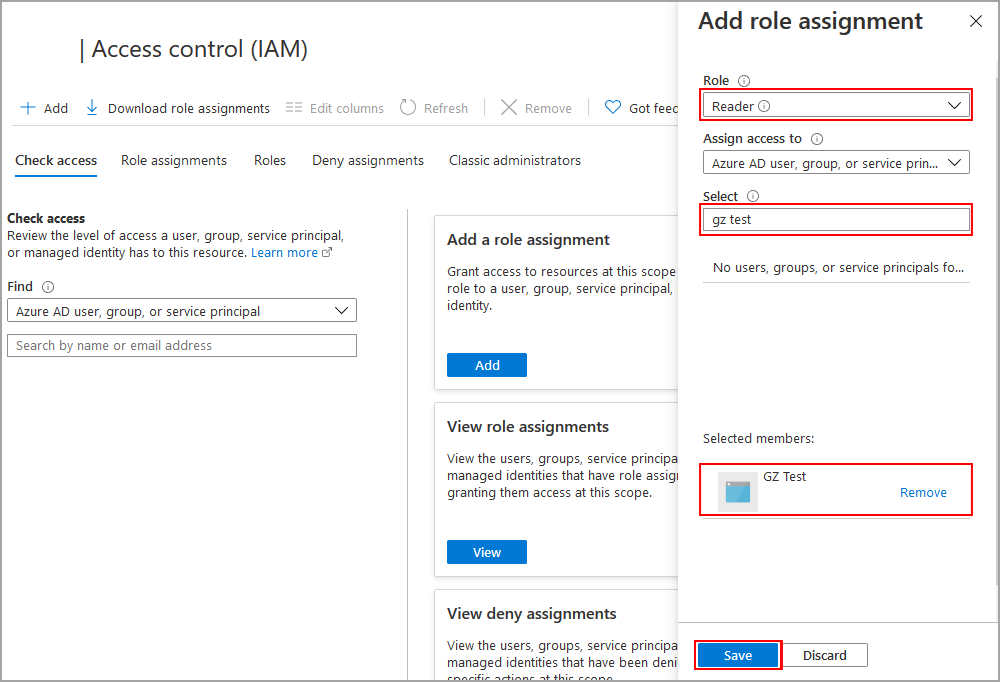
Select Azure AD user, group, or service principal.
Select the application you have created.
Click Save.
To integrate GravityZone with Azure, you also need the application secret.
Select Azure Active Directory.
Go to App registrations and select your application.
Select Certificates & secrets.
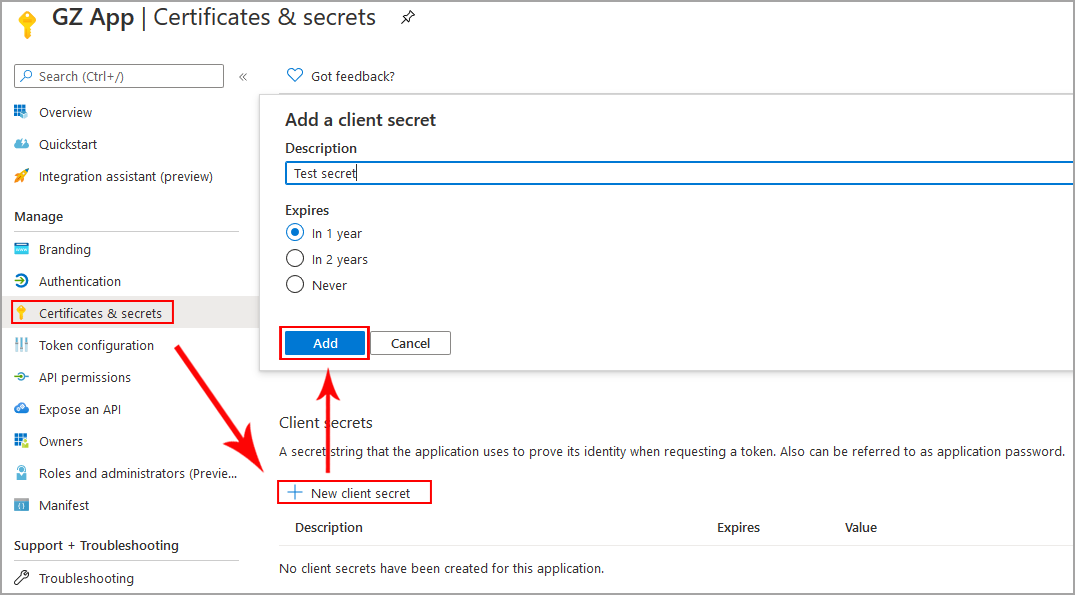
Under Client secrets, click New client secret.
Enter a description, select the duration and click Add.
Caution
After the secret expires, the synchronization between the Microsoft Azure and GravityZone inventories will not be possible. In this case, you must use another secret for integration.
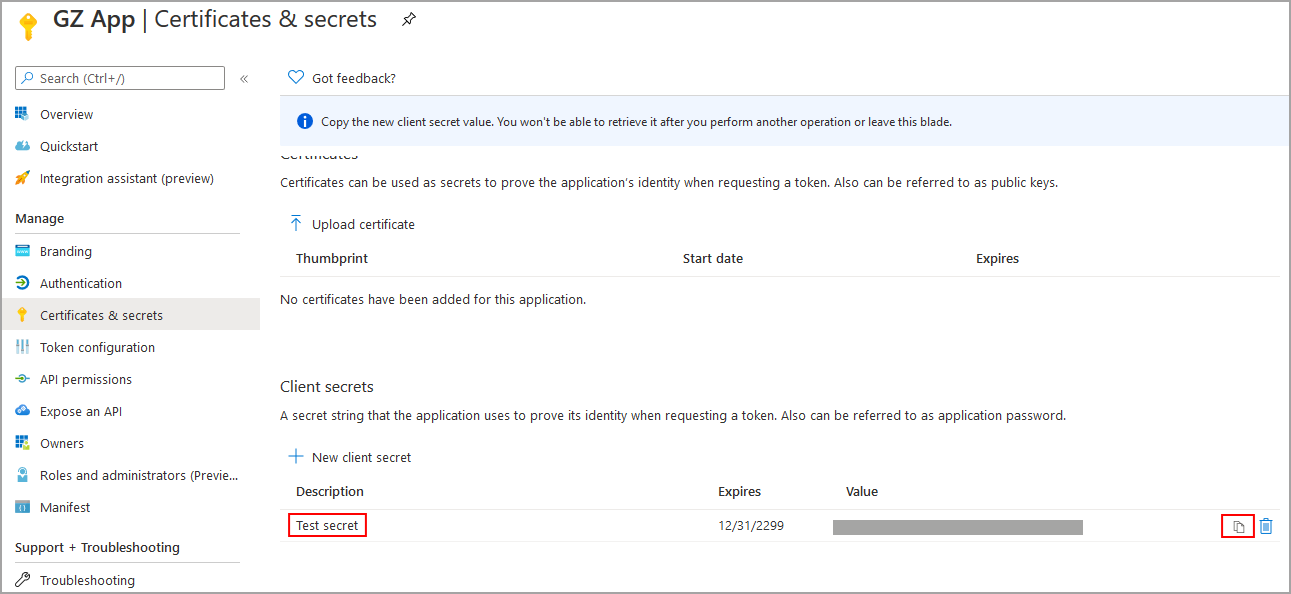
Back under Client secrets, a key value is displayed. This value represents the application secret required for GravityZone integration.
Use the Copy to clipboard option and keep the value in a safe location. You will not be able to retrieve this value later.
Microsoft provides additional information on creating an Azure application: How to: Use the portal to create an Azure AD application and service principal that can access resources
Create the Azure Application
Log in to Microsoft Azure portal.
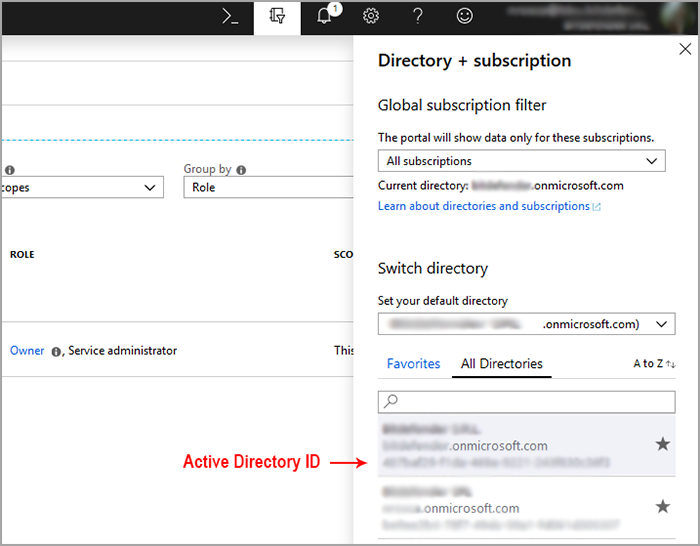
On the right upper-side, click the Directory and Subscription filter icon and, under Switch directory, select the directory where you want to register you app. Under the directory name, there is an alphanumerical string which represents the Active Directory ID. This identifier is the first one necessary to configure the GravityZone integration.
From the left-side menu, go to Azure Active Directory > App registrations > New application registration.
Under Create, fill in the required fields:
Name for your application.
Application type: Web app / API.
Sign-on URL – the URL of the GravityZone instance that you integrate with Azure.
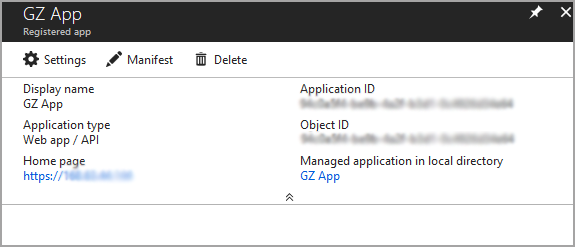
Click the Create button. A new window provides you with details about the new application. These details include Application ID, an identifier also required for GravityZone integration.
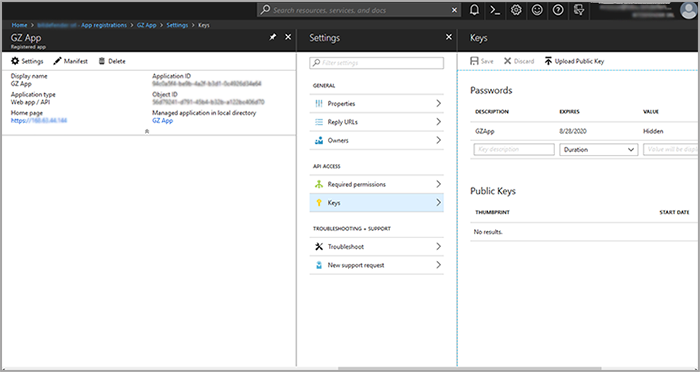
Click Settings, then click Keys.
In the new window, under Passwords:
Enter a description as you desire.
Select the duration of the key.
Note
After the key expires, the synchronization between the Microsoft Azure and GravityZone inventories will not be possible. In this case, you must use another key for integration.
Click Save. A key value is displayed immediately. This key represents Application Secret, required to complete in Control Center the GravityZone integration with Microsoft Azure. Copy the value and keep it in a safe location.
Add Permissions for Azure Application
The Azure application requires Reader permission to be able to synchronize the Microsoft Azure and GravityZone inventories.
From the left-side menu, go to Cost Management + Billing > Subscriptions.
In the subscription list, click the name of the subscription you want to assign access to.
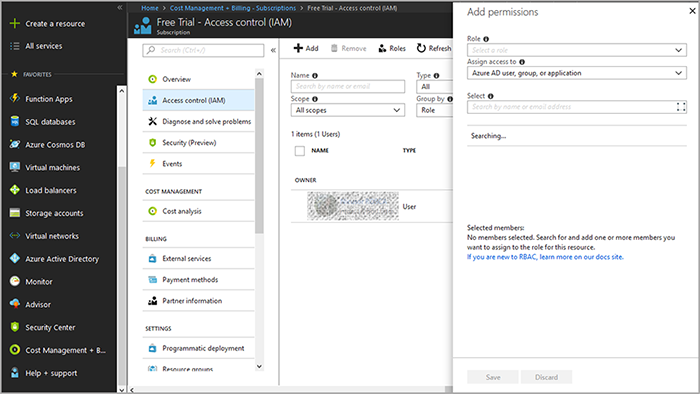
Click Access control (IAM), then click Add.
In the Add permissions window:
Fill in the required fields with the following values:
Role:
Reader.Assign access to:
Azure AD user, group, or application.Select: search for the name of the application that you have created.
Click Save.
If you have more than one subscription in Microsoft Azure, you can add Reader permission for all of them using the same Azure application.