Bitdefender SecurePass allows you to export the passwords stored in your vault to a file. You may need to export your passwords when creating a backup, transferring your data to another password manager, or keeping an offline copy of your vault.
You can export your passwords from:
- the Bitdefender SecurePass browser extension or web client on Windows and macOS
- the Bitdefender SecurePass mobile app on Android and iOS
The export process varies slightly depending on the platform you are using. Select the appropriate section below and follow the corresponding steps.
Browser (Windows and macOS)
Use these steps to export your passwords through the Bitdefender SecurePass browser extension or web client.
Step 1. Open Bitdefender SecurePass
- Go to https://securepass.bitdefender.com/ or click the Bitdefender SecurePass extension icon
 from the browser toolbar. The icon is normally located near the address bar.
- If the icon is not visible, click the browser’s extensions menu (puzzle icon) and select Bitdefender SecurePass. You can also pin the extension to the toolbar for quick access.
- Unlock your vault if prompted.
Step 2. Select the Export data option
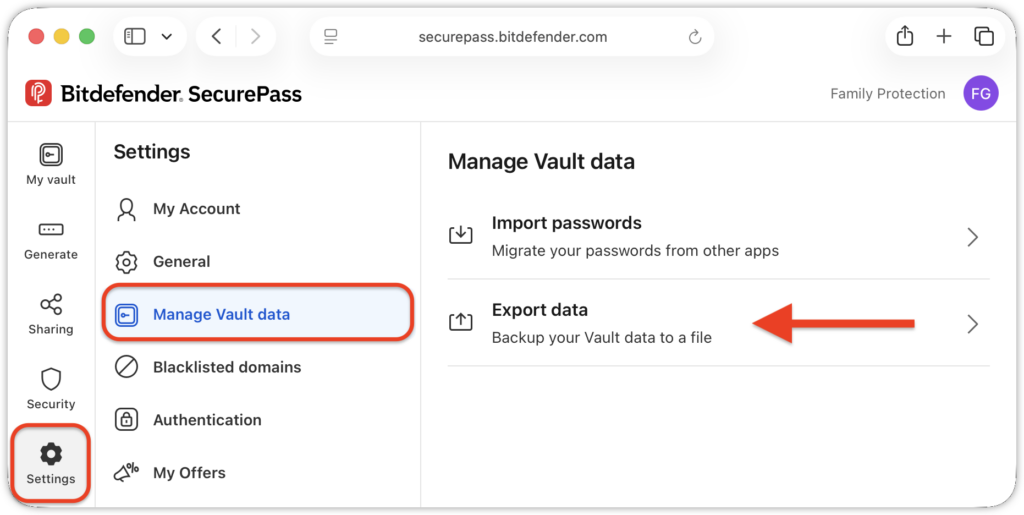
- In the SecurePass window, go to Settings → Manage Vault data → Export data.
- This will open the export window.
Step 3. Choose whether to include shared items
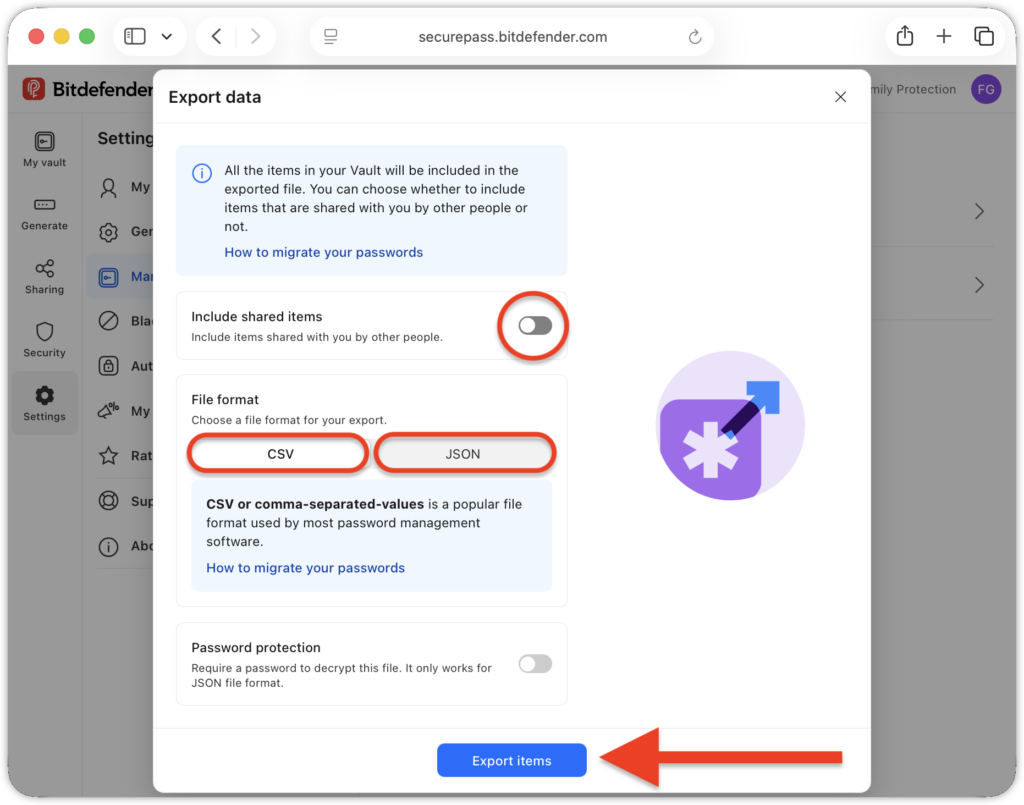
Use the Include shared items switch to control whether the export should also contain items that other people have shared with you:
- Turn on the switch to include shared items.
- Leave the switch off to exclude them.
Step 4. Select the export format
In the File format section click one of the following options.
- CSV – Saves the information in a table-based, widely supported format. CSV files can be opened by spreadsheet applications and are commonly accepted by other password managers.
- JSON – Preserves the exported information in a structured data format. This format is generally suitable for backups or for importing data into services that support SecurePass-compatible JSON files. (Optionally, you can turn on the Password protection switch and enter a password to protect the exported JSON file. Select the eye icon beside the field when you need to verify the password you entered.)
Note: CSV files may expose their contents as plain text when opened. Treat an exported CSV file as highly sensitive.
Step 5. Export passwords
- After setting your preferences, click Export items.
- Browse to the folder in which you want to store the SecurePass export, then click Save.
- When the export is finished, SecurePass displays the confirmation: Items exported successfully.
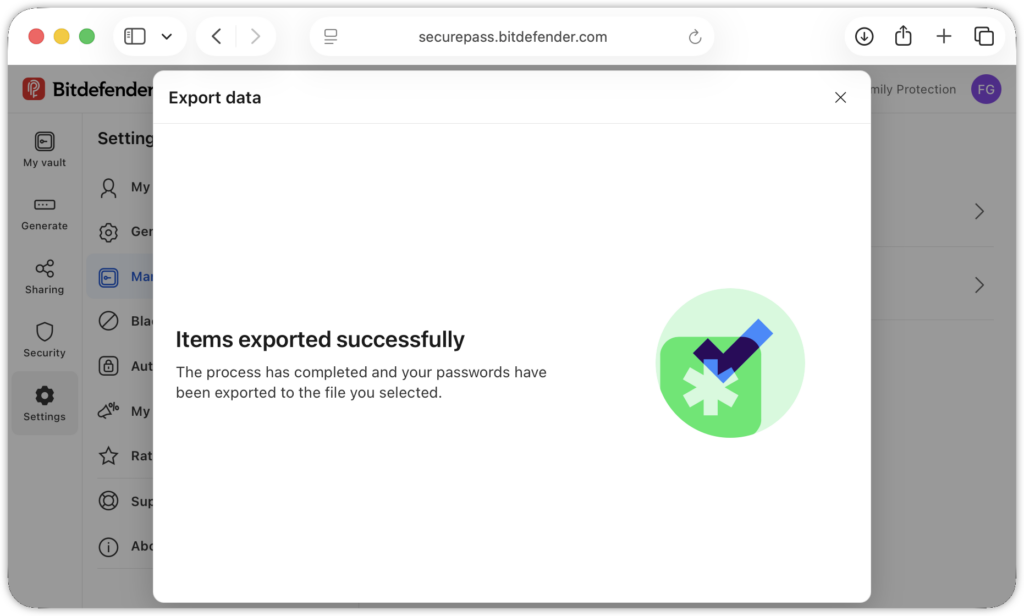
The exported file is now stored in the folder you selected.
Mobile app (Android and iOS)
Use these steps to export your passwords with the Bitdefender SecurePass mobile app.
Step 1. Open Bitdefender SecurePass Settings
- Launch the Bitdefender SecurePass app and unlock your vault if prompted.
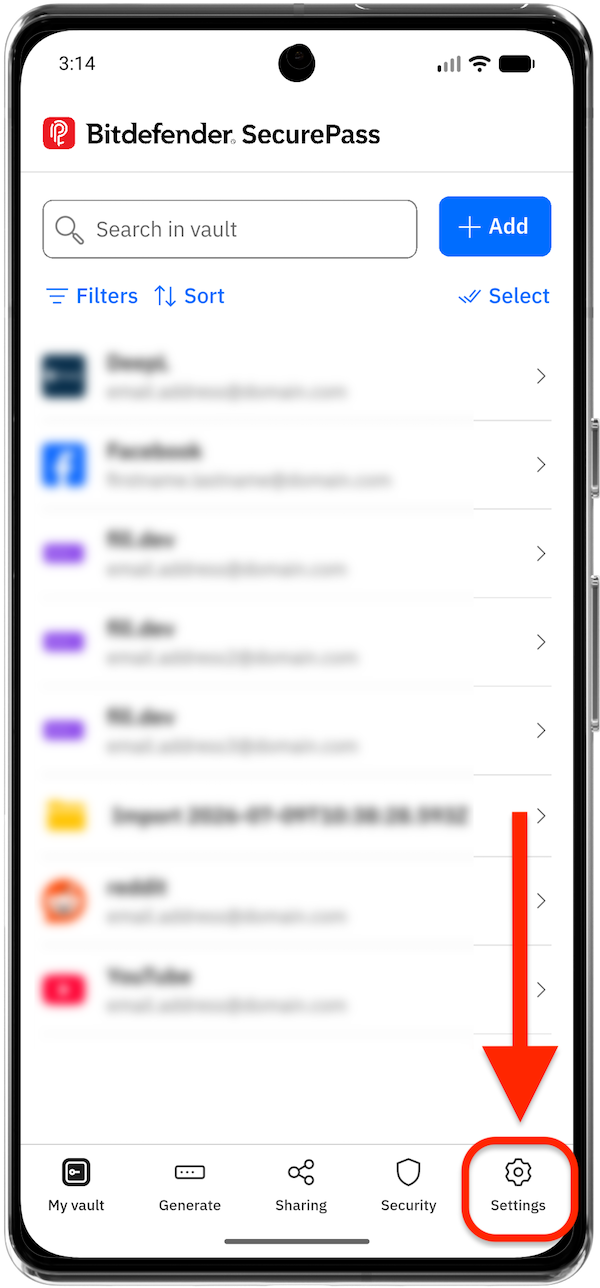
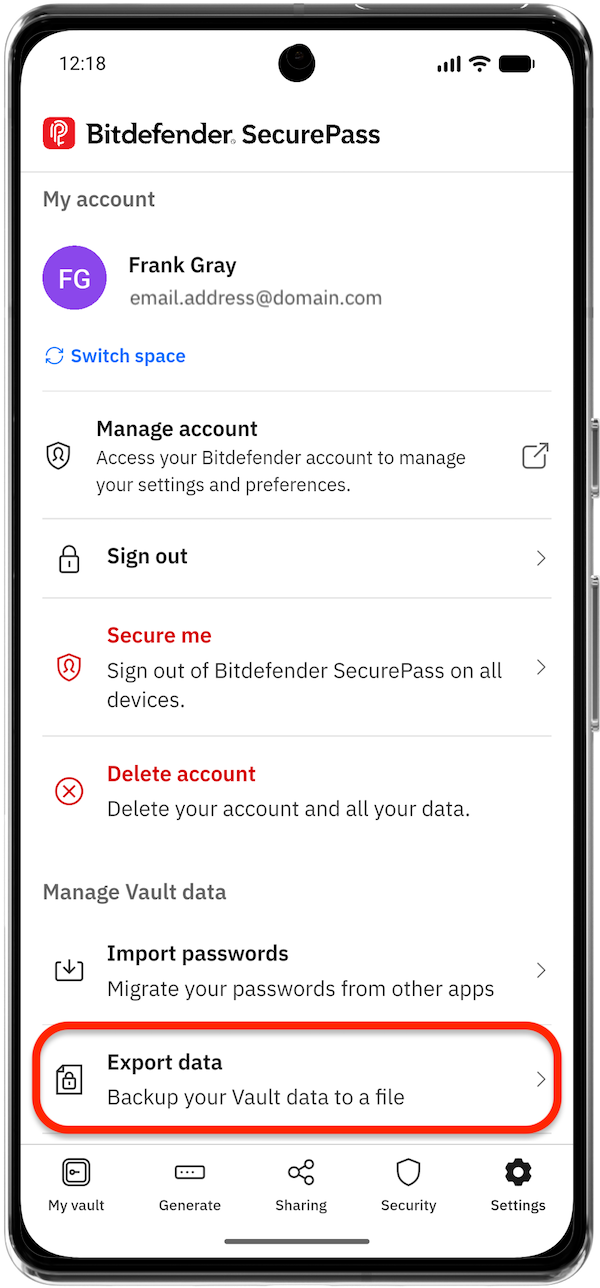
- After the vault opens, tap Settings in the navigation bar at the bottom of the screen.
Step 2. Select Export data
- Scroll and tap the Export data option.
- The export data page opens.
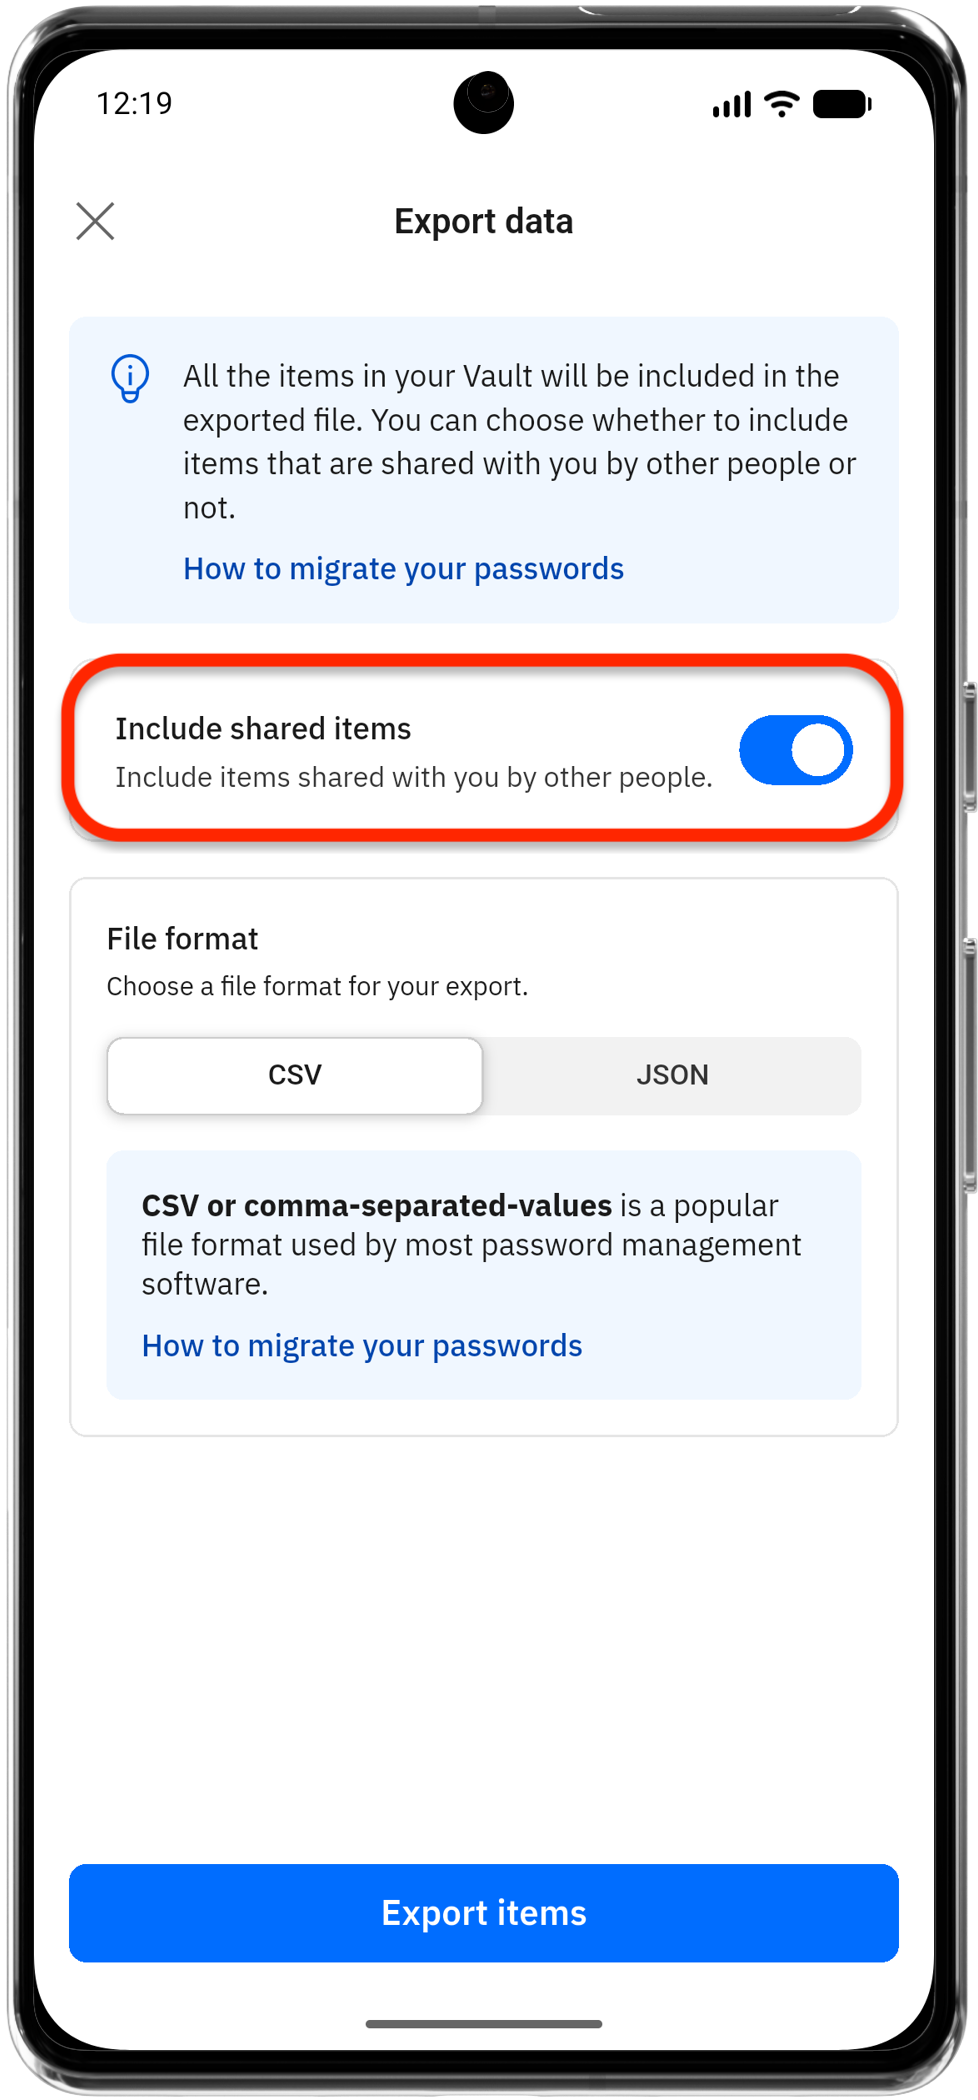
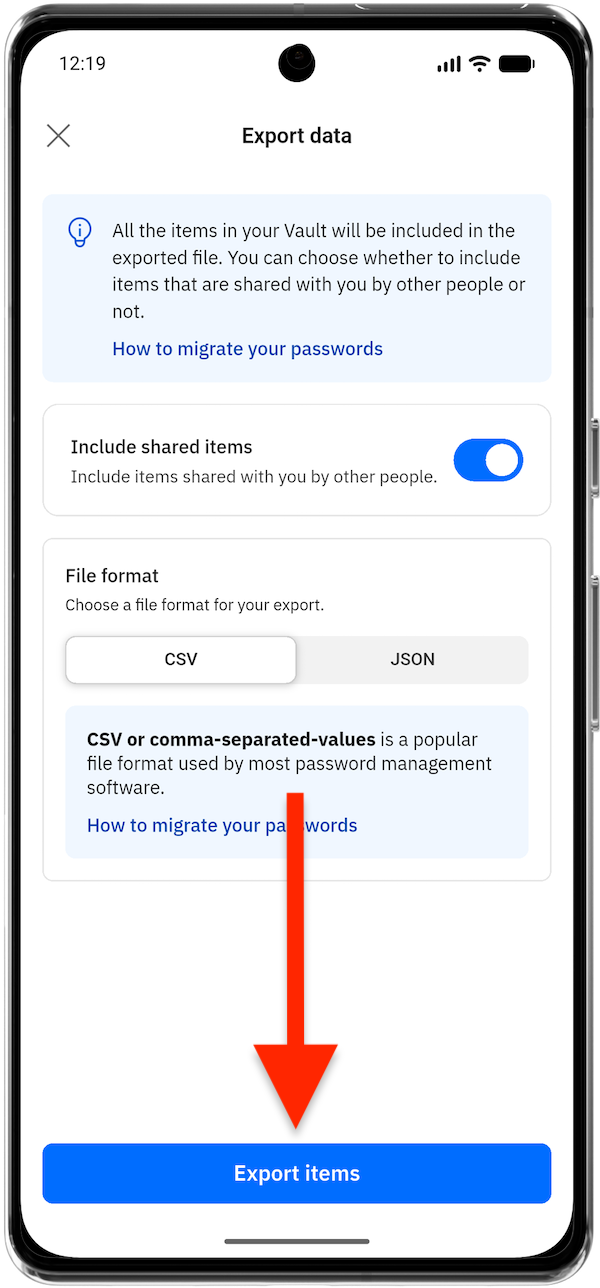
Step 3. Choose whether to include shared items
Use the Include shared items switch to control whether the export should also contain items that other people have shared with you:
- Turn the switch on to include shared items.
- Leave the switch off to exclude them.
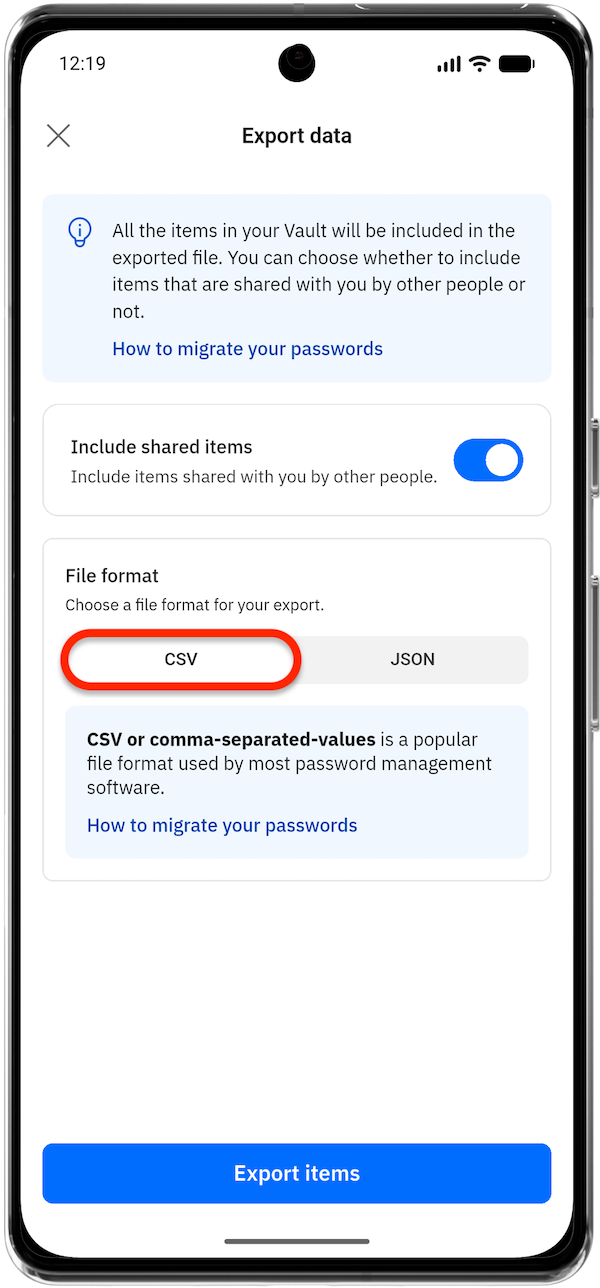
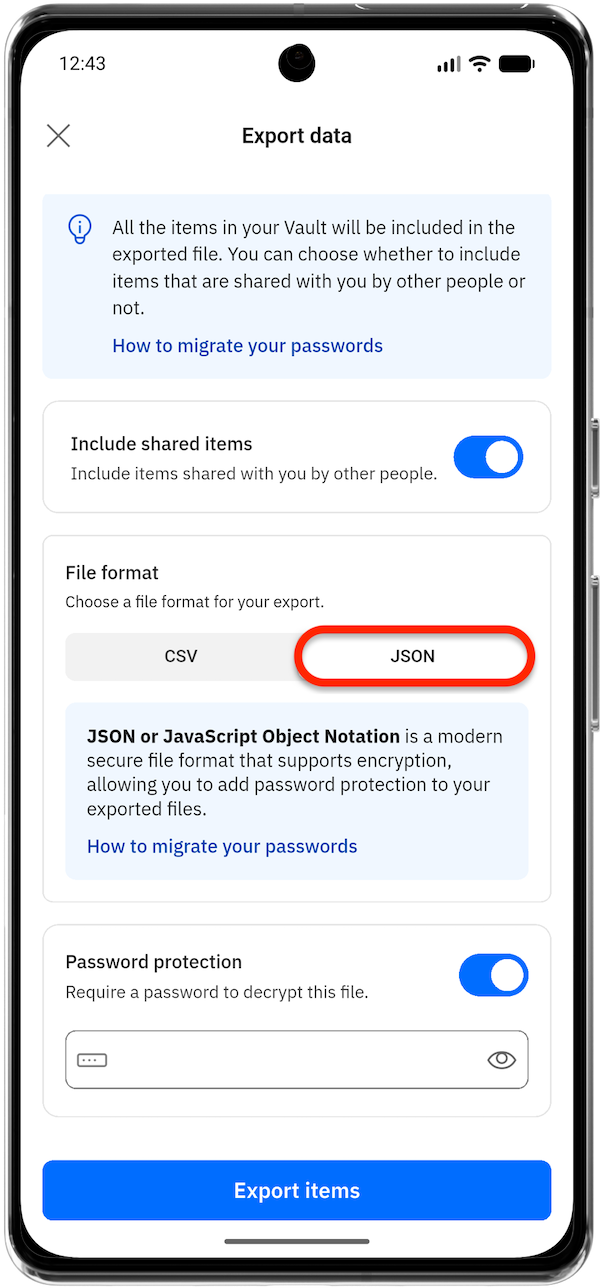
Step 4. Select the export format
Under File format, tap one of the following options.
- CSV – Saves the information in a table-based, widely supported format. CSV files can be opened by spreadsheet applications and are commonly accepted by other password managers.
- JSON – Preserves the exported information in a structured data format. This format is generally suitable for backups or for importing data into services that support SecurePass-compatible JSON files. (Optionally, you can turn on the Password protection switch and enter a password to protect the exported JSON file. Select the eye icon beside the field when you need to verify the password you entered.)
Note: CSV files may expose their contents as plain text when opened. Treat an exported CSV file as highly sensitive.
Step 5. Export passwords
- After setting your preferences, tap Export items.
- SecurePass opens your device’s folder picker so you can choose where the exported file will be saved.
- Select the folder in which you want to store the SecurePass export.
- SecurePass displays an exporting message while it creates and saves the file.
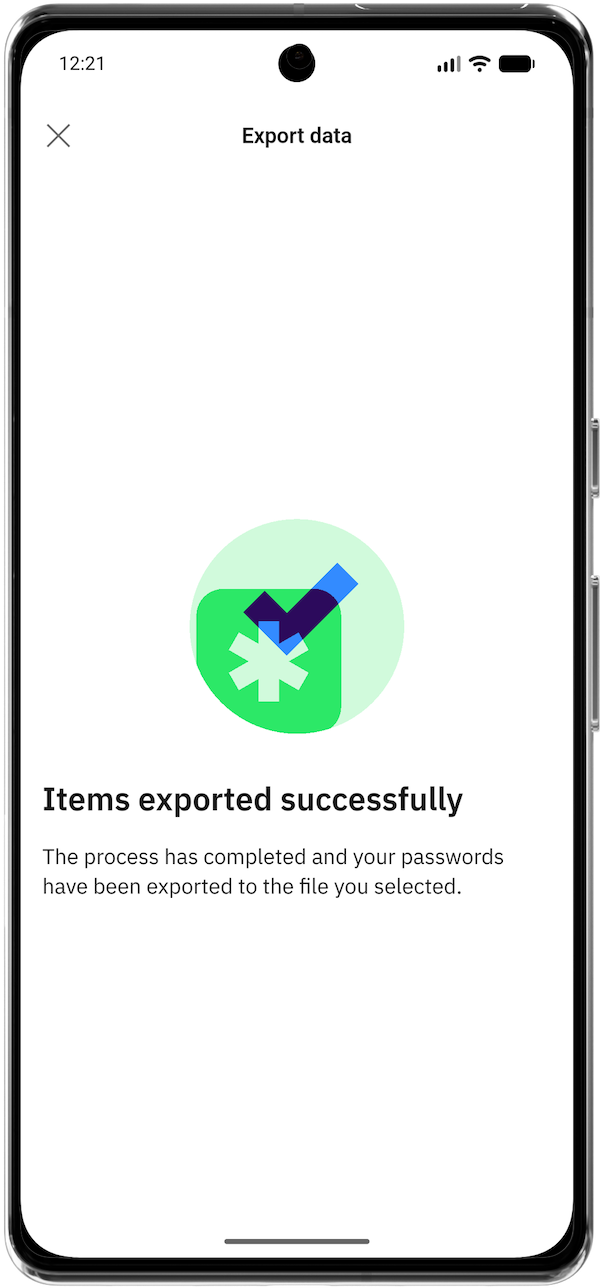
- When the export is finished, SecurePass displays the confirmation: Items exported successfully.
The exported file is now stored in the folder you selected.