This guide introduces Bitdefender VPN for Mac, covering how to access the app, configure it on new macOS versions, select a VPN server, adjust preferences, and upgrade to Premium VPN. Bitdefender VPN encrypts your data and hides your IP address, ensuring secure browsing and protecting your privacy, especially on public Wi-Fi. It also allows access to region-restricted content. Explore the following sections to delve deeper:
Open Bitdefender VPN for Mac
To open Bitdefender VPN for Mac, click the small shield icon  located in the upper-right corner of your screen within the menu bar.
If the Bitdefender shield cannot be found in the menu bar, use your Mac Launchpad or Finder:
From Launchpad
- Press F4 on your keyboard to enter the Launchpad on your Mac.
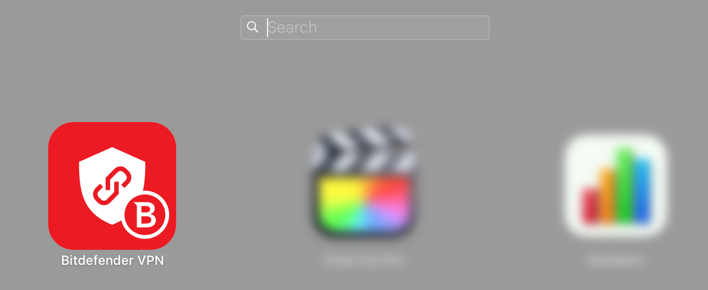
- Then browse through the pages of installed apps until you locate the Bitdefender VPN app. Alternatively, you can type Bitdefender VPN in Launchpad to start filtering your results.
- Once you see the Bitdefender VPN app, click on its icon to pin it to the menu bar.
From Finder
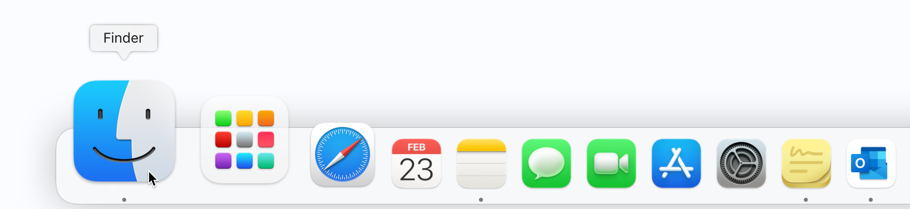
- Click on Finder at the bottom left of the Dock (Finder is the icon that looks like a blue square with a smiley face).
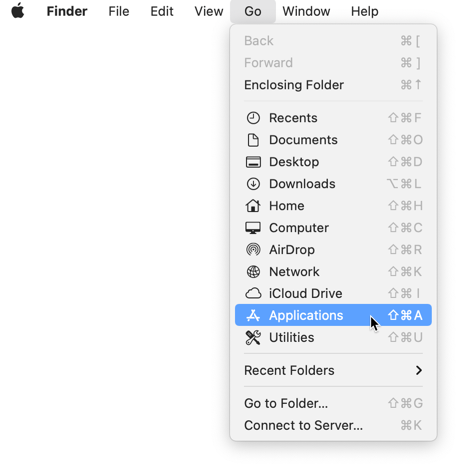
- Next, click Go at the top left of the screen, on the menu bar.
- Select Applications from the menu to enter the Applications folder on your Mac.
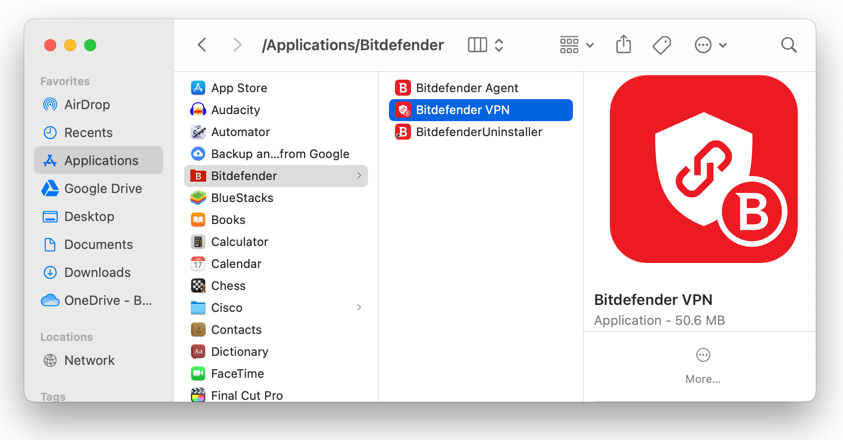
- From the Applications folder open the Bitdefender folder and then double-click the Bitdefender VPN app.
Connect to VPN
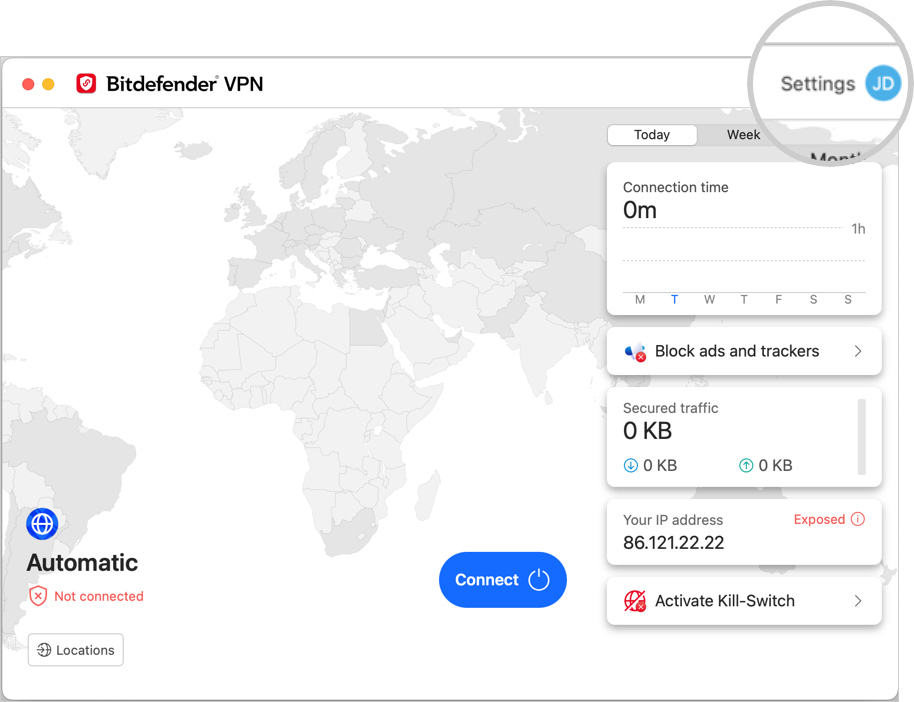
The VPN interface indicates whether the app is connected or not. The server location for users with the free version is automatically set by Bitdefender to the nearest server. If you’re using the premium version and want to connect to a certain VPN server, tap on Locations and then pick a country from the list.
To connect or disconnect, simply click the ⏻ power button on the VPN interface.
ⓘ You will need to allow Bitdefender VPN to run the first time you connect to the service on macOS Catalina and later versions. Please refer to the next sections for guidance on granting the necessary permissions.
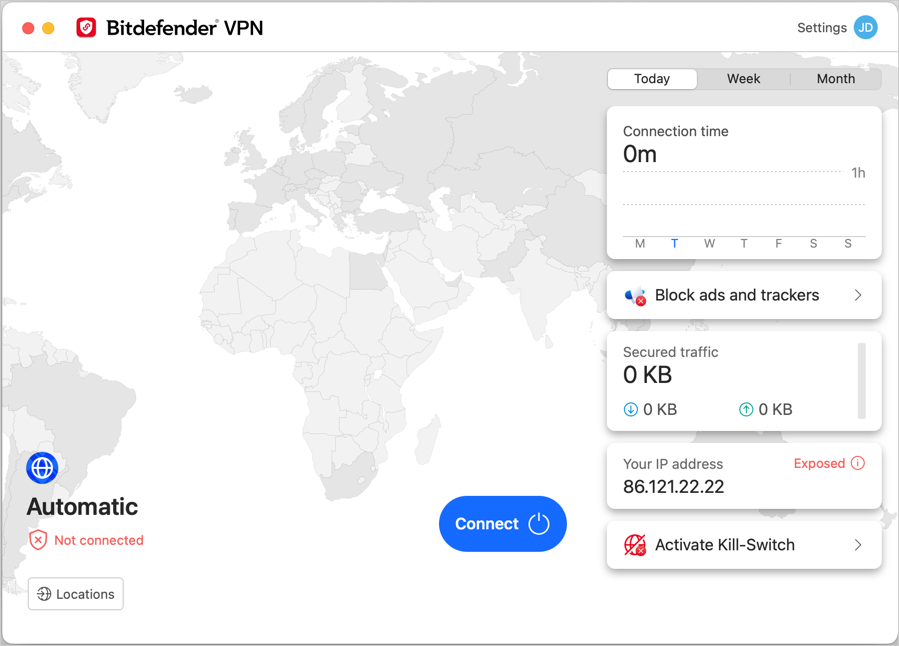
- The virtual server’s IP address is shown on the home screen while connected to Bitdefender VPN for Mac.
- A summary of your connection time, the amount of secured traffic, and the last 5 locations you connected to are also shown on the main dashboard.
Allow Bitdefender VPN on macOS Catalina, Big Sur, Monterey
The following message will appear the first time you try to connect to VPN on macOS Catalina (10.15.4), Big Sur (11), or Monterey (12): Allow Bitdefender VPN to run. Bitdefender VPN requires user permission to be fully functional on newer versions of macOS.
Follow these steps to grant Bitdefender VPN the necessary permissions:
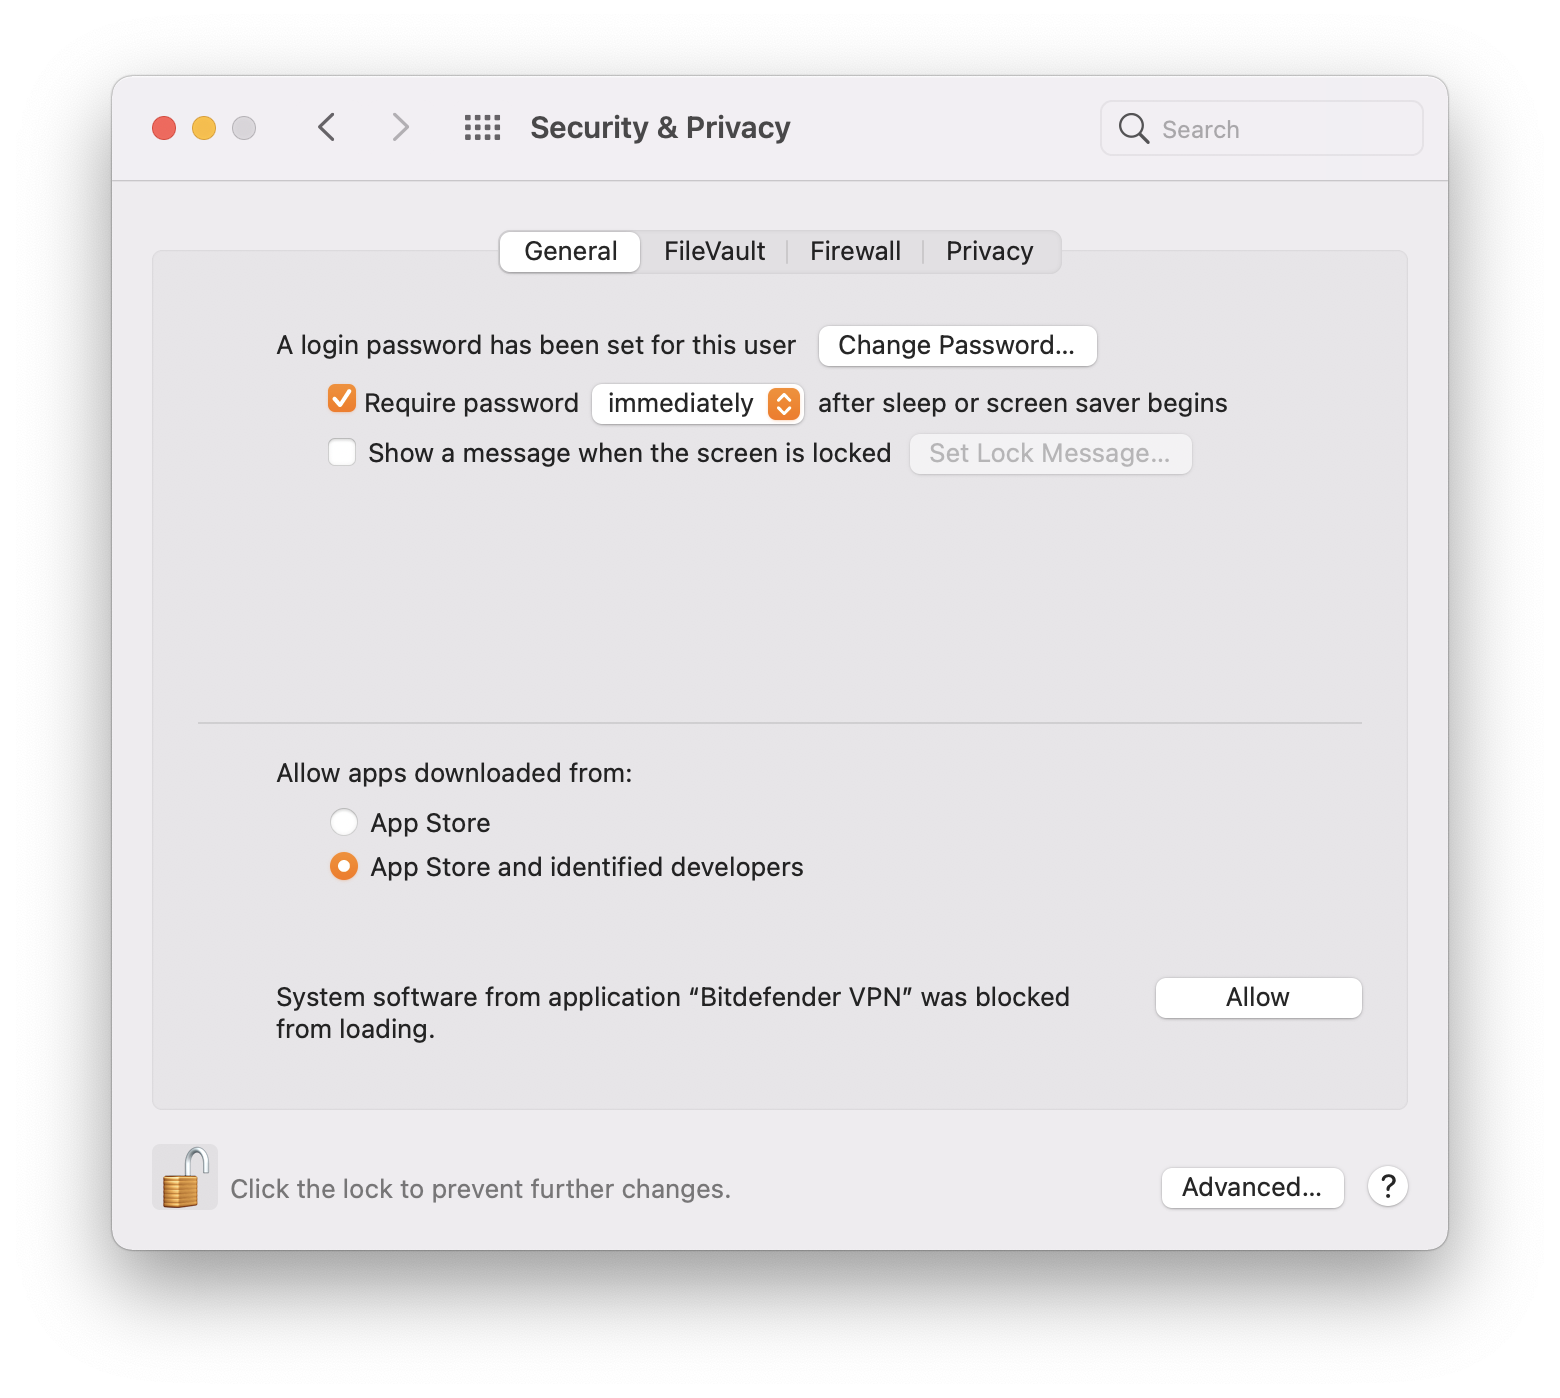
1. Click the Open System Preferences button.
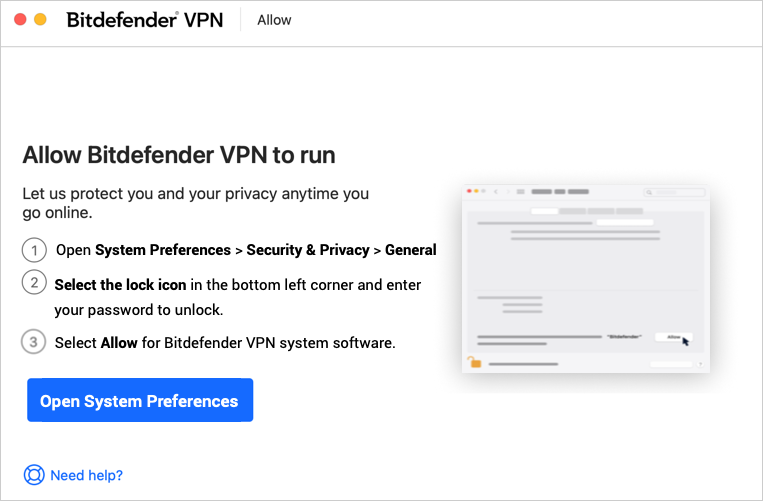
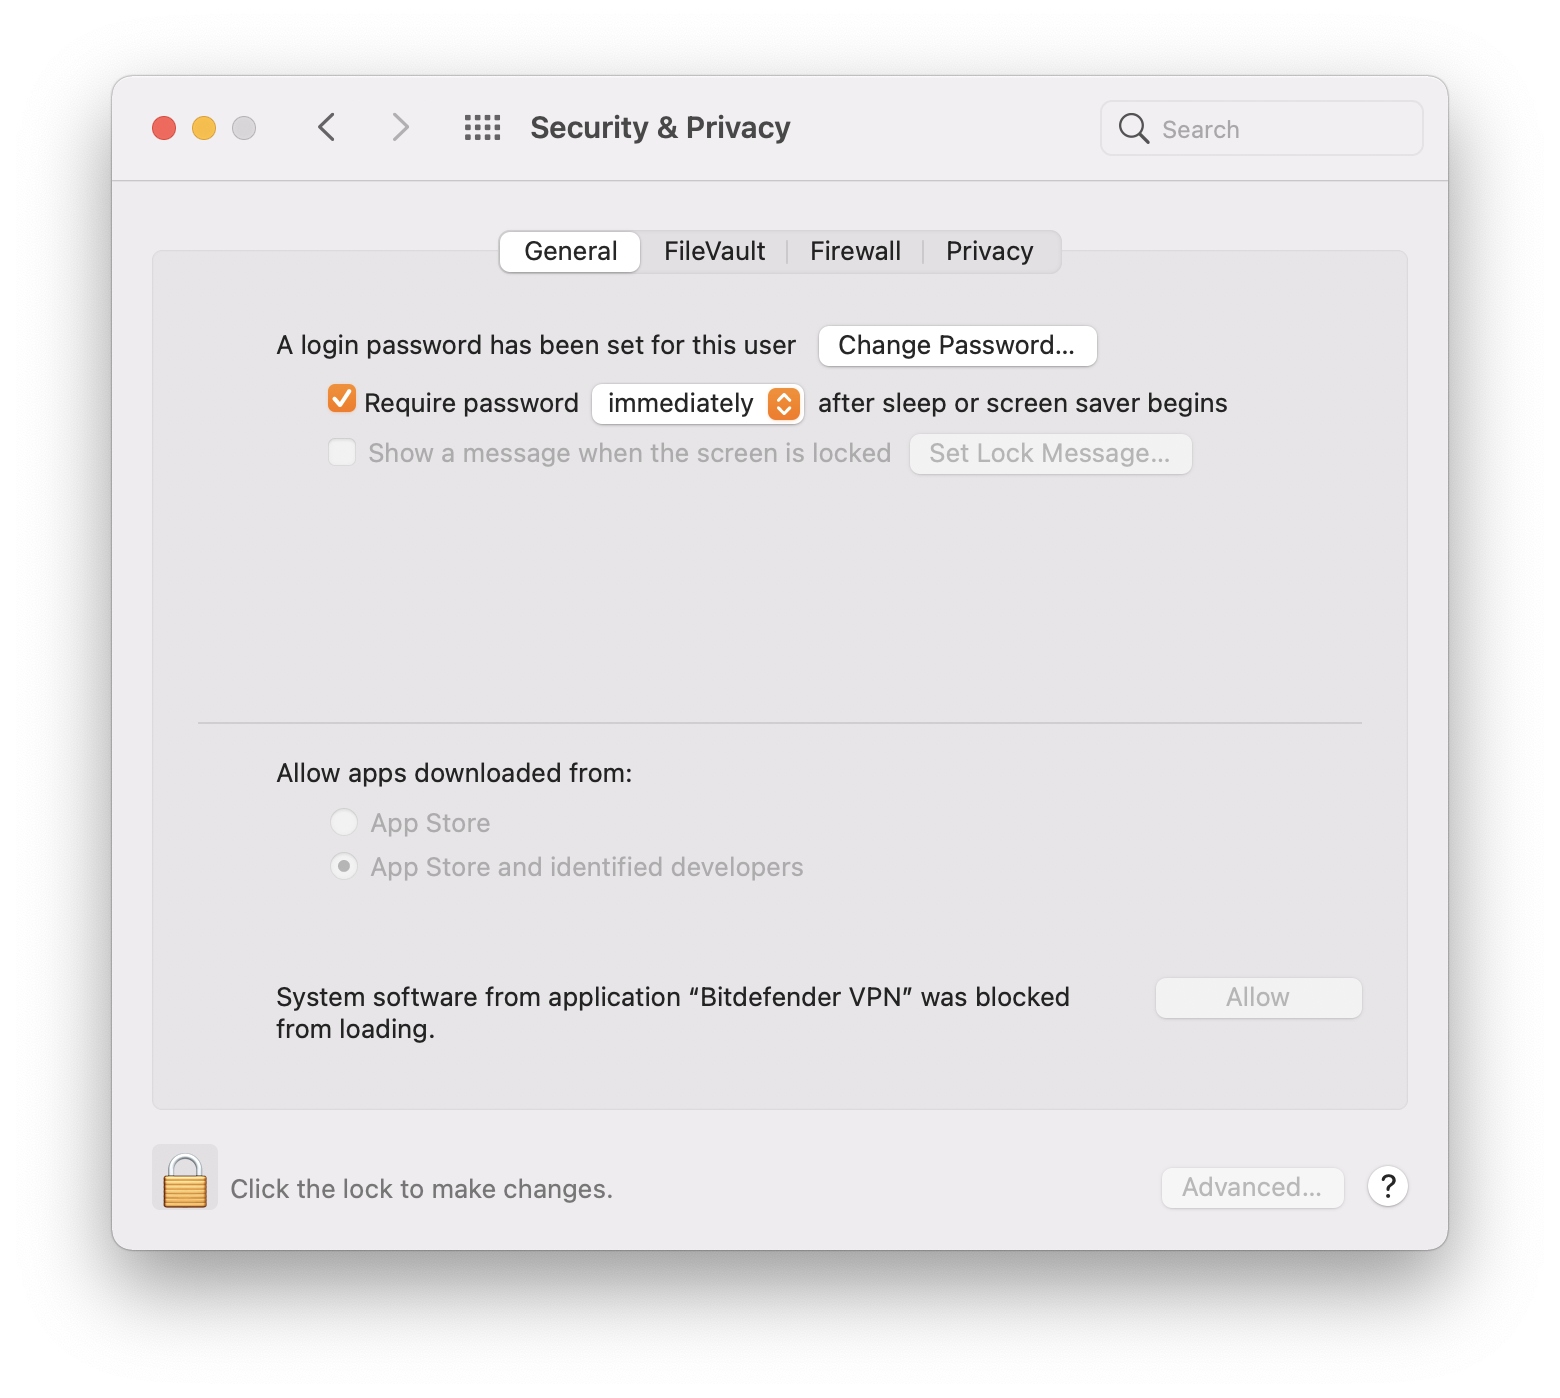
2. The Security & Privacy window will appear. Click the lock icon in the bottom left corner to make the changes.
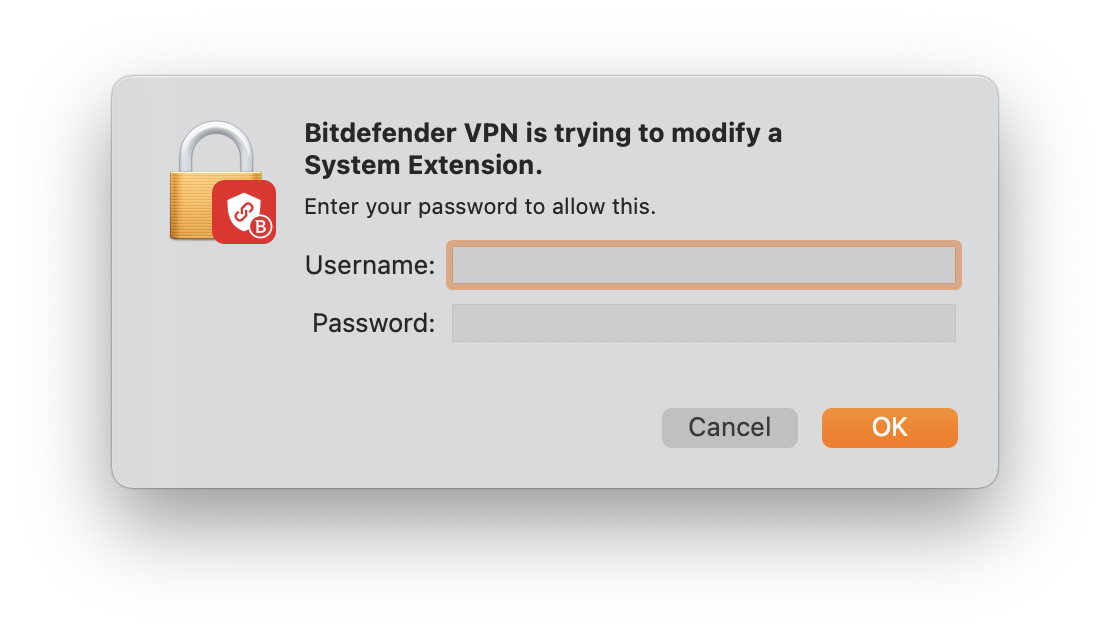
3. Enter your Mac administrator name and password when requested, then press OK.
4. Next, click the Allow button located in the lower right-hand corner of the Security & Privacy window.
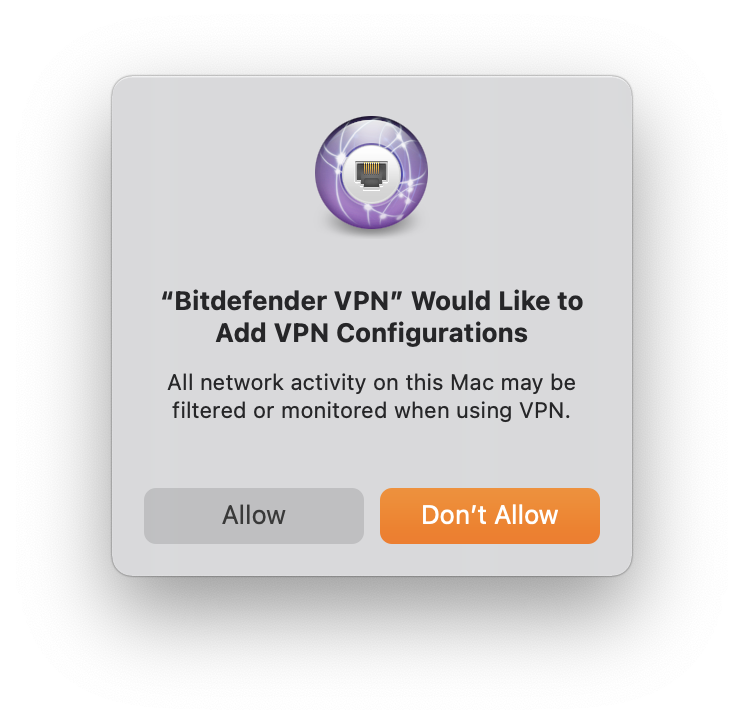
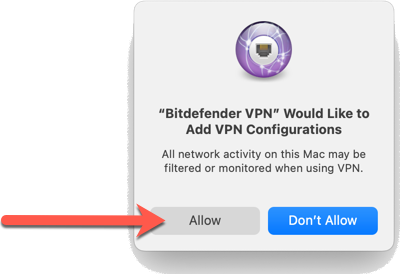
5. Your Mac will display a dialog asking you to add the VPN configuration profile. Choose Allow.
Allow Bitdefender VPN on macOS Ventura & Sonoma
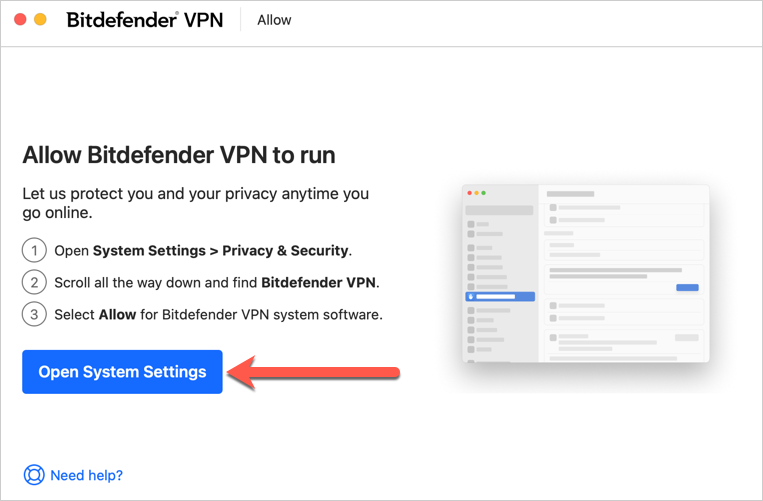
The following message will appear the first time you try to connect to Bitdefender VPN on macOS Ventura (13) and macOS Sonoma (14): Allow Bitdefender VPN to run. Bitdefender VPN requires user permission to be fully functional on this version of macOS.
Follow these steps to grant Bitdefender VPN the necessary permissions:
1. Click the Open System Settings button.
2. The Privacy & Security window will appear. Scroll down to the Security section and click the Allow button.
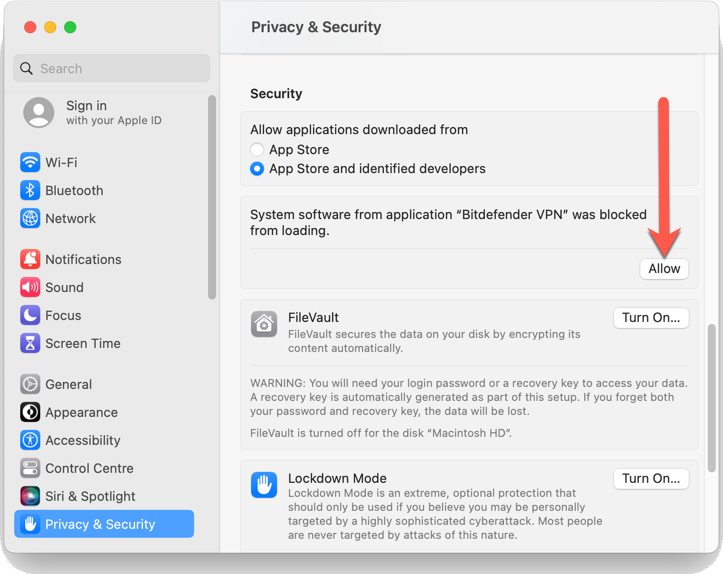
3. Enter your Mac administrator name and password when requested, then press Unlock.
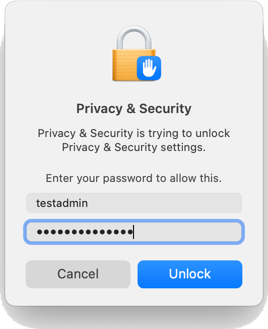
4. Your Mac will display a dialog asking to add VPN configurations. Choose Allow.
Allow Bitdefender VPN on macOS Sequoia & Tahoe
When connecting to Bitdefender VPN for the first time on macOS Sequoia (15) or macOS Tahoe (26), you will need to allow the app extension for full functionality. Follow these steps:
1. When prompted, click Open System Settings to access the Bitdefender VPN network extension.
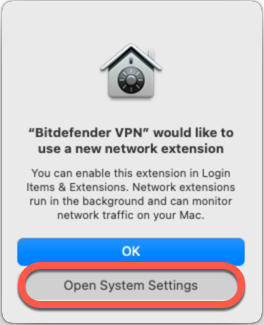
ⓘ If the pop-up above doesn’t appear when connecting to Bitdefender VPN the first time on macOS Sequoia/Tahoe, open System Settings
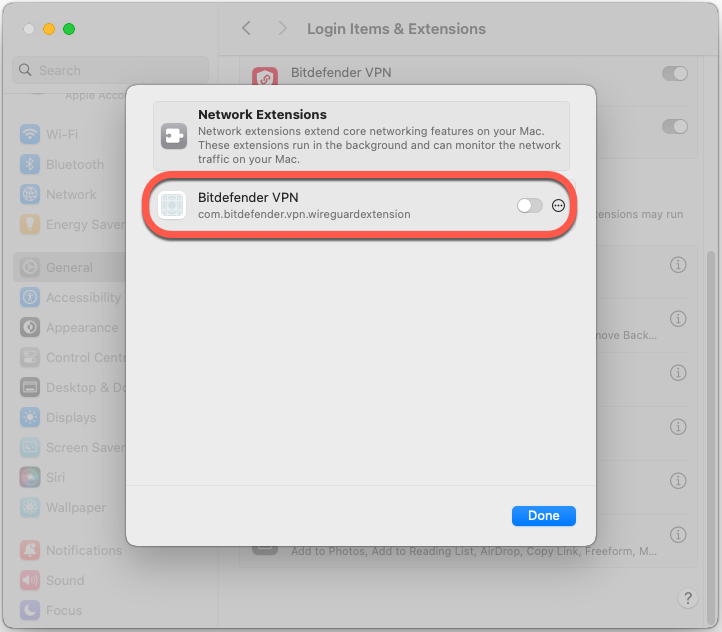
from your Dock, go to General > Login Items & Extensions > Extensions > Network Extensions.
2. Toggle the switch next to Bitdefender VPN to enable it.
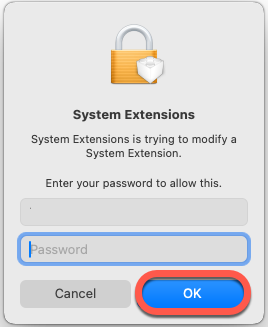
3. Enter your Mac administrator name and password when prompted.
4. Click Allow to add VPN configurations.
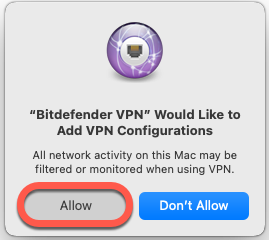
Now you can connect to Bitdefender VPN.
Settings
Click Settings at the top of the Bitdefender VPN window to access additional settings.
General
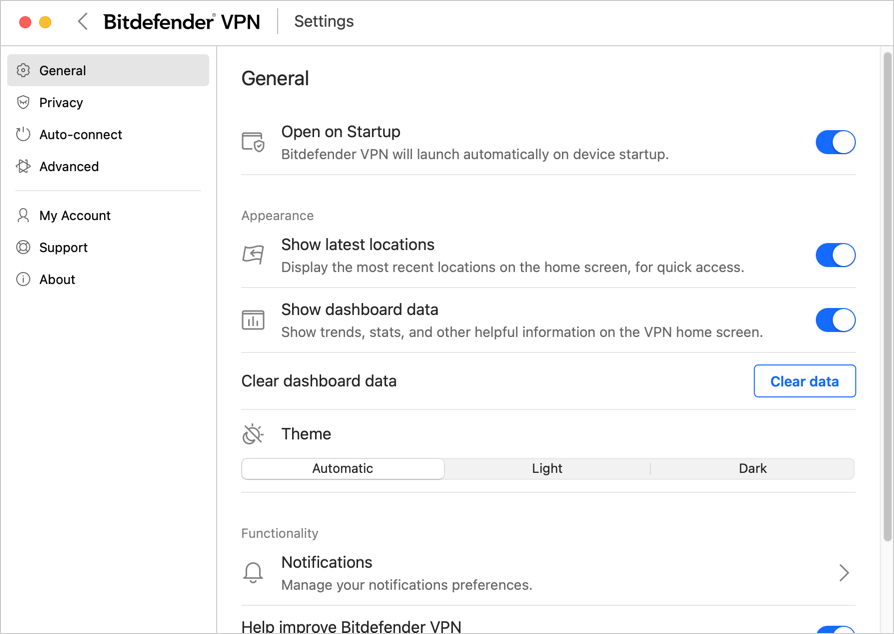
Here you can modify the following:
- Open on Startup – Bitdefender VPN will launch automatically on device startup.
- Show latest locations – Display the most recent locations on the home screen, for quick access.
- Show dashboard data – Show trends, stats, and other helpful information on the VPN home screen.
- Clear dashboard data – All your dashboard data will be erased and all counters reset.
- Theme – Light/dark theme
- Notifications – Manage your notifications preferences.
- Help improve Bitdefender VPN – Submit anonymous product reports to help us improve your experience.
- Reset all settings – Reset the VPN to its original settings without reinstalling it.
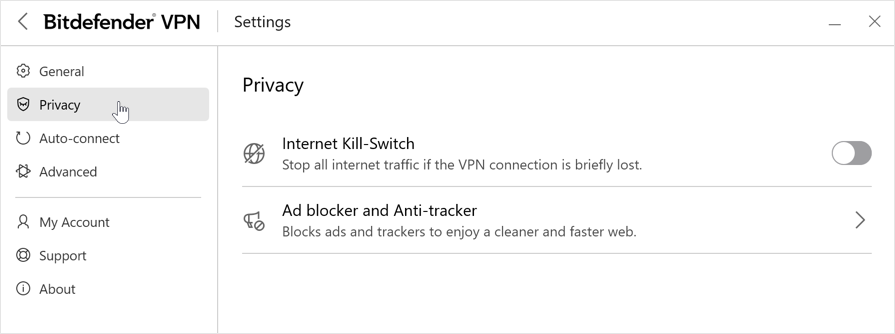
Privacy
- Internet Kill-Switch – Stops all Internet traffic if the VPN connection is briefly lost.
- Ad blocker and Anti-tracker – Blocks ads and trackers to enjoy a cleaner and faster web.
Auto-connect
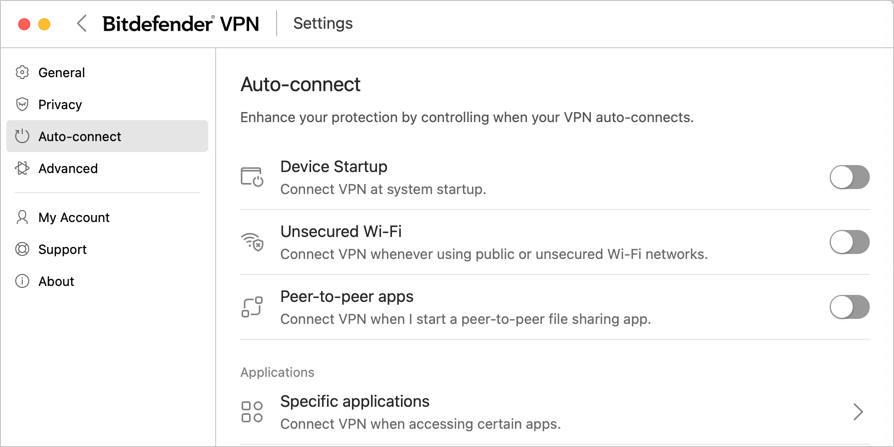
Here you can control when the VPN connects automatically:
- Device Startup – Connect Bitdefender VPN at macOS startup.
- Unsecured Wi-Fi – Connect VPN when using public or unsecured Wi-Fi networks.
- Peer-to-peer apps – Connect VPN when starting a peer-to-peer file sharing app.
- Specific applications – Connect VPN when accessing certain apps.
Advanced
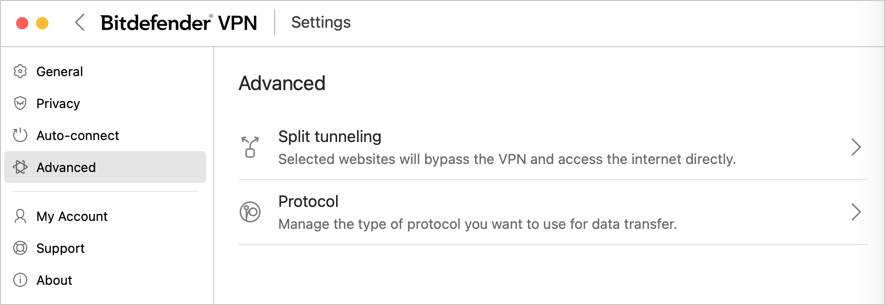
- Split tunneling – Select websites to bypass the VPN and access the internet directly.
- Protocol – Manage the type of protocol you want to use for data transfer.
My Account
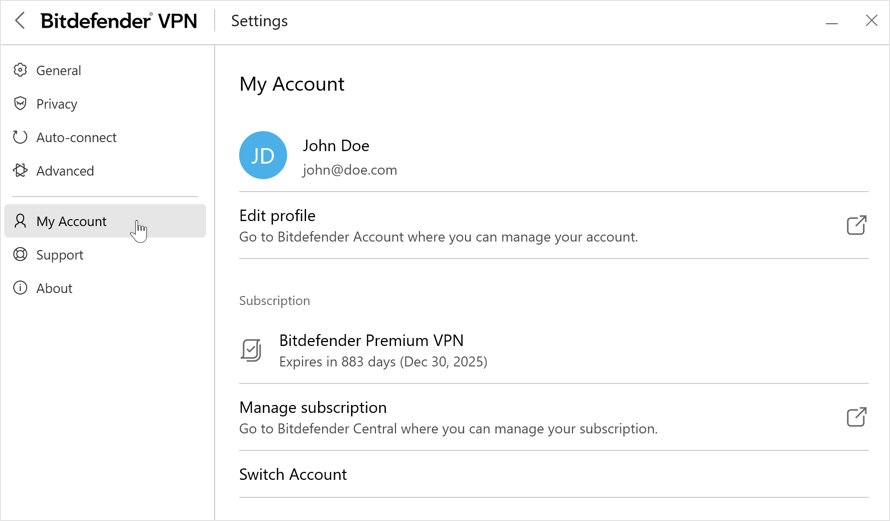
Details about your Bitdefender user account and VPN subscription appear here.
- Edit profile – Manage your account settings and info.
- Subscription – Displays your subscription type and expiration date.
- Manage subscription – Manage your subscriptions in Bitdefender Central.
- Switch Account – Sign in with another Bitdefender Central account.
Support
- Support Center – Browse the FAQ or reach out to our Support team if you need help with your VPN app.
- Ask the Community – Get answers and solutions on Bitdefender’s forum.
About
Indicates the VPN version installed on your Mac.
Here you can also consult:
- Subscription Agreement
- Privacy Policy
- Third party license terms
Subscriptions
With Bitdefender VPN, you get 200 MB of data usage per day for each device included in your subscription (except for Bitdefender Small Office Security, which gets 500 MB per day). This daily traffic quota helps secure your connection whenever you need it, and it automatically connects you to the nearest server.
If you want even more benefits like unlimited traffic and the ability to access content from anywhere in the world by selecting your preferred server location, you can upgrade to the premium version. To learn how to upgrade to Premium VPN, just follow the instructions provided here – How to upgrade to Bitdefender Premium VPN on macOS.